If you are new to working in Lightroom your first few weeks will be a steep learning curve. Here are my top 5 mistakes to be aware of and avoid when you’re starting out. I hope they’ll save you wasting time, getting frustrated and generally tearing your hair out.
1 Think – Navigate on the left – Keyword on the right.
Ok, so this isn’t exactly true but basically, in the Library module, your navigation options are on the left and bottom of the screen and the Keywording options are on the right.
The typical mistake you’ll make is to open the Keywording or Keyword List areas of the panel on the right and click on a checkbox for a keyword or click one of the keyword sets thinking that somehow this will select and display images with those keywords – Not so! Instead you just added those keywords to the selected image or images.
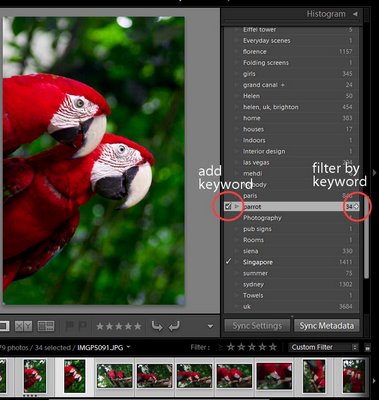
You can filter by keyword using the Keyword list in the panel on the right and you do so by clicking the small arrow to the right of the keyword – that switches to display all the images with this keyword.
2 Don’t move your photos – except in Lightroom.
This is a biggie. Once you bring images into Lightroom, Lightroom tracks where they are on disk. If you delete or, worse still, move the images from one folder to another one, the links inside Lightroom will be broken. If you rename your folders then the links to them and to the images in them will be broken too. In a very short time you can wreak havoc on your Lightroom catalog – this is the voice of experience speaking here! In short, once your photos are in Lightroom, manage them in Lightroom.
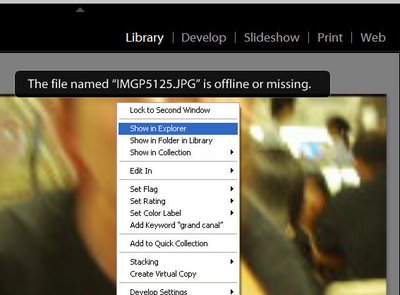
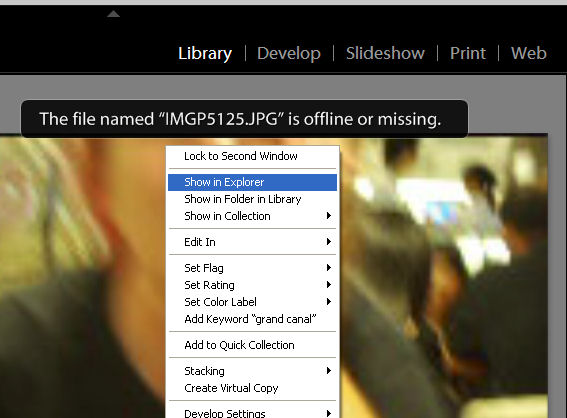
If you break the links to your photos, Lightroom will still display the previews and it will tell you the “The file named xxx is offline or missing”. If you moved the image, right click it and choose Find in Explorer and you can then click Locate and browse to locate the folder you moved it to.
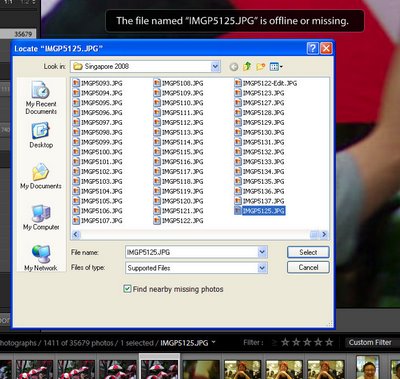
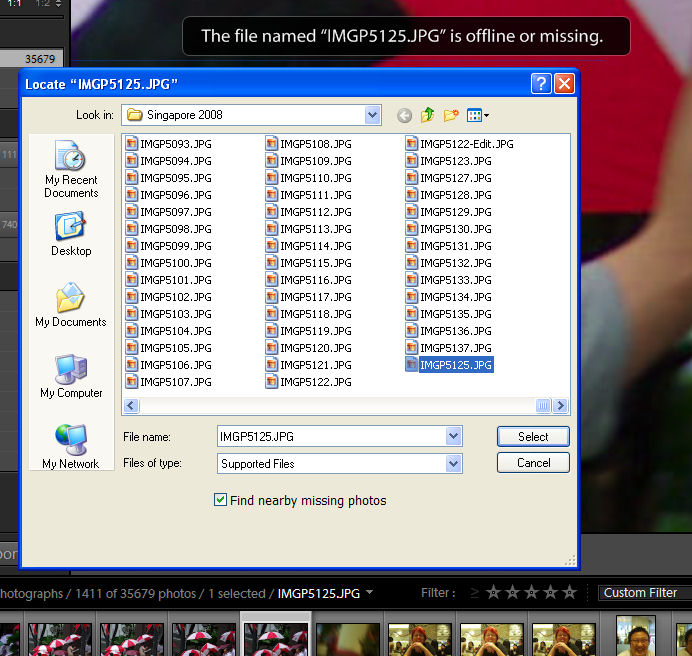
When you locate the missing image, click it to select it and also enable the “Find nearby missing photos” checkbox as chances are if this image has been moved other photos in the same area of the catalog will have moved too and Lightroom will now locate and update their details in the catalog too.
3 Don’t by pass a valuable organizing opportunity
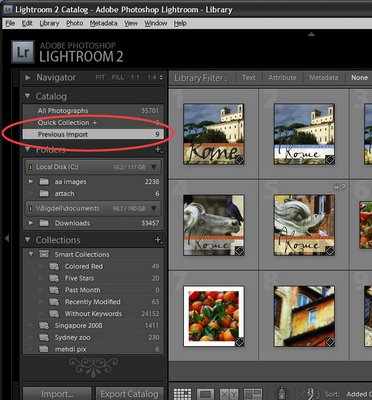
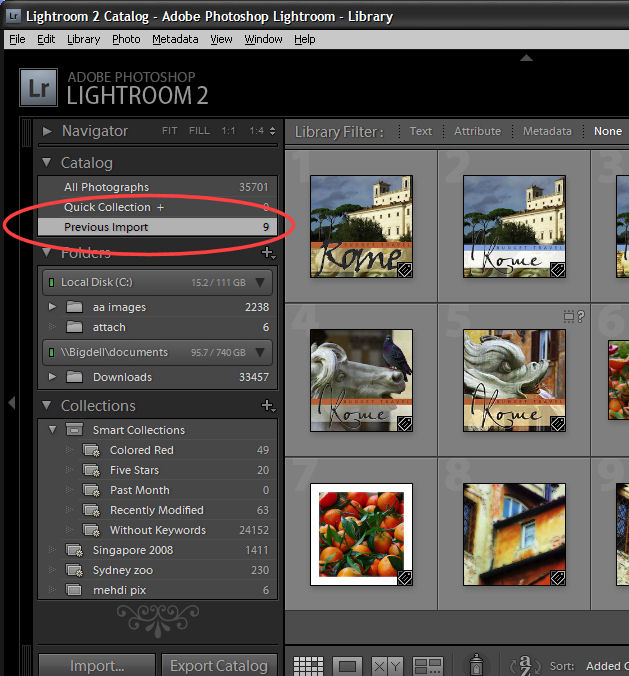
When you import images into Lightroom they’re immediately added to a new category called Previous Import. They stay there until you import more images. Having all your newly imported images in a single collection lets you do things with them such as adding keywords, sorting them, moving them into new folders and even preprocessing them as a group and without having to search for them.
However, you’ll need to do some fancy footwork if you want to bring in more than one set of images into Lightroom and to manage them all at once using this temporary catalog. One such situation would be where you capture two or more cards of related images at a time such as a wedding or other event, or photo walk.
In this situation, you can avoid losing the benefits of the Previous Import catalog by dumping all the images from multiple cards into a single folder on your disk outside Lightroom and then import the folder of images into Lightroom. Now all the imported images will appear in the Previous Import catalog and you can organize and pre-process them as a group. They stay in this category even if you close Lightroom and reopen it and only disappear when you import another set of images.
4 Don’t make work for yourself
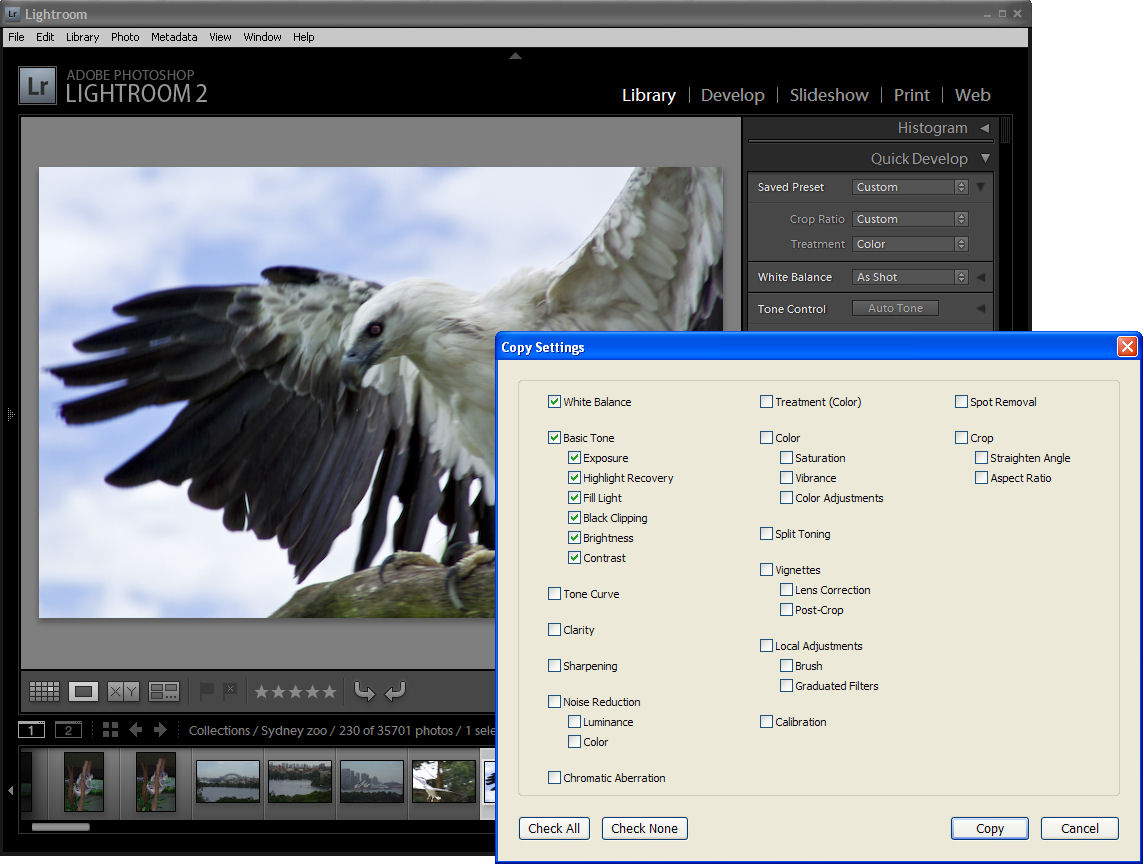
When you capture a number of images in a single location or with a particular light you can batch process them in Lightroom and save yourself hours of work. To do this, choose one representative image from the group and use either the Quick Develop tools in the Library module or switch to the Developer module and make your initial fixes there. Fixes that you might apply to a sequence of images include White Balance, Exposure, Recovery, Fill Light and Blacks. Remember you don’t have to get it 100% right, just better than it was.
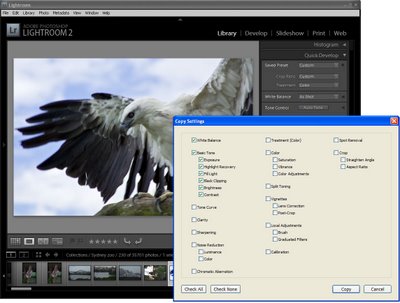
When you’re done, right click this image and choose Develop Settings > Copy Settings and select the settings that you have just made to the image and that you want to copy and click the Copy button. Now select the other images in the sequence, right click and choose Develop Settings > Paste Settings to paste these changes onto all the selected images. These changes give you a starting point for your work in Lightroom.
5 Don’t risk losing your sidecars
If you’re working in Camera RAW (not DNG) any changes you make to an image in Lightroom are stored in the sidecar XMP file for the image – because it is not possible to write data into a proprietary Camera RAW file. So, when you send a RAW image to someone else they can’t see your edits unless they have the sidecar XMP file that goes with it. Long term you need to make sure your RAW files and their XMP files always stay together.
Because of this, many users prefer either to capture in the non proprietary DNG format rather than Camera RAW if their cameras offer this as an option or to convert to DNG as the RAW image files are imported into Lightroom. Converting to DNG rather than working in Camera RAW ensures that changes can be stored in the DNG file making it easier to manage your images now and in the future.
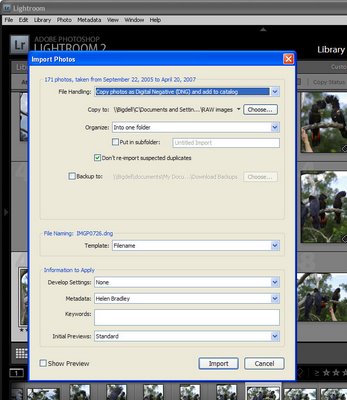
To convert to DNG as you import your files, choose File > Import Photos From Disk and select the folder or files to import. When the Import Photos dialog appears, choose the “Copy photos as Digital Negative (DNG) and add to catalog” command and then choose a folder to store them in. Complete the remainder of the dialog options and click Import to import and convert them in the one step.
Helen Bradley