Wednesday, February 16th, 2011

A cool resource for understanding Av and Tv

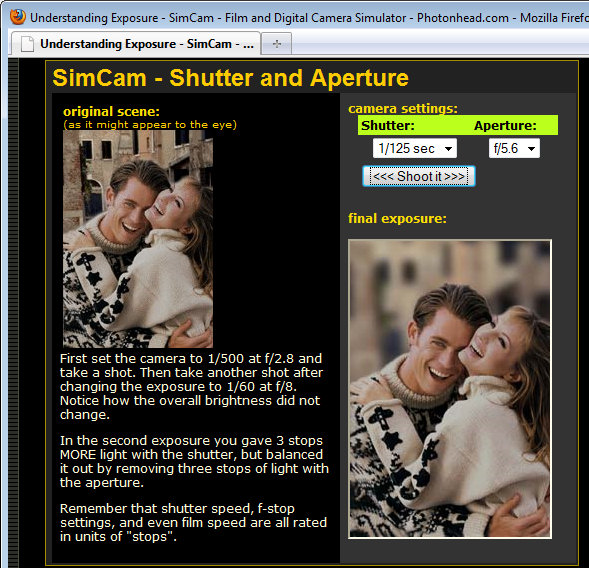
photon simulator showing how shutter speed and aperture relate when taking photos

I’ve been explaining recently why you might shoot in Av (Aperture Priority) or Tv (Shutter Priority)  mode.

Sometimes it can be hard to understand these things so I’ve found a cool tool you can use to see how these interact. Click here to visit the hands on simulator.

The simulator is an interactive camera that you can use online to experiment with aperture and shutter speed. You get to set the speed and the aperture and take your shot – the preview shows you what the image will look like with those settings.

Helen Bradley

Tuesday, February 8th, 2011

Understand your camera’s settings – Part 3 – ISO

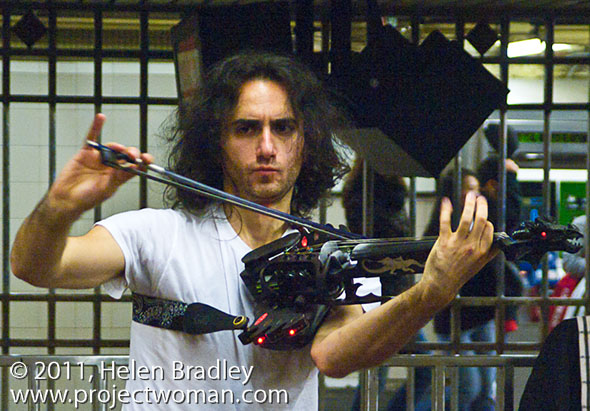
Image: ISO3200, f5.6, 1/80s – the high ISO gives good sensitivity to light allowing this image to be captured quite fast in a relatively dark NY subway station.

In part 3 of this series on understanding your camera’s manual settings I’ll explain how to combine a choice of ISO settings when varying Aperture and Shutter speed.

In addition to Aperture and Shutter speed you can also configure your camera’s ISO setting. You would do this to adjust for the situation where there is not enough light for a shot or where there is too much light.

ISO is the camera’s sensitivity to light and small ISO values such as 80 and 100 indicate low sensitivity so the camera needs more light to take the photo. High values like 400 and 800 (and even up to 6400 and beyond) increase the camera’s sensitivity to light and can be used when you need more light, for example, where the shutter speed or aperture you want to use can’t give the light you want.

Take care when using very large ISO values as these are susceptible to noise so, using a value of 1600 or more might give you a good exposure but the image may have a lot of digital noise as a result.

Small values like 100 and 200 should show little noise at all.

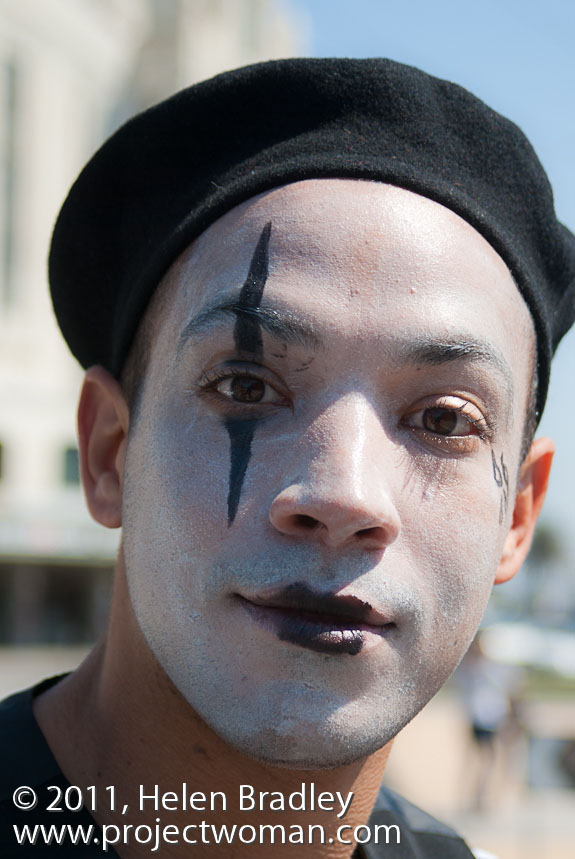
Image: ISO100 f/4.5 1/500s – in bright summer sunlight, the ISO 100 value reduces sensitivity to light still allowing for a fast shot.

Of course, even excessive amounts of noise are preferable to getting a blurred image because you couldn’t hold the camera steady long enough to take it.

While the Auto setting on your camera will ensure that you get a good photograph most of the time, for creative purposes being able to configure your camera to adjust either the aperture or the shutter speed will give you more and varied options for getting even better images.

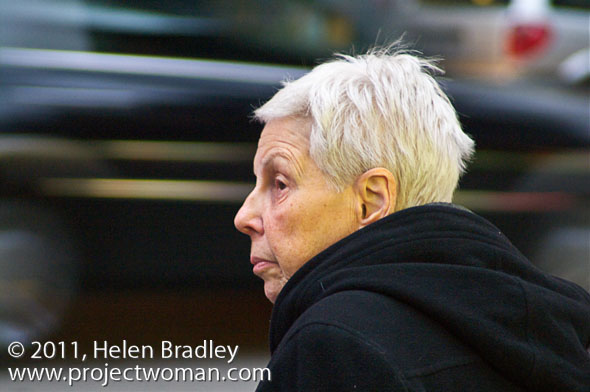
Image: ISO 1600, f/5.6, 1/15s – At dusk in a NY street, the high ISO gives good light sensitivity and the slow shutter speed allows the cars in the background to be blurred nicely.

Helen Bradley

Thursday, February 3rd, 2011

Understand your camera’s settings – Part 2 – Shutter Speed

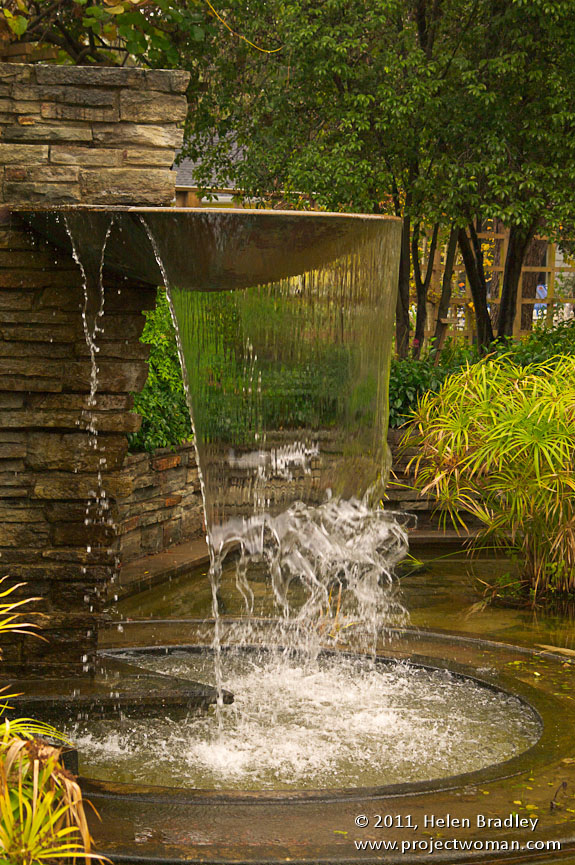
Image: 1/320s, f7.1, ISO 1600

In part 2 of this series on understanding your camera’s settings I’ll explain working in Shutter Priority mode.

Shutter speed can be controlled manually by switching to Tv mode. You can then select the shutter speed yourself so you adjust the time the shutter is open for and the camera will adjust the aperture to give you a good exposure.

How to use shutter speed

Setting shutter speed is a creative tool too. You might choose a fast shutter speed when photographing a moving object and where you want to freeze its motion. The image at the top of this post, for example, was captured at 1/320s.

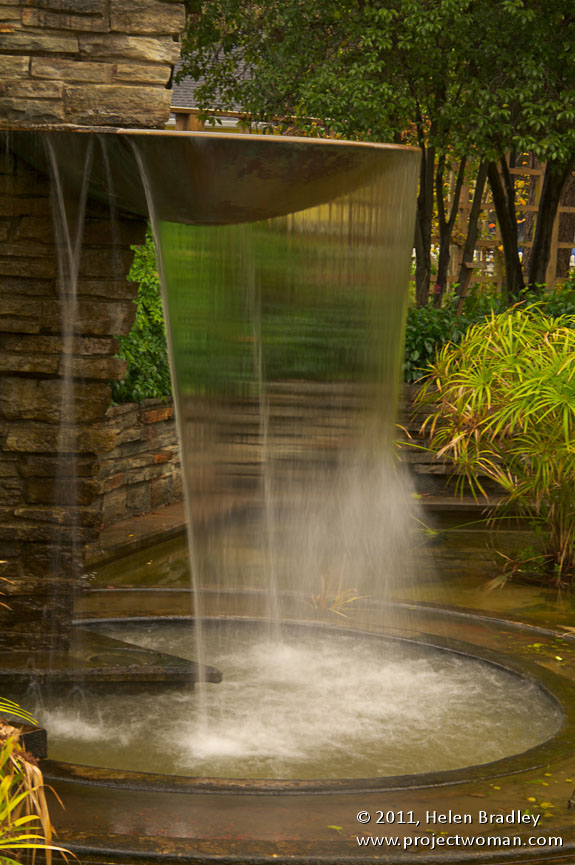
On the other hand, where you want the water in a waterfall or fountain to appear as a silky stream you would use a long shutter speed. Shutter speeds such as 1/250 of a second will freeze motion and shutter speeds of 1/30 a second or slower are considered to be slow.

This second version of the same fountain was shot at 1/3s at f/25 and the water is much silkier:

When you select shutter speed, your camera will show the aperture so you can preview this – on some cameras you may have to press the shutter release mechanism down halfway to see this.

If the camera doesn’t have a large or small enough aperture for the speed you’ve chosen it will indicate this using some warning system allowing you to adjust your shutter speed setting.

Using a tripod

Take care when selecting slow shutter speeds. Anything slower than 1/60th of a second will make it hard for you to hand hold the camera and keep it steady. If you’re using long lenses on a digital SLR, for example, you may not be able to hand hold the camera successfully at even quite fast shutter speeds.

A good rule of thumb is to use a tripod for shots slower than 1/the focal length of the lens so a 70-200mm lens at full zoom would need a tripod for shutter speeds slower than 1/200th second.

Helen Bradley

Thursday, January 27th, 2011

Understand your cameras settings – Part 1 – Aperture

All digital SLRs and many point and shoots can operate in manual or semi-manual modes. If you capture most of your photos using Auto mode it’s time to look at some of the benefits you can get by switching to semi-manual operation.

With these modes you control the aperture or shutter speed and you get a chance to capture more creative photos. So how do you do this and what settings do you use? In this series, I’ll explain your camera’s Aperture Priority and Shutter Priority (Av and Tv) modes and also explain why your ISO setting  is important to understand too.

If your camera can operate in manual mode you’ll have settings such as M, Av, Tv and P on your camera’s dial. The two settings we’ll focus on are Av and Tv where you set the aperture or shutter speed yourself.

What is Aperture?

This begs the question, what is aperture and what is shutter speed? Aperture is, very simply, the size of the hole through which light enters your camera. The larger the hole, the more light gets in.

Aperture is described using an f number which is calculated using a complex formula. A rough rule of thumb is to think of aperture being a fraction so an f number (often called a f-stop) of f/2.8 is bigger than f/22 for example.

Understanding aperture

Aperture not only has a direct relationship to the amount of light let in to the camera, it also affects depth of field. When you use a large aperture such as f/2.8 you will get a small depth of field so only a small distance in front and behind the point of focus in the photograph will be in sharp focus and the remainder of the image will be out of focus.

Depth of field is a creative tool that many photographers use to their advantage. For example, when photographing a beautiful flower, you’ll want the focus to be on the flower and not the things behind it. Using a large aperture such as f/2.8 throws the background out of focus. The photograph at the top of this post is an example of a large aperture and a small depth of field.

On the other hand, using a small aperture such as f/8 or f/11 gives you a large depth of field so everything in the photograph will be in focus – useful when photographing landscapes for example.

The relationship between Aperture and Shutter speed

When you set the aperture using the Av setting on the camera, the camera sets the shutter speed to an appropriate value. This is because there is a direct correlation between aperture and shutter speed.

When you use a small aperture, only a small amount of light comes into the camera so you need to compensate for this by using a slow shutter speed to ensure you capture enough light.

On the flip side, when you use a large aperture such as f/2.8, you get lots of light so the camera will set a fast shutter speed.

When you use Av mode, you’re effectively saying, I’ll set the aperture I want and you – the camera – are to adjust the other settings to give me a good picture. When you are in Av mode, there will be a dial or other option you’ll use to set the desired aperture value.

Helen Bradley