Learn how to make a collage effect showing a hand holding a Polaroid photo over the top of your own original photo. The process can be done in practically any version of Photoshop. It uses some simple masks and selections.
Transcript:
Hello, I’m Helen Bradley.
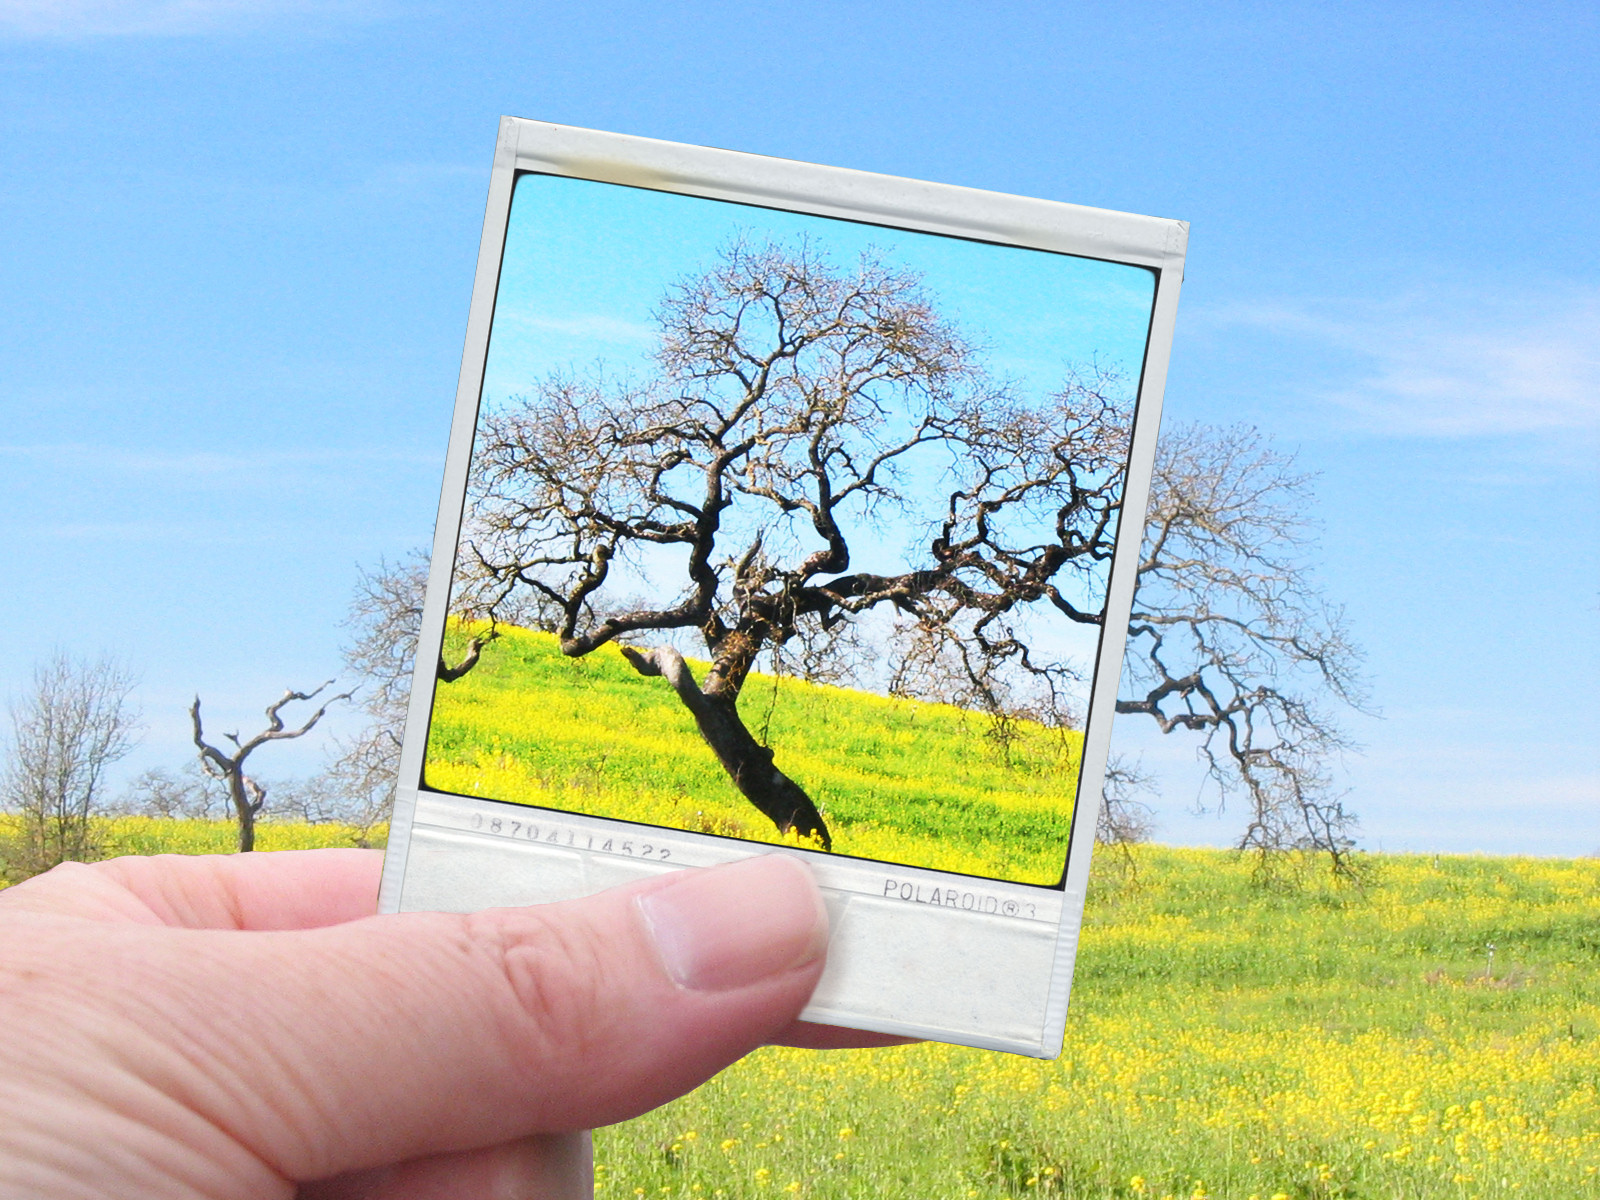
Welcome to this video tutorial. In this tutorial I’m going to show you how you can create a collage image that shows you holding your own photo. Before we get started let’s have a look and see the effect that we’re looking for.
What I have here is a Polaroid frame and I’ve extracted a portion of the image underneath to place inside the frame. And we have a hand here looking as if the Polaroid image is being held over the top of a scene.
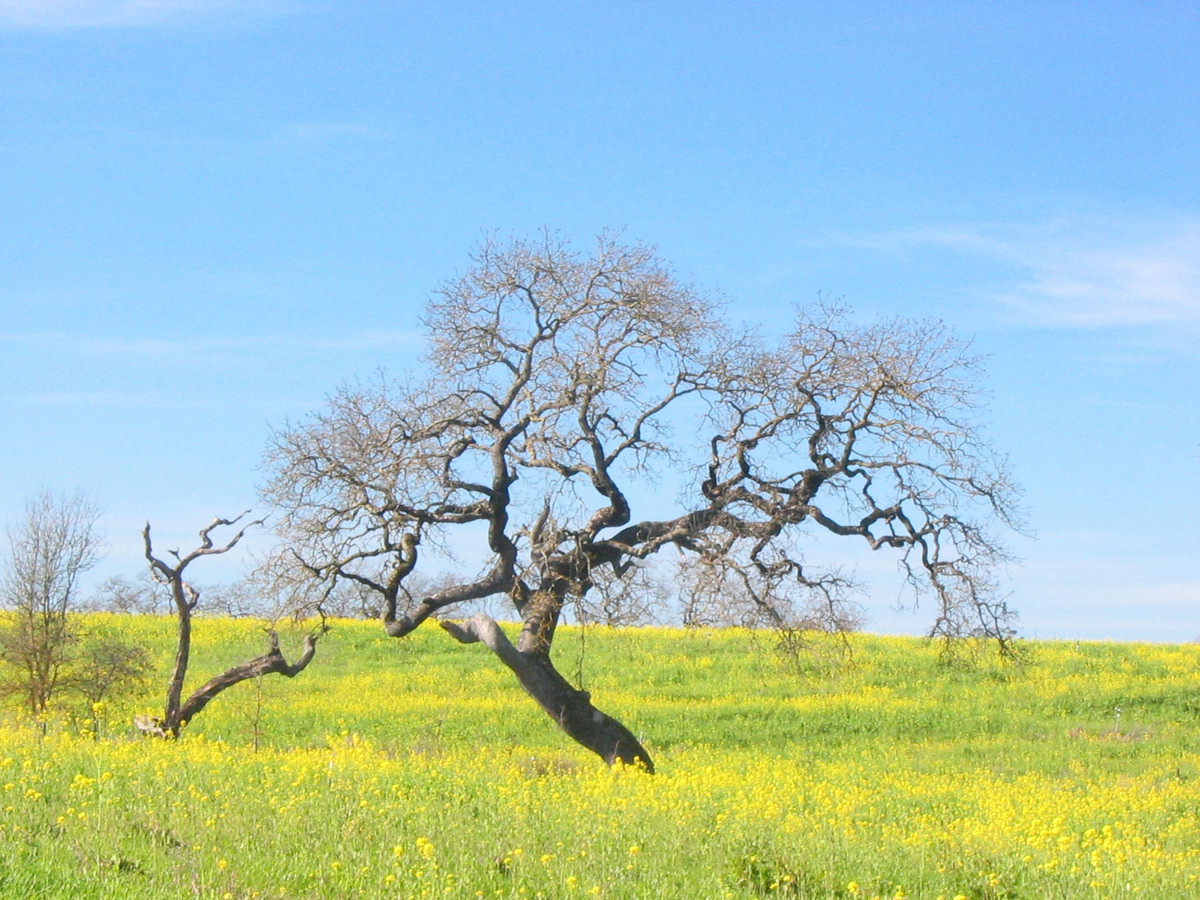
So this is the image that we start with. We’re going to add a hand to it and also a Polaroid frame which we’re then going to fill with our image. We’re going to finish off with just a little bit of shading to help the realism of the situation. So, if you’re ready let’s get started.
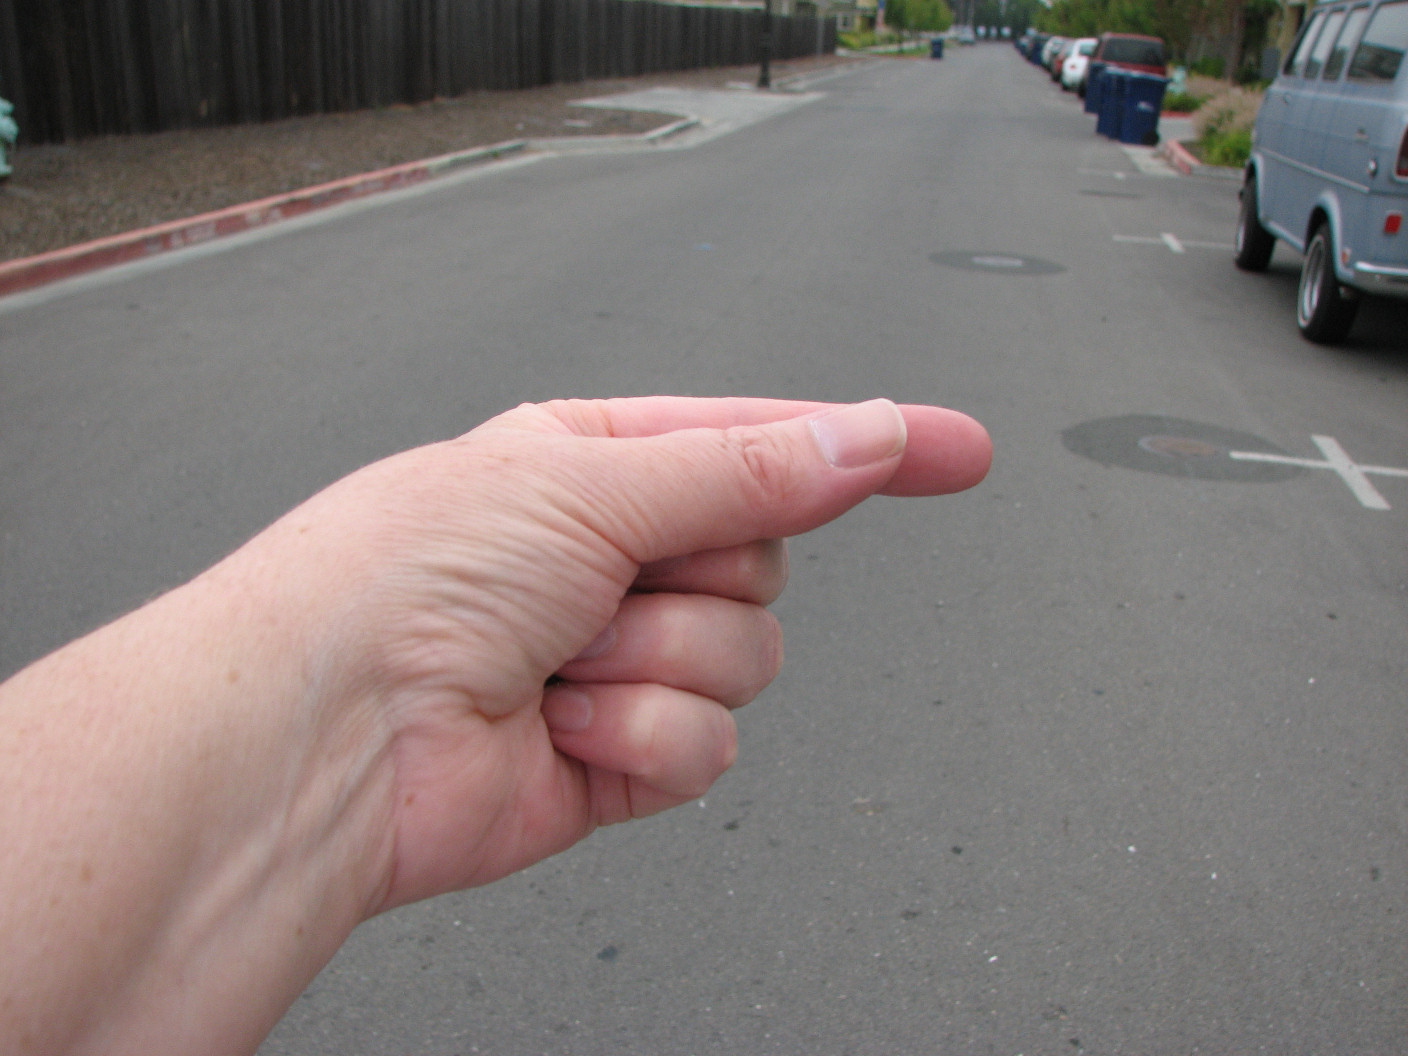
To create this effect you’re going to need three images. You’re going to need your main starting image, an image of a hand and an image of a Polaroid frame. Now this image I shot on the street front in front of my house. All I did was hold my hand up as if I was holding something and then shot it with a macro setting on the camera because that allowed me to focus at that hand.
Now the Polaroid image is from a website. I got it from this Deviantart.com website.
There’s a person there who has a Polaroid image. You’ll just open the Polaroid image up, right click and choose Save Image as. And I’ve got the link for that in the description for this video. So once you’ve got all three images open you’re ready to go.
Now I’m going to start by just dragging and dropping the Polaroid image into my main image. So here’s my main image. I’m just taking the background layer and just dropping it in and then I can move it and resize it.
Now if I’m resizing it I want to do that with the Shift key held so it’s constrained in the correct proportions. I’m just going to place it loosely where it’s going to go. Now with the hand image I don’t want all of the detail because this is straight out of the camera. So I’m just going to crop it fairly tightly so the only bits that I’m going to work on are the actual bits that I need in my image.
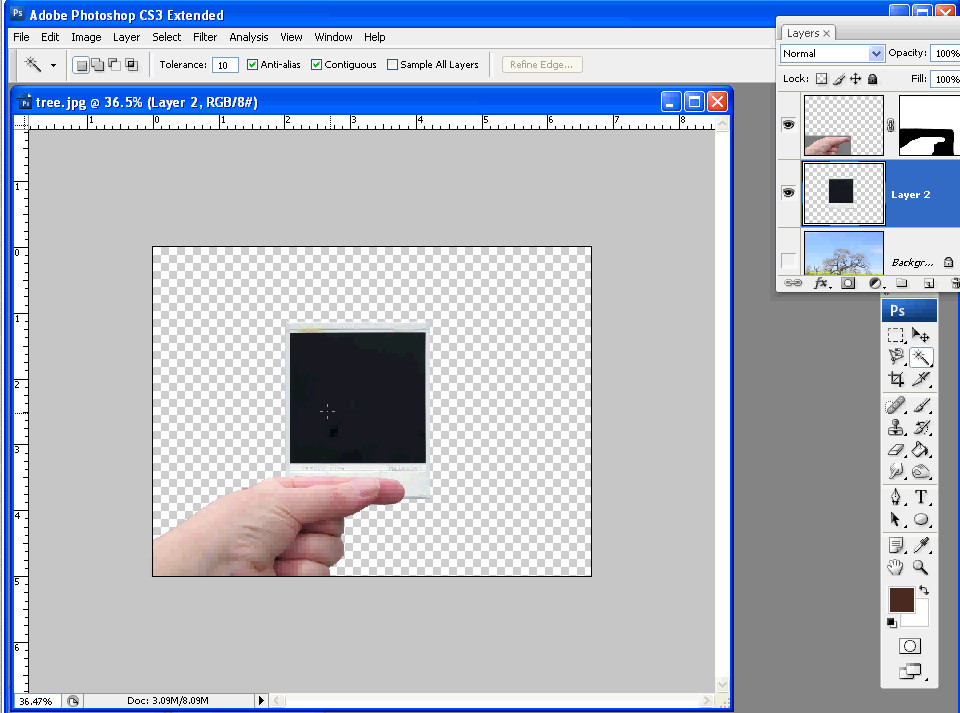
So I’m just going to crop it there and then just drag and drop it into position. So once we’ve got the three images all in one we’ve got a lot less stuff hanging around on our desktop. So the first thing I’m going to do is deal with the hand. So I’m going to turn off the other layers, click on the hand layer and I’m going to use the Quick Selection tool.
It really, if it works for your job, it’s the best tool to use because it’s quick. And so I’ve just gone too far there and we’ve selected everything. But let’s just go and deselect the hand. If you select a bit more than you need you can Alt and drag with the Quick Selection tool to deselect an area. So now I have all this outside edge selected and I could either delete that or I could mask it.
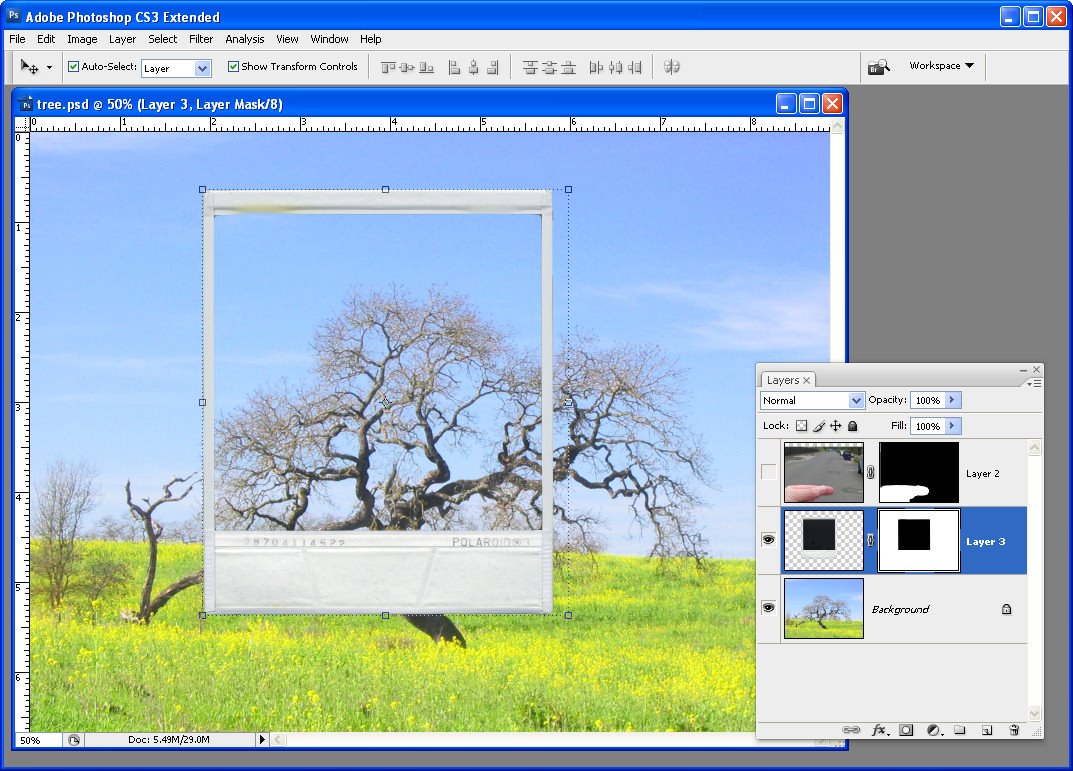
And since I’m going to need a mask later on I may as well just mask it for now. So I’m just going to click the Mask icon. Now the mask has gone in the wrong way around but all I need to do is to tap on the mask layer and Ctrl I to invert it.
Now it looks like I’ve got a bit of extra here. So I’m just going to select the black color here and just paint out along this line to make sure that it’s all gone, ok, so I don’t have anything trailing and I’m just going to move my hand back into the very corner of the image where it’s going to go. Now we can go and focus our attention on the Polaroid frame. Again, I’m going to turn everything off, focus on the Polaroid frame layer and again I’m going to use the Quick Select tool just because it is so good.
So I’m just going to select around the edges of this Polaroid because it comes in with quite a bit of edge detail and we don’t want that. All we want is the white Polaroid frame itself. So I’m going to need to get rid of that edge and we’re also going to want to select everything in the middle here so that all that is left is the white frame. Now let’s learn from the last mask that we created.
The last mask we created when we selected the background and just clicked the Mask tool what we got was a mask that gave us the background, the selection and nothing else. So let’s just undo that and this time if we Alt Click on the layer mask we’ll get a layer mask that actually shows us the frame and not the excess.
Now again, we’ve got some trailing little bits around the edge which is a bit annoying. But with black as my paint color I’m going to click at one end of it, Shift Click at the other and there’s a bit of a strip down here too. I’m just going to get rid of those so that I have just the frame itself. And now we can go ahead and we can bring back in our hand and we can have a look at the frame over the top of the image. So you can see how everything is starting to go together.
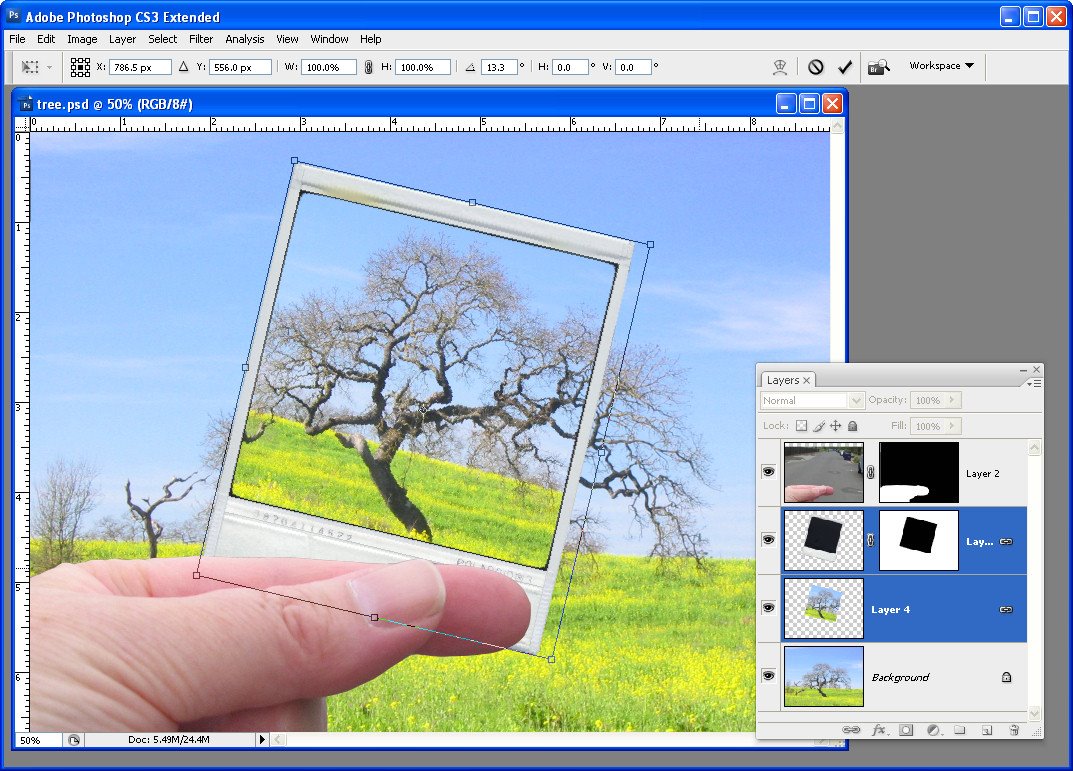
The next thing to do is to position this frame pretty much where I want it to be.
Now I’m going to want to tilt it. Before I do that I want to grab a selection of the middle of the frame so I can then go and get the image of Sacre Coeur that I need. So I’m going back to my Quick Select tool. I’m going to make sure that the polaroid itself is selected, that layer, not the mask, just the polaroid and I’m going to click inside it with the Quick Select tool so I get a selection of the area that is the inside of the polaroid and turn everything back off again.
And you can see my selection is in place. Now if I just wanted exactly the same size I could go ahead and make a copy but I actually want my Sacre Coeur to be a slightly different size in the frame. So I need to transform this selection. So I’m going to Select and then Transform Selection because that allows me to make the selection bigger so the portion of Sacre Coeur that I’m going to take will be scaled down inside the Polaroid frame.
So I’ve not only scaled it by holding the Shift key as I’ve sized it up but I’ve also positioned the selection exactly where I want it and I’m going to click the Transform or the Commit tool here. Now I want this image but I also what my background so I sort of want my cake and eat it too. So then I’m going to make sure that I have the background selected and I’m going to do Layer > New Layer via Copy.
And what that gives me is not only my original background layer but also a layer that has just this image on it. And so now I want to size it and position it inside this frame. So I’m going to turn everything off except for the Polaroid frame and the image portion. I’m going to make sure that the image itself is selected and click the Move tool. And now I’m going to size it down. I want it just the right size for fitting inside this Polaroid frame.
So it can be a little bit larger than the inside of the frame because it’s in a layer behind the frame but I won’t want it so large that it’s falling over the edges. So we just need to get it in the right position. So having done that I’m going to select the Polaroid frame layer and the picture layer and just tilt it. And now when I turn everything back on we can see how it’s all fitting together. And you can see that it’s probably not in the ideal place still.
So I’m going to with those two layers selected – actually I think I’m going to move the hand. I think it’s the hand that’s the problem more than the image itself so I’m just going to move the hand back down. And now let’s go to the Polaroid and the image and we’ll just move them over a little bit and perhaps even square them up a little bit more.
So I want it where it is going to appear held in my hand. So now let’s go to the image itself and let’s make the image a little bit different so it’s obvious that it’s a Polaroid and not the image behind. I’m going to do this using an adjustment layer with Layer > New Adjustment Layer and I’m just going to choose a black and white adjustment because this allows me to convert the image into black and white.
In fact everything is going to black and white and I’m not worried about that. I’m only focusing on what’s happening inside the Polaroid because we’re going to limit this fix in a minute just to the Polaroid. So I’m going to darken the sky up and lighten up the building a bit. So let’s call that done. And now we’re going to create a clipping group of that which will limit this adjustment layer to only affect the layer below.
And to do that we select the adjustment layer and choose Layer > Create Clipping Mask. Now you can see that this is clipped to the layer below. Now I don’t want it to be black and white. I just want it to be a little less than full color. So I’m just going to drag down the opacity of this layer so that we get the distinct impression that this image inside the polaroid frame is a different image to the one that we’re actually seeing.
Now we just need to sort out the hand issue. And the problem with the hand is that the polaroid frame is behind the hand and we’re not getting that sense that the hand is actually even holding the frame. So we’re going to zoom in. So I’m going to click the Zoom tool with the letter Z and then just zoom into the image and move it around by holding the Spacebar. We already have our mask and the mask will be white where the image is showing and black where it’s not showing. So we want to start painting with black and I want a brush that is fairly hard.
So I’ve got a small, hard brush here and what I want to do is start painting on the mask layer in black to remove the finger where it shouldn’t be. Now it’s a little bit hard to see exactly where it shouldn’t be so I will generally paint out too much of it and then go back and fill it in again. And if I go too far I can just fine-tune that as I go.
And I may want to move even more closely into the image to do this. I certainly will want to size my brush down quite a bit. Now you’re going to do a better and more considered effect than I am because I’m just trying to do this for the sake of the video but you’ll be able to do a better job of this. You obviously – I’ve taken the wrong part of the finger out here.
Let’s just deal with my stupidity here. This is a much better idea. Let’s take the part of the finger that is in front of the Polaroid and then let’s get back the portion of the finger that is behind it. Hum, much better, ok. Now we’ve got some problems here.
Again, this time now I’m getting too much of the background in but I can just deal with that. And then I’m going to get in close here as well. And I would get a bit more of this skin because this is actually the second finger showing behind. We want to ease that off a little bit so we don’t get quite that effect. And part of this is the roadway too. Now having done that let’s just zoom out and see where we’re at.
We’re pretty near done on this. The only thing that concerns me is that there probably would be a bit of shadowing around here. So to put the shadowing in I’m going to add a new layer. I’ll just click the Add New Layer icon, I’m going to select a brush and then I’m going to select a sort of brown paint color. And you can sample this from the image if you want to. Just click on something that’s sort of brown. And then we’re going to paint in where we think that there would typically be a bit of a shadow. And there might be perhaps a bit of shadowing here as well and maybe even across the top of the Polaroid itself.
Now obviously the opacity is going to be reduced enormously. We’re going to take it right down. And we could use multiply if we wanted to just to blend it into the layer below. And then I would just get the Eraser in to just neaten up the edges so that you can take out the effect where you don’t want it to be.
This Eraser has got a reduced opacity which is not helping me here right now, just take out the effect where you don’t want it leaving it in where you do what it. And you fine-tune this. You can also go ahead and soften the edges of the brush so that you sort of peter out this effect so it’s not totally at 100 percent at the very edges. So you can soften the shadow effect a little bit and soften it under here.
But that shadow effect it might be very, very subtle but it will make a big difference in the final image. So let’s just zoom out again and here is our hand held photo. We’ve done this using a Polaroid frame that we downloaded from the web. We’ve copied a portion of the image and adjusted it within the frame so it looks as if it is a Polaroid image and then we’ve placed everything over the top of our underlying photo.
Now apart from a little bit of tidying up for example I can see I’ve still got a slight edge down here that I need to deal with, that’s pretty much the effect that we’re going for. I’m Helen Bradley. Thank you for joining me for this video tutorial. I encourage you to subscribe to my video channel so that you’ll be advised when new videos are release.
And visit my website at projectwoman.com for more tips, tricks and tutorials on Photoshop, Illustrator, Lightroom, Photoshop Elements and a whole lot more.