Wednesday, January 6th, 2010

Photoshop – Clip an image to a shape

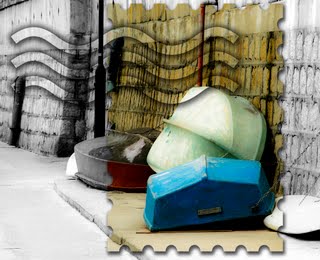
For scrapbook projects, photo crafting and other creative uses you can achieve a cool effect for your photos by clipping your favorite images into shapes. Here’s how to do it:Step 1
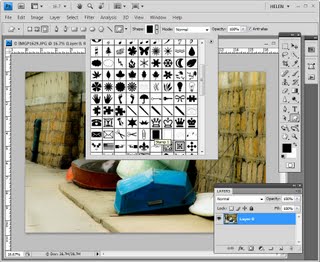
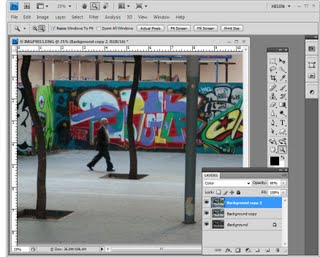
Open an image and make the background layer a regular layer by double clicking it in the Layer palette and click Ok.

From the Photoshop’s Custom Shapes collection, select a shape and set the Shape tool to Fill Pixels in the Tool Options palette – ignore the color that you have selected for now. Step 2
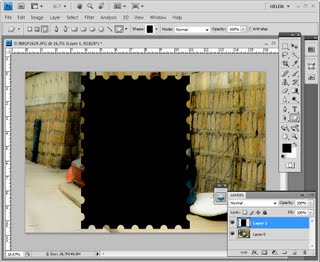
Add a new layer to the image by choosing Layer > New > Layer and drag to create the shape on that layer. Use the Move tool to rotate the shape, size and move it. Step 3
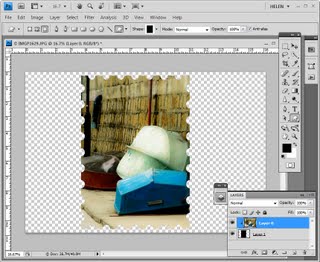
Drag the background layer above the shape layer. Select the top layer and choose Layer > Create Clipping Mask to mask the image to the shape. Step 4
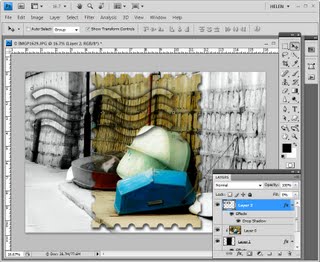
Add a drop shadow or other effect to the shape layer to set it aside from the background. You can also add a new background layer and fill it with a color or texture to show off the image.

If you drag the shape into a different position in the image using the Move tool or scale it, you will reveal more or less of the top image.

Helen Bradley

Monday, January 4th, 2010

Better photos Tip #2 – Hold the camera right

© Iryna Kurhan,istockphoto.com
Hold your camera in both hands as you shoot to steady it and to ensure your shot is in focus.

When you are photographing, take care to hold the camera steady so your photos won’t be blurred.

Hold your camera in both hands and position your arms close to your body with your elbows tucked in to form a solid foundation for supporting the camera.

Press the shutter release half way down and pause to let the camera’s auto focus system focus on the subject.

Then press the shutter the rest of the way down to capture the image.

If possible, hold your breath as you do this, to avoid the movement which would otherwise occur if you breathe in and out as you are taking the shot.

Helen Bradley

Monday, January 4th, 2010

Video – Fixing animal eyes in Lightroom

Here is a video presentation of a recent blog post on fixing animal eyes in Lightroom.

How to use the Adjustment Brush in Lightroom to fix dull and dark animal eyes.

I am working on changing the size of the videos. A few of these were made for a special job and they are different sizes than I would actually want to use in future. I am aiming for some that are taller than this and narrower so they fit in the post layout more comfortably.

Helen Bradley

Saturday, January 2nd, 2010

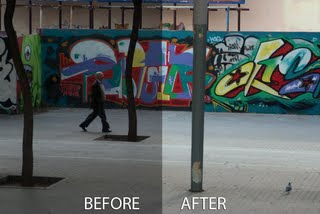
Photoshop – Cool fix for an underexposed image

My camera seems to shoot consistently on the side of underexposing images and while sometimes an exposure adjustment will solve the problem I often need a stronger fix.

This is when Lab color can help out. This color mode has special characteristics in that it can handle very bright colors differently than RGB mode does and it can be used to boost brightness in an image while at the same time ensuring that color isn’t lost when you do this using screen blend mode. Here is a simple fix for underexposed images – if you like it you can create it as an action so all you have to do is run the action then tweak the opacity of the top layer to get the result you want.

Step 1

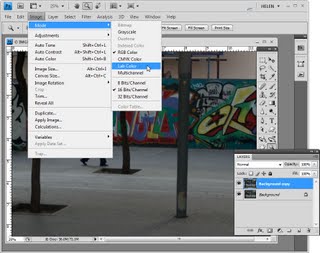
Right click the background layer of the image and choose Duplicate Image. Choose Image > Mode > LAB Color and select Don’t Flatten.

Step 2

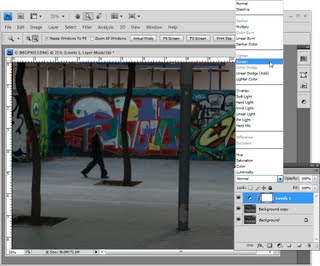
Choose Layer > New Adjustment Layer > Levels and click Ok twice. This applies a levels adjustment with no change to the image. Set the layer blend mode to Screen.

Step 3

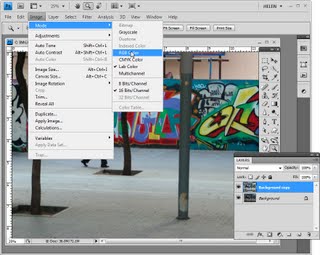
Select the Levels adjustment layer in the layer stack and choose Layer > Merge Down to merge this layer into the layer below. Choose Image > Mode > RGB Color and select Don’t Flatten to return to RGB Color with both layers intact.

Step 4

Right click the top layer (it’s the duplicate background layer) and choose Duplicate Layer and click Ok.

Select the middle of the three layers and set its blend mode to Luminosity.

Select the topmost layer and set its blend mode to Color.

Adjust the opacity of the top layer until you get an acceptable amount of color in the image.

Helen Bradley

Friday, January 1st, 2010

Better photos Tip #1 – Rule of thirds


Place objects at the intersection of lines on an imaginary noughts and crosses board for a more interesting image.

When you are composing your photograph have in mind the principles of the rule of thirds. This rule suggests that you draw an imaginary noughts and crosses board over the photograph that you are about to capture. Where the lines intersect is a good place to position the subject of your image.

For example, if someone’s eyes are located where the lines intersect you will get a much more interesting photo than if the person is positioned dead centre of the photograph.

In addition, placing the horizon along one of the lines of the noughts and crosses board is more interesting than placing it across the middle of the photo.

Simply moving your camera a little bit to the right or left, or up or down can be the difference between a so-so image and one which looks much better.

Helen Bradley

Friday, January 1st, 2010

All New! Video Tutorial, Fix a Sky in Photoshop

New for the New Year!
I am trialling some videos for the site and here is the first of them.

It is a video rendition of a recent post from my blog, but this time you get to see it in action rather than read about it.

This video shows a simple and effective way to replace a blown out sky in Photoshop without having to make a complex selection to do so.

Let me know by posting a comment if you like the concept of viewing video tutorials. I plan to offer a mix of both videos and text but I’d love to hear what you think.

Helen Bradley

Page 3 of 3123