Wednesday, February 8th, 2012

More Flexible Lightroom to Photoshop editing

If you work in Lightroom, at some stage you’ll probably want to take an image to Photoshop for some additional processing. How you send it to Photoshop will have an impact on the options available to you. One option in Lightroom is to take an image to Photoshop as a Smart Object and that has some advantages. Here’s how to do it and why you might consider using this feature.

Open as a Smart Object

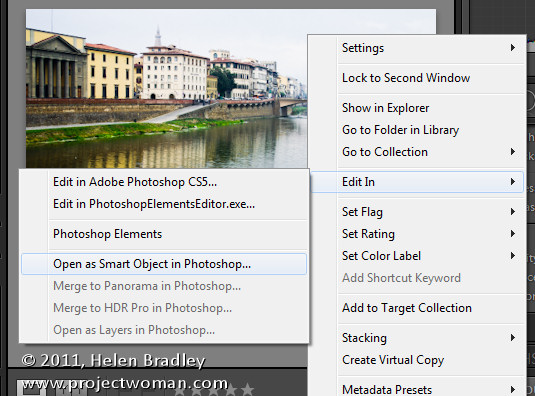
In Lightroom, when you’ve finished processing the image and you’re ready to head to Photoshop, right click the image and choose Edit in > Open as Smart Object in Photoshop (this is available if you’re using Photoshop CS5, CS4 or CS3 – Smart Objects weren’t available in earlier versions of Photoshop).

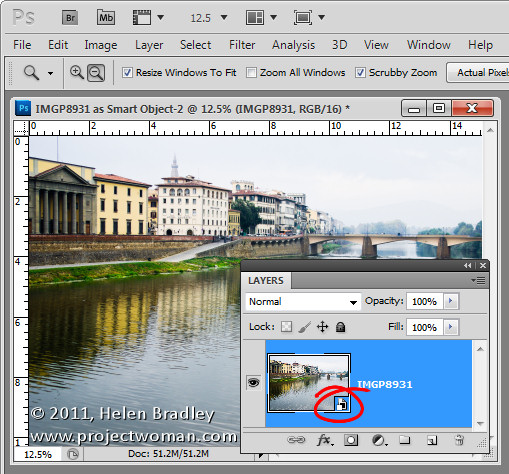
Photoshop will open with your image open on the screen. If you look at the Layers palette you’ll see the layer has an icon in the bottom right corner of its thumbnail. This tells you the image is a Smart Object.

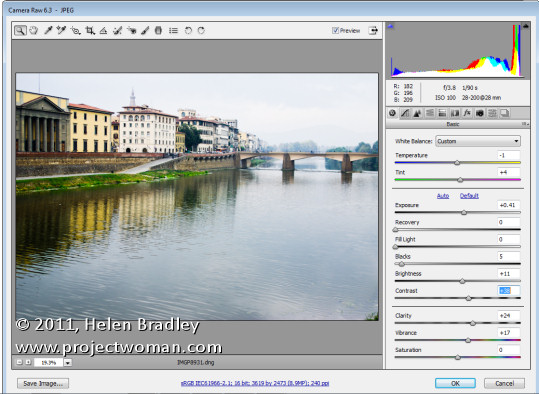
If you want to make further adjustments to the image you don’t have to start over. Instead, double click the image thumbnail in the Layers palette and the image will open in Adobe Camera RAW (ACR). The processing options in ACR are the same as you have in Lightroom so you can change how the image is processed.

When you are done making changes, click Ok. The changes to the image will appear in the Smart Object back in Photoshop.

Double processing

The obvious advantage of opening an image in Photoshop as a Smart Object is being able to make changes to the image even after it has been brought into Photoshop and even after you have made changes to it – such as adding an Adjustment Layer, for example.

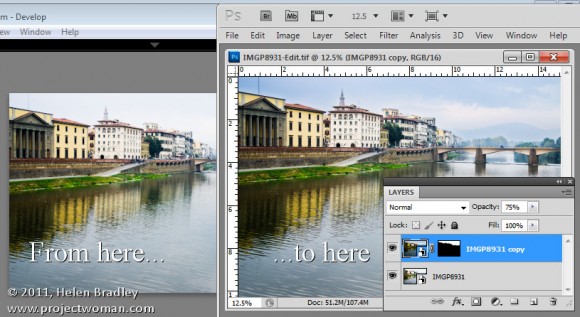
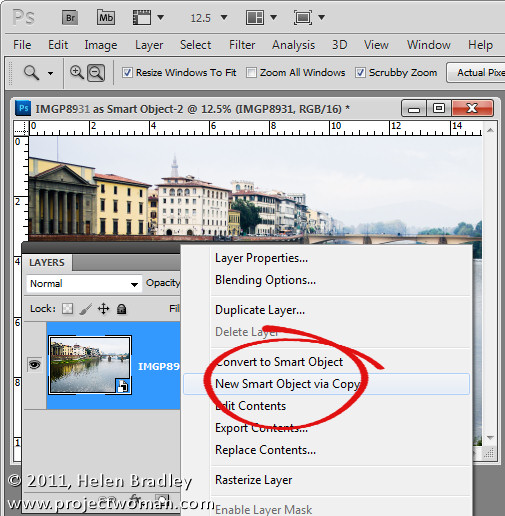
In addition you can use this feature to process an image in more than one way and to blend the two versions together. To do this, right click on the smart object layer and choose New Smart Object via Copy. This creates a copy of the smart object layer.

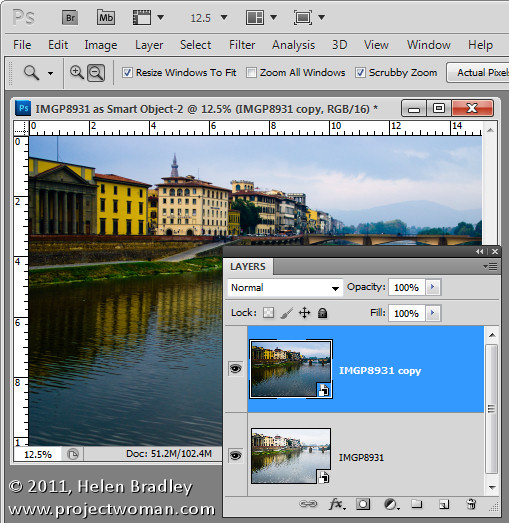
Double click on the thumbnail of this second Smart Object to open it in ACR and now process it a second time to bring out detail in another part of the image. In this case I adjusted to get a better sky. When you’re done click Ok to return to Photoshop.

The changes have been applied to only the second copy of the image and not the first so there is a different version of the image in each layer.

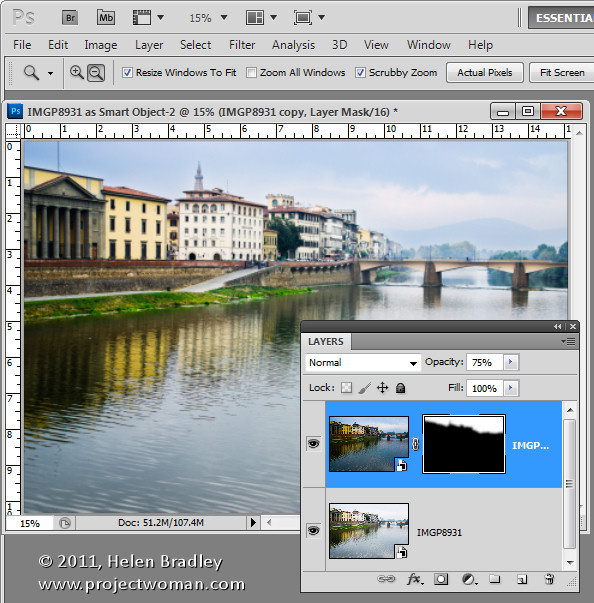
To blend the two layers together add a Layer Mask to the topmost layer – to do this, select the layer and click the Add Layer Mask icon at the foot of the Layers palette. Target the mask by clicking its thumbnail in the Layers palette and paint on the image with black to bring back detail in the layer below.

If any of the layers still needs fine tuning, return it to ACR to fix it.

Because the two versions of the image are on separate layers you can blend those two layers together using a blend mode or adjust the Opacity of the top layer.

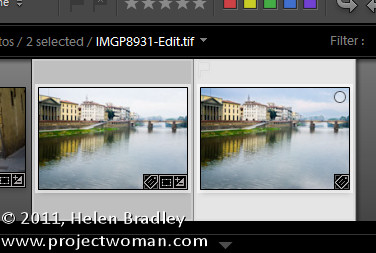
When you are done, click Save to save the file, close it and return to Lightroom. Your edited version of the image will be saved in the same location as the original image and will appear in Lightroom too.

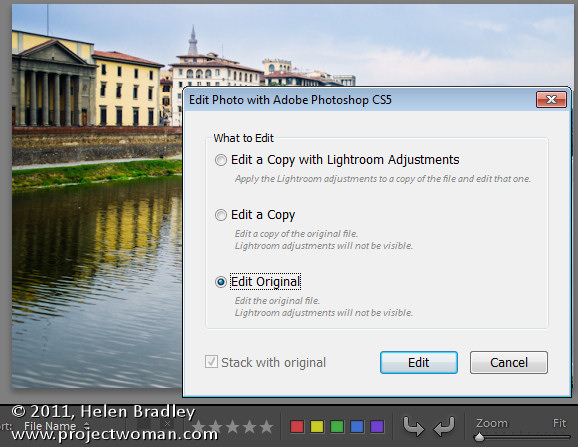
If  you want to edit this image again at a later date and have the Smart Objects still in place, when you right click the image and choose Edit In > Adobe Photoshop CS5 (or CS4 or CS3), choose Edit Original.

Taking your images to Photoshop as Smart Objects gives you additional tools for working with your images in Photoshop – it’s a handy technique to add to your Lightroom/Photoshop toolkit.

Helen Bradley

Tuesday, February 7th, 2012

Create a collage in Gimp

One task I perform regularly in Photoshop and Lightroom is to assemble multiple images on a single page for printing.  I love displaying my photos, for example, as triptychs –which are three side by side images.

I’ve posted before on the process in Lightroom here (http://projectwoman.com/2009/07/creating-a-triptych-in-lightroom.html) and here (http://projectwoman.com/2009/10/how-to-select-and-compose-a-triptych-in-lightroom.html)and today I’ll show you how to do this in Gimp using a set of templates I have created for you and that you can download free.

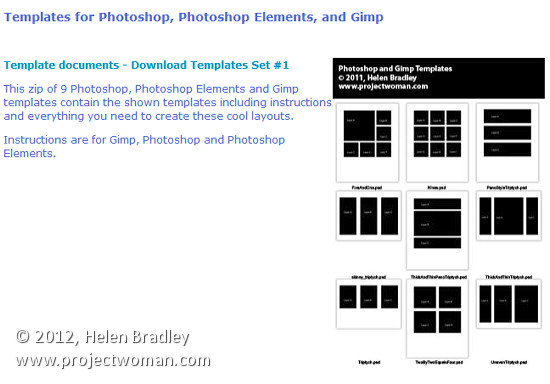
These templates work with both Gimp and Photoshop and you can find them here: http://projectwoman.com/articles/45PhotoshopTemplates.html

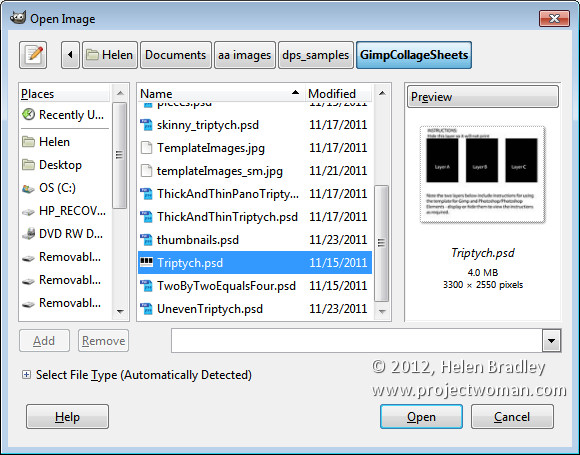
Unzip the files and open the one to use in Gimp along with the images that you want to use. I’m using the Triptych.psd file.

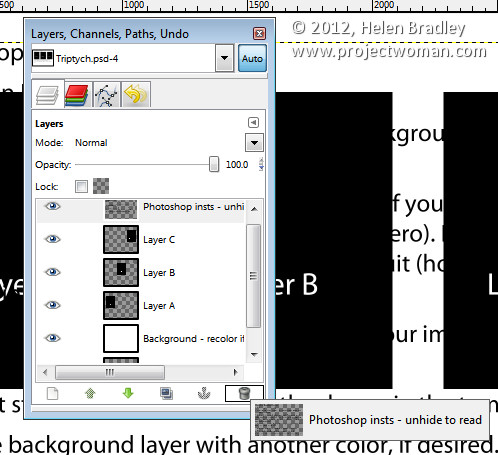
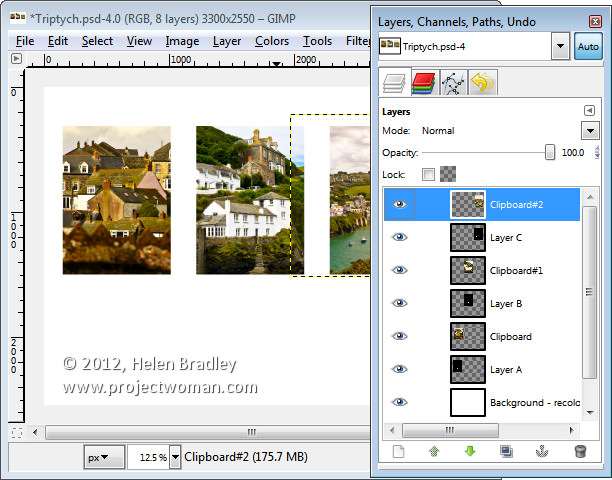
Start by viewing the template you are using and, in the Layers palette select and discard the top three layers which include the instructions for using the template in Gimp and in Photoshop and Photoshop Elements.

Select the first of your images, choose Select > All  and then select > Edit > Copy to copy the image to the clipboard.

In the template click on the layer marked A and choose Edit > Paste as > New Layer. This pastes the image from the clipboard into the layer immediately above layer A.

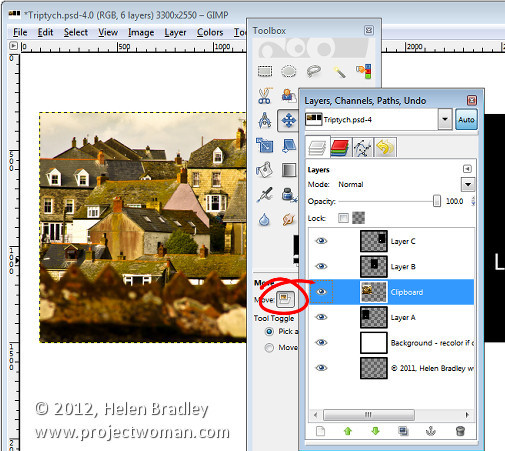
Click the Move tool (set it to Layer) and drag the image over the top of the shape on the right. If desired, click the Scale tool and scale the image to size it larger than the black rectangle.

Move the portion of the image that you’re most interested in seeing over the shape.

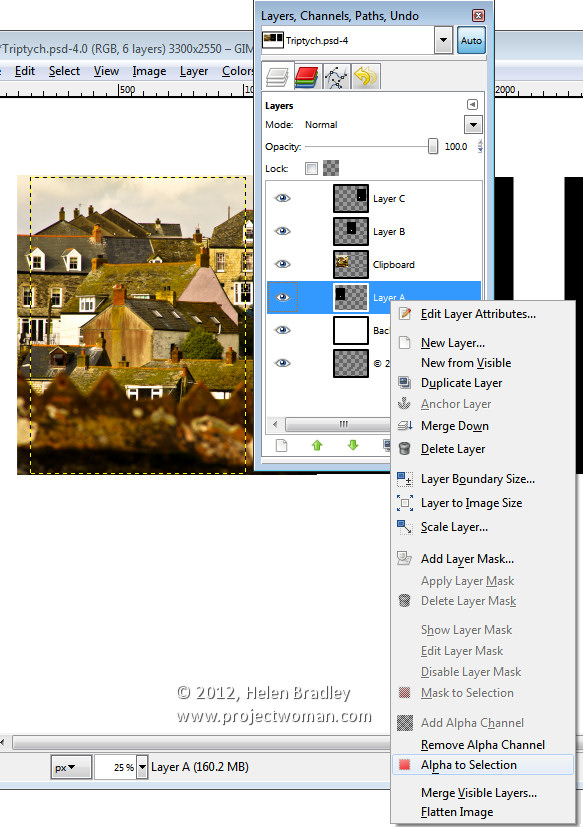
Now, to crop the image to size, click layer A, right click and choose Alpha to Selection.

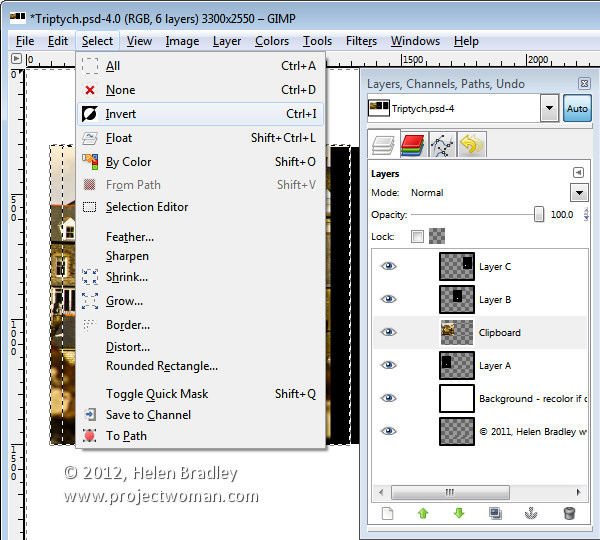
Now select the Clipboard layer that you’ve been working on, choose Select > Invert and press Delete.

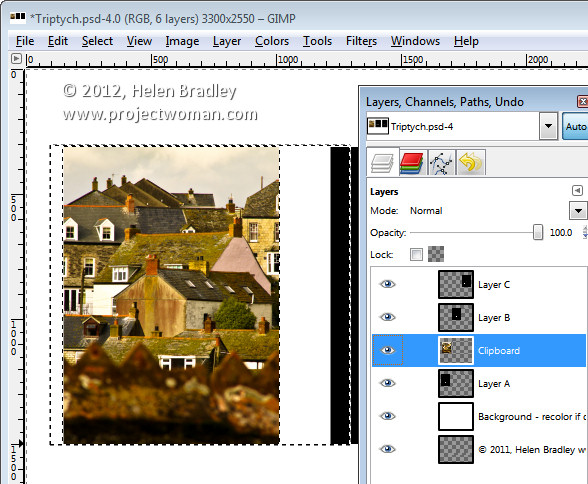
The image will be clipped to size using the template shape as a guide to the size. Choose Select > None before continuing.

Repeat this process for layers B and C – select and copy the image to use, click the layer you’re working with (B or C) and choose Edit > Paste As > New Layer.

Move the image into position and scale it if desired. When scaling, making sure to lock the width and height so that the image is scaled in proportion.

Right click the layer you’re working with – Layer B (or C) and choose Alpha To Selection. Click your newest clipboard layer and choose Select > Invert and then Delete.

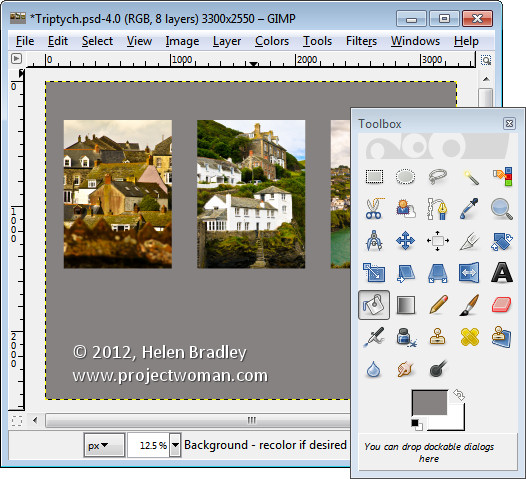
When you are done you should have all 3 images in position.

This image has a background layer behind the pictures which currently shows white. If you prefer to add a solid color behind everything, delete this layer and add a new layer filled with your choice of color. Here I’ve added a new dark grey filled layer.

You can finish off the design with some text or simply save the resulting image.

These storyboard templates are a good place to start with your picture layouts. You can find similar templates elsewhere on the web so start with a search for “Free Photoshop Clipping Mask Templates” or “Free Storyboard templates”


Helen Bradley

Monday, February 6th, 2012

Cool Suffolk Sheep

On the weekend I had the chance to photograph some suffolk sheep, the lambs were so cute and the ewes too. Click here for the picture gallery.

Helen Bradley

Saturday, February 4th, 2012

Slideshow Titles with Identity Plates in Lightroom

Identity plates are one of the best kept secrets in Lightroom. There are lots of ways that you can use Identity Plates in Lightroom not only to customize the interface as I discussed in this post: http://projectwoman.com/2011/11/personalize-lightroom-with-identity-plates.html but also customize your print, web and slideshow applications.

In this post, I’ll show you how to create and use identity plates to create custom title and ending slides in the Lightroom Slideshow module.

Create a slideshow

For a slideshow, it is a good idea to start by placing all the images in a collection – then select the collection and switch to the Slideshow module.

From the toolbar choose All Filmstrip Photos to set up the slideshow with all those images.

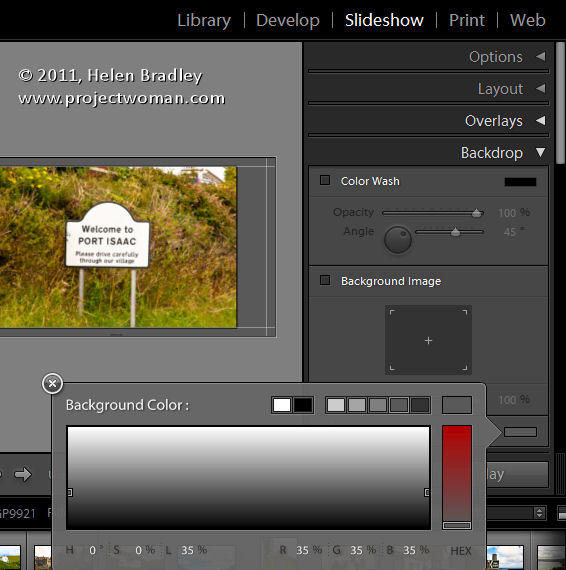
From the Template Browser choose the Default template. Chose a background color by opening the Backdrop Panel and choose Background Color and sample a color to use.

You can add a background color with or without a color wash. You can also set a background image – for example use an image from your slideshow with a reduced opacity as the background.

Here I have settled for a plain dark gray background.

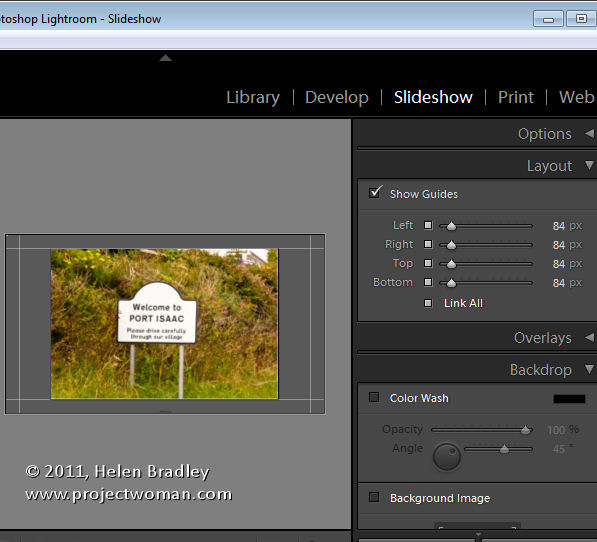
From the Layout panel select Show Guides and make sure Link All is selected and then drag in on the guides so you have some space around the images.

By unlinking the guides, you can set one guide to be smaller than the others – I like to make the top margin smaller than the others to push the images higher on the screen.

Use your Identity Plate

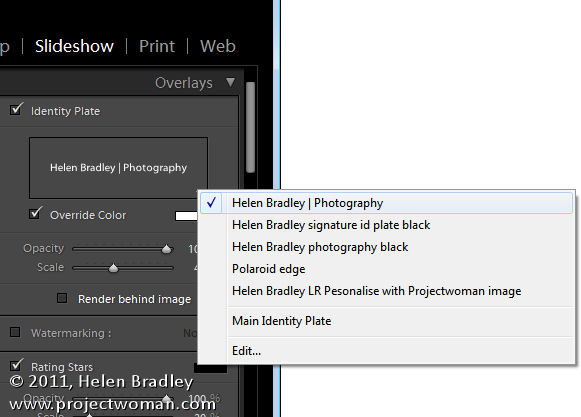
The first place you can use an identity plate is in the Overlays panel. This Identity Plate will sit on each slide and it will show as the slideshow plays. For this, I like to use a plain text identity plate so make sure Identity Plate is checked and then click the down-pointing arrow and select an identity plate that you’ve already created.

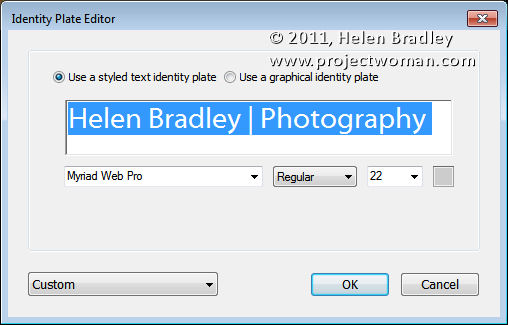
Alternatively, click Edit and type identity plate information into the box and then select it and select a font, font size and color. When you’ve done this, click the Custom button, click Save as and give your identity plate a name.

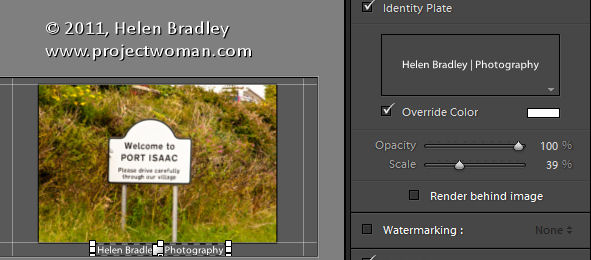
It doesn’t matter what color you have selected for the Identity Plate text because you can select the Override Color checkbox and select an alternative color for your text identity plate. Adjust the scale to a large value so that you can see the identity plate text on the screen, drag it into position and then fine-tune the scale and opacity to suit.

Identity Plate for a Title

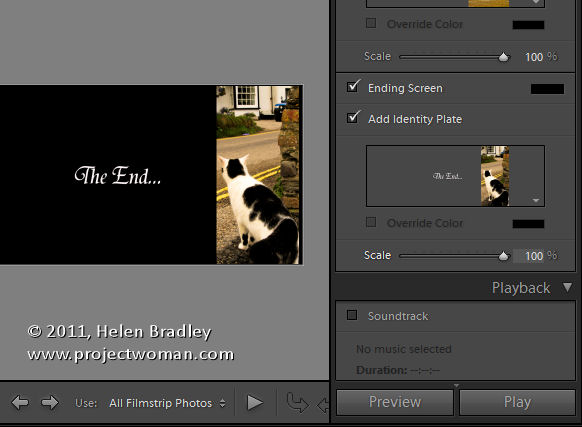
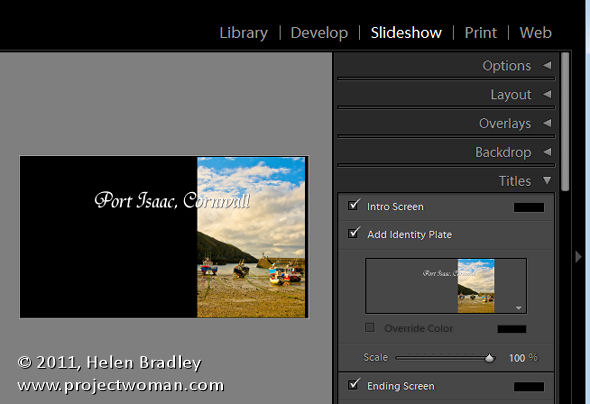
Another place you can use an Identity Plate is the Titles panel. Here you can add an Intro and Ending screen to your slideshow. While you could use a simple identity plate configured for the purpose, you can also use an image.

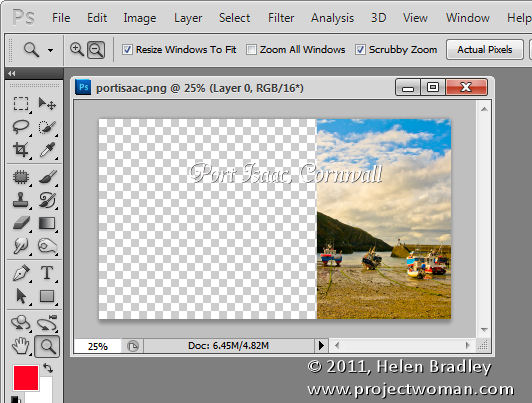
Here I have taken one of the images from the slideshow into Photoshop by right clicking it and choose Edit in Photoshop.

I cropped a portion of the image and used it to create an interesting starting slide for the slideshow. Here I added some text to the image to introduce the slide show. Where possible, it’s a good idea to leave as much of the image transparent as possible so you keep the file size small.

Size the image to approximate the size of the slideshow window – I used 1408 x 800 pixels.

Save the image in Photoshop as a PNG file so it retains its transparency. Later you can control the background color for the title slide by selecting a color from the Intro screen color selector rather than having the color already in the Identity Plate image.

Now, back in Lightroom, in the Title panel click Add Identity Plate and select Edit and this time select Use a Graphical Identity Plate. Click Locate file and either drag and drop the image into the window or find the image on disk. Click Ok to load it as an identity plate – you may be prompted that it is very big – click Use Anyway to continue.

The image will appear for a second or two on the title slide and it will then disappear from the main screen but you will see it in the Titles panel. It will probably be too small so adjust the Scale slider to increase its size.

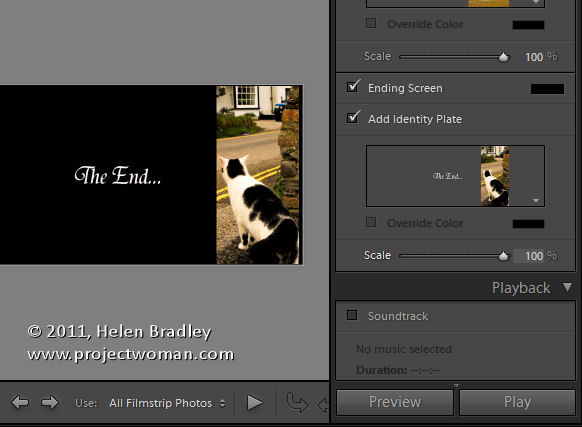
You can go ahead and create a similar graphical identity plate if desired for the ending screen.

By creating a second Photoshop image in the same way and importing it as a Graphical Identity Plate you can have a different and custom ending screen for your slideshow.

To view the slides and your new titles, click the first image in the slideshow and click the Play button.

Helen Bradley

Friday, February 3rd, 2012

Winter Photography Tip # 9 – Camera care

Most cameras work just fine in cold weather but their batteries don’t so you’ll treat your camera one way and batteries another.

To avoid condensation affecting your camera it’s best to keep it cold rather than taking it from warm to cold all the time. So, don’t tuck your camera inside your jacket, and if it’s wet use a rainproof covering for it only.

If you get the camera covered in snow just brush or shake it off – don’t rub so it melts into the camera!

On the flip side, a battery’s chemicals will simply not work efficiently if the batteries are cold so tuck them close to your body in an inside jacket pocket until you need them. And expect to consume more batteries in winter as they won’t last as long as they do in warmer months.


Helen Bradley

Page 2 of 212