Develop Presets are powerful Lightroom tools. You can use them to quick start your editing in Lightroom and to apply creative fixes to your images. You can create your own presets and you can download them from the web. Here are my top five tips for harnessing the power of Develop Presets.
1 Create Disconnected Presets
Instead of creating a preset which, for example, applies a split toning effect as well as a vignette to an image, split this into two separate presets. Then you can use the split toning effect as well as the vignette if you want to do so but you also have the ability to apply one and not the other. If both effects are applied with one preset, you’ll have some work ahead of you to undo one of the effects. In addition when they are separate presets the vignette, for example, could be used on images where you would not consider also using the split toning effect.

2 Create Undo Presets
When you create a preset that adds, for example, grain or a vignette to your image, consider at the same time creating a preset that removes that effect. If you call the two presets the same name such as Grain_heavy and the delete preset Grain_heavy_del they will appear side by side in the list and it will be obvious that the second preset cancels out the effect of the first. Then, when you apply the preset and subsequently make other changes to the image you can easily remove the effect of the preset without having to wind back all the changes you’ve made.

3 Choose the Right Tools
I recently downloaded a great preset which applied a cool effect as well as a vignette. Unfortunately the designer applied the vignette using the Lens Vignetting tool in the Lens Correction panel. This isn’t a post crop vignette so, while the preset worked fine on some images it failed spectacularly on images which had been cropped. When you want to add a vignette, do this using the Effects panel’s Post Crop Vignetting options so your preset will work on any image cropped or not. Testing your presets with a range of images will tell you if they have problems that using a different solution may avoid.

4 Organizing Presets
If you’re creating a lot of presets or downloading a lot of presets from the web, it will help to organize them neatly. For this purpose, I like to create separate folders for preset sets that I download from the web. This allows me to open or close a folder of presets to display all its contents or shrink the list to show just the folder title. Be aware that the folder hierarchy for presets is very flat and you cannot create folders inside folders for example.
If you have a lot of your own presets consider grouping them in folders too – so you might have a folder of editing presets and then a second folder of more creative presets. You can drag and drop presets from one folder into another in the Develop module.
If you download or create presets and you know you will never use them, right click the preset and choose Delete to remove it from Lightroom and from your disk.

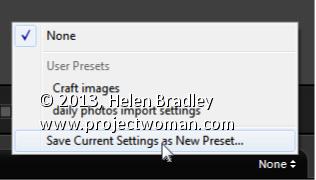
5 Apply them on Import
Here’s a good reason for ignoring Tip #1 (at least for now) and for creating a Develop Preset that applies all the changes you typically apply to your images. So, if you typically apply some extra Brightness, Clarity and Vibrance and some noise reduction to your images, make all these changes to an image and save them as a preset. Now, in the Import dialog’s Apply During Import panel you can choose this preset and have it applied automatically to all images as you import them.

Helen Bradley