Friday, September 14th, 2007

How-To with Helen Bradley

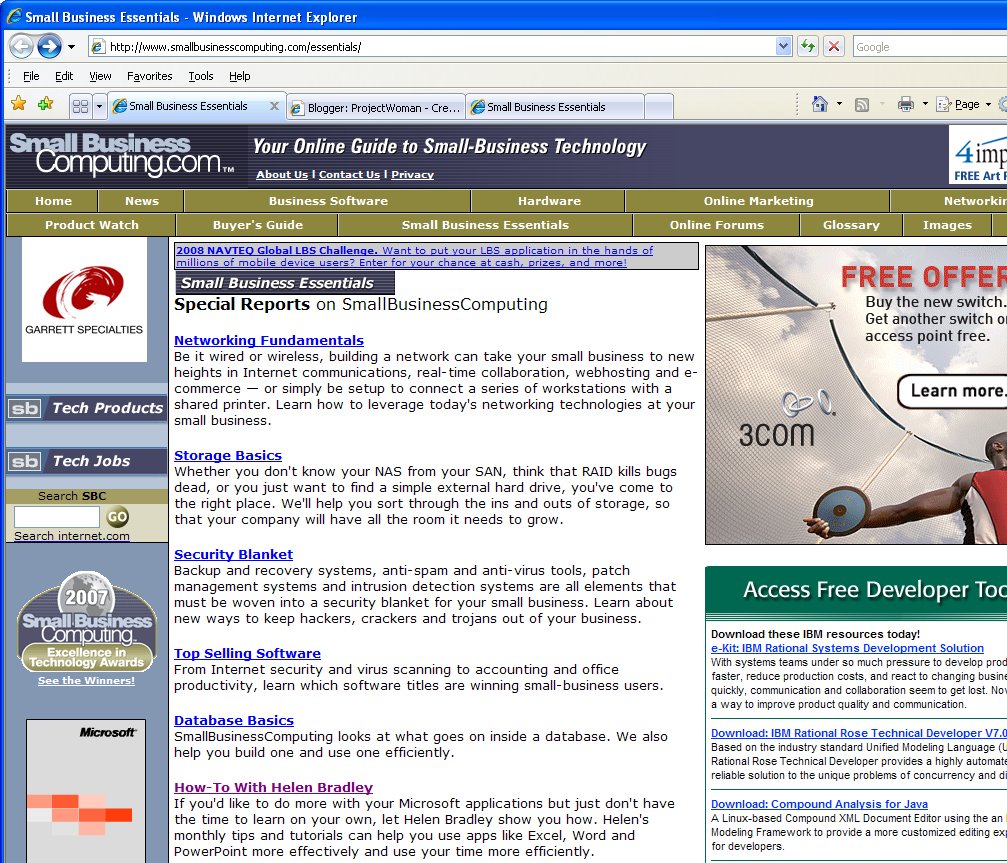
I write for lots of wonderful publications across the globe and one of them is Internet.com’s Small Business Computing web site.

The great news is that I now have my own section and here it is: SmallBusinessComputing.com. Check a few sections down and you’ll see a link to all my small business columns. There are heaps of columns on all things Office including Office 2007 and lots of stuff for earlier versions too. It’s a great way to get down and dirty with some of the new features in Excel, PowerPoint and Word including Themes, SmartArt, Charts and lots of other handy tools.

Helen Bradley

Wednesday, September 12th, 2007

Watch your language!

I write for magazines and online providers all across the world. One day, I’m typing a Canadian article, another an Australian one and later in the week my work gets sent off to the UK and the USA. I’m constantly juggling color/colour, labor/labour and tricky ones like jewelry/jewellery. It’s confusing to say the least and the last thing I want to do is to miss obvious misspellings. That’s why I rely on Word’s language tools.

Prior to Word 2007 I can set the language for a document by selecting it and choose Tools, Language, Set Language and choose the proofing language.

In Word 2007, of course, everything is different but it’s easy to find – thank you Microsoft!

In Word 2007, select your document (Control + A works just fine) and click the language indicator on the Status bar – the Language dialog appears and you can choose the language to use to proof the text.

Helen Bradley

Monday, September 10th, 2007

MIA – Word 2007 commands

It happens for the first few months of using any significant program update like Microsoft Word 2007 – you go looking for something and it’s not where you expect it to be. It can take time to find it and sometimes, it was there in front of your nose all the time.

Take the Word Count tool in Word. It got it’s own toolbar in Word 2003 but in 2007, of course, we have the Ribbon and try as you might you won’t find any Word Count icon on the Ribbon. The reason is that it’s there, under your nose! Check the bottom left corner of the screen and Word is counting your words as you type them. Need a quick count of the words in a paragraph? Too easy, select the paragraph (tip in a tip: Click it 3 times with your mouse) and then read off the results in the same place.

Easy when you know how.

Helen Bradley

Wednesday, September 5th, 2007

Word 2007 – Help, my SmartArt disappeared

Open a Word 2003 document in Microsoft Office 2007 and click Insert SmartArt. You might be surprised at what you see. The beautiful Word 2007 SmartArt dialog disappears and all you have is the old Word 2003 diagramming tool.

At this point you might wonder exactly what has happened. The answer is that Word is operating in compatibility mode as you can see by looking at the toolbar. To convert the Word 2003 document to 2007 format so that you can use Word 2007 features such as SmartArt and Themes, click the Office button and choose Convert. Once the document is converted you can then use all the lovely new features of Word 2007 even on your older Word documents.

Helen Bradley

Monday, September 3rd, 2007

Random text in Word 2007

In olders versions of Word, you could enter random text into a document using something like this typed in at the beginning of a new line and press Enter:

=rand(2,3)

This gives you 2 paragraphs each of 3 sentences of the text “The quick brown fox jumped over the lazy dog.” It was not particularly original but it was handy for filler text.

In Word 2007, the news is better still. There are two options:

type

=rand(3)

To get three paragraphs of random text, this time it actaully makes sense and looks like real text.

The best news is, however, that Lorem ipsum can be entered automatically. Now I can remove the AutoText entry I always use to insert this Latin text and do it anywhere, anytime in Word 2007. Here’s what you type:

=lorem()

this gives you a little sampler of text. Type:

=lorem(10)

to get 10 paragraphs of it.

It’s easy to remember and easy to use and, well – thank you Microsoft, I’m impressed!

Helen Bradley

Wednesday, August 29th, 2007

What personal information are you sharing?

Word has been a problem in the past – it buries information in your Word documents that interested people can find and use.

Talk to those politicians, for example, who have used Track Changes to make changes to a document then mistakenly sent off the document complete with original text. Any one in the know takes around 2 seconds to find the deleted information and then another 2 seconds to tell every man and his dog exactly what that politician didn’t want them to know.

So, in Word 2007, life is better, and you can remove personal and hidden information from your Word documents quite easily – if you know how to make it so.

To see what is buried deep in your Word documents for everyone to see, save your document then click the Office button. Choose Prepare, then Inspect Document to launch the Document Inspector. A dialog opens to show options describing you might want to check – I can’t see any reason for not checking all the checkboxes. Now click Inspect and you’ll see a list of personal and hidden stuff that is lurking in your document. Click any option to remove what you don’t want others to see and then click Reinspect to check it’s all gone.

Now you’ll never send out anything that will be embarassing – and you know how to easily find the hidden stuff in Word files you receive from others 😉

Helen Bradley

Wednesday, August 22nd, 2007

Rotated Text in Word 2007

I love the look of page headings that appear down the side of the page – vertical text mixed with regular text just looks so cool.

Here’s how to create rotated text or vertical text on a page in Word 2007:

Start by creating a text box so choose Insert > Text Box and select either a text box style from the list (not the best idea), or click Draw Text Box to draw your own (much better).

Type your text in the text box then click Text Box Tools > Format and locate the Text Direction button. Click it to rotate the text to the desired orientation. Now simply size the text box to the desired size and move into position and apply one of Word’s new text box styles and you’re done. Simple and fun.

Helen Bradley

Thursday, August 9th, 2007

Shapes are different in Word 2007

I’ve been working with shapes a lot in Office 2007 cause I’ve just written a huge article about them. It didn’t start out to be huge but that’s the way it ended up. You see there’s just so much to learn about them and it’s not all intuitive. The problem as I see it is that part of Office 2007 was just cobbled together (love that word cobbled!). Things aren’t consistent, far from it. One of the most interesting inconsistencies is how Shapes are implemented in Word and in Excel and PowerPoint.

In Excel and PowerPoint shapes work the same pretty much and, if you add a shape and right click it you can choose Format Shape and you get this snazzy new dialog to work with. Do the same in Word and life is very different indeed – there’s no new dialog just the old stuff.

What this means in practical terms is that you can’t fill a Word shape with an image from the clipboard or a clip art image – you can in Excel and PowerPoint and you can’t create your own custom multicolor gradient for a Word shape. The issue is that there’s a new graphics engine in Office 2007 called Escher graphics (presumably named after one of my favourite artists, MC Escher) which is implemented fully in Excel and PowerPoint but only partially in Word. So, don’t expect Shapes in Word to behave the same as they do in PowerPoint or Excel, cause they won’t – it’s that simple.

Helen Bradley

Thursday, August 2nd, 2007

Print in Reverse – Word

Are you one of those people who print long documents in Word and then spend a few mintues reversing the page order because they come out printed back to front? Or do you print multiple copies of a document and then have to collate them by hand?

If you are, it’s probably cause you haven’t read this blog post! You see, life doesn’t have to be this difficult. Word will collate for you and it will print in the order you want and if it’s not doing it right you can change it.

First things first, if you need to reverse your print order, choose Tools, Options, Print and change the setting in the Reverse Print Order checkbox – if it is checked, uncheck it and if it is clear then check it. This setting remains for all documents so now you don’t have to shuffle paper any more.

The collating options are in the printing dialog. Choose File, Print and you can click to set one of two collating options for multiple prints.

In Word 2007, find the print options by clicking the Office button, choose Word Options, Advanced and scroll down to locate the Print options.

Helen Bradley

Wednesday, July 11th, 2007

Configuring Themes in Word 2007

While themes are a gimme for working in PowerPoint, they don’t appear to be as useful in Word as they don’t seem to do much to format the document if you’re not using diagrams or shapes. However the problem isn’t quite this simple. Themes in Word won’t apply to the text in the document if you don’t have a style in place. Use the Home tab to view the Styles option and click Change Styles and select a Style Set. Now, when you choose the Theme, the styles available change.

All of a sudden, themes make a little more sense in Word 2007.

Helen Bradley

Page 6 of 8« First45678