Sunday, December 7th, 2008

Where on the Curve are you?

The Curve dialog in Photoshop hides some surprise features that aren’t immediately apparent at first glance. In Photoshop CS3 and later, one surprise is that you now have the adjusters under the chart that you’re used to using in the Levels dialog inside Curves. So it’s easy to perform a Levels adjustment in Curves – the reverse isn’t true – Levels can’t do a Curves adjustment. So I don’t use Levels for increasing tonal range in my images anymore – Curves does everything I need.

Second tool is the sampler. If you want to add contrast in a particular area of an image it helps if you can find that area on the curve. Simple. Just move across and hold the left mouse button as you wave your mouse pointer over the area of your image to sample. When you do this, you’ll see a marker move along the curve showing you where those pixels are in the curve. This is the area you want to steepen – the steeper the curve, the more contrast in that area. So pull the curve above the area you want to affect upwards and pull the curve below that area downwards to steepen the curve and you’ll get more contrast in that area of the image.

To add markers to the curve – Control + Click (Command + Click on the Mac) on a point in the image and you will add a marker on the curve indicating exactly where those pixels are to be found. You can use the marker to anchor the curve so it doesn’t move when you pull the curve above or below it or drag on the marker to change the shape of the curve at that point.

Helen Bradley

Thursday, December 4th, 2008

Straightening images with Photoshop’s Lens correction tool


Let’s be honest, Photoshop’s tool for straightening an image sucks – well it would if it really were a tool – it’s not even that. It’s a cumbersome workaround.

Start with the Ruler tool (if you can find it – it’s stuck away under the Eyedropper) then ‘measure’ along the line you want to be horizontal. Then choose Image > Rotate Canvas > Arbitrary and accept the value for the angle – that’s what you used the Ruler tool to measure. Wow, that’s sophisticated – NOT! And it gets worse. While now have a ‘straight’ image, the edges look horrible. Grab the Crop tool and crop the image to remove the messy edges.

So, while there isn’t a tool, there is a slightly smarter workaround. Choose Filter > Distort > Lens Correction – ok, I promised it would be smarter – I didn’t say it would be any easier to remember where to find it.

In the Lens Correction dialog, drag on the Angle to straighten the image – best thing about this is that you get a grid to guide you. Then, drag the Scale slider upwards until the rough edges disappear. Then click Ok and you’re done.

So, there you have it, a one stop straightening tool – still sucks compared with programs like Paintshop Pro and Photoshop Elements which will straighten and crop in one step but it does it in one menu rather than 3 tools – I call it an improvement – just!

Helen Bradley

Thursday, December 4th, 2008

Yes Master…


I love it when folks call me or email to pose questions. It’s hard when you work with apps every day to remember there are folk out there for whom Word and Excel are a daily challenge and not necessarily in a good way.

Today’s came from my partner, a PowerPoint file with a serious case of bloat. Now, if it were a cow, you’d do something rather disgusting with a knife between the ribs – no it doesn’t kill them, it cures them – lets all the nasty gasses out. In PowerPoint, the solutions are different. One cause in this file was the lack of use of a Slide Master. You see the person (not my partner, she’s better at PP than that) put a wonderful but very large image on all the slides – each one had its own version of the image – instant bloat.

The solution, next time would be to build the file properly and put that image on the background layer of the Slide Master – when you do this it automatically gets added to all slides – if you have 100 slides you still have only one image – instant slimming for your file.

If you need a plain slide – no image, you create two masters – one with an image and one without – use the master you need for the slide you’re creating. Pretty easy stuff and makes a presentation much easier to email – that was the problem here – at 7Mb it was too big for most folk’s email inbox so it bounced right back and something that big doesn’t bounce so much as go splat!

The solution I used on this file was different. I didn’t want to go rebuild someone else’s file at no charge – so I grabbed a great app called PowerPoint Minimizer – it shrinks PP files really really small so folks like me can look good by solving a problem that everyone else has spent hours on in a matter of minutes.

Find PowerPoint Minimizer here for download. Best thing is you can trial it and see how it works.

Helen Bradley

Saturday, November 29th, 2008

Getting Vista’s Windows Media Player to play videos

Vista’s Windows Media Player will play audio and video files, only if it has the codecs for them. Codecs are like translation programs, without the codecs you get exactly zip, nada, zero on the screen. Sucks huh?

Unfortunately not all the codecs you need are included in Vista so you might try to play a video and find you have no visuals although the sound might play just fine, or vice versa. The solution is to download the codecs you need to play the range of media files you’re likely to encounter.

To locate the codecs you need, visit softpedia.com and search for the Vista Codec package. At the time of writing the latest version is 5.0.3 and it can be found here.

Download it and install it and you should be right to play just about any media file around.

This is the file which Microsoft should have provided. These codecs should be supplied with the player, after all, what use is a DVD or audio player if it doesn’t play disks? If you buy a physical DVD player you don’t expect to have to go out and buy something extra to make the player and your disks compatible. Just because the player is software doesn’t excuse the lack of compatibility.

So, yes, it sucks you have to go find and download this file, but kudos to the guy who did all the work so we don’t have to.

Helen Bradley

Saturday, November 29th, 2008

Smarter Photoshop Crop

Before (above), After (below)

There is more to Photoshop’s crop tool than meets the eye! Read on to learn everything you didn’t know about using it:

Shield color and opacity
When you click the crop tool and drag the crop marquee over an image in Photoshop you will see a shield around the area of the image that will be removed when you commit the change. You can change this shield color from the Tool Options bar to make it any color you want. For example, click in the color selector and make it white, gray, black. You can also Adjust the opacity of this shield to make it, for example, 100% so it totally masks out the unwanted area of the image. This lets you see more clearly the portion of the image you have selected.

Rotate your crop
Rotate the crop marquee by dragging on one of its handles to change the angle of the rectangle and make an angled crop from your image. This way you can make a diagonal crop without having to first rotate the image.

Perspective crop
This option is way too cool! Click the Perspective checkbox on the tool options bar and you can crop an image in perspective. So, drag the corner handles into any four sided shape you like – each corner operates independently of the others when this option is enabled. Then click the Commit button and the unwanted part of the image will be discarded and what remains will be reshaped and deliciously distorted to a rectangle.

You can use this feature to fix keystone perspective problems with images such as tall buildings (which tend to be wider at the base and narrower at the top) or you can use it for creative purposes.

So, next time you select the Crop tool, check out these features and put them to work on your images.

Helen Bradley

Friday, November 21st, 2008

Smarter Photoshop Crop


Before (above), After (below)


There is more to Photoshop’s crop tool than meets the eye! Read on to learn everything you didn’t know about using it:

Shield color and opacity
When you click the crop tool and drag the crop marquee over an image in Photoshop you will see a shield around the area of the image that will be removed when you commit the change. You can change this shield color from the Tool Options bar to make it any color you want. For example, click in the color selector and make it white, gray, black. You can also Adjust the opacity of this shield to make it, for example, 100% so it totally masks out the unwanted area of the image. This lets you see more clearly the portion of the image you have selected.

Rotate your crop
Rotate the crop marquee by dragging on one of its handles to change the angle of the rectangle and make an angled crop from your image. This way you can make a diagonal crop without having to first rotate the image.

Perspective crop
This option is way too cool! Click the Perspective checkbox on the tool options bar and you can crop an image in perspective. So, drag the corner handles into any four sided shape you like – each corner operates independently of the others when this option is enabled. Then click the Commit button and the unwanted part of the image will be discarded and what remains will be reshaped and deliciously distorted to a rectangle.

You can use this feature to fix keystone perspective problems with images such as tall buildings (which tend to be wider at the base and narrower at the top) or you can use it for creative purposes.

So, next time you select the Crop tool, check out these features and put them to work on your images.

Helen Bradley

Friday, November 21st, 2008

Find Office Documents faster

The My Places feature in Microsoft Word and other Office applications makes it easy for you to find documents quickly by adding the folder that they’re stored inside as a link on the left hand bar of the File Open and File Save dialogs.

So, when you’re working on a project even a short-term one, navigate using the File Open or File Save dialog to the folder that the files for the project will be stored in. With the folder selected (don’t open the folder), in Office 2003 and earlier click the Tools button on the toolbar and choose Add to My Places. In Office 2007, right-click the left sidebar and click Add folder name.

This adds the folder at the bottom of the list in the left sidebar making it easy for you to navigate to that folder by simply clicking its name in the list.

If you’re using a combination of Office 2003 and Office 2007 you will notice that the left hand panel of each of the File Open and File Save dialogs are different. However, if you’re working in Word 2003, for example, the same sidebar appears in Excel 2003.

If you have lots of links in the sidebar – I have around 20 – right-click the panel and select Small Icons to make the links smaller so that everything fits better.

Helen Bradley

Tuesday, November 18th, 2008

10 ways to Go Green with Microsoft Office

Saving paper is easy with Microsoft Office. Here are some cool ways you can save paper when printing (other than the very obvious option to not print in the first place!)

1 Use Shrink to Fit in Word’s Print Preview to size your document down so it takes one less page.

2 Use the options in Excel’s File > Page Setup dialog to select the number of pages wide and tall to print onto – the document will be scaled down to fit.

3 Use Print Preview – every time – before you print. Check your document thoroughly to make sure there aren’t errors in layout or design before you waste paper finding out!

4 Print in duplex (double sided) where possible and if your printer allows.

5 For documents which you’re printing for archive or reference purposes – print 2 up so you get 2 “document” pages on each sheet of paper – if you duplex this you’ll get 4 pages per sheet.

6 Use Internet Explorer’s Send to OneNote 2007 feature to save web pages for reference to a OneNote notebook rather than printing them.

7 Install the Office 2007 PDF writer and save documents as PDFs to email instead of post. Find it at: http://tinyurl.com/2v77sn

8 Instead of printing Slides in PowerPoint one per page, use the Handout option to print up to 9 per page.

9 Email documents to other users when working on documents as a team. Use the Track Changes feature in Word to mark up changes so they can be seen, shared and evaluated.

10 To print only part of a worksheet, select the area to print and choose File > Print > Selection.

Helen Bradley

Friday, November 14th, 2008

Vamoose the Grid – Photoshop Vanishing Point Filter

Ok, this one has had me stumped for forever. Problem is I really needed to solve it. You have used the Vanishing point filter in Photoshop to create a grid then you don’t want it any more.. perhaps because you want to show someone how to create the grid. So how do you get rid of it. Delete button? nah! doesn’t work. There isn’t an option in the filter for deleting the grid and starting over, at least I can’t find it. So, what’s a gal to do?

Answer is.. BACKSPACE. Who would have thought it, but it works. Click the panel of the grid you want to remove to select it and press Backspace and it is removed (so too are any grids built off this one). So, to remove the entire grid, select the first panel and press Backspace and all the other grids disappear.

Like so much in Photoshop, easy when you know how!

Helen Bradley

Thursday, November 6th, 2008

Walking the walk in Paris – Before Sunset

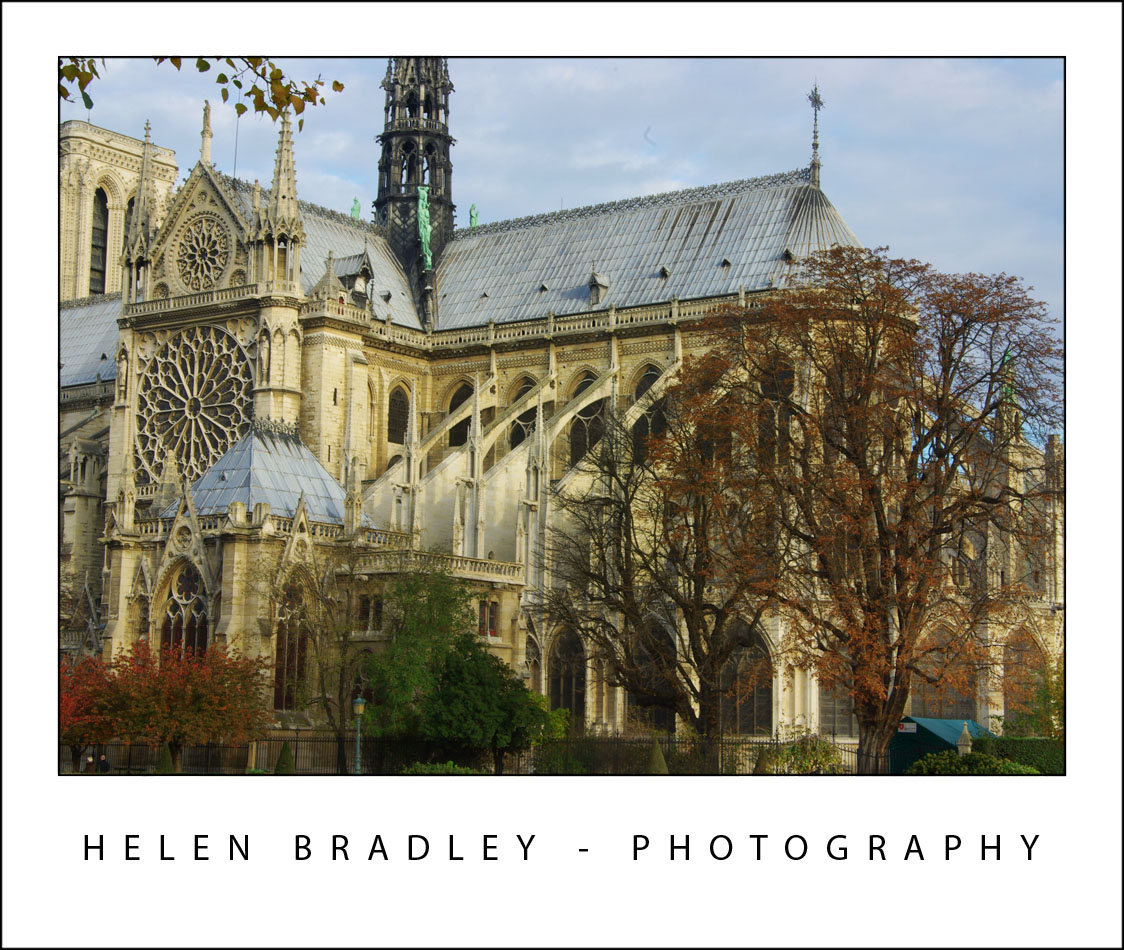
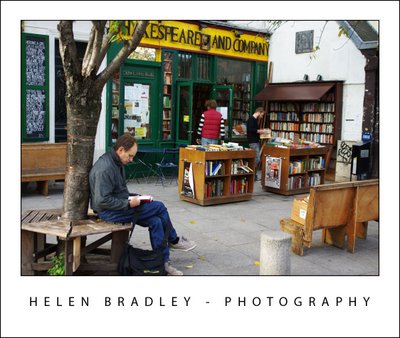
My one full day in Paris I followed the path taken by Jesse and Celine in the movie Before Sunset… it took me all over Paris but it starts at the wonderful Shakespeare and Co book store in the Rue de la Bucherie just opposite Notre Dame:

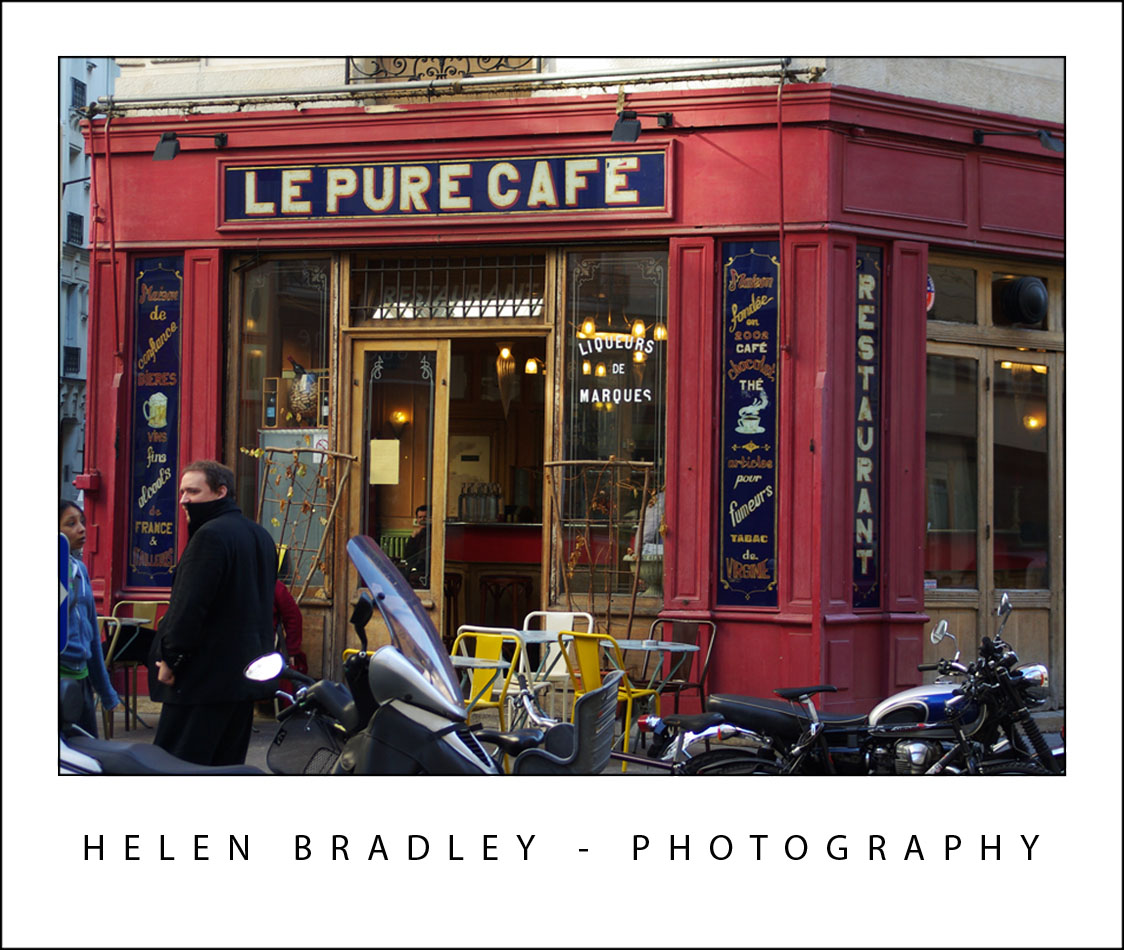
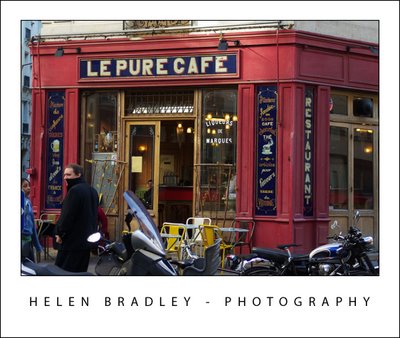
I strolled across to Le Pure Cafe at 14 Rue Jean Mace and it was as quirky a cafe as you are ever likely to find and well worth a visit:

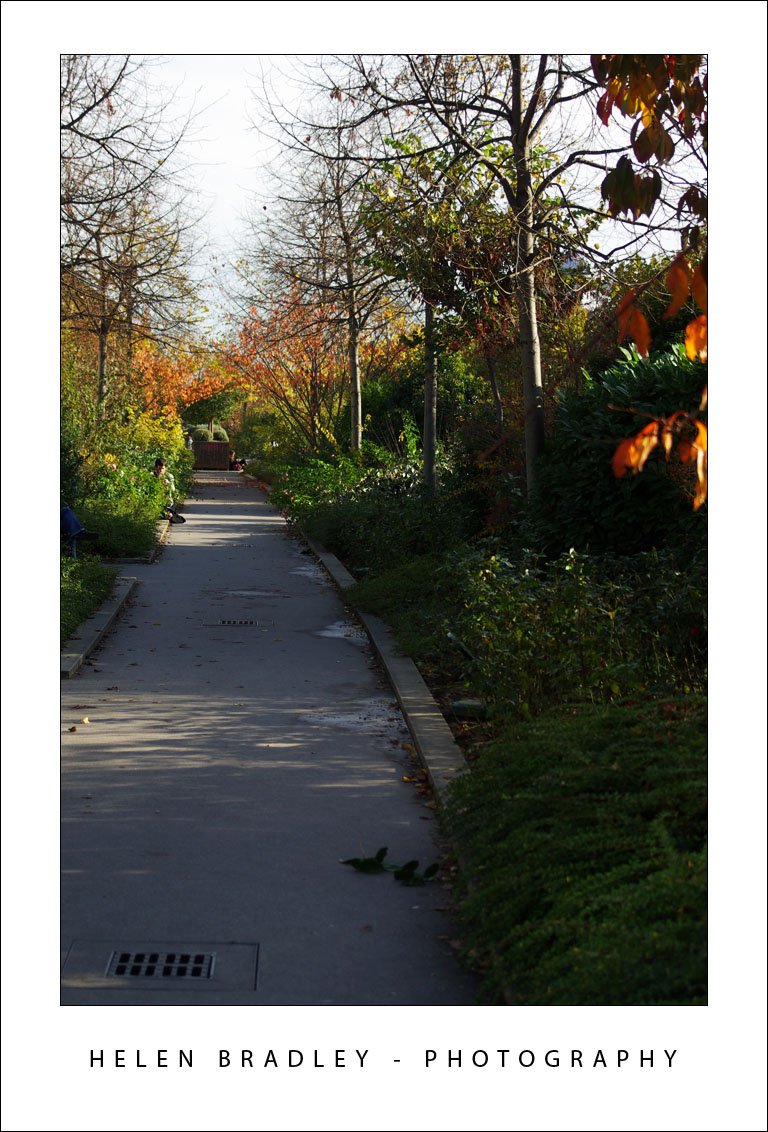
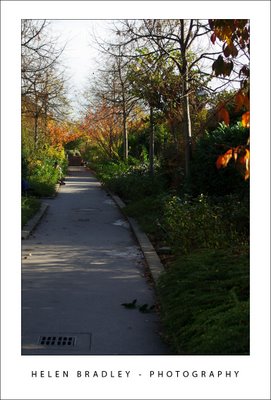
Then I walked to Le Viaduct des arts which is a converted old railway line – the overhead line is now a narrow park and underneath are shops. It’s almost invisible so you won’t realise it is there unless you know it is – the park is well worth walking through:

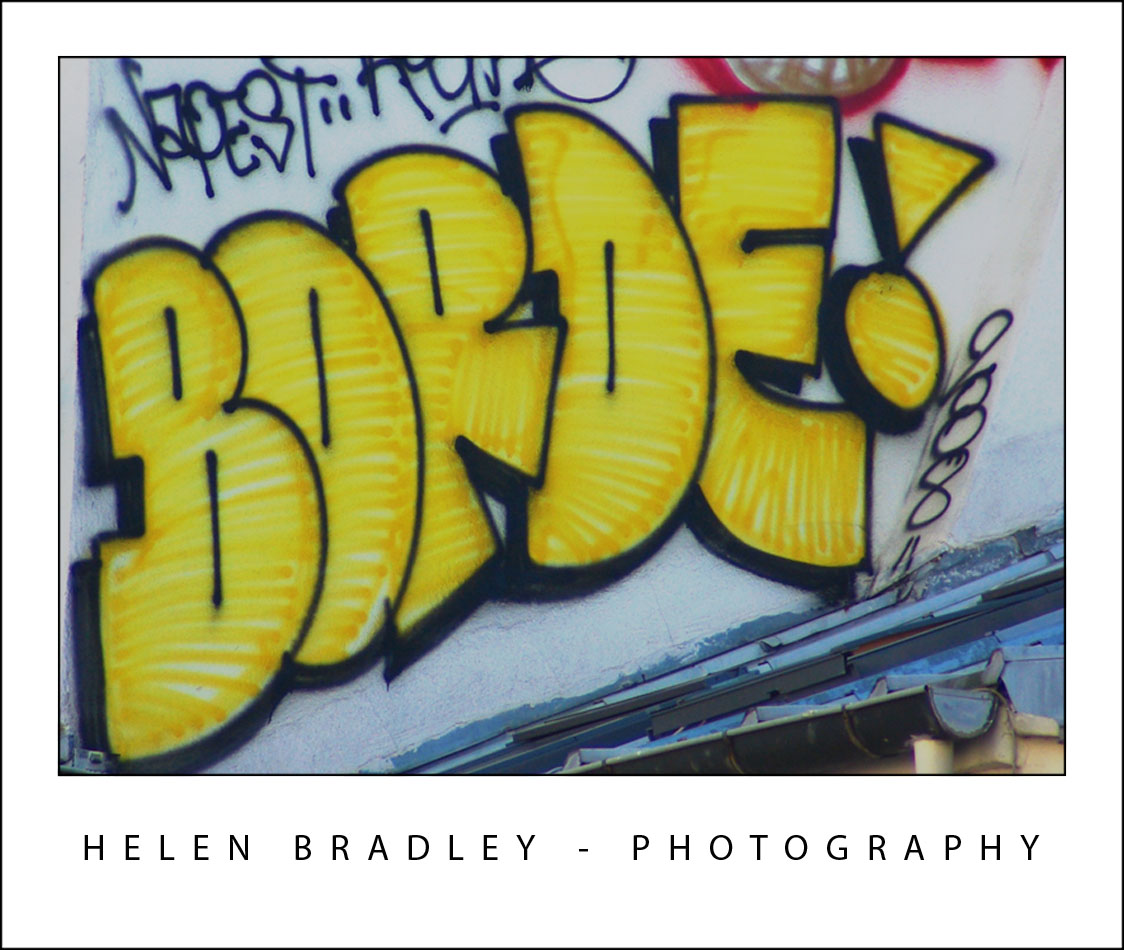
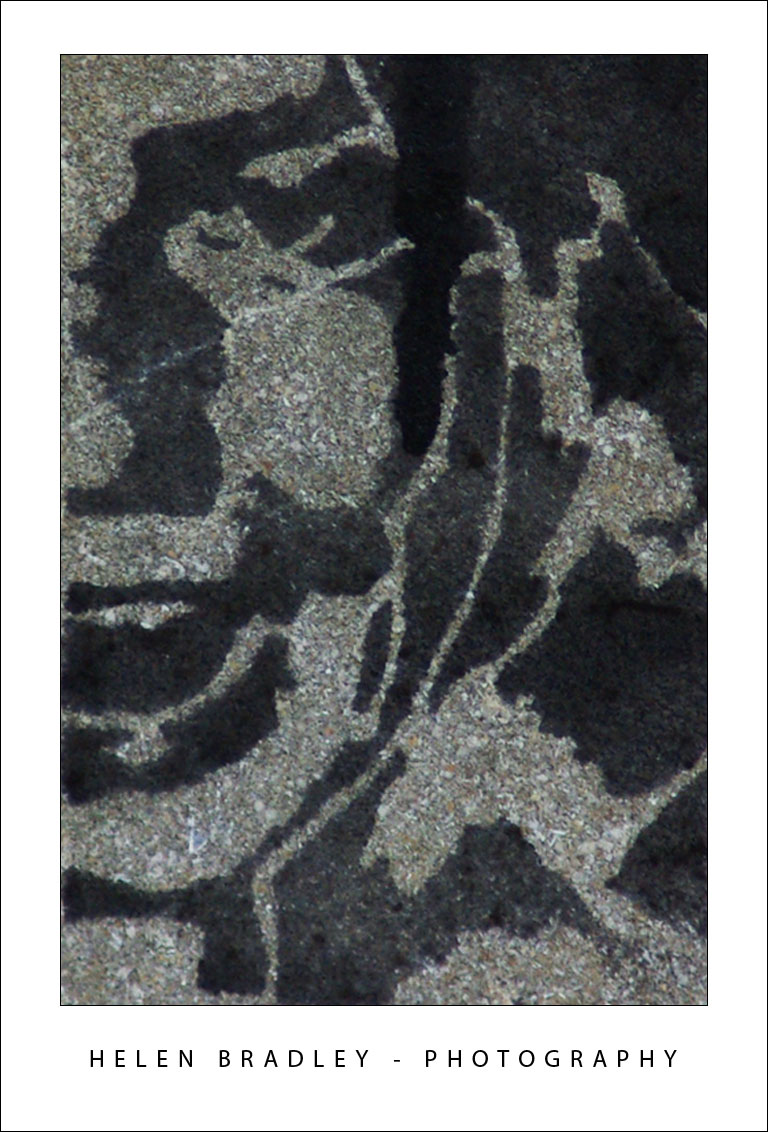
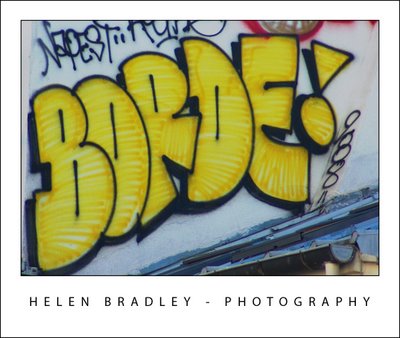
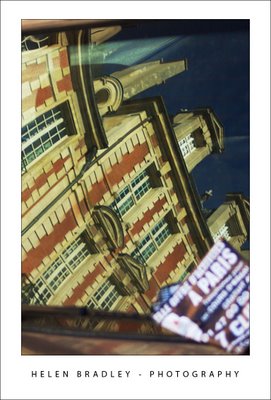
In Paris, graffiti is different to the other places I’ve been. You have to look high up as much of it, as this shot shows, is at roof top level – and that’s five or six stories high:

Stencil art is also popular. Last year I captured a large wall of graffiti in Paris which included a Shepard Fairey piece of stencil art. What a blast to have seen it and to have a photo of it. This year, this is one more addition to my stencil art collection.

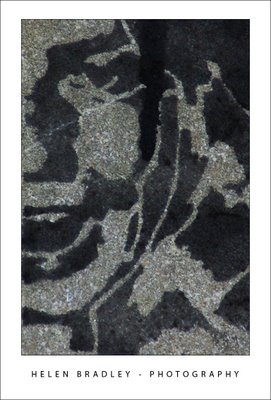
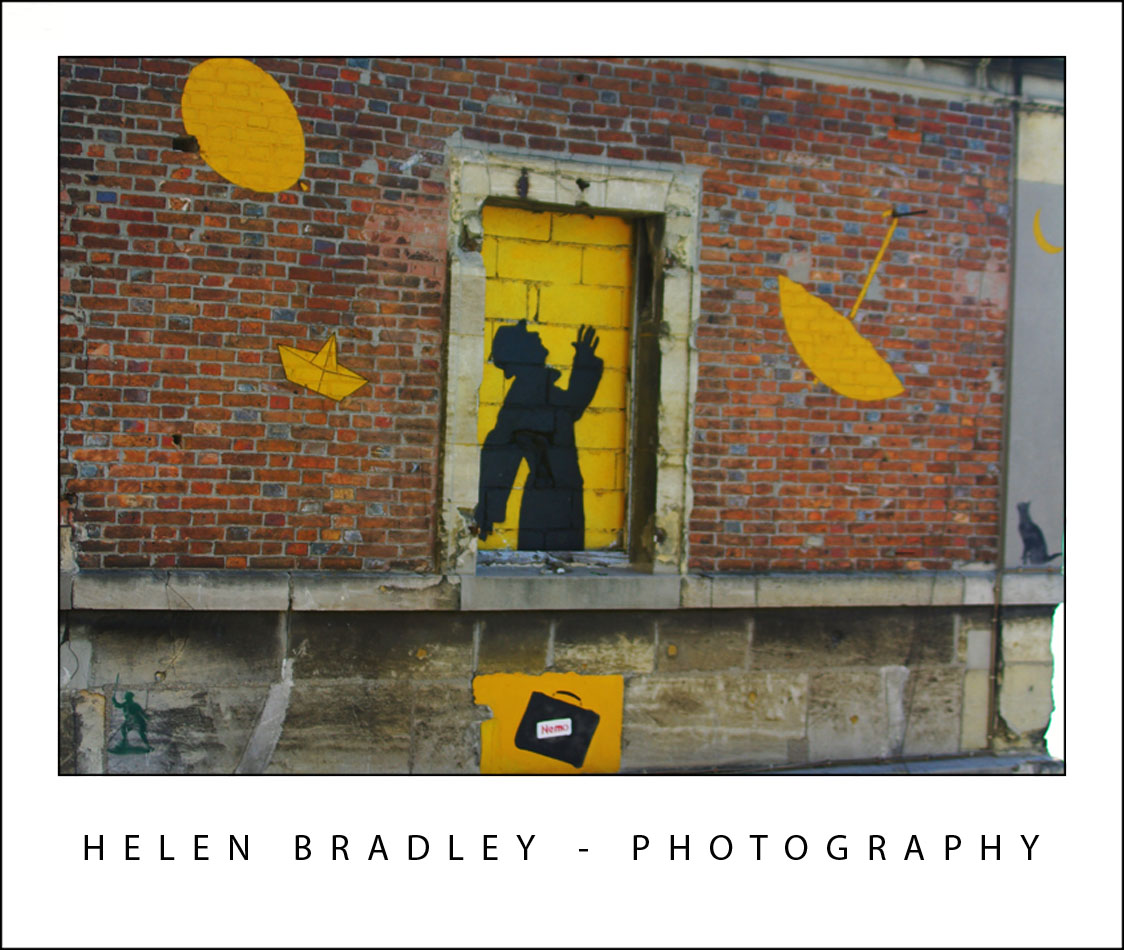
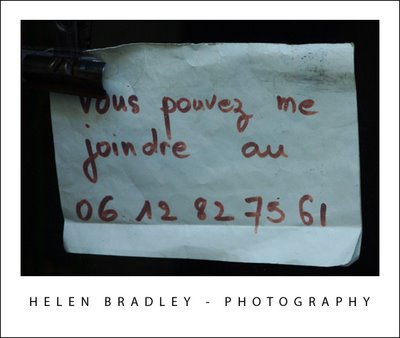
And, at first glance this doesn’t look like graffiti but it is. The building is abandoned and derelict and this graffiti and a couple of pieces of stencil art (can you see the cat?) decorate one side of the building:

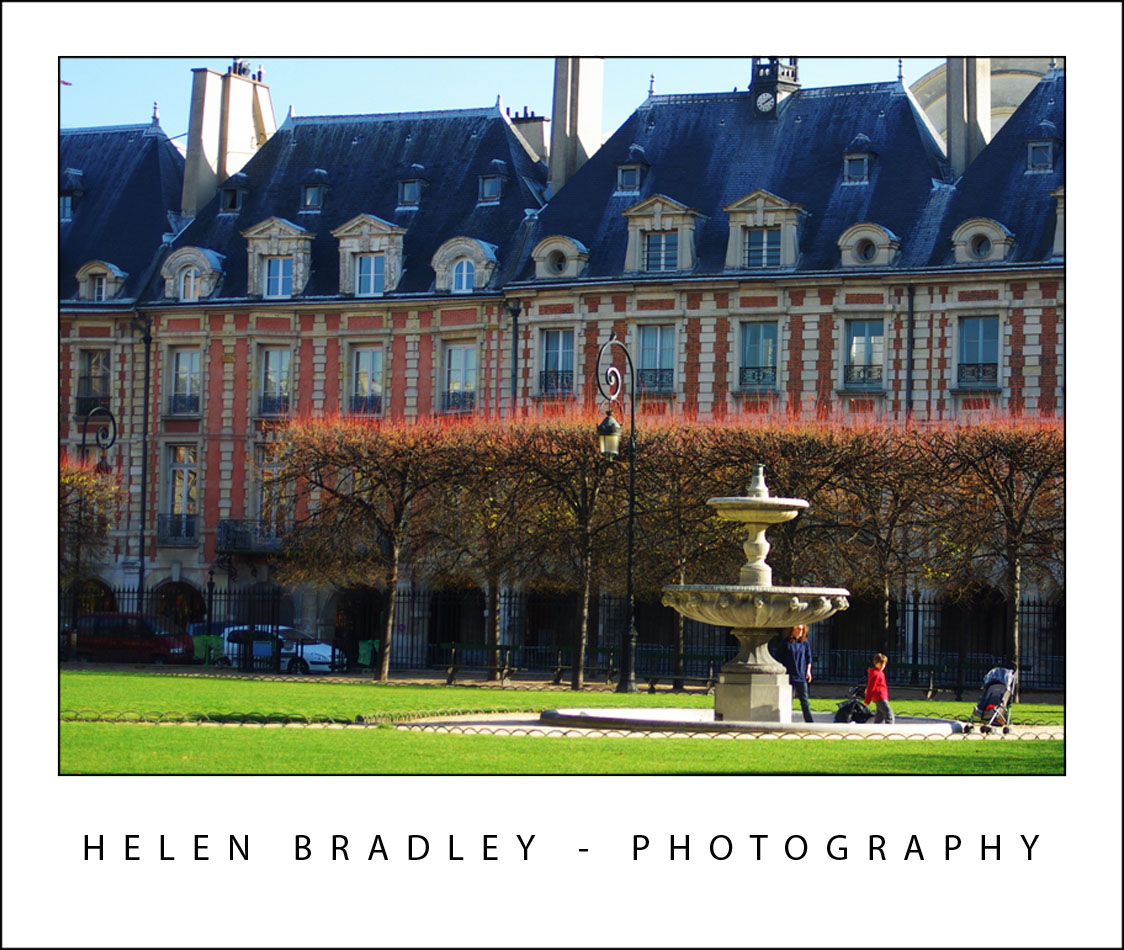
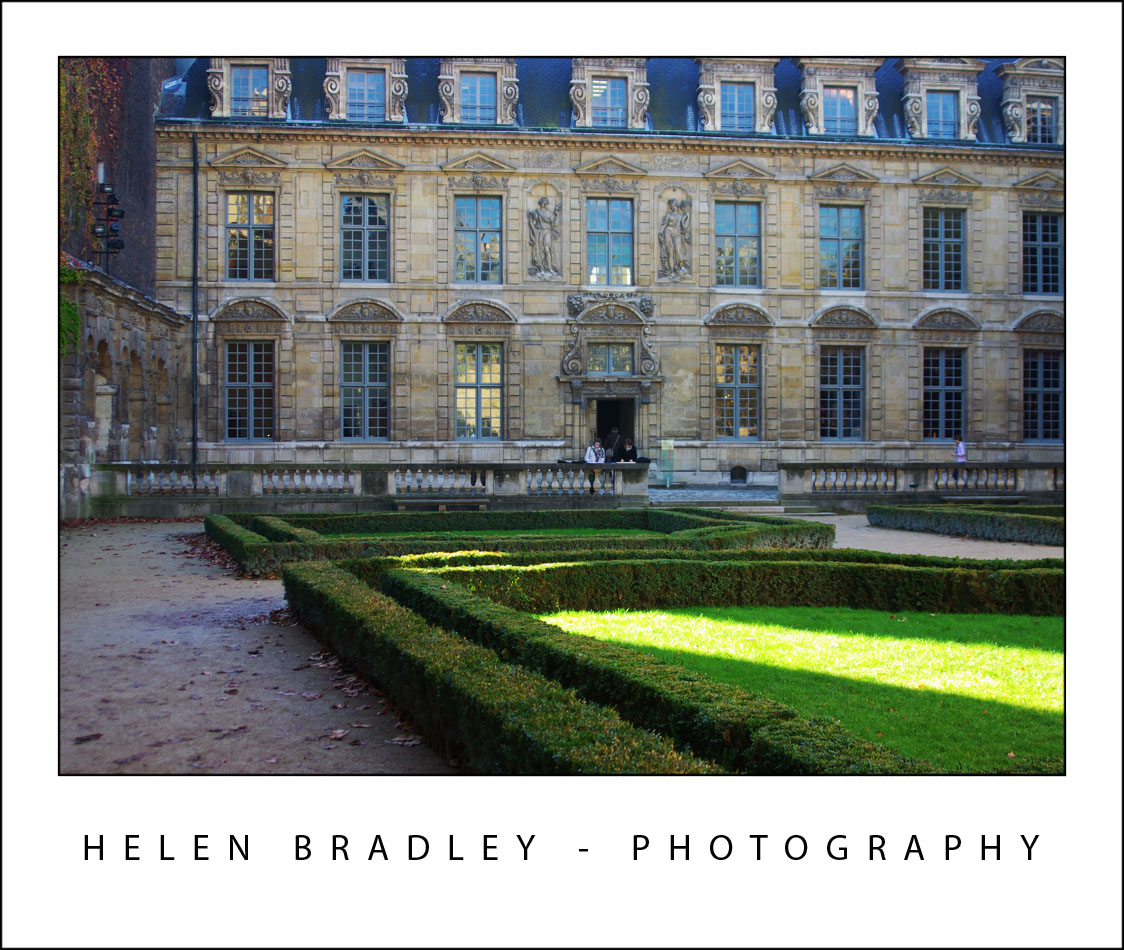
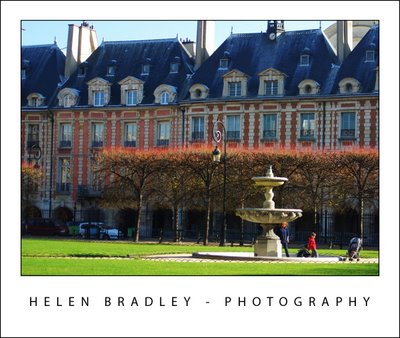
The Place des Vosges is like Paris’ backyard. When you come here, Parisiens are sitting in the park, running around its outer edges and kids are running and playing. It’s the most amazing place, tucked as it is just off a very busy street but very peaceful and green. I love entering it through the lovely gardens of the Hotel Sully – go through the hotel entrance, across the courtyard, straight through the arch and past the bookshop and out into the hotel garden. In the bottom right corner facing you is a small archway which takes you direct to the Place des Vosges – you simply won’t know you are in Paris and entering this way makes you feel like you’re in the know!

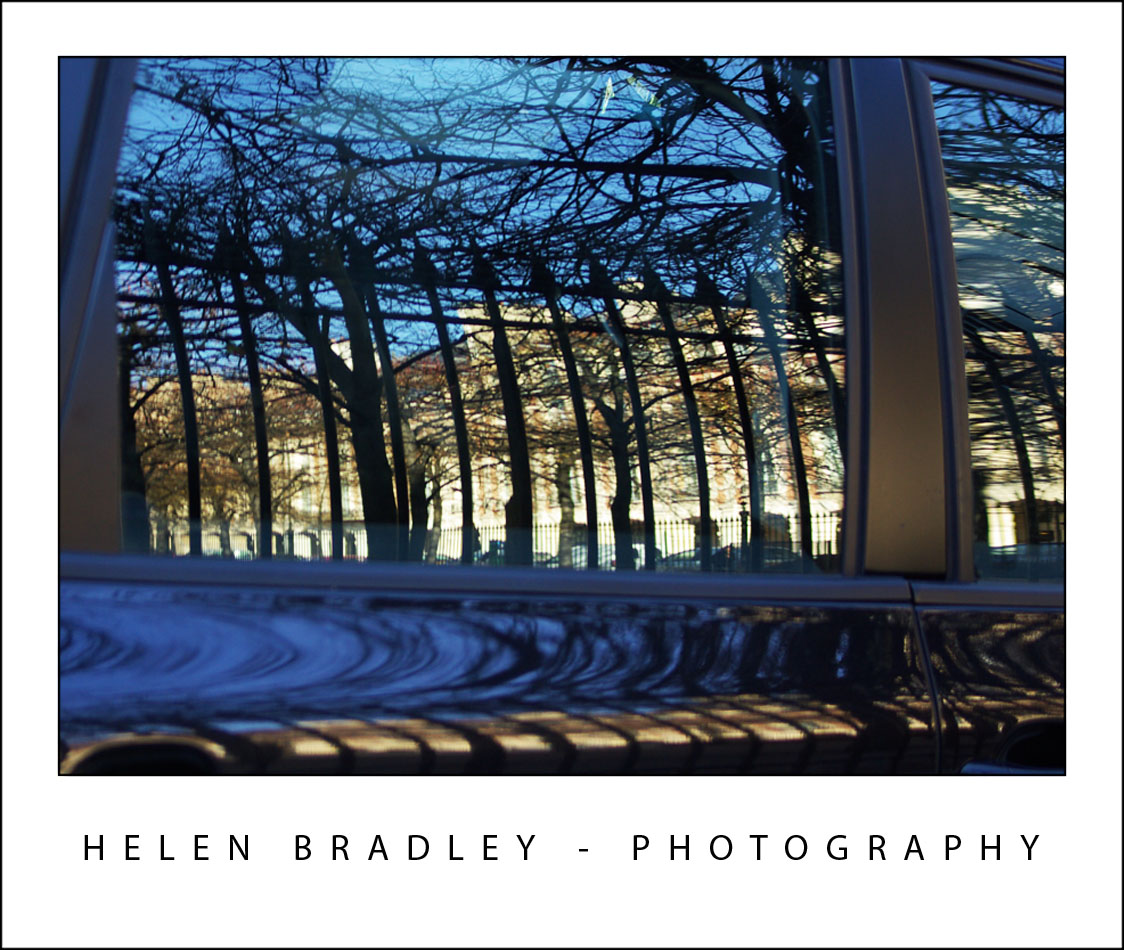
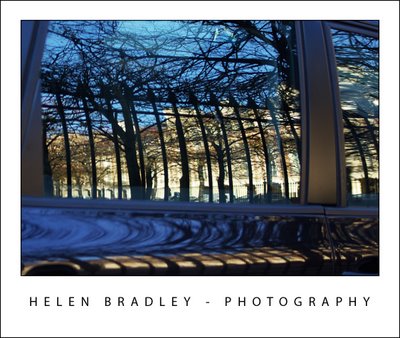
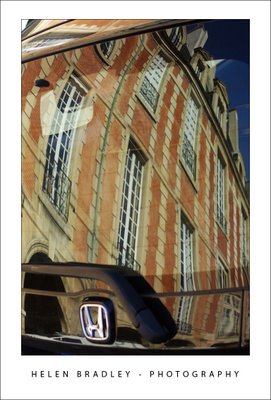
These are some reflections from the Place des Voges, the gardens are gated and around them is a road and around that a courtyard of beautiful buildings. The gardens themselves are probably an acre or two in size:

These are the beautiful gardens of the Hotel Sully – I’m standing at the entrance to the Place des Vosges looking back to the Hotel itself:

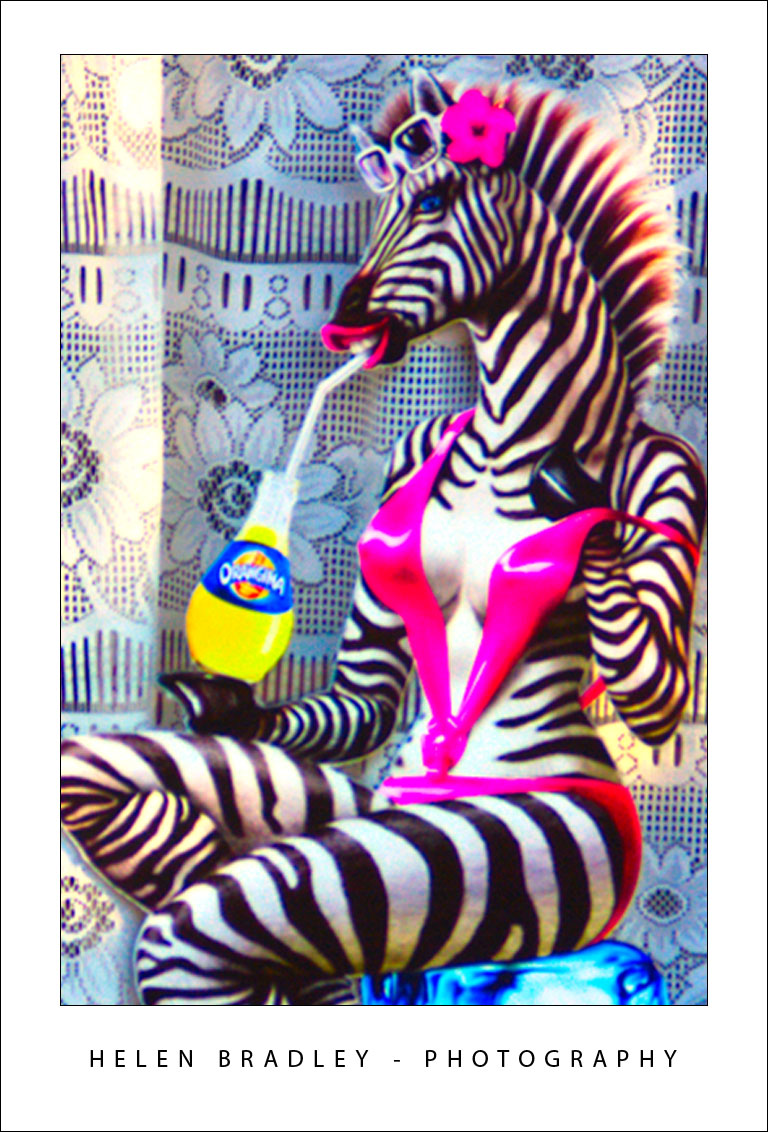
Here are some colourful and quirky things I found. First of all – just what are you supposed to think will be the result of drinking THIS soft drink?

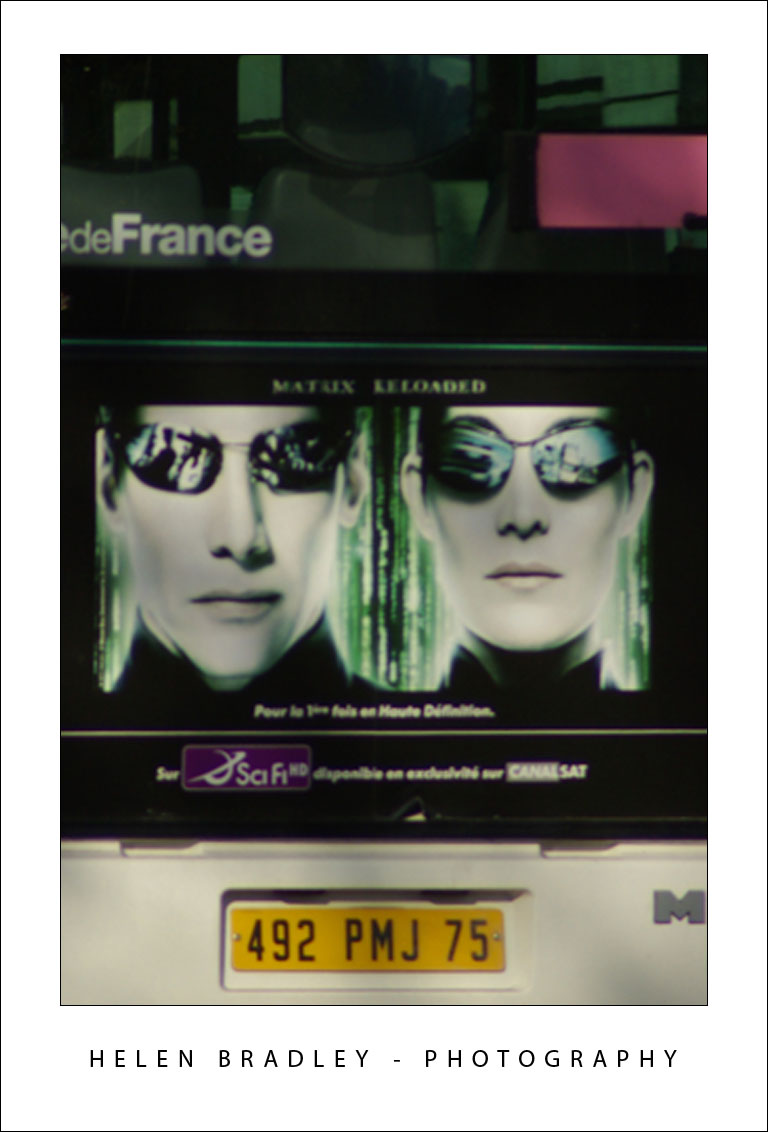
You have to wonder what Neo and Trinity were doing in Paris – I never did quite work it out but they were on ads at metro stations and on the back of every third bus – too strange!

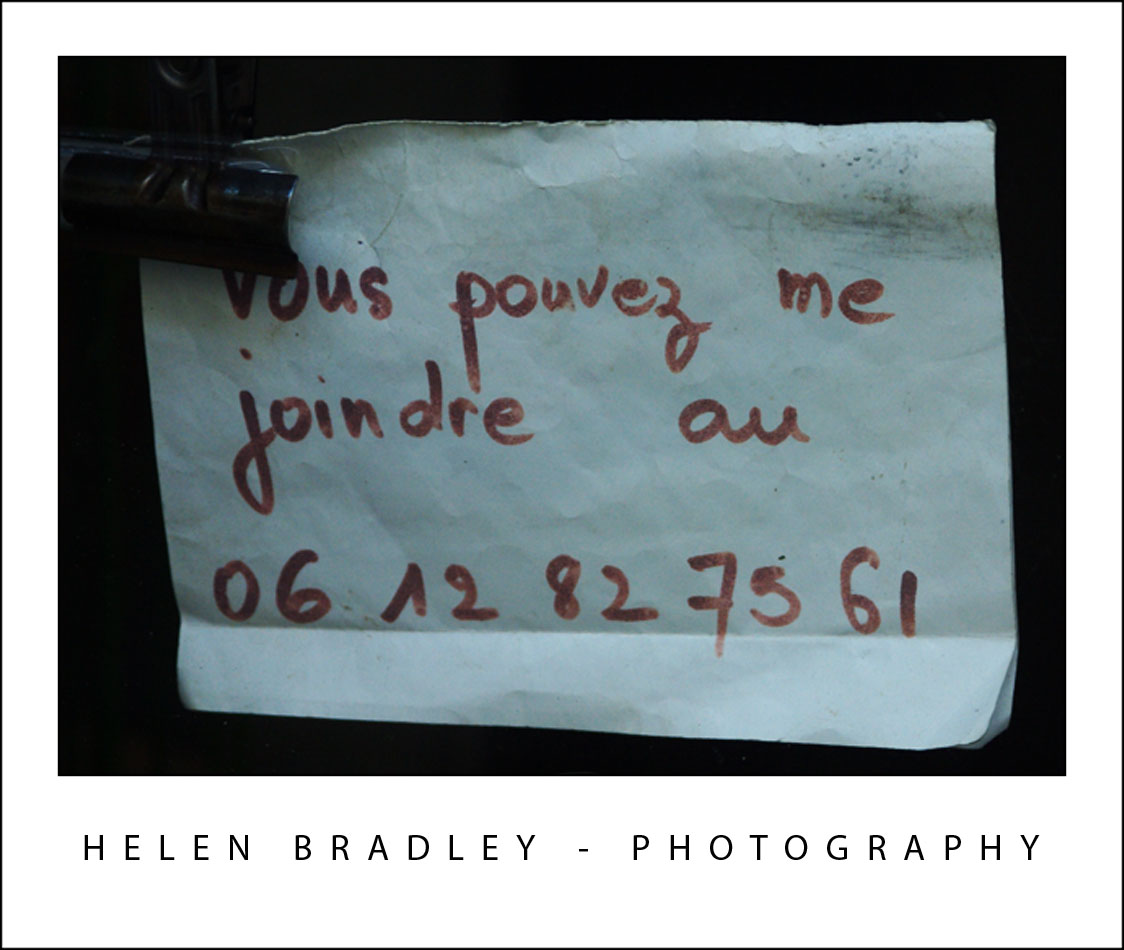
I love getting up and out early in the morning. You see things then you just don’t see later in the day. Here are the ubiquitous cafe chairs piled up ready to be set out for the day:

Sure, can do:

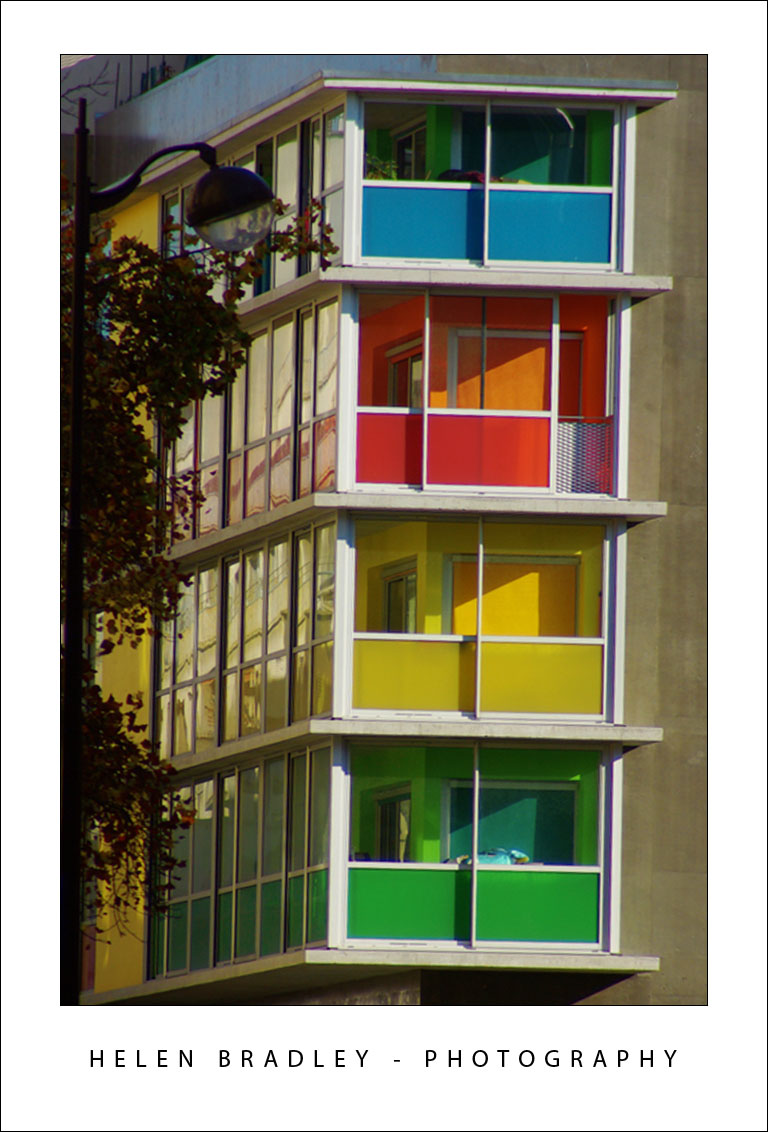
Finally, some rooms built out of the side of a building – the colour were so unexpectedly modern, the remainder of the building not so..

Helen Bradley