Friday, May 6th, 2011

Illustrator – my Direction handles have gone!

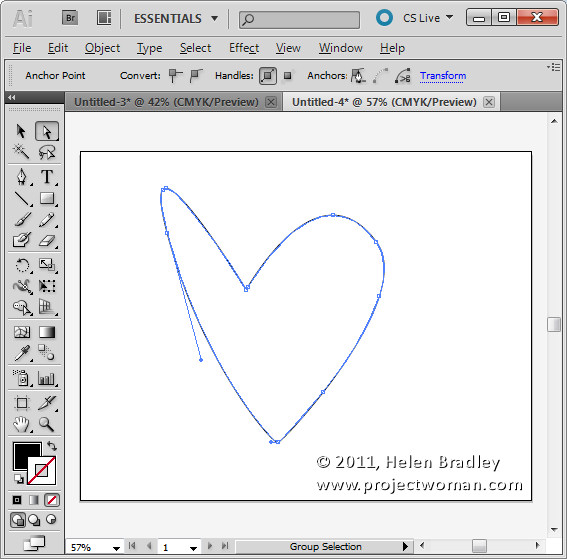
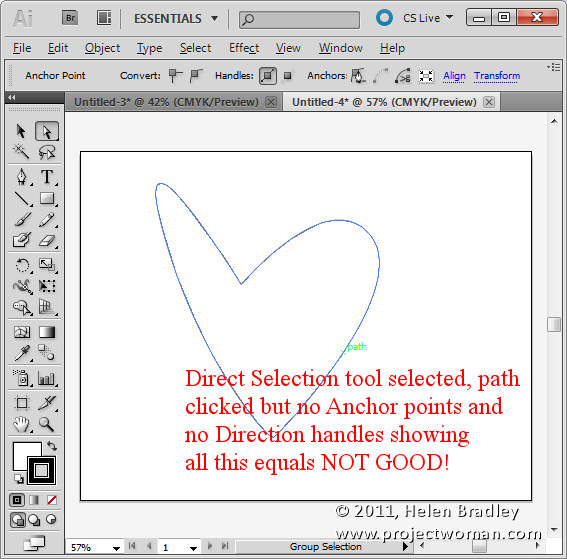
Ok, this has probably happened to you before and it is horribly frustrating. You draw a shape with the Pen tool or you open a file with a shape on it. You click the Direct Selection tool and you click on the shape expecting the anchors and direction handles to appear. But they don’t!

Your direction handles and anchors are gone, vanished, not there – nada – yikes!

The solution is to press Control + H (Command + H on the Mac). Quite simply it’s the shortcut for Hide Edges and that means it’s not exactly obvious that it hides or reveals anchor points and direction lines – like these are edges? Well, I for one don’t call them edges – but, swallow your frustration with the poor terminology and hit the keys – it works.

Now write it down – share it with your friends, someone you know needs this shortcut key – today!

20110924-160039.jpg

Helen Bradley

Tuesday, May 3rd, 2011

Quick and easy pattern making in Illustrator CS4 & CS5

Creating repeating patterns in Illustrator can be a time consuming process but, with MadPattern, it can be simplicity itself.

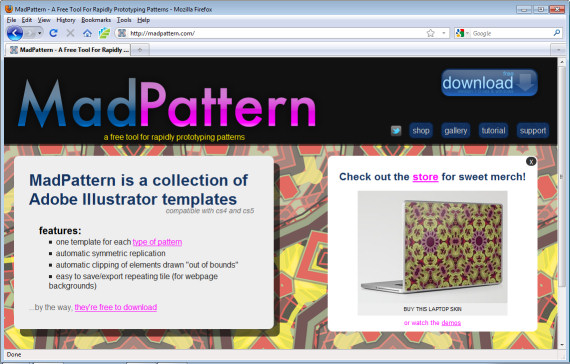
MadPattern is a series of templates you can use to quickly and easily create repeating patterns in Illustrator CS4 and CS5.

To get started, visit http://madpattern.com and click the download icon to download the zip file. Double click it and extract its contents.
You’ll need to put these files in your Illustrator template folder. The easiest way to do this is to open Illustrator, choose File > New from Template to open the template folder. In Windows, right click and choose New > Folder and add a new folder for these templates. Drag and drop the templates that you just unzipped and extracted – they are all .ait files – into the template folder that you just created.
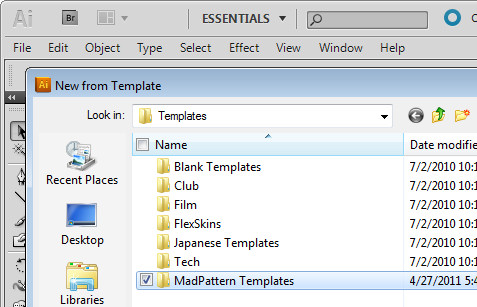
You can now select a template to get started with. I suggest you choose p3m1.ait at this point.

What you’ll see on the screen is a grid with characters and some instructions along the right of the screen.
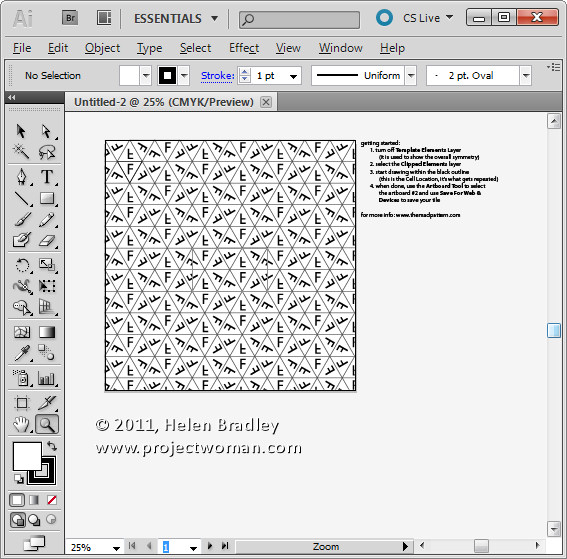
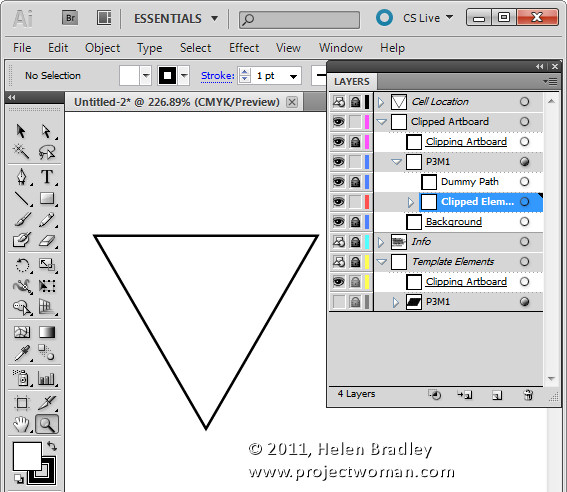
Open the layers palette (Window > Layers) and locate the bottommost layer which will be called p3m1 (the template’s name). Click its visibility icon to make it invisible.

You’ll now see clearly the triangle in the top left corner of the Artboard and a rectangle in the middle of it. Before you leave the layers palette, click the Clipped Elements layer to select it. This is the layer you will work on.

Use the Zoom tool to drag over the topmost triangle to make it larger – this is where you’ll create the image for your pattern.
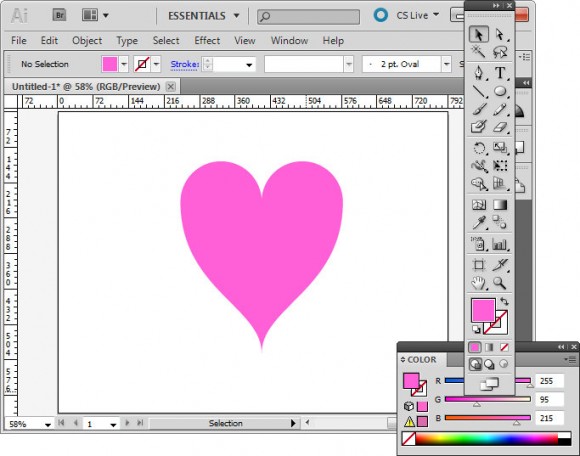
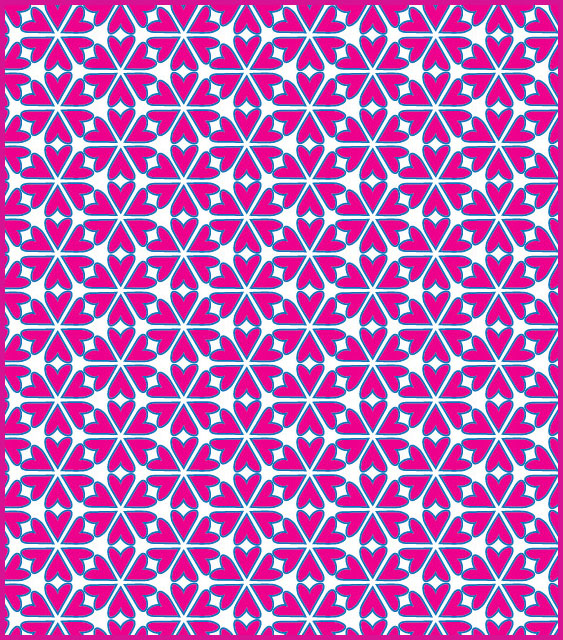
Create a shape within the triangle. For example, you can select the pencil tool and draw a wiggly line or use the pen tool. Here I’ve drawn a rough heart shape using the pen tool – as soon as the shape is created you will see it repeated across the Artboard.
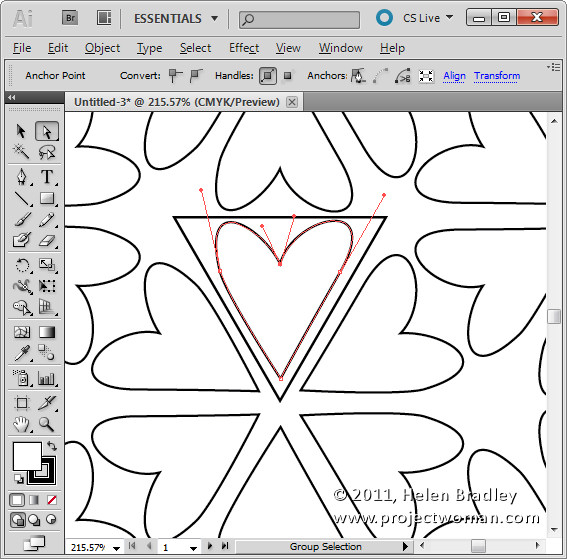
You can now use the Direct Selection or any of your favorite tools in Illustrator to fine tune your shape – for now, keep the shape within the triangle.

Choose a fill and stroke color for your shape.
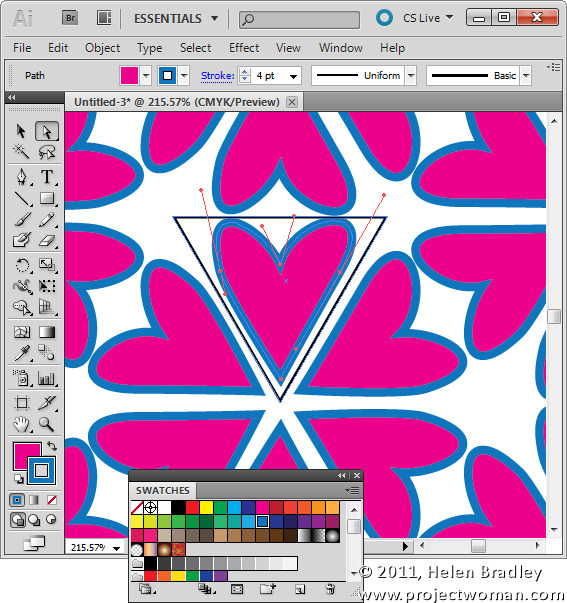
Each of the templates in the MadPattern download contains the same basic elements and works in this same way. You will find a small triangle on the template in which you design your pattern and the remaining elements in the template take care of the rotation and duplication of the shape.
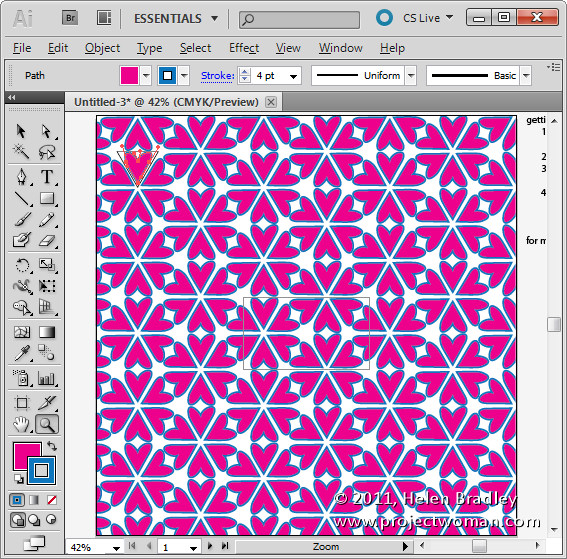
In this tutorial I’ve shown you how to design within the triangle shape but this is only the tip of the iceberg of what you can do – the edges in most templates can be used to create mirror shapes as I’ll show you in a future post.

In the meantime you can learn more about the math behind repeating patterns by visiting http://en.wikipedia.org/wiki/Wallpaper_group. This Wikipedia article includes reference to a 17 groups – click on any of them to learn more about the pattern. You can work backwards from this article by finding a pattern that has the elements that you want to use rotated as you want to see them and then identify which of the MadPattern templates you’ll need to use to create it.

I have also created a page showing thumbnails of all the MadPattern patterns so you can quickly preview them to see which ones you want to use.

In future blog posts I’ll show you how to change the background color, how to save and reuse your patterns and how to create way more complex patterns with ease.

Helen Bradley
Monday, February 28th, 2011

Scale a Gradient in Illustrator CS5

If you’re working with Illustrator CS4 or Illustrator CS5, you can scale, rotate or vary the opacity of a gradient using the gradient bar.

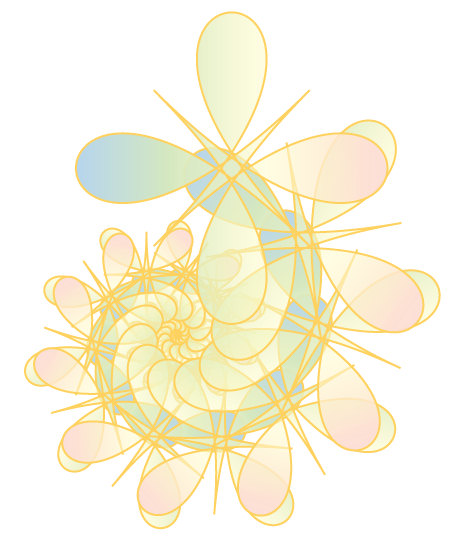
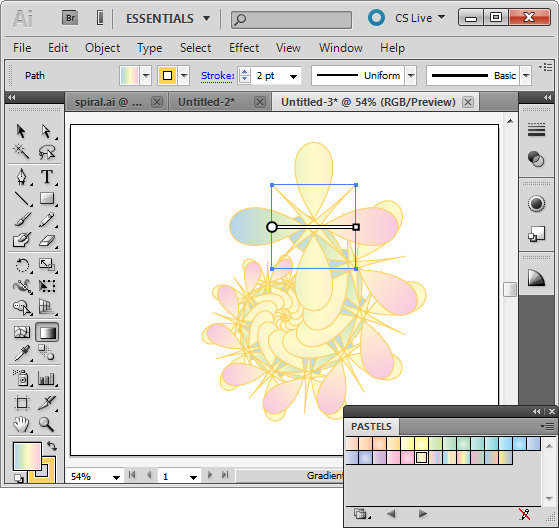
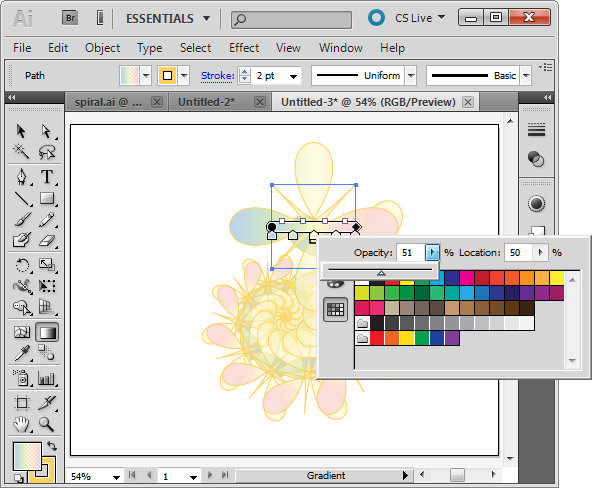
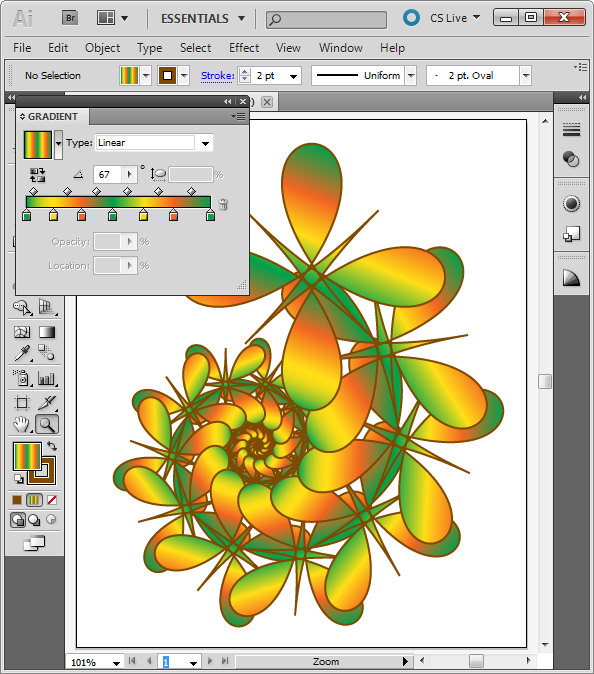
Here I am working with the spiral shape I created in an earlier post on Creating Cool Spirals in Illustrator. Here I have selected the original path using the Selection tool and then clicked the Gradient tool in the toolbar. This displays the gradient bar over the image.

To make a color from the gradient partially transparent double click the marker for that color on the gradient bar. This displays the Swatches dialog with a slider which lets you change the Gradient Opacity at this point.

You can repeat this for other color markers on the bar. Adjusting the opacity of colors for this spiral shape lets colors from shapes underneath appear through the original gradient.

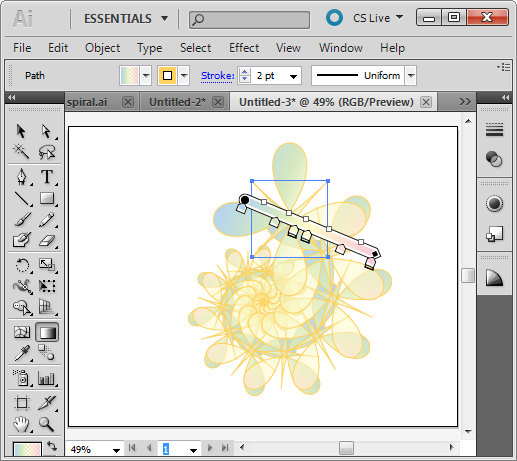
To rotate the gradient, hold Alt as you drag on the square marker to rotate it.

To scale the gradient drag on either end of it to stretch it. You can also move the bar to change how the gradient is applied to the shape.

Helen Bradley

Wednesday, February 23rd, 2011

Find and install Gradients in Illustrator

If you’ve come to Illustrator from Photoshop then Gradients will be a feature that will take some getting used to.

There is no fly out menu on the Gradient palette to use to load new gradients and instead gradients are available through the Swatches palette.

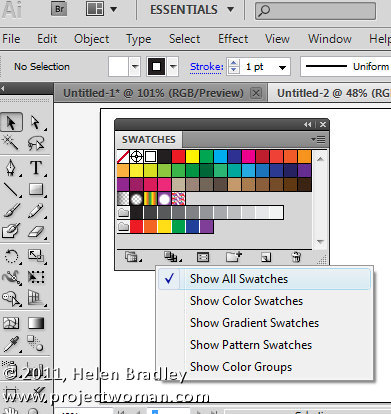
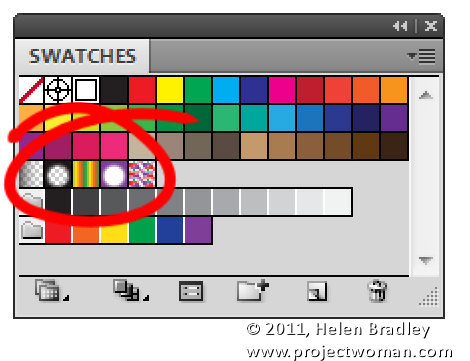
Choose Window > Swatches to view the Swatches palette and make sure that you click the Show Swatch Kinds menu at the foot of the palette and click Show All Swatches. This will display all the swatches you have available.

In the middle are your gradients. These include Fade to black, Super Soft Black Vignette, Green Yellow Orange, Purple Radial, and Laguna.

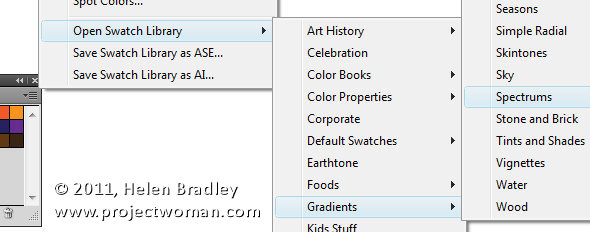
To find and load additional gradients, click the fly out menu on the Swatches palette and select Open Swatch Library > Gradients and then select a set of Gradients to open. These open in a palette all of their own.

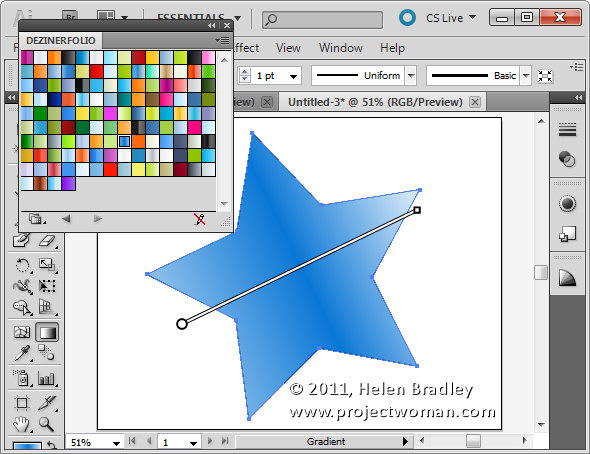
Select a gradient to use for an object from this palette and, when you do, it is automatically added to your Swatches palette.

Like Shapes, Brushes and other features of Illustrator you can also find, free gradients online and then download and install them into Illustrator.

How To Install downloaded Gradients

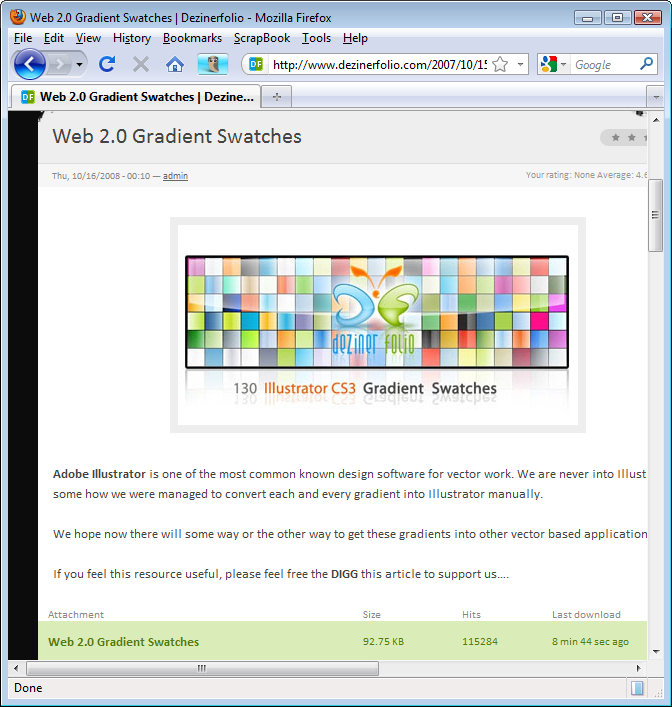
To install downloaded gradients first locate and download the file and, if necessary, unzip it. Once you unzip the gradient you should have an AI file which is your gradient file. I downloaded a set off Web 2.0 Gradients from http://www.dezinerfolio.com/2007/10/15/130-web-20-gradient-swatches-for-illustrator/

Place the .AI file you downloaded in your Illustrator Swatches folder. The location of this depends on your operating system. On Vista it is [user name]\AppData\Roaming\Adobe\Adobe Illustrator CS5 Settings\en_US\Swatches. For other versions and countries you may need to choose Adobe Illustrator CS4 Settings or en_GB etc..

On the Mac choose: [user name]:library: ApplicationSupport: Adobe: Adobe Illustrator CS5: en_US: Swatches.

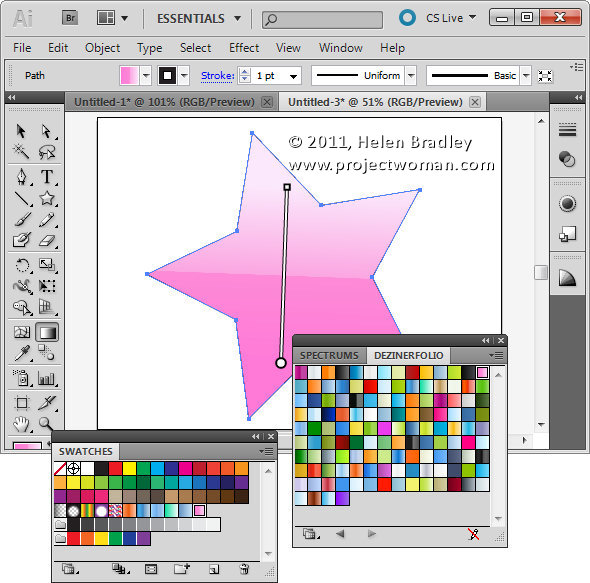
Close and reopen Illustrator and the gradients will be available in the Swatches palette in the User Defined group.

You can then select and use any of the downloaded Gradients for your objects.

Helen Bradley

Friday, February 18th, 2011

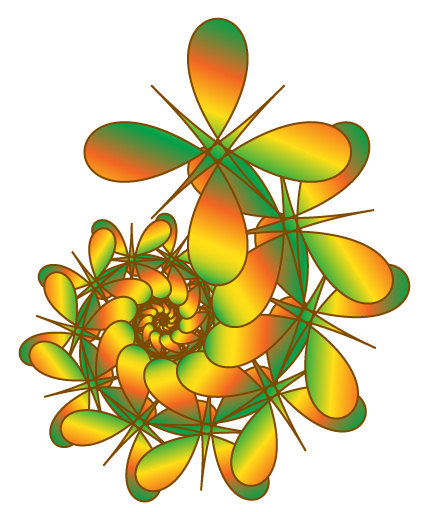
Create Cool Spirals in Illustrator

Spiral shapes are simple to create in Illustrator using some of its built in effects.

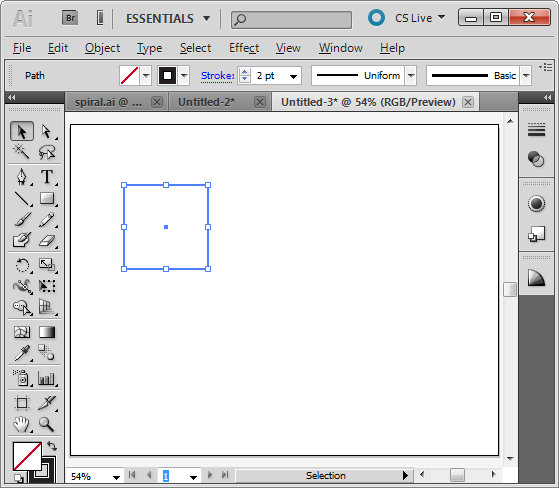
To get started, create a new image and select the rectangle tool. Hold Shift as you drag to create a small square on the artboard.  Set the stroke to around 2 pixels, set black as the stroke color and don’t apply any fill.

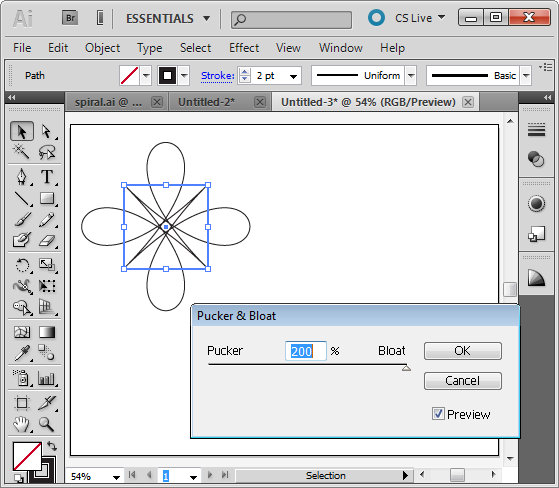
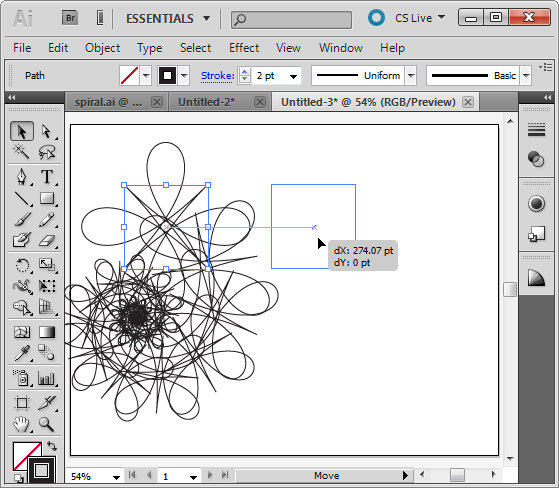
With the shape still selected, choose Effect > Distort & Transform > Pucker & Bloat. Enable the Preview checkbox and drag the slider to create an interesting shape. Here I dragged it to 200, which gives an interesting floral shape. Click Ok to confirm the transformation.

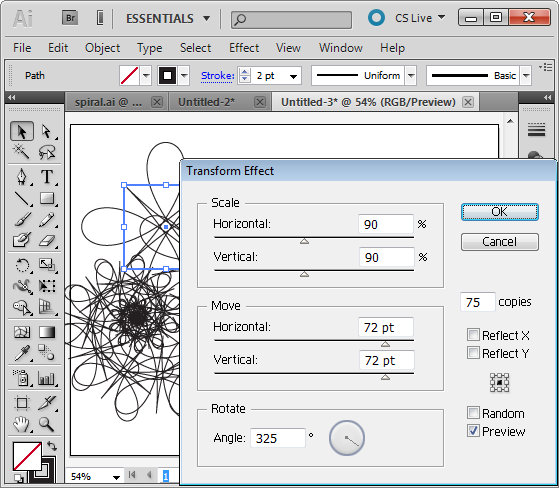
To create the spiral, with the shape still selected choose Effect > Distort & Transform > Transform to open the Transform Effect dialog. Enable the Preview checkbox. Set the number of copies to, for example, 75 and then experiment with various settings of the various sliders.

Changing any of the sliders will alter the shape significantly. Here I set Scale: Horizontal and Vertical to 90% so the shape gets incrementally smaller each transformation. I set the Move: Horizontal and Vertical to 72 pt so the shape moves both horizontally and vertically a small increment each transformation and the Rotate Angle to 325 degrees so each shape is rotated as it is transformed.

Once you have a shape that you like, click Ok.

If necessary, use the Selection tool to move the shape back so it sits within the artboard.

With the shape still selected, set the Stroke to a color of your choice. Select Fill and select a gradient such as the built in Green, Yellow, Orange gradient. By changing the angle of the gradient, for example, you can change the look of the filled shape.

In an up coming blog post I’ll show you more about working with Gradients in Illustrator.

Helen Bradley

Friday, December 31st, 2010

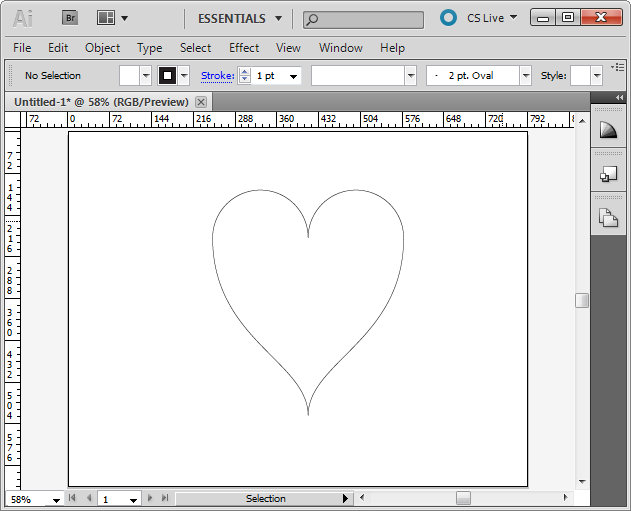
Creating a perfect heart shape in Illustrator

Here’s how to create a perfectly symmetrical heart shape in Illustrator:

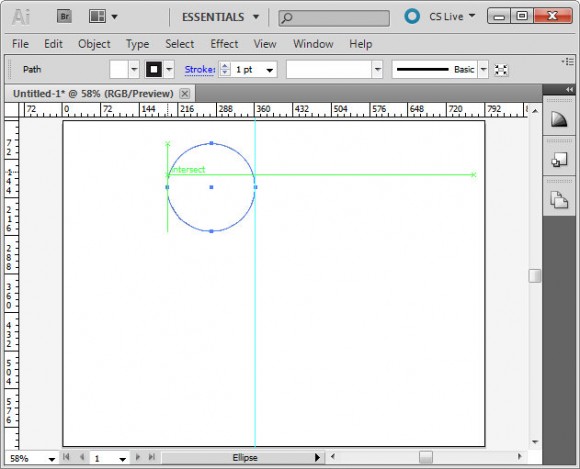
Start in Illustrator and drag a guide to use to position the shape.

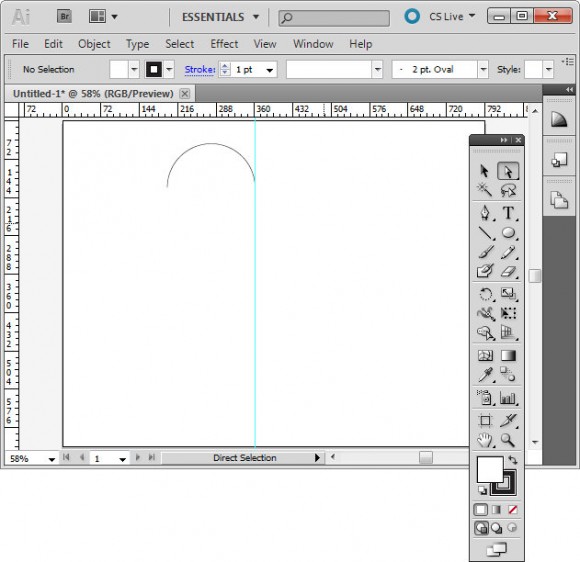
Select the Ellipse tool, click on the guide to start and draw a circle shape to one side of the guide. Add the Shift key to make a perfect circle.

Select the direct selection tool, drag over the bottom half of the circle to select it and press Delete. You should now have a semicircle shape.

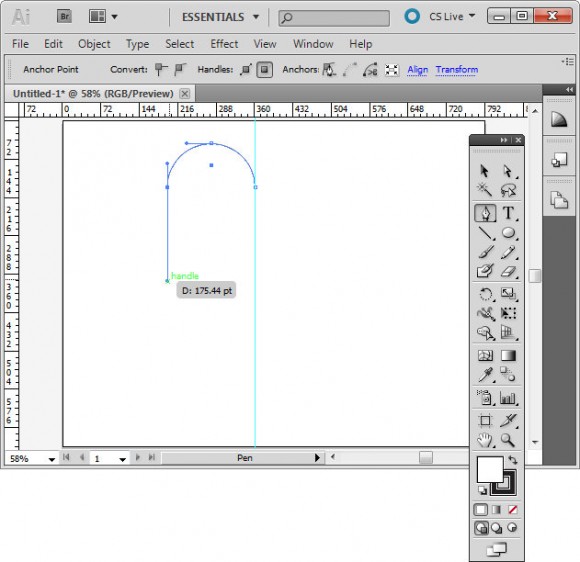
Click the pen tool and then click on the outermost anchor point, the one furthest away from the guide. Click and drag downwards adding the Shift key after you’ve started dragging to ensure the line curves correctly.

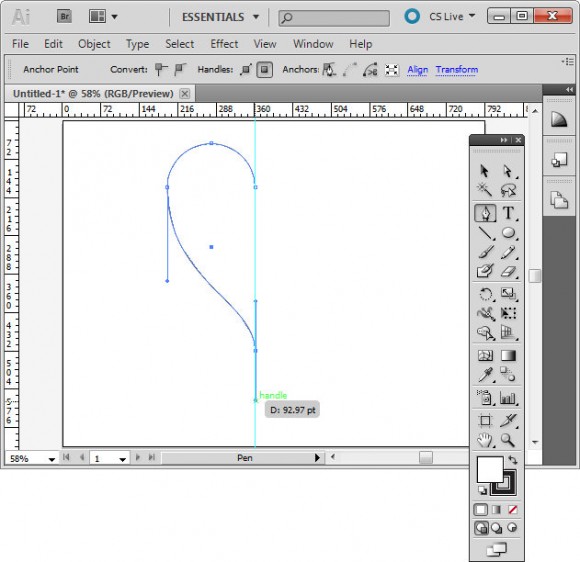
Click again on the guideline and immediately add the Shift key and drag downwards to create half of a heart.

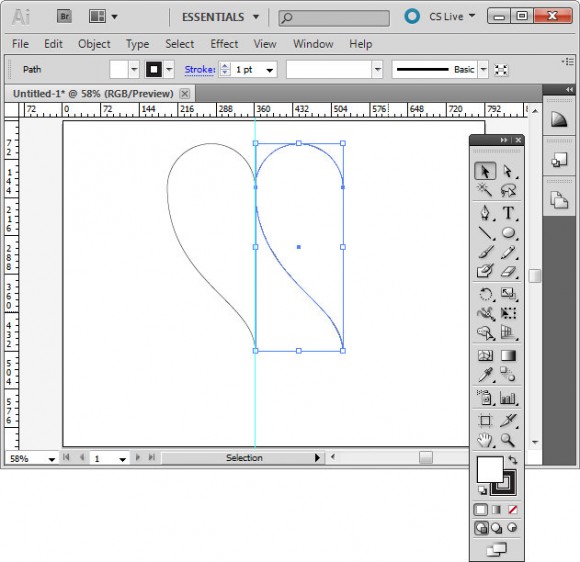
Click on the half heart shape to select it. Drag to the right and as you do, add the Alt and Shift keys (Option and Shift on the Mac) and move the shape until it snaps to the grid line. This should create a duplicate shape.

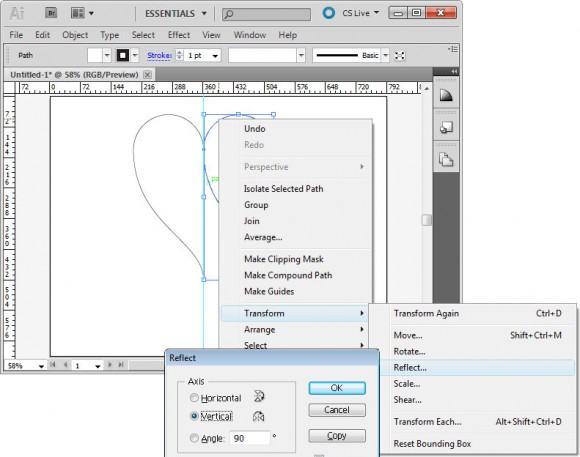
Right click this shape, choose Transform > Reflect > Vertical and click Ok. You now have two halves of the heart.

With the selection tool, drag over both sides of the heart to select them, choose Object > Path > Join to join these into a single shape. You can now remove the guide and you have a custom heart shape.

Helen Bradley

Page 6 of 6« First23456