Thursday, June 7th, 2007

Love the theme, hate the background image?

Yum, PowerPoint’s new themes. They’re fun, colorful and a far cry from the drab and boring ones we’ve lived with for so long. So, what happens when you love everything about a Theme except its background?

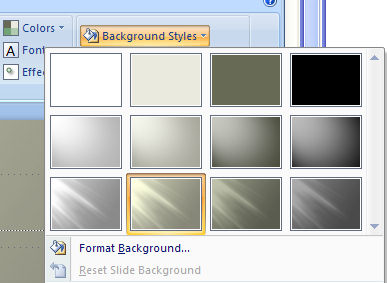
Well, since I’m waxing lyrical about PowerPoint you can probably guess I’m about to let you in on a trick for fixing the background problem in your PowerPoint 2007 theme love affair? Click the Background Styles option in the Design tab and there is an entire selection of different backgrounds all coordinated with the theme. If you change your color scheme the background’s colors change too – sweet!

Helen Bradley

Tuesday, May 15th, 2007

Grid and Guides in PowerPoint 2007

If you’re like me you like to have everything neatly aligned on your PowerPoint slides. If you don’t, a slide with navigation and action buttons can very quickly become very untidy.

To line everything up, you need to be able to see the gridlines. Gridlines on a PowerPoint slide? I hear you ask. Why not?

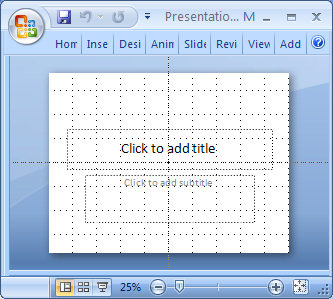
To see the gridlines, right click an empty area on a slide and choose Grid and Guides. Select the Display Grid on Screen checkbox and configure the grid size and click Ok. You can also display drawing guides using the same dialog. By default these are placed in the middle of the slide horizontally and vertically.

To add a new guide, hold the Control key as you drag a new guide from an existing one.

Reverse the process to hide the guides and grids when you’re done.

Helen Bradley

Thursday, May 3rd, 2007

Gilding the Lily – Animating SmartArt

I love the new SmartArt feature in Office 2007 and I’d buy Office just to get hold of it. The images are drop dead gorgeous and they’re so easy to make and to color.

So, what’s better than great looking SmartArt? Animated SmartArt, that is. Launch PowerPoint 2007 and create a SmartArt object. Select it and then click the Animations tab. From the Animate dropdown list choose One by One and Preview the result – deliciously animated SmartArt. Of course, you can do all sorts of Animations – this is just to whet your appetite.

Fun huh?

Helen Bradley

Friday, April 27th, 2007

Vale PowerPoint features

Hmm – there is good and bad in everything I presume but I’m particularly bummed by the fact that a couple of the tools that I have grown to love in PowerPoint over the years have been removed from the new PowerPoint 2007. Well, perhaps love is too strong a word, but I liked them a lot and they’re gone.

Gone is the AutoContent Wizard but you can find much of its functionality in templates. There’s no broadcast feature and no macro recorder (but you can still use macros), and no title master – but there’s a new title layout which really makes better sense. All this I could live without, what I’ll miss is the Speaker Notes tool which let you record notes while making a presentation which you could save later on. Gone too is the summary slide tool which really is a big omission – summaries were a great way to create an agenda so folks knew what they’d be learning… poor choice of tools to go in my book.

Helen Bradley

Wednesday, March 21st, 2007

Too cool for school – Office 2007 SmartArt

New to Microsoft Office 2007 PowerPoint, Excel and Word is the SmartArt feature which is one you’re just going to love.

To test it out add a new slide to a PowerPoint presentation, for example, and select the blank layout. From the Insert tab on the Ribbon, select SmartArt and then one of the SmartArt objects.

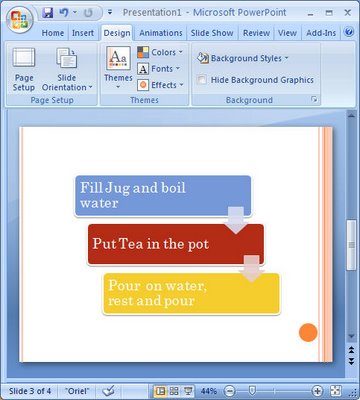
I like the one called Staggered Process which I’ve shown here as it makes a great display for a simple step-by-step process. Select your choice of design and then you’ll see text brackets appear on the screen. Click in them or click the double-pointing arrows at the left of the SmartArt object and type your text in the special dialog.

Once you’ve got your bullet points in – and you can add more than the default three if you need more – you have a simple step-by-step graphic. But – this is only the beginning.

There are lots of different looks for your graphic including beveled edges and 3D effects, and you can choose these from the SmartArt styles dropdown list in front of you. You can also change the colors used in the design which, of course, are based on the current document Theme colors. Change the Design Ttheme and the look of the project changes with it.

It’s about as simple as it’s ever going to be to add great looking step-by-step graphics to a PowerPoint slide. They are, seriously, way cool…

Helen Bradley

Sunday, March 18th, 2007

PowerPoint 2007 Torn Photo Edges

One of the cool things about PowerPoint 2007 is the way that you can create fab photo edges with no work at all.

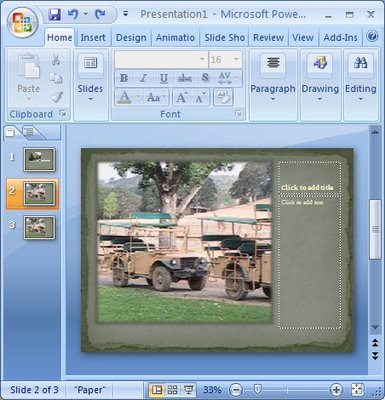
To see this at work add a new slide using the Home tab, click New Slide and then from the Layout list choose Picture with Caption. Now click on the icon in the middle of the slide to add your picture.

Go to the Design tab and choose one of the designs to use for your slide. You’ll see that designs like Opulent create a stacked photo effect, Paper creates a rough paper edge effect, Solstice creates an effect where the photo looks adhered with sticky tape (this is soooo cool!), Concourse has an interesting shadowed edge effect, Flow tips the image on an angle, and Foundry rounds the opposing corners.

From here you can click the picture and then click the Picture Tools, Format tab to add other picture effects to your image such as a reflection or soft edges.

There’s really an almost unlimited number of variations available. I dare you to stop at just using one!

Helen Bradley

Page 3 of 3123