Tuesday, July 15th, 2014

Illustrator – Tricks of the Appearance Panel

Tricks for Using the Appearance Panel in Illustrator

Learn tips and tricks for using the Appearance Panel in Illustrator.

You will see how to add multiple fills, how to add extra shapes to a single shape, how to move and resize a shape.

You will also see how to make part of a shape transparent using a transparency mask effect created inside the Appearance panel.

This video is ideal for intermediate level Illustrator users and will expand your knowledge of Illustrator tools.

Helen Bradley

Wednesday, November 28th, 2012

5 Techniques for taking better photos

These 5 techniques can help you improve your photography today

Here are 5 techniques you can put to work today to help take better photos:

Tip 1 – Capture Moving objects

When shooting a moving object, capture it as it comes towards because as your camera can focus more easily this way.

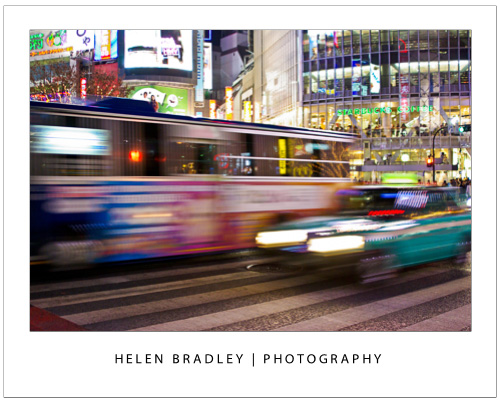
If an object is travelling across your field of vision, follow the movement with the camera as you capture the shot. The object will be in focus and the remainder of the background will be pleasantly blurry. Or do it in reverse and focus on the background and let the subject move across the image.

In this photo I opted to keep the background in focus and the vehicles in motion:

 Tip 2 – Create a frame

When shooting an object in the distance, frame it using an object in the foreground such as an overhanging tree or an arched window. The frame will invite the viewer to look into the image.

Tip 3 – Focus and shift

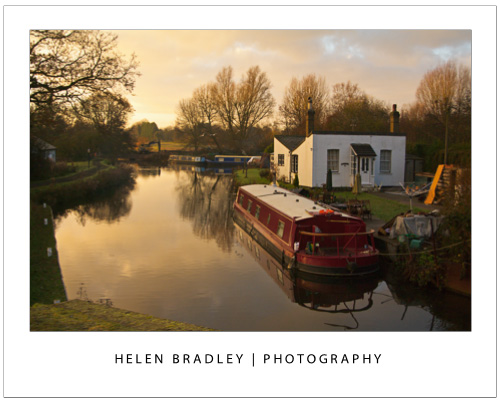
To focus on an object off centre in your photo, point to the object and press the shutter release halfway down to focus on the object. Move the camera to reframe the scene and continue to depress the shutter and take the photograph.

In this image I focused on the boat on the right then reframed the image before capturing the shot.

Tip 4 – Reflections

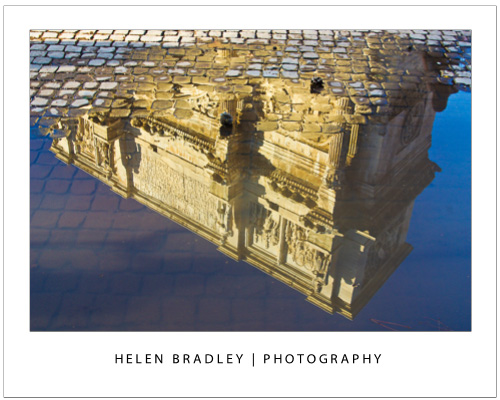
Look for interesting items to reflect your subject in. Faces can be reflected in a car’s rear vision mirror and buildings can be reflected in a puddle on the footpath. Images of objects reflected in shiny surfaces often result in more compelling images than would be the case if you simply photographed the original object.

 Tip 5 – Get down low

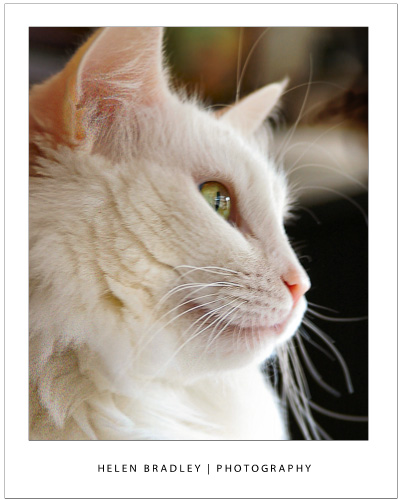
When photographing pets and children get down to their level so you capture the child or animal face on rather than photographing the top of their head. If shooting from above, get a lot higher and get your subject to look up as you take the shot.


Helen Bradley

Friday, July 20th, 2012

5 Cool Excel 2010 tips and tricks

Here are five cool tips, tricks and keystrokes to help your day go faster in Excel:

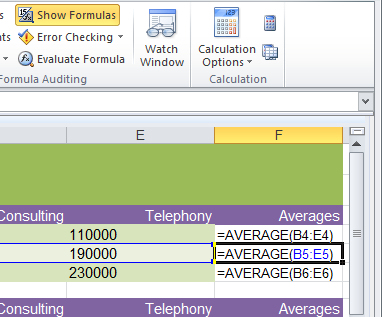
Display cell formulas and not results

If you want to see the cell in your worksheet display formulas rather than the results of those formulas then  you can do it one of two ways.

Use the keyboard shortcut Ctrl + ~ to toggle formula display on and off

You can also use Formulas > Show Formulas

Start a new line

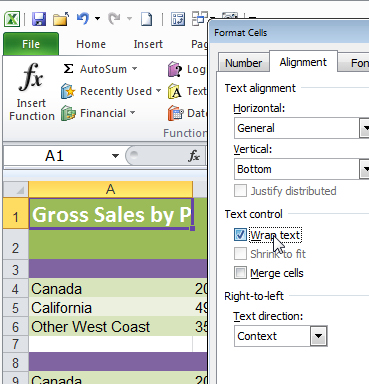
When you need to add a line break to a cell to start a new line of text press Alt + Enter in the cell. If you just want to wrap a long piece of text in a cell right click the cell and choose Format > Alignment tab > Wrap Text.

Copy the contents of the cell above

To copy the contents of the cell above into the current cell press Control + ‘.

Moving around super fast and super smart

To move from one sheet in a workbook to the next (or in reverse), press Control + PgDn and Control + PgUp.  To move to the next open workbook press Control + Tab or Control + Shift + Tab.

Super quick mouse free SUM formula

Skip taking the mouse to your Ribbon to add a SUM function and do it with a simple keystroke instead. Type Alt + = and Excel adds the SUM function automatically to the current cell. Doesn’t get much easier than that!

Helen Bradley

Thursday, January 26th, 2012

Winter Photography tips #7 – Work with what you have

Winter scenery typically lacks the bold colors of the other seasons. However, there’s still plenty of good subject matter to photograph. Look for the contrast of bare trees against wintry skies or soft snow hanging from the boughs of prickly conifers.

Contrast in line and texture make a great focal point for your images.

In the city, look for winter fogs and mists that partially hide buildings and in the country, look for elements which break the landscape drawing your eye to them such as a stream running through snow, a fence, hoof prints in icy paddocks or early bulbs.

Helen Bradley

Friday, October 28th, 2011

3 Cool tips for working in Adobe Bridge

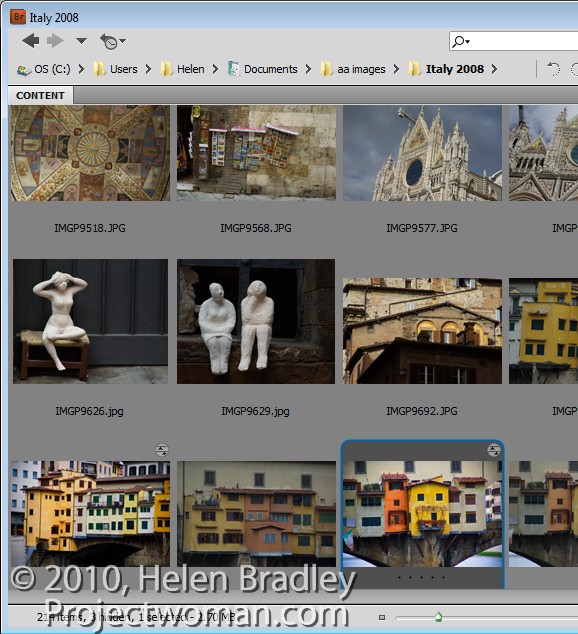
Do you open photos direct into Photoshop or do you use Bridge? If you don’t use Bridge, there are some good reasons for changing your habits. You may not realize it but some of how Camera Raw behaves depends on whether you open an image from Bridge or from Photoshop. Here’s how:

Freeze Photoshop or not?

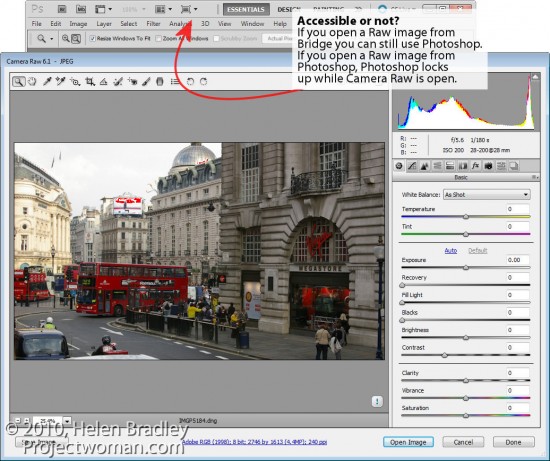
Open a Raw image in Photoshop and it opens, of course, in Camera Raw. But look at the screen – Photoshop is open but the window is frozen. You can’t minimize it and you can’t work in Photoshop at the same time as work in ACR.

Close the image and now do the same thing from Bridge – right click a Raw file and choose Open in Camera Raw. See the difference? When you open a Raw file from Bridge it opens in Camera Raw but without seizing the Photoshop window as well. You can still work in Photoshop at the same time as you work in Bridge.

In short, if you want the best of both worlds – Photoshop and Camera Raw then head to Bridge to open your images from there.

Bypass Camera Raw

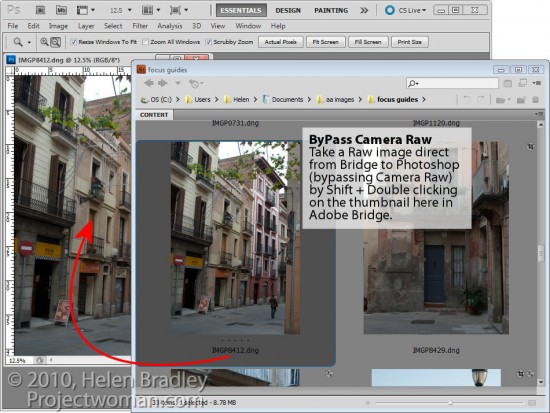
If you’re in Bridge, you can bypass Camera Raw entirely and open a Raw file direct in Photoshop by holding the Shift key as you double click the image in Adobe Bridge. The image opens automatically in Photoshop. This is handy, for example, if you’ve already processed an image in Camera Raw in the past and if you now want to work on it in Photoshop.

JPGs to Camera Raw

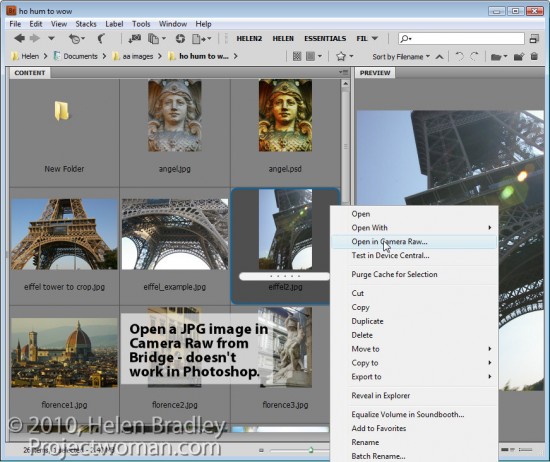
In Camera Raw you can make adjustments and craft images often much more quickly and easily than you can in Photoshop. This being the case, you may want to use Camera Raw for your JPG files as well as your Raw files. In Photoshop CS3 and later versions, you can open any JPG in Camera Raw by right clicking the JPG in Bridge and select Open in Camera Raw. You can’t do the same thing from inside Photoshop.

As a bonus the changes you make to JPG images in Camera Raw are undoable. So, for example, if you convert a JPG to greyscale in Camera Raw and click Done, the photo will show as greyscale in your Bridge thumbnails. However, open the JPG in Camera Raw again and you’ll see the changes aren’t permanent – you can undo them and return the image to full color – don’t try that in Photoshop!

So, if you’re not using Bridge – there are three good reasons for considering changing your workflow habits.
Helen Bradley