Tuesday, June 19th, 2012

Transparency and the Gimp


One of the most confusing things for Photoshop users will be the concept of a transparent layer in Gimp.

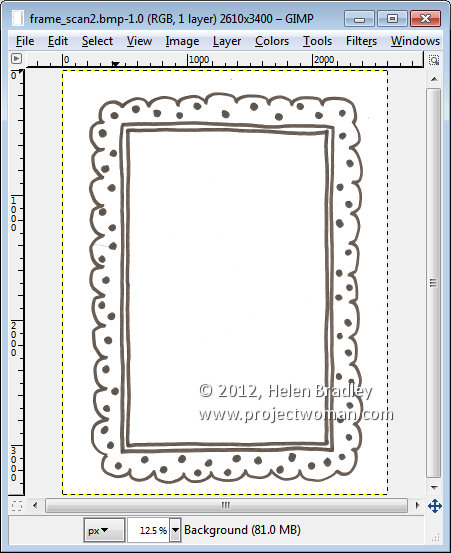
Consider the situation where you open an image such as this hand drawn frame here. The image is a BMP image and what I want to do is grab the middle out of the frame so that I can put something behind it.


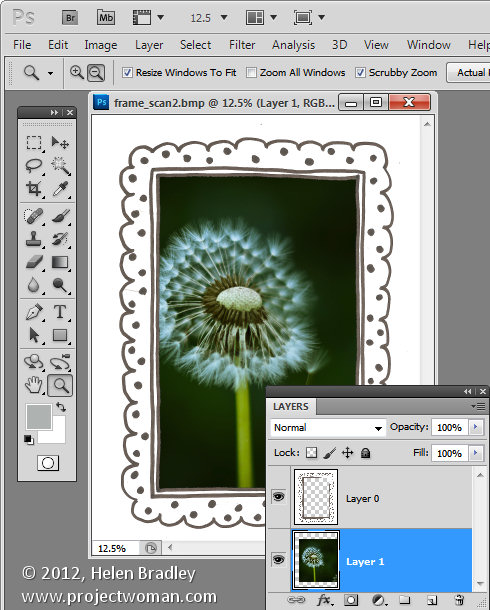
If this were Photoshop, I would convert the background layer to a regular layer by double clicking on it and press Ok. Then I would target the Magic Wand tool and click in the middle of the frame to select the middle area then press Delete to make it transparent so I can drop an image in behind it.


If you try this process in Gimp, all you get is an extreme level of frustration as nothing seems to work. Select and delete does absolutely nothing !

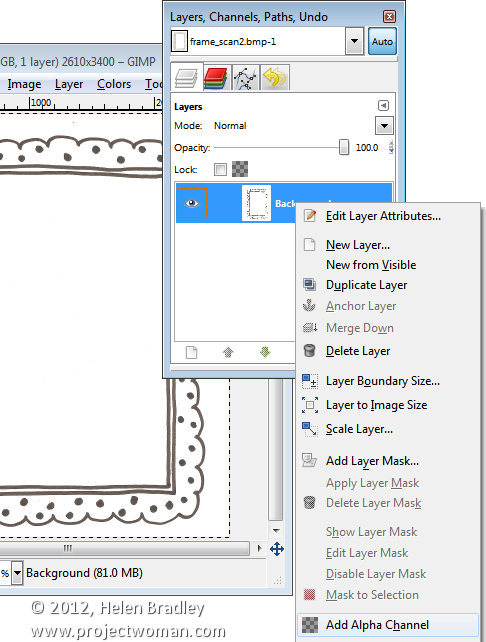
Here’s the solution. With the layer with the image on it selected, right click and choose Add alpha channel. This then allows you to select an area on the image using the Fuzzy Select tool, and press the Delete button. Then choose Select none and you will have a transparent middle to your image. It’s an easy process once you understand what’s happening but an extremely frustration one until you do.


Helen Bradley

Thursday, June 7th, 2012

Recording Yes, No, Maybe so in Excel

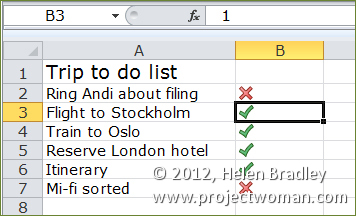
You can use Excel to fill a range with ticks and crosses to indicate Yes and No using a simple Excel Conditional Format.

To see this at work place a list such as to do items in column A of your worksheet. In column B, type the numbers 0 or 1 depending on when the task is completed or incomplete – 1 is completed, 0 is incomplete.

To make the numbers appear as checkmarks and crosses instead of 1 and 0, select the column of numbers and choose Conditional formatting from the Home tab on the Ribbon.

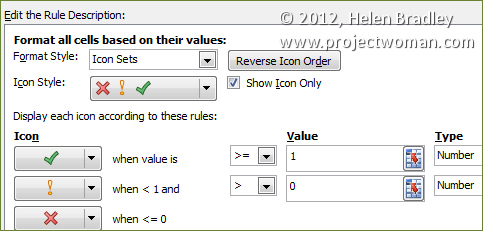
Select Icon Sets and then select the indicator set that has a checkmark, exclamation mark and cross in it.

To fine tune this conditional formatting rule so it displays just the checkmark or the cross and not the numbers themselves and so it works correctly, keep the range selected and, from the Conditional Formatting dropdown list select Manage Rules. Select the Icon Set rule, select Edit Rule and click Format all cells based on their values in the top of the dialog.


Select the Show Icon Only checkbox and, set the checkmark to read >= 1 and set the Type to Number. For the ! icon set it to read > 0 and set its type to Number also. Click Ok.

You can change the icons by simply typing 1 or 0 into a cell.

Helen Bradley

Monday, April 16th, 2012

Making Groups in Windows 8

In Windows 8 Metro you can name groups of tiles so they have headings on the Start screen and you can drag groups around. Pity that nothing on the screen makes it clear that this is something you can do.

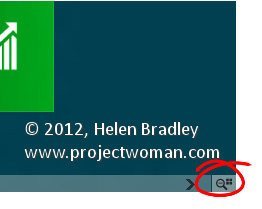
To do this, first use the semantic zoom to shrink the start menu tiles so they are very small.

step 1

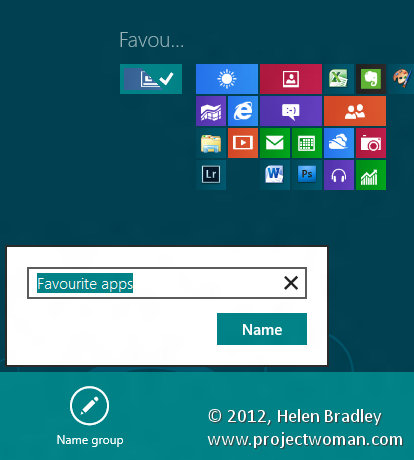
Then right click a tile in the group of tiles you want to name.

step 2

A dialog pops up where you can type the group name. This only appears when you are zoomed out making it hard to find.

step 3

When you’re done, zoom out and you’ll see the group named. You can now drag and drop tiles into the group to help keep things nicely organized on the Windows 8 Metro Start screen.


Helen Bradley

Friday, September 3rd, 2010

Run out of canvas using Photoshop’s Pen tool?

I’m sure this has happened to you – you’re zooming along drawing a path around an object using the Photoshop pen tool and all of a sudden you’re running out of room – the image is off the screen. The solution is simple, press and hold the Spacebar and the cursor turns into the Hand tool so you can move the canvas around to get the next bit of the image in view. Let go the Spacebar and you’re back to working on your path.

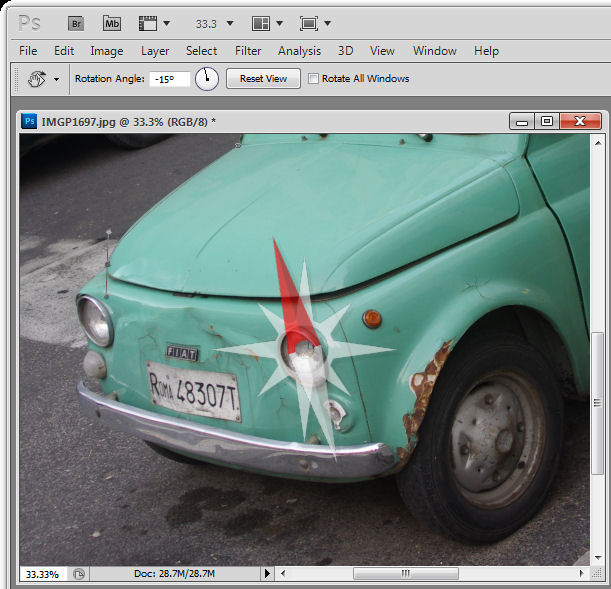
And, while you’re there – wanna rotate the canvas so you can draw your path more easily? Easy! Press and hold R (R for rotate) then drag the canvas to rotate it.

Helen Bradley

Page 7 of 7« First34567