Sunday, April 7th, 2013

Lightroom Tip – Find Images by Keyword

Find images by Keyword

In the Library module in Lightroom the Keyword List panel tells you how many images are keyworded with a particular keyword. It can also find these images for you so, open the Keyword List panel, and click the arrow to the right of a keyword to view images that have that keyword associated with them.

These arrows appear only when you are hovering over a keyword in the list.

Helen Bradley

Sunday, April 7th, 2013

Talk to the Animals – Photograph at the Zoo – Part 1

Your local zoo is a place to get great animal photos without leaving home

Zoos are a great place to polish your photography skills and to get photos of animals and birds you may never see otherwise.

However, just because the animals are caged doesn’t mean they are easy to photograph so there is plenty to think about and work around.

The plus is that your perseverance will be rewarded and you can get some truly great photos if you know how. Here are some tips for a successful day photographing at the zoo.

Pack the right kit

A digital SLR is a good choice for the zoo because most let you switch to manual focus which will be handy where you are trying to photograph an animal behind foreground foliage.

In this situation, the camera’s autofocus feature will have trouble distinguishing what you actually want to have in focus – being able to focus manually will let you have better control of what you shoot than using a point and shoot camera.

At the zoo you’ll be shooting at a reasonable distance away from most animals so a good zoom lens will get you close to the animals to fill the frame. A 28–200mm lens is a good choice as it offers a good zoom and is still easy to hand hold. A 70-300mm lens will get you in closer still but you have to be careful to hold it very still.

Also consider the issue of glare – you may not have a lot of choice about where you photograph so a polarizing filter may help you cut glare and get more saturated colours on a bright day.

When to go

Choosing the right time of the day can help you get better photographs. Photographing early in the morning or late in the afternoon when the light is softer and the shadows less harsh is always better than shooting at midday.

When you arrive at the zoo ask about feeding times, animal shows and anything that will get you close to the animals and preferably without cages between you and them.

To this end I’ve attended the free flight Bird Show at Taronga Park Zoo in Sydney and I’ve paid to breakfast with Orangutan in Singapore. I’ve also paid to photograph koalas up close at Taronga Park Zoo – instead of having my photo taken with them – I paid to do the photography. In Stockholm I paid to get inside an enclosure with some very curious Lemurs and I’ve done safari photo tours at Safari West in California. In short, any time you can get close to birds and wild animals unencumbered by cages do so. You’ll find these situations typically less encumbered by other people taking happy snaps and you’ll have more space and time to shoot.

Elsewhere around the zoo if you can visit the animals at their feeding time you that will bring animals out of hiding into places where it’s easier to see and to photograph them.

You do, however, still need to be well prepared and well positioned to get the best photos.

Helen Bradley

Saturday, April 6th, 2013

What to do when your PowerPoint 2013 templates go missing

You need to set up PowerPoint 2013 so it can find and save your templates.

I encountered a problem recently with PowerPoint 2013 not being able to save templates to the correct location much less find my new templates once I had created them.

The problem appears to be with the PowerPoint 2013 setup so first go to PowerPoint and choose File > Options > Save and make sure that you have your Default Personal Templates location set up in this box. For me it is c:\Users\Helen\AppData\Roaming\Microsoft\Templates\. You will replace Helen with your own <user name>.

Once you set up this location, in future when you go to save a file as a template you will choose File > Save As, click Computer and then click Browse. From the Save As Type drop down list, select PowerPoint Template (*.potx) as the type of file to save and type a name for your template.

PowerPoint will automatically go to the folder that set as your Default Personal Templates location so all you need to do now is to click Save and save your template.

In future when you choose File > New you will see that both FEATURED and PERSONAL options appear below the Search box. Click PERSONAL as that is where you will find the templates that you created and saved. If you had personal templates stored for use in PowerPoint 2010 these will be in this same location.

Unfortunately Office 2013 doesn’t make it clear where templates are stored or how you can get to your own templates so hopefully this will help you in PowerPoint.

I haven’t had the same difficulties with Microsoft Word 2013 but then my Default Personal Templates location was already set up in Word 2013. If you have trouble finding your Word templates then I suggest you try the same process as shown here for PowerPoint but do it in Word 2013. Set up your Default Personal Templates location in Word – in this case my folder is c:\Users\Helen\AppData\Roaming\Microsoft\Templates\Custom Word Templates\.


Helen Bradley

Wednesday, April 3rd, 2013

Lightroom Tip – Flick a Switch

Flick a Switch – Using Switches in Lightroom

Switches in Lightroom appear in areas such as the Develop module where they can be used to enable or disable a setting such as the Tone Curve. You can use this switch to compare your image with or without the effect in place.

Set the switch to the up position to turn it on and to the down position to turn it off.

The benefit of doing this is you can turn the effect on and off in isolation to any other changes made to the rest of the image and you don’t have to wind back your history to see the change.

Helen Bradley

Tuesday, April 2nd, 2013

Photographing in the Midday Sun Part 3

Here are some more techniques for capturing great images in full sun

The worst possible time to take photos is when the sun is overhead. But that doesn’t mean you should head home, because you can capture good images even when the light is harsh. Here are some techniques to put to use at midday:

Capture Reflections

You can capture reflections in just about any light and when the sun is at its highest you’ll find interesting reflections where one building is reflected in another and also reflections in water such as in fountains and lakes where the surrounding areas are reflected.

If the water is still the reflections will be perfect and if the water is rippling you may capture abstract patterns. If you are experiencing sunshine after rain look for water on the ground so you can capture things reflected in puddles. In fact, reflections can be an interesting way of capturing a tourist attraction in a way that it’s different to what you’ve ever seen before.

Capture shadows

With the sun high overhead, anything between the sun and the ground or the face of a building will throw strong shadows. By looking for shadows, you can often capture an interesting image either by capturing the shadow rather than the object itself or by getting both the object and its shadow. The brighter the sun the crisper the shadows will be so look for an interesting contrast between the shadow and its surrounds.

Shadows are like reflections in that you won’t necessarily see shadows or reflections until you train your eye to look for them. When you do start looking for them you’ll see shadows and reflections everywhere and you’ll wonder how you ever missed seeing them before.

Capture Lens Flare

When the sun is very bright, you’ll find that shiny objects result in little flares where the sun hits them. These flares can make an attractive star shape and add sparkle to your images. You might also see interesting patterns where the sun is filtered through trees or along narrow alleys between buildings. Look out for these opportunities to capture light that you won’t see at other times of the day.

When capturing a lens flare you’ll may need to slightly underexpose the image so the flare is captured as a subtle star rather than an overexposed white blob. To do this, adjust your camera to manual mode and increase the shutter speed or reduce the aperture to underexpose the image.

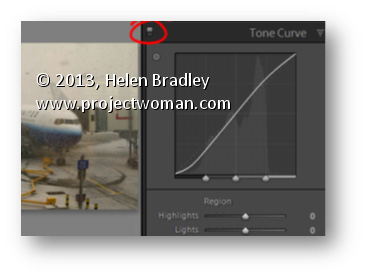
Alternatively use the camera’s Exposure Compensation (EV) adjustment to underexpose the image. You will need to experiment with the setting but start with around -1 (one stop underexposed) and adjust from there. The result should be an underexposed image with a good looking flare. You can adjust the remainder of the image in post processing to bring back some detail. If you capture the image in a raw format, you will ensure you have plenty of image data to work with in post processing.

Go for Hot!

In bright sunlight colors can look very rich indeed. If you can zoom in to get the color and avoid excessive shadows or bright spots you can capture color that is nearly impossible to get in other light.

This car image was shot on a blistering hot day with high overhead sun in horrible conditions for photographing. By zooming in to remove all the background and choosing a great vehicle to shoot I’ve captured an image rich with color that would have looked a lot duller in other light.

Helen Bradley

Tuesday, April 2nd, 2013

Photoshop – Thicken and Thin out Lines

Learn to make lines thicker or thinner using a Filter in Photoshop. This is useful for adjusting scanned line art images, as well as, for thickening up lines on images which you have converted to a line drawing inside Photoshop.

Transcript:
Hello, I’m Helen Bradley. Welcome to this video tutorial. In this tutorial I’m going to show you how you can easily make lines thicker or thinner on line art images that you either scan into Photoshop or create in Photoshop yourself. In this video tutorial I’m going to show you a really quick technique for making lines a lot thinner or a lot thicker. And this is handy for images where you’ve actually converted it to line art or where you’ve got line art like this that we’ve actually scanned in.

To make the lines thicker choose Filter and then Other and then Minimum. And with Minimum you can then select the minimum radius which is going to make the image lines a lot thicker and you can test these out. Generally just one or two pixels is like all you need to do. And this is the original image and this is the thicker lined image. So let’s perhaps take this up to 4 and I’ll click Ok. And that has just thickened the line. So if that were all we wanted to do we could just save this and be off. But let’s have a look and see how we can make the lines thinner.

I’m going to choose Filter and this time, Other, and this time we’re looking at Maximum. And we’re just going to set the maximum line width. And so we want this down to something that gives us the lines that we’re looking for. So here I have it set to 5. This is what it was. This is what it is now. If I go a bit smaller the lines are going to get thicker. If I get bigger the lines are going to get thinner to the extent where they actually totally disappear. So you need to find this sweet spot here for your particular image. But if you do want to make the lines that are fairly thick right now to be a little bit finer then you can do that here with this tool. And these are again Filter, Other. Maximum allows you to set it so it’s smaller and minimum allows you to set the width so it’s larger.

I’m Helen Bradley. Thank you for joining me for this video tutorial. Look out for more tutorials on my YouTube channel. Please like and comment on this video if you do like it. And look out for more videos, tips, tricks and techniques on my website at projectwoman.com.

Helen Bradley

Page 3 of 3123