Thursday, April 26th, 2012

Harness the power of Business Information sets in Publisher


Publisher’s Business Information Sets make it easy to populate documents with information about people and businesses. You only need type the text once and you’ll know it is always  correct wherever it happens to be used.

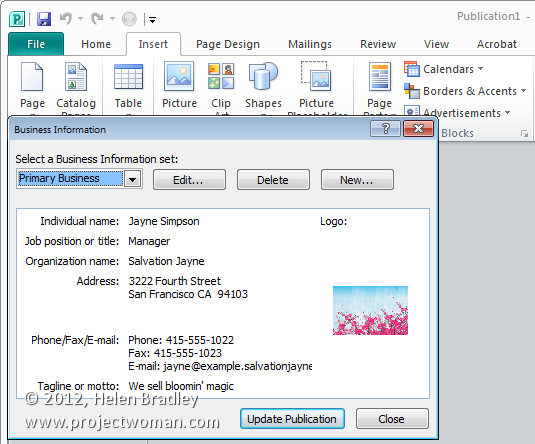
To use these sets, in Microsoft Publisher use File > Info and select the Edit Business Information. Here you can view the information sets that you have available. While they’re called Home/Family, Other Organization, Primary and Secondary Business, you can make them anything you want them to be.
So select an option and click Edit. Enter the information for your business including the person’s name, address and information. Click Add Logo to add a your company logo.
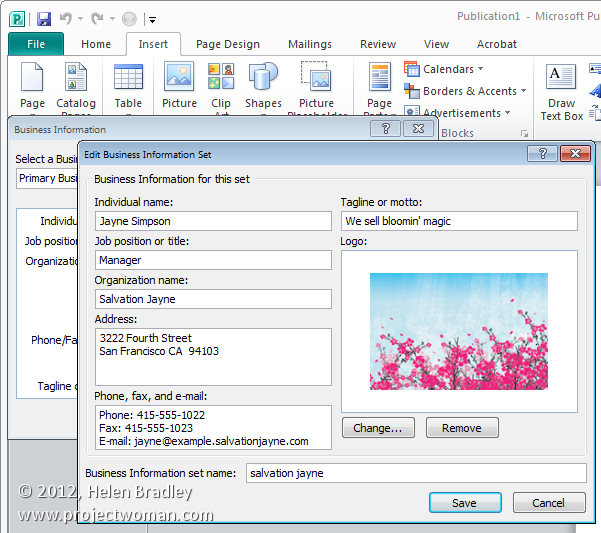
You can also type a new set name in the set name box. By adding to the business information sets details you use frequently, you can use this information in any document later on such as business cards and brochures.

To do this, select the business card template to use and then select the business information set to use with it. You can choose to include your logo or not as circumstances demand. Click Create and the business card will be created for you with all the details already in place.
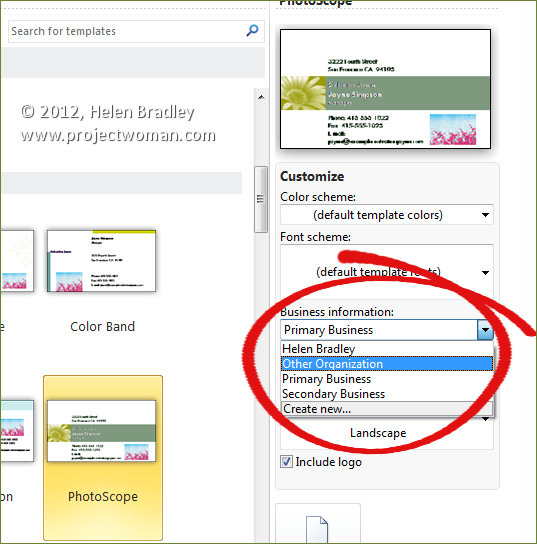
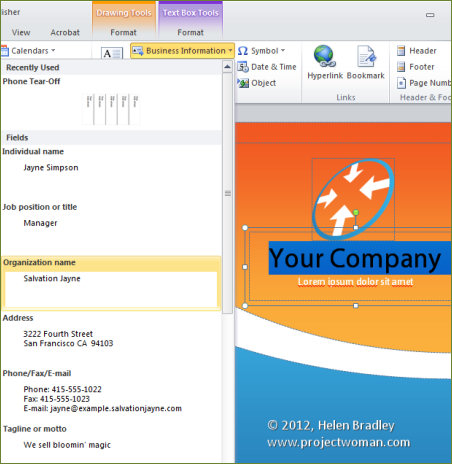
You can also use business information in regular documents by choosing Insert and then from the Business Information dropdown list select the items that you want to use in a document. For example, you can drag and drop telephone information into any document from the business information set.

You can also change the business information in a document. So, if you’ve created a business card and want to do the same thing for another person for whom you have a business information set  created, just choose File > Info > Edit Business Information and select the set to use and click Update Publication. This allows you to quickly change information in documents and create flyers for multiple businesses or business cards from multiple people.

Helen Bradley

Friday, April 20th, 2012

Must know Windows 8 keystrokes

Windows 8 makes a lot of use of keystrokes –  more use than other versions of Windows ever has. Here is a list of handy keystrokes, you won’t use all of them but some are totally awesome for getting around. My fave? This week it is Windows + E! yeah instant access to My Computer – you gotta love it!

Windows key              display the Start menu

Windows + tab           display the task switching panel

Windows + C              reveal Charms

Windows + D              switch to the desktop

Windows + M             switch to the Desktop

Windows + H              Share charm

Windows + I               Settings charm

Windows + K               Devices charm

Windows + L              Lock the screen

Windows + P             shows second monitor options

Windows + Z              display an app’s application bar

Windows + T              Cycle through small images of open apps – press Enter to switch

Windows + Q             Open Metro search charm

Alt + Tab                    Cycle through open apps

Windows + , (comma) Show desktop (temporarily)

Right click an application window                 reveal the application bar

Windows + PrtSc        Capture a picture and save it to the Pictures folder

Windows + Space       change input language and keyboard

Windows + R                          Display the Run dialog

Windows + T                          Cycle through programs on the taskbar

Windows + F                          Find other computers on your network

Windows + E                          Open Windows Explorer and show My Computer

Windows + left arrow             Dock a desktop app to the left of the screen

Windows + right arrow           Dock a desktop app to the right of the screen

Windows + Shift + Up arrow maximize desktop app’s height (width is unchanged)

Windows + Shift + Down arrow        restore/minimize desktop app’s height (width is unchanged)

Windows + 1 (or 2, 3…)         Launch or switch to the application at this position on the taskbar

Windows + Shift + 1 (or 2, 3…)        Launch a new instance of the application at this position on the taskbar

Windows + + (plus)                Magnifier – zoom in

Windows + – (minus)              Magnifier – zoom out

Helen Bradley

Sunday, March 25th, 2012

Use Lightroom Presets in Adobe Camera Raw

If you’re like me, you have some presets that you’ve created in Lightroom that you would like to use in Adobe Camera Raw. Unfortunately the format of the preset files in each program is different so you can’t just install a Lightroom preset in ACR. However you can make an ACR preset from a file that has had that same preset applied to in Lightroom. Here’s how:

Apply the Preset

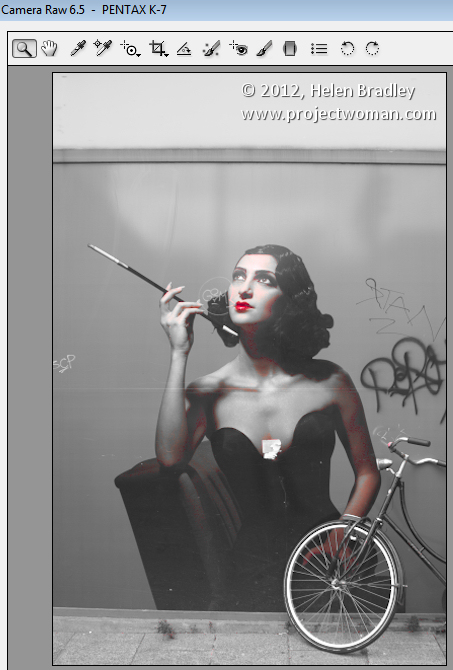
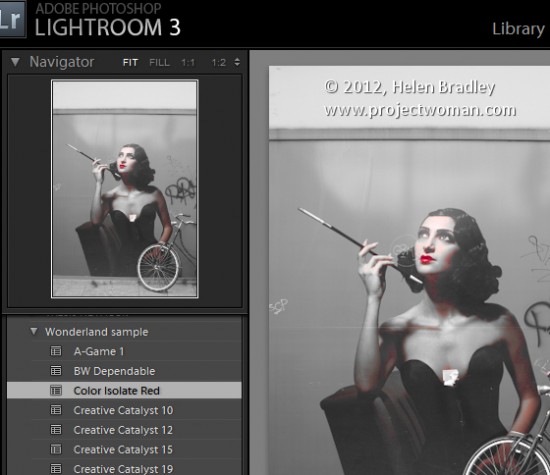
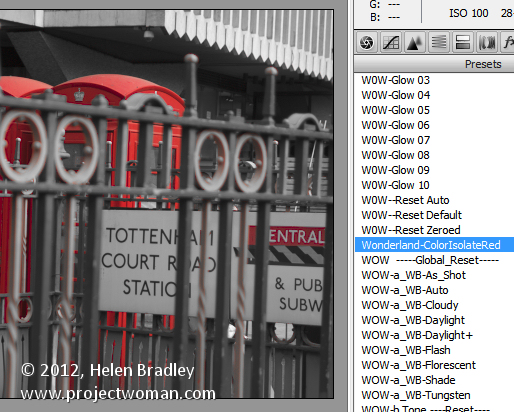
To begin, open an image in the Develop module in Lightroom. Without applying any other changes to the image, apply the Preset that you want to take to ACR. Here I have applied one of the free Wonderland presets from wonderlandpresets.com.

Export the Image

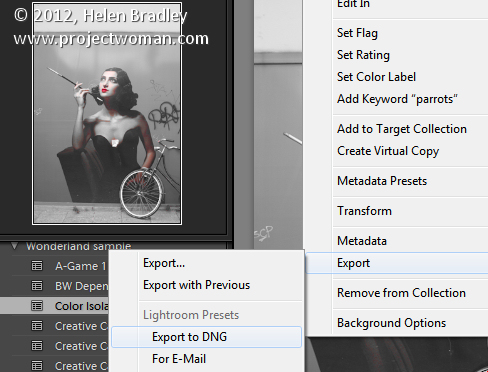
Now export the image as a DNG file so that the changes will be written to the file. To do this, right click the image and choose Export > Export to DNG and export the image to folder of your choice.

Open in ACR

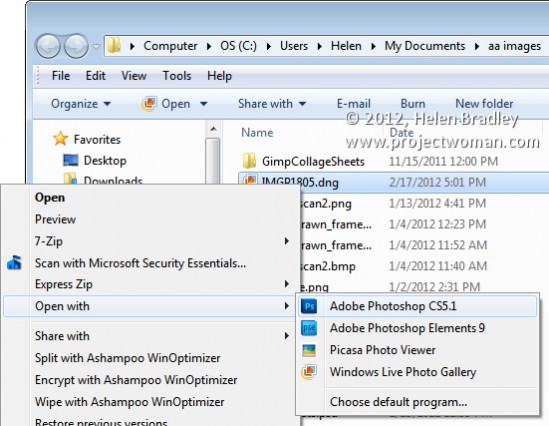
Launch Windows Explorer and locate the image on disk. Right click it and choose Open With > Photoshop CS5. Because it is a DNG file, it will open automatically in ACR.

Create the Preset

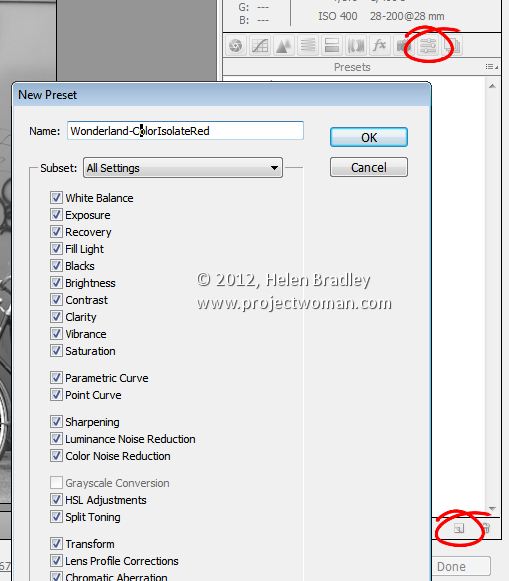
Click the Presets tab and click the Create New Preset option at the foot of the Presets panel. Type a name for your preset and then select the options that you want to include as part of the preset. Type a name for the preset and click Ok.

The preset will now be available from the Presets panel in ACR and will be able to be used to adjust any image.

Features not included

You should note that while most of the Lightroom adjustments that can be stored in a Lightroom Preset can also be saved as an ACR Preset, one exception is any Graduated Filter adjustment.

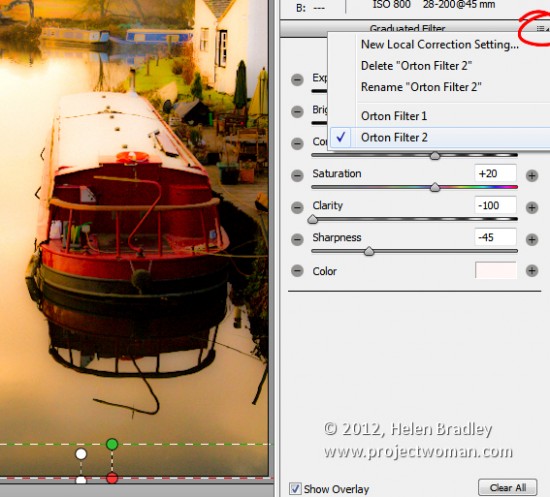
In Lightroom any adjustments you make using the Adjustment Brush cannot be saved in a Lightroom preset and in ACR those made using the Graduated Filter cannot be saved either. You will see the Graduated Filter adjustments that you made in Lightroom in ACR if there are any but you cannot save them in your preset as a Graduated Filter adjustment. What you can do however, is to save the settings for the Graduated Filter but not its placement as a separate setting. To do this, click the Graduated Filter icon in ACR to select the tool then click the Graduated Filter to save the settings for. Click the icon in the top right of the Graduated Filter panel and choose New Local Correction Setting and save it giving it a name.

You can apply this to an image in future using the Graduated Filter tool – just select the setting to use from this menu and drag to create the Graduated Filter for the image. The solution isn’t perfect but it can save you some work as shown here with the two Graduated Filters which are part of my Orton Preset for Lightroom. I can apply the preset then switch to the Graduated Filter and quickly apply the two Graduated Filter adjustments with their individual settings.

Advantages of taking Lightroom presets to ACR

One of the reasons you may want to take presets from Lightroom to ACR using this process is to take advantage of the free presets available for Lightroom. There are lots more of these than there are presets for ACR. If you use ACR as well as Lightroom then having your favorite presets available in both program will be useful.

Helen Bradley

Wednesday, March 21st, 2012

Shoot right at night – Tip #8 – Closed shops

After dark you will find many shops completely blacked out but those which are lit or partially lit offer unique opportunities to photograph empty places.

Without people around to question what you are doing you can spend the time you need to do to find great subjects to capture. Look for different colours of light and repeated objects – here the local laundromat provides a moody subject which is only enhanced by the grain from the high ISO setting used.

Helen Bradley

Friday, March 16th, 2012

Shoot right at night – Tip #7 – Night activity

In busy cities and even in country towns you will find that the activity at night differs from that during the day.

Tankers deliver fuel, people clean areas that aren’t cleaned during the day and they are all great subjects to shoot.

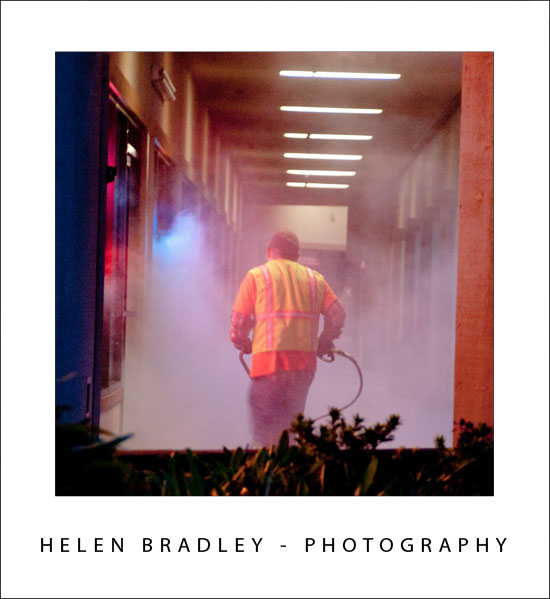
Take the time to search out unusual activities to capture them. Here a cleaner was throwing up a cloud of steam and water and, captured in the night lights of the shops it made for an interesting shot.


Helen Bradley

Tuesday, March 13th, 2012

Shoot right at night – Tip #6 – Early Morning Sun

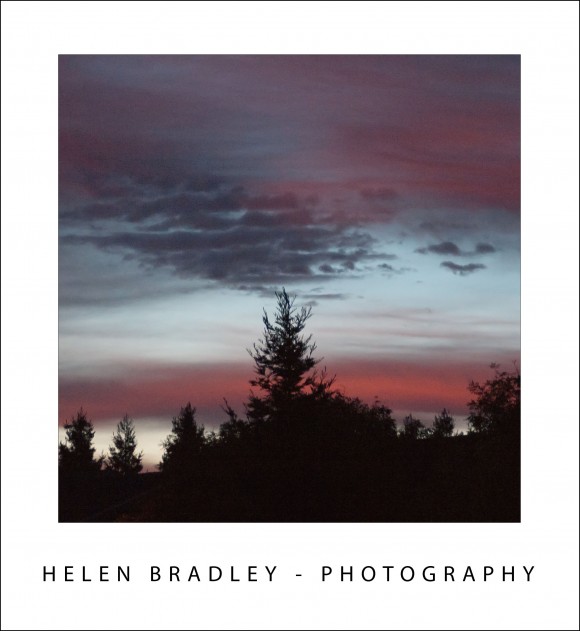
If you’re shooting after sundown or if you are up early in the morning before the sun is up look for drop dead gorgeous skies.

If you can capture the last rays of a dying sun or the first rays in the early morning you’ll get great color and wonderful silhouetting of anything between you and what light there is. Look for interesting trees, buildings and other features to capture as silhouettes.

Use a slow shutter speed, wide aperture or a high ISO (or all three) and be ready to capture the hues as they change from minute to minute across the horizon.

Helen Bradley

Wednesday, March 7th, 2012

Shoot right at night – Tip #5 – Capture movement

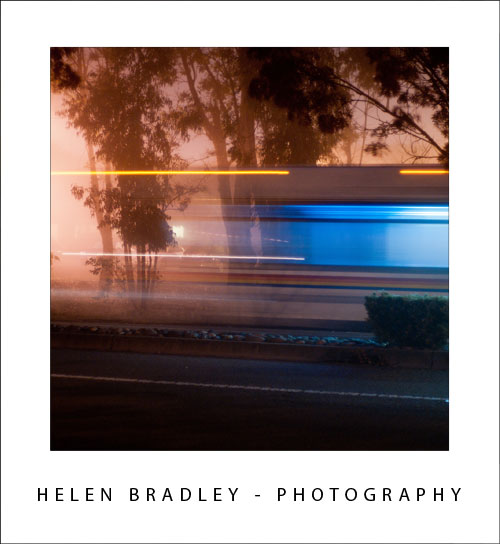
When you’re capturing shots with a slow shutter speed of a half a second or more, look out for things that are moving in an interesting way to capture them.

The tail lights of cars moving away from you look great when they are caught as parallel strips of red light.

You can get a similar effect with cars and other traffic which moves perpendicular to you – in this case you will catch both the light from headlights and tail lights as they move across your path.


Helen Bradley

Friday, March 2nd, 2012

Shoot right at night – Tip #4 – Capture silhouettes

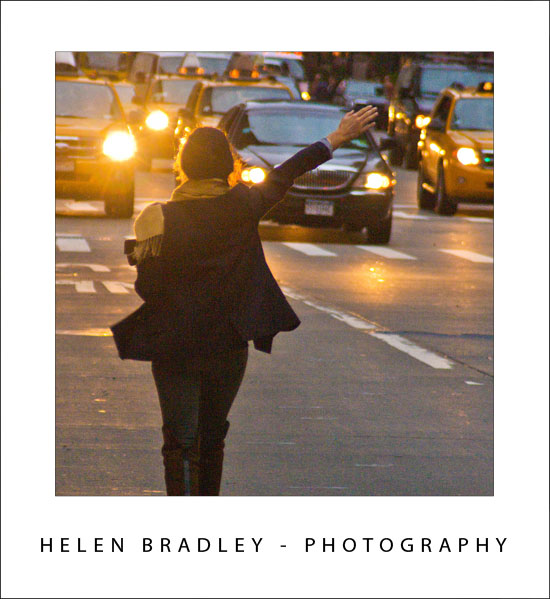
At night, if you’re using what light there is, you need capitalize on it. One option is to look for silhouettes where you capture a subject in front of a light source.

In this image shot in New York after dark on a wet night I used the lights of the oncoming traffic to backlight this woman as she walked down the road trying to hail a cab.

Because she was moving fast I was walking behind her at a similar pace so there was no chance to stop or use a slow speed so this image had the ISO set high to capture what light I had.

Helen Bradley

Tuesday, February 28th, 2012

Shoot right at night – Tip #3 – Set a high ISO

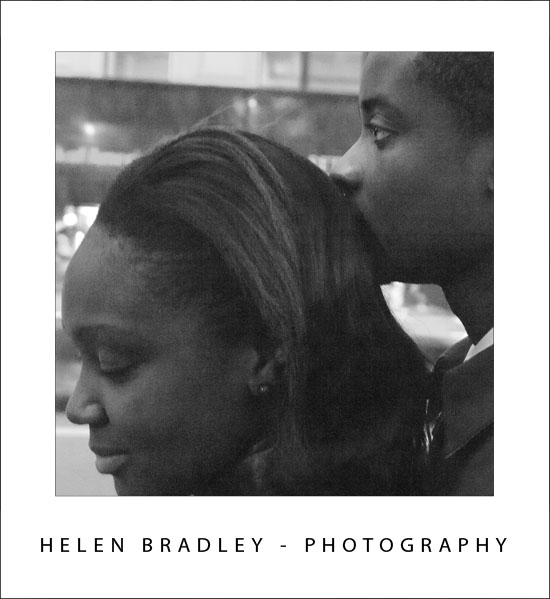
While a flash is handy for taking snapshots of friends, it’s useless when the subject is more than about 10-15 feet away as this is the range of a typical flash. It also makes it impossible to shoot candid images.

So, the best solution to shooting at night is to turn the flash off – before you head out, make sure you know how to disable the camera’s flash so it doesn’t fire.

If your camera lets you do so, set the ISO equivalent to use for capturing the shot, increase this at night to 1600 or more. In the shot above the ISO was 6400, the image is grainy but a flash would have disturbed the couple and that would have spoiled the candid moment.

The shots will be more grainy – like film, shots taken at higher ISO levels are more grainy even when shot digitally. However, grain is not a ‘bad thing’ and night time images can look particularly interesting when the film grain is obvious.

Helen Bradley

Friday, February 3rd, 2012

Winter Photography Tip # 9 – Camera care

Most cameras work just fine in cold weather but their batteries don’t so you’ll treat your camera one way and batteries another.

To avoid condensation affecting your camera it’s best to keep it cold rather than taking it from warm to cold all the time. So, don’t tuck your camera inside your jacket, and if it’s wet use a rainproof covering for it only.

If you get the camera covered in snow just brush or shake it off – don’t rub so it melts into the camera!

On the flip side, a battery’s chemicals will simply not work efficiently if the batteries are cold so tuck them close to your body in an inside jacket pocket until you need them. And expect to consume more batteries in winter as they won’t last as long as they do in warmer months.


Helen Bradley

Page 2 of 41234