

Wednesday, March 21st, 2007
Too cool for school – Office 2007 SmartArt
New to Microsoft Office 2007 PowerPoint, Excel and Word is the SmartArt feature which is one you’re just going to love.
To test it out add a new slide to a PowerPoint presentation, for example, and select the blank layout. From the Insert tab on the Ribbon, select SmartArt and then one of the SmartArt objects.
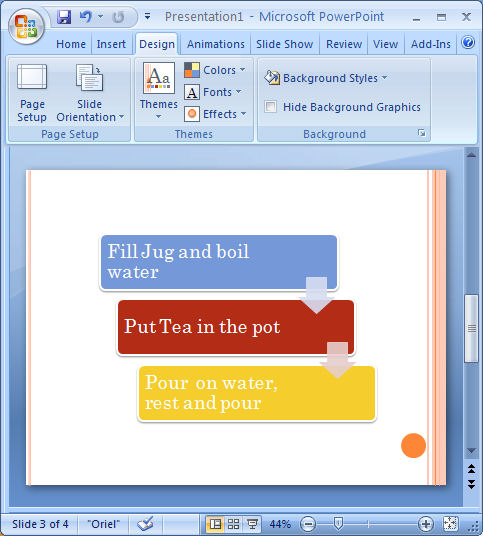
I like the one called Staggered Process which I’ve shown here as it makes a great display for a simple step-by-step process. Select your choice of design and then you’ll see text brackets appear on the screen. Click in them or click the double-pointing arrows at the left of the SmartArt object and type your text in the special dialog.
Once you’ve got your bullet points in – and you can add more than the default three if you need more – you have a simple step-by-step graphic. But – this is only the beginning.
There are lots of different looks for your graphic including beveled edges and 3D effects, and you can choose these from the SmartArt styles dropdown list in front of you. You can also change the colors used in the design which, of course, are based on the current document Theme colors. Change the Design Ttheme and the look of the project changes with it.
It’s about as simple as it’s ever going to be to add great looking step-by-step graphics to a PowerPoint slide. They are, seriously, way cool…
Labels: Excel 2007, Office 2007, PowerPoint 2007, SmartArt, Word 2007
Tuesday, March 20th, 2007
Naming Ranges in Excel
When you’re working with different areas on an Excel worksheet it sometimes helps to name the area or range as Excel calls it.
You might do this so that you can easily select a print area from a number of different printing areas on the worksheet or where you want to move very quickly to a named area which is in an out of the way place on the worksheet.
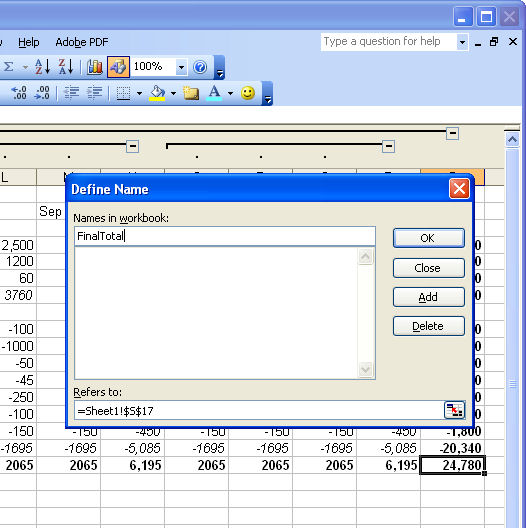
To name a range, select the cell or range of cells to name and choose Insert, Name, Define and give the cell or range a name. You can use whatever name you like, it just must be a single word name with no spaces and it can’t start with a number. When you’re done, click OK.
Now look up to the top left corner of the screen to the left of the formula bar you will see a small Name dropdown list. You can dropdown the list and select the named cell from the list and you will automatically go to it and, if it is a range, it will be automatically selected ready, for example, for printing.
Labels: Excel 2003, named range
Tuesday, March 20th, 2007
Vale BoxOver?
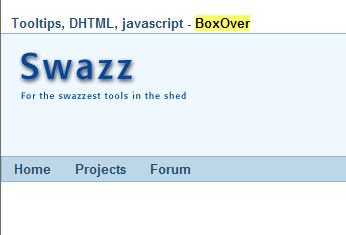
Yesterday morning I was investigating this cool tool, BoxOver. It’s a JavaScript routine for making the most wonderful popup boxes that appear over the contents of your web page.
In what was to become a classic “snooze and you lose” scenario I planned to return later that day to get the code.
Yeah! right. Like the planets were all in some sort of weird cosmic alignment on that one. By nightfall, the site was gone. Seems like the owner probably didn’t pay their domain name registration and it expired – the very day I was planning to download their utility. So, the site is gone and because you could only download the tool from that site, I now can’t have it.
I’m off to check the registration expiry dates on all my sites, this one, http-design, my namesake, helenbradley.com and my ecommerce site backgroundartz.com. It’s a salutary lesson on the importance of making sure you pay your registration fees on time or there are squatters out there who will move in within seconds of the time expiring – there’s no late fee payable, when you’re over time, you’re out.
If anyone knows where BoxOut can be downloaded from, I’d love to hear from you!
In the meantime – check your domain name expiry dates. Mark your calendars and pay up well in advance or the next person who loses years of good will could be you.
<rant ends>
UPDATE: BoxOver is back! Well, sort of.. read on..
Actually, on reflection, I think BoxOver never really left. You see, it comes and goes… it’s there one time you visit and not the next. So, first off, snaffle a copy while you can… it’s the neatest utility around – if it’s there when you visit the site, grab it and don’t think twice!
I think the site probably has a daily download limit and when it exceeds this it closes down and you get a funky portal view which is useless. The solution is to get up really early (or, my preference, stay up really late!) and snag it when a new day begins and the site is up.
Anyway, short answer is – it’s there, you just have to be lucky and if you miss it once, try again later.
Labels: BoxOver, domain name registration, Rant
Monday, March 19th, 2007
Shrink to size Excel Printouts
When you’re working on a very big worksheet in Excel sometimes it happens that when you print it out you get a stray row or column on a single sheet of paper. It’s not only a nuisance but it’s also a waste of paper.
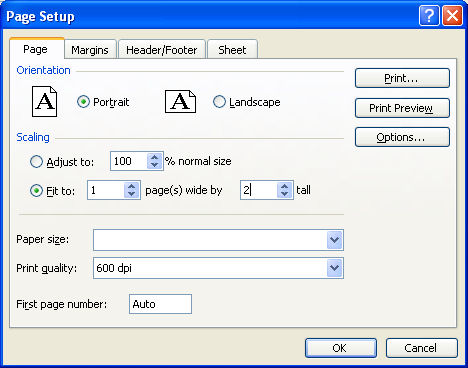
To ensure that this doesn’t happen choose File, Page Setup and click the Page tab. The Fit To option lets you specify the number of pages wide or tall that a worksheet is. Select the measurements that you want to fit, for example fitting to one page wide by one page tall will print everything on a single page.
What if you don’t know both measurements? Don’t worry, if you know you want it one page wide but don’t know how tall that will be, select Fit to 1 Page Wide and leave the Tall box empty – that means delete anything that’s in it.
This works the same if you know how tall you want it to be but not how wide. It’s a smart way of saving trees and frustration and it looks much neater than handing someone something with a skerrick of info on the last page.
Labels: Excel 2003, print to fit, shrink
Sunday, March 18th, 2007
PowerPoint 2007 Torn Photo Edges
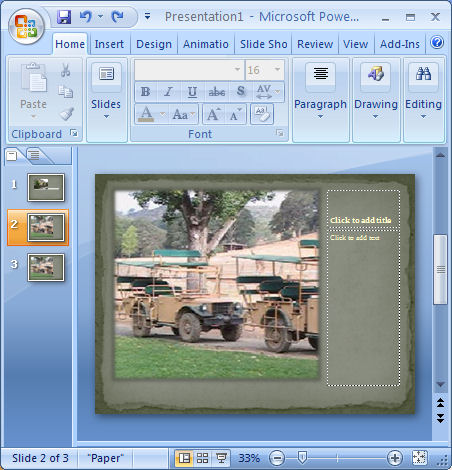
One of the cool things about PowerPoint 2007 is the way that you can create fab photo edges with no work at all.
To see this at work add a new slide using the Home tab, click New Slide and then from the Layout list choose Picture with Caption. Now click on the icon in the middle of the slide to add your picture.
Go to the Design tab and choose one of the designs to use for your slide. You’ll see that designs like Opulent create a stacked photo effect, Paper creates a rough paper edge effect, Solstice creates an effect where the photo looks adhered with sticky tape (this is soooo cool!), Concourse has an interesting shadowed edge effect, Flow tips the image on an angle, and Foundry rounds the opposing corners.
From here you can click the picture and then click the Picture Tools, Format tab to add other picture effects to your image such as a reflection or soft edges.
There’s really an almost unlimited number of variations available. I dare you to stop at just using one!
Labels: images, PowerPoint 2007, slide, sticky tape, torn edges
Friday, March 16th, 2007
Axing Word Smart Quotes
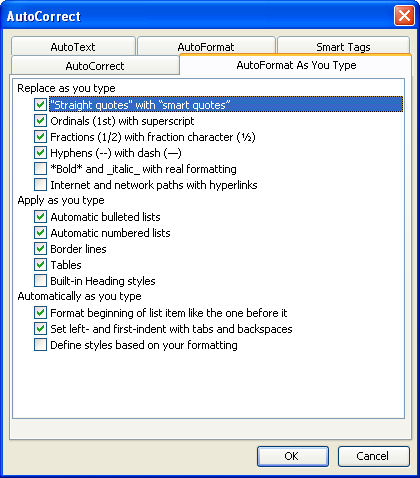
I like Word smart quotes most of the time but sometimes, like when I’m preparing an email or some code, they’re not needed and can make a mess of the project.
You can, quite easily, stop this happening if you choose Tools, AutoCorrect Options, AutoFormat as you Type tab and disable the checkbox for “Straight quotes” with “smart quotes” and click Ok. Now you’ll have straight quotes in your document.
Reverse the process to get them back.
This simple macro, attached to a toolbar button can do the toggling work for you (just make sure you put everything between the Sub and End statements appears on one line:
Sub changeQuotes()
Options.AutoFormatAsYouTypeReplaceQuotes = Not (Options.AutoFormatAsYouTypeReplaceQuotes)
End Sub
Labels: Microsoft Word, Smart Quotes, Straight Quotes
Thursday, March 15th, 2007
Inserting Images in Word
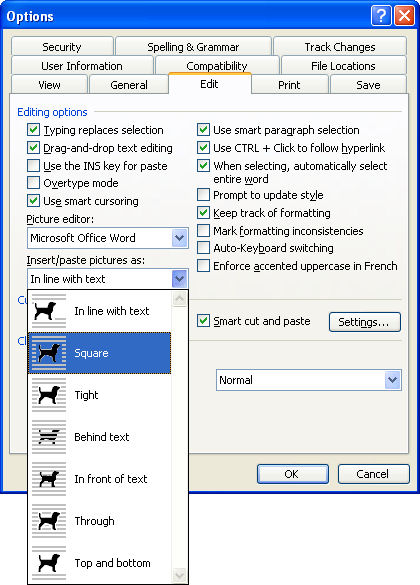
In recent implementations of Word they broke the image insertion tool. When you insert an image it comes in as “Inline with text” which means it won’t move, it breaks up lines and, in general, looks awful.
Luckily it’s fixable and permanently so. To do this, choose Tools, Options, Edit tab. From the Insert/Paste pictures as dropdown list choose something like Square or In front of Text (in fact anything other than In line with text). Click Ok and the change will be permanent. Although you can, of course, always change the setting for any inserted image if you really do want to put it inline with text by selecting the option from the Picture toolbar on an image by image basis. My bet is you won’t ever do it though!
Labels: image, insert, Microsoft Word
Wednesday, March 14th, 2007
PowerPoint Guides
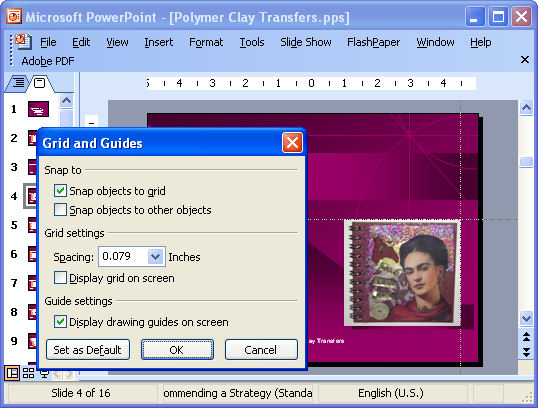
If you’re a perfectionist like I am (on a good day, anyway), you will want everthing lined up neatly on your PowerPoint slides. To do this, use Drawing Guides. To do this, choose View, Grid and Guides and enable the Display Drawing Guides on Screen checkbox.
You’ll see two cross hatch grid lines. To move them simply hold your mouse over them and move one. To create a new guide, hold the Control key as you drag on an existing guide. To remove a guide drag it off the slide.
You can now neatly line everything up that needs to be lined up.
Labels: guides, PowerPoint
Tuesday, March 13th, 2007
Smaller spaces on PowerPoint Slides
Sometimes there is just too much space between the edge of the slide and the bullet character that PowerPoint uses.
However, luckily, there is a way to fix the problem and to make the space smaller. Start by displaying the ruler by choosign View, Ruler. Then select the text to alter and, on the ruler you’ll see the marker that controls the positioning of the bullet. Drag it with your mouse, if you need to do this in small amounts, hold Control as you do it.
Which is a bit strange really, because in Word, for example, holding Alt is how you get to fine tune spacing.. hmm! well, if nothing else, these crazy mixed up keystrokes keep some of us in business.
Labels: PowerPoint, spacing
Monday, March 12th, 2007
Joining data in Access queries
When your Access query results need to look neat and tidy, you’ll often want to join related pieces of data together that actually appear in separate fields of the file. For example if you have a list of first names and last names in separate fields (as you should), you can still view them in a single column in your query results.
To do this, join the data in the query data sheet, for example this will join the data from the FirstName and LastName fields and display it as a proper name in the query results:
FirstName & ” ” & LastName
Labels: Access, Query results
Sunday, March 11th, 2007
Keeping watch in Excel
Big worksheets are a bit of a nuisance to work with. I typically find myself working in one area but wanting to see what is happening in another.
To do this, I set up a watch value that tracks the figure I’m most interested in and which is off the screen. To do this, right click the cell you’re interested in seeing and choose Watch to set the cell as one to watch. Now, regardless of where you are in your worksheet, you can see the value in the ‘watched’ cell in the Watch window – double clicking its title bar anchors it on the screen.
In earlier versions of Excel you could create your own watch window using a text box. Draw it using the Text Box button on the Drawing toolbar, click inside it, press F2 and type the cell to watch, eg =Z100 – simple and very effective.
Labels: Excel 2003, watch window
Saturday, March 10th, 2007
Color code Outlook 2003 appointments
I’m a visual person so I like to see things and I use the Outlook calendar to plan my day. But some appointments are really important and some I can miss if I need to.
So, I like to color code my appointments so I know at a glance what has to be done. I show personal appointments as one colour, online seminars and things that would be nice to attend but which I don’t have to attend as another color and stuff I have to do as yet another color.
To do this, open the Calendar and select the Calendar Coloring button on the Standard toolbar. Choose Edit Labels and, opposite each color make sure the descriptions for the types of appointments match those you want to use and, if not, change them (you only need to do this step once).
Then, to color code an appointment click the Label drop-down menu and choose the color to use – simple but very effective!
Labels: appointment, color code, Outlook 2003
Friday, March 9th, 2007
PowerPoint preview and edit
I’m one of those people who love to do multiple things at one time. I can listen to a movie, work and have the washer and dryer chugging away in the background while I’m planning a weekend art project.
That’s why I love today’s tip. It lets you preview a PowerPoint presentation at the same time as you edit it.
Simply, choose Slide Show and while clicking View Show, hold the Control key. You’ll see your slide show on the screen in the top left corner and PowerPoint visible in the remaining area. You can work on the show and preview it (and your changes) the same time.. neat idea?
Labels: PowerPoint, view show
Friday, March 9th, 2007
Cool moves in Publisher
Here are some of my favorite tips for getting things lined up in Publisher 2003:
To move a number of objects together, select them and choose Arrange, Group from the menus or click the Group button which appears when the objects are selected. You can now move and size the objects all at once. Choose Arrange, Ungroup to ungroup them again.
The Nudge and Measurement menus help you move objects in small increments. Choose Arrange, Nudge and tear off the Nudge menu to have access to the buttons. The measurement toolbar (View, Toolbars, Measurement) helps you position objects with pinpoint accuracy.
To create a ruler guide, position your mouse over the horizontal or vertical ruler bar and, when the mouse changes shape, drag the ruler guide into position. To display rulers, choose View, Rulers. Use these guides as an aid for lining up objects on your page. Right click the guide to access other options.
Labels: grouping, guides, Microsoft Publisher
Saturday, March 17th, 2007
Any shape Excel Comments
I like to use comments in my Excel worksheets but sometimes the square yellow boxes just don’t do it for me.
Luckily with a little bit of imagination and skill, I can change the shape of my comment boxes.
Here’s how to do it yourself:
Add a comment to your worksheet and click the cell that contains the comment, right-click and choose Edit Comment and then click on the border of the comment so you have it selected.
Now, from the Drawing toolbar click the Draw button and choose the Change AutoShape option in the menu. You can select from all sorts of shapes including stars and banners and flowchart symbols.
When you’re done just click outside the comment and the change will be created for you. Neat stuff? I think so.
For more tips and tricks and helpful Office columns, visit Projectwoman.com
Helen Bradley
Labels: comments, Excel 2003, shapes
posted by Helen Bradley @ 4:36 pm0 Comments - links to this post