Saturday, April 20th, 2013

Spring photo inspiration and how to capture great flower photos

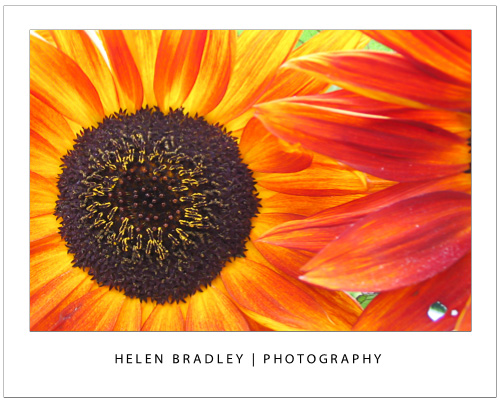
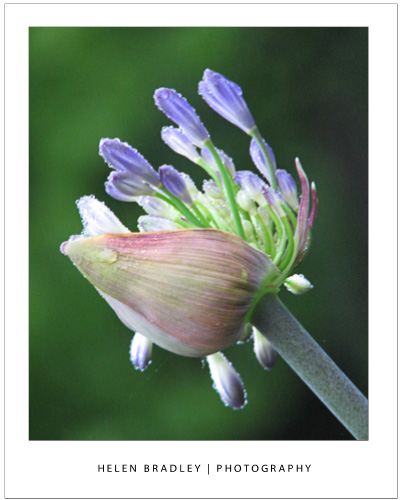
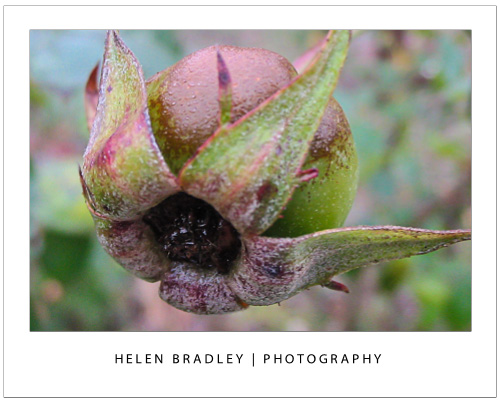
Capture the magic of spring with great flower photos

There’s simply no better time to get out and take photographs than in Spring. The weather is great, the colors are spectacular and the flowers are at their peak. Flowers are great to photograph – they don’t get fractious and they don’t blink so they’re good subjects to practice your skills on. Here, I’ll introduce some techniques to try that will ensure you get great photos.

Get up close and personal
When you see a wonderful flower to photograph, move very close so the flower fills the camera’s viewfinder or its LCD screen. When you are this close, the camera won’t focus properly unless you set it to Macro mode – this is indicated by the flower icon and it’s usually easy to find. If you can’t see it, check your camera’s manual to learn how to set this mode. With macro mode set, you should see the flower in focus and you can take the shot.

Macro mode not only ensures the flower will look crisp and in focus but it also has the effect of blurring out the background detail. In macro mode your camera shoots with a short depth of field so only objects on the same plane as the flower should be in focus, things closer to you or further away than the flower won’t be in focus. This is an effect that photographers try to achieve. It is, however, critical that your camera focuses on the flower.

To check the camera is focusing correctly press the shutter release half down and check the LCD screen. If the object is out of focus, let go the shutter release, move the camera so the flower is centred in the screen and press half down again. When the focus is correct, continue to hold the button half down as you move the camera slightly to compose the shot. Then continue to press the button to take the shot.

Even though the background in the shot will be blurred in macro mode, you should still check that any background that is visible is not distracting. If it will ruin your shot, move and try shooting from higher up or lower down so the background isn’t as visible.

Apply the rule of thirds
Apply the Rule of thirds to your flower photography. This rule says you should divide the area being photographed into a grid like a tic tac toe board. Place something of interest along one of the horizontal or vertical lines or where the lines intersect. The result is that you’re not centering everything – and your photo will look much better.

Vary your position
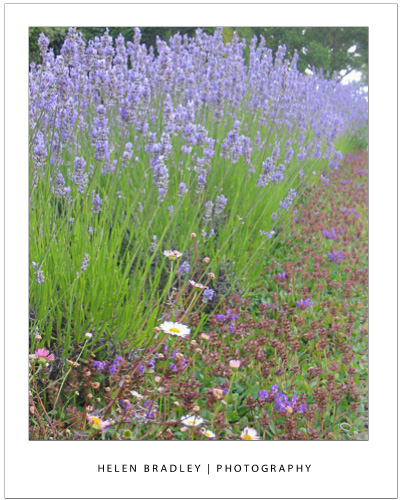
Don’t take all your photos close up and, instead, look out for opportunities to photograph masses of flowers. If you position yourself carefully you can make a bank of flowers look as if they go on forever!

Include the kids
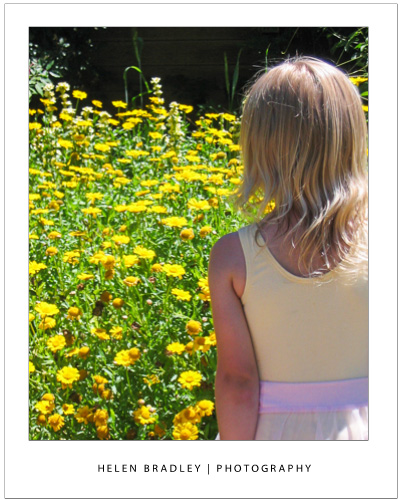
Occasionally, include children or other people in your flower photos for some added interest.

Shoot side on and from underneath
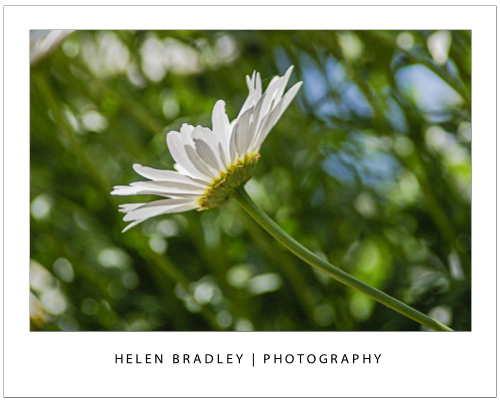
Vary how you shoot your flowers too. While it is typical to take photos of a flower looking into it, you don’t have to take them this way. Shooting from the side will show the shape of the flower and, in some cases, this is what makes them compelling subjects.

Unusual photos can also be taken shooting blind from under the flower. To do this, you’ll benefit from having a polarizing lens on your camera particularly if you’re photographing on a sunny day. This will cut a lot of the glare and give you deep saturated colors. Hold the camera at ground level under the flower and shoot up through the flower to the sky avoiding shooting direct into the sun. The results you’ll get will be of the “hit or miss” variety – because you can’t see what you’re shooting you’ll have to try a few times until you get results you like. However, you’ll get a totally new perspective on things and you just might be surprised at how interesting the photos are.

Walk and snap
If you’re lucky enough to live in a rural area, take a walk along your favorite towpath or lane and capture the wild flowers that are so often overlooked as subjects for photography. If you live in a city – visit a local park or photograph the colorful display of a local flower vendor. When you’re shooting up close, one flower is all you need to get a wonderful shot.

Helen Bradley

Tuesday, October 30th, 2012

7 Camera Settings for Capturing Better Photos

Whether you are using a Point and Shoot or a DSLR camera here are seven camera settings that will help you capture better photos:

Tip 1 – Adjust for light

Most digital cameras, in particular SLRs, let you select ISO film equivalencies. Choose 100 – 200 sensitivity for photographing in bright light conditions and use 400 – 800 when there is less light.  In very poor light you can capture at 3200 – 6400 or higher but you will find that, as a result, there will be more film grain visible in the final image a a result.

To capture an image like this at night you should have an ISO setting of at least 800 -1600 or higher and a tripod to steady the camera.

Tip 2 – Choose your mode

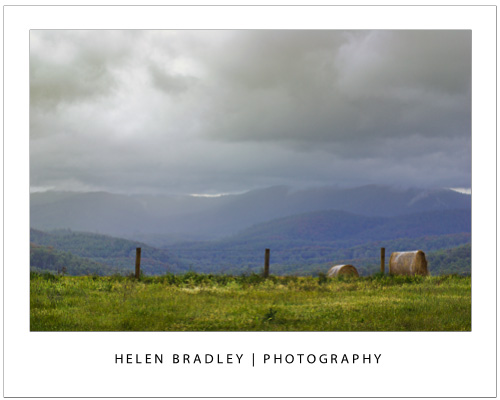
Most cameras, in particular point and shoot cameras have settings for portrait, landscape, night shooting, sports, etc. Choose the correct mode for the type of conditions and the camera will automatically configure the ideal settings to ensure the best shots in the available light conditions.

For an image like this choose Landscape mode so it is all in focus.

Tip 3 – Depth of field

Use your camera’s Aperture Priority setting and set the aperture to a small f stop such as 2.8 to capture photographs with an interesting depth of field. Focus the camera on the object to appear in focus and, when you do, objects in front and behind this object will appear pleasingly out of focus.

Here I focused on the girl in front with a very small f stop and she is in focus – the girl facing us is not.

Tip 4 – Axe the digital zoom

Of the two types of digital camera zoom, which you will find in both point and shoot cameras and camera phones only Optical Zoom is a true zoom . If your camera offers digital zoom it is best to disable it or avoid using it. Digital zoom merely increases the size of the image captured and crops away the area not required. Optical zoom actually zooms into the scene to capture it at full size.


Tip 5 – Adjust exposure

Avoid over or under exposed photos using your camera’s exposure compensation settings. These can usually be adjusted to somewhere between -2 to +2EV. To lighten a shot use + values and to darken one, use – values.

Here is the same Boston building captured at -2, 0 and +2 exposure – the one on the right is the better exposed shot.
Tip 6 – Set the correct White balance

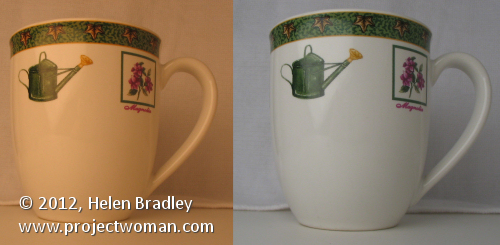
Different light sources throw different color casts onto your photos. For instance, inside lighting such as florescent and tungsten globes will throw blue/green or orange tints onto your image. When shooting indoors without a flash, set the white balance mode to match the light source, to remove any undesirable color cast.

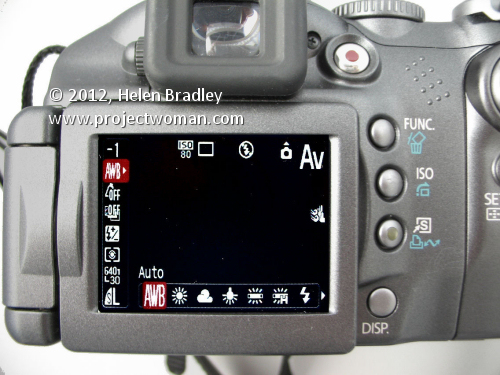
This camera is set to an ISO of 80 (suitable for a very bright day) and AWB – Auto White Balance – this  means the camera will adjust the white balance – not good for indoor shooting but should be fine out of doors in full sun.


The image on the left was shot in tungsten light with no white balance adjustment. The one on the right was shot in the same position but with white balance set to tungsten light – the color is much improved.


Tip 7 – Set the Flash

Use your flash when capturing portraits on a very bright day. While it may seem counter productive, the flash will light your subject’s face and avoid the deep shadows that the overhead sun will cast on their face.

On the left the little girl is captured with no flash and over head sun. On the right I fired the flash and her face and clothes are more evenly lit.


Helen Bradley

Wednesday, October 24th, 2012

5 Quick Tips to Improve your Photography Today!

If you want to add a quick boost to your photos, follow these five tips to take better photos today… and everyday!

Tip 1 – Get close to your subject

The single simplest way to improve your photographs is to move physically closer to what you are photographing. If you can’t get physically closer then zoom in close using your camera’s zoom.

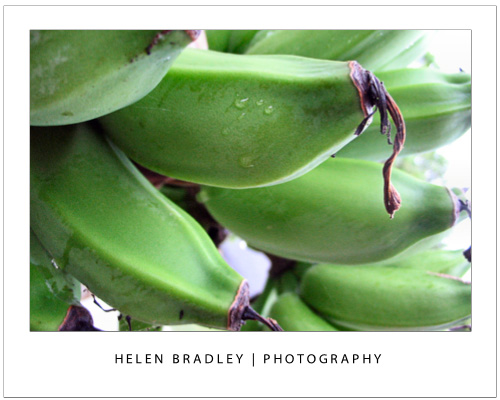
This image was captured from the verandah of a house in the tropics so it was possible to walk up very close to the clump of bananas on the palm.


Tip 2 – Capture Close ups with Macro

When shooting an object close up, set your camera to its Macro setting which is indicated by a small flower – you can set it using either a setting on the camera itself or from inside its menus. Zoom all the way back out (macro and zoom don’t mix) and check that the camera is able to focus on what you’re shooting – if not, move further back a little and try again. Most cameras can capture shots using macro mode as close as a few inches from the object.

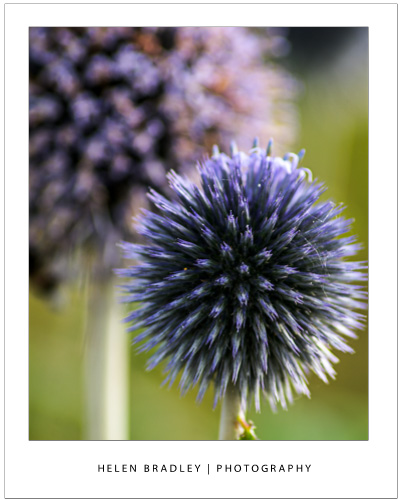
This flower was captured with a macro setting – one side benefit of this is that the background is thrown out of focus showing an attractive shallow depth of field.

Tip 3 – Follow the Rule of thirds

The rule of thirds is a tool for creating a dynamic composition for your image. To apply it, draw an imaginary tic-tack-toe board over the scene you see in the  camera’s LCD screen or the viewfinder before you take the shot. Position the subject of the image along a horizontal a vertical line or at the  intersection of the lines. This ensures, for example, that the  horizon appears across the top or bottom third of an image and never right in the middle.

In this image the out of focus wall in the foreground is along the bottom line of the imaginary tic-tac-toe board.

Tip 4 – Capture from an Unusual Angle

Look for different angles to shoot from. Take a portrait  from a vantage point high above the person and look for different angles when photographing classic buildings so you  capture photographs that aren’t the same as everyone else’s.

In this image the camera was positioned under the flower and facing the sky and the translucency of the flower shows beautifully.

Tip 5 – Respect the “no flash” zone

The effective radius of your camera’s flash is around 9-12 feet so it won’t work in a sporting stadium at night. Instead use a long exposure time and mount the camera to a tripod.

In the image below the short radius of the flash has lit the statue which is close to the camera. A long exposure has captured the light on the structure behind. Read this post to discover how setting a curtain flash lets you combine both flash and long exposures.


Helen Bradley

Sunday, February 19th, 2012

DIY Excel functions

With a little bit of coding experience it is possible to create your own functions in Excel 2010 and earlier.

In Excel 2010, make sure the Developer toolbar is visible – if it is not, follow this post to make it so.

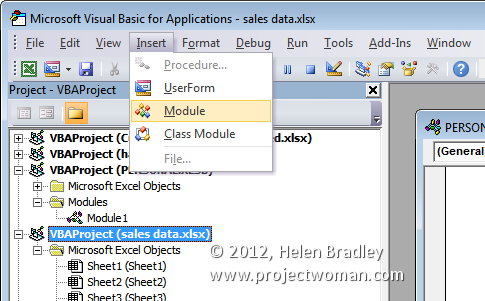
Now choose Developer tab and click the Visual Basic button. In the Project – VBAProject pane, select the current file and choose Insert > Module.


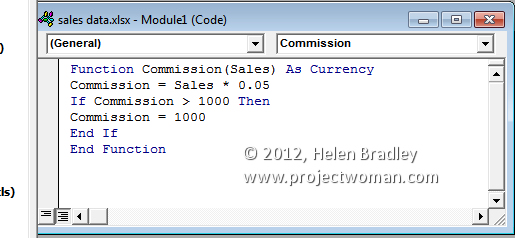
Type this function into the dialog and then close the VB editor and return to your worksheet:

Function Commission(Sales) As Currency
Commission = Sales * 0.05
If Commission > 1000 Then
Commission = 1000
End If
End Function


To test your function type this formula into a worksheet:
=COMMISSION(20000)

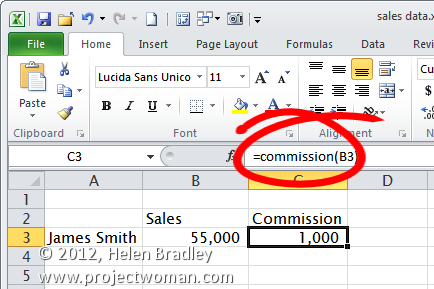
or as shown here:

=COMMISSION(B3)

The function calculates commission at 5% of the amount of sales. If the 5% value is more than $1,000 then the commission is pegged at this amount – to check this, test the function with a very large number. Functions created this way are only able to be used in the current workbook.

Helen Bradley

Wednesday, January 20th, 2010

Better photos tip #6 – Depth of field

This image shows a shallow depth of field – the statue is in focus but everything else is nicely blurred.

There is a benefit you get when you use the macro setting on your camera and that is that when you use it your camera generally captures the image using a very small depth of field.

Depth of field is the area in focus around and in front of and behind the subject of the image. When you have a large depth of field, everything is in focus and where the depth of field is small, only a very small portion of the image is in focus.

Shooting with a small depth of field requires some skill because you have to make sure that the subject itself is in sharp focus – so that the rest of the image is not.

Check the LCD screen or viewfinder to ensure that the subject looks crisp and in focus before shooting. When you have taken the shot, check the image and zoom in to it and make sure the subject looks sharp – the LCD screen preview at the regular size won’t show clearly enough if you have the subject sharp enough.

Depth of field will be a new concept if you’ve only used inexpensive film cameras in the past. Automatic film cameras shoot with a very wide depth of field so that everything in the photograph is in focus. In the days of film, only SLRs were capable of capturing images with a small depth of field.

Digital cameras changed that and many point and shoot cameras can capture images with smaller depths of field if you know how. The secret is in using the camera’s manual controls to set the aperture manually rather than leaving the camera to make the choice. This same option is available with digital SLRs and the results, because of the lenses you use, are generally better with a digital SLR.

For a small depth of field, adjust the aperture to a value such as f2.8 or f3.6 so it is very wide and so the camera takes in a lot of light. To get a large depth of field so everything in the image is in focus, use an aperture setting of f8 or f16 for example. This setting lets in less light so the shutter speed will be much slower than when shooting with an aperture value of f2.8 for example.

Helen Bradley

Saturday, January 16th, 2010

Better Photos Tip #5 – Use Macro

Use your camera’s macro setting to shoot flowers and other objects up close.

When you are shooting within a few inches (or centimetres) of your subject your digital camera will make a poor job of focusing on the subject unless you use its macro setting.

Macro is indicated by a small flower icon on a dial on your camera or configurable within its menu system.

The macro setting ensures the camera will focus on an object which is only a few inches or centimetres from the camera. Use this setting when shooting a close up of a flower or an insect in the outdoors or when capturing detail indoors like objects on your desk.

If you’re using a digital SLR you won’t generally find a macro setting on your camera and the lens that it came with probably won’t focus well enough to get good close up shots.

Instead, consider investing in a telephoto zoom lens with a macro setting so you not only get a good telephoto lens but it doubles as a macro lens too.

One benefit of this setup is that you can stand back from your subject and still get in very close to the subject so you don’t scare small insects.

Helen Bradley

Wednesday, May 6th, 2009

What cell is that? Identifying table cells in Word

When you’re working with Word and doing math in your tables, you need to know the name of each table cell. In a largish table it can be difficult to keep track of everything.

Back in the days of Word 97 a macro shipped with Word that would tell you the name or cell reference of a given table cell. Here’s how to take a step back in time and get that macro, install and use it, with later versions of Word:


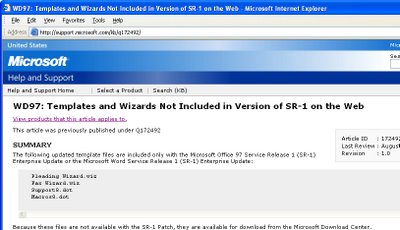
Visit http://support.microsoft.com/kb/q172492/  http://download.microsoft.com/download/word97win/addin/1.0/W9XNT4/EN-US/Wdtlupd.exe and download the file Wdtlupd.exe which is referred to on this page. This is a self-extracting zip file which includes various documents, the one we’re using is not version specific. Run this file and select a location to save the extracted files into.


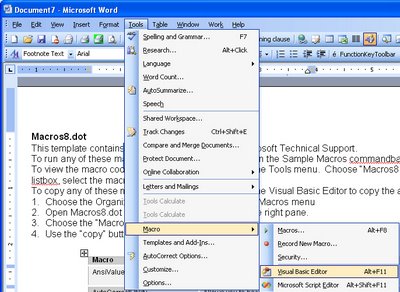
Open the folder containing the extracted files and double click the file macros8.dot to open it in your version of Word. If prompted to do so, click the Enable Macros button and the file will open automatically in Word. Now choose Tools, Macros, Visual Basic Editor if you are using Word 2003 or earlier. In Word 2007, make sure the Developer tab is visible (Office button > Word Options > Popular > Show Developer tab in the Ribbon). Choose Developer tab > Visual Basic.


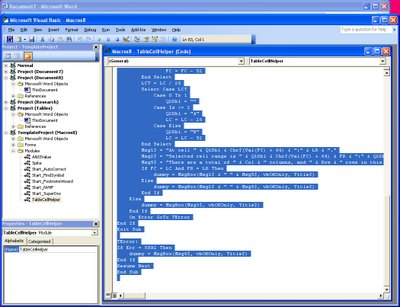
Locate the Macros8.dot file in the Project list on the left of the screen and click to open its Modules collection. Locate the module called TableCellHelper and double click it open the code window. Select the code and copy it by choosing Edit, Copy.


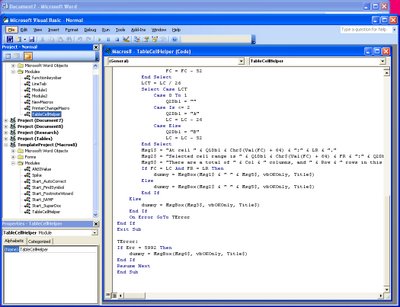
Locate the file Normal in the Project collection and click its Modules collection. Choose Insert, Module to add a new module, double click to open this new module and choose Edit, Paste to paste the copied code into the module. In the Properties area (choose View, Properties Window to display this if needed), alter the module name to TableCellHelper and, when you’re done, close the Visual Basic editor and close the file created using Macros8.dot.


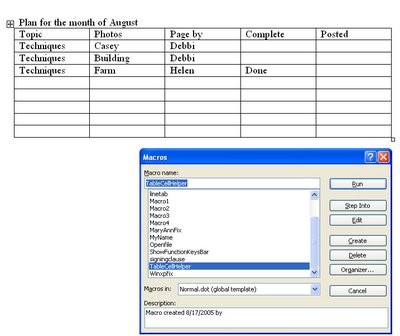
In Word 2003 and earlier, run the macro by clicking somewhere inside a table and choose Tools > Macro > Macros from the Macros in list choose Normal.dot and locate and run the macro called TableCellHelper. In Word 2007 click the Developer tab > Macros and from the Macros in list choose Normal.dotm and locate and run the macro called TableCellHelper. The macro will report the cell address and the total number of rows and columns in the table.


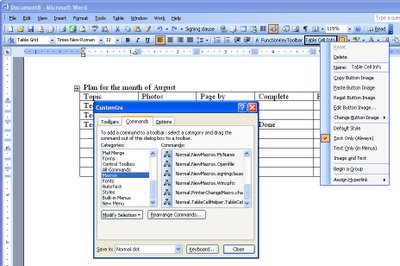
If you’d use this macro repeatedly, add it as a button to your Word 2003 (and earlier), toolbar by right clicking a toolbar and choose Customize. Click the Commands tab, select Macros from the Categories list and locate and drag the macro TableCellHelper on to the toolbar. Right click the new button and edit the name so it is shorter and more helpful. Close the Customize dialog.

  • Updated 4 Oct 2017 to list a new download site for the file.

Monday, March 5th, 2007

Autonumbering documents in Word

Word does not contain any option for automatically numbering a series of documents with a consecutive number. The solution is to create a macro to do the work for you. Start with a template that has a macro that runs when ever the template is used for a new document. The macro should read a number stored in a file on your drive, add it to your document and then, to prepare the number for the next time it’s required, the number should be incremented by one and be written back into the file.

To create the solution, create a new document (or open an existing one to use as a template) and click where you want the sequential number to appear, and choose Insert, Bookmark, type docNum in the Bookmark name area and click Add.

Save this file as a template by choosing File, Save As, from the Files as type list choose Document Template (*.dot), give the file a name and click Save. With the file still open, choose Tools, Macro, Macros and type the name of the macro docNum and, from the Macros In list choose the template file name for the file you just saved and choose Create.

Type this macro as shown, the sub and end sub lines should be there already:

Sub docNum()
Dim MyString, docNumber
FileToOpen = “c:\windows\docNumfile.txt”
Open FileToOpen For Input As #1
Input #1, docNumber
Close #1 ‘ Close file
ActiveDocument.Bookmarks(“docNum”).Select
Selection.InsertAfter Text:=docNumber
docNumber = docNumber + 1
Open FileToOpen For Output As #1
Write #1, docNumber
Close #1 ‘ Close file.
End Sub

Now choose File, Close and Return to Microsoft Word. With the template on the screen, choose File, Close and answer Yes when prompted to save your changes.

Now open Notepad and type a number 4 or 5 numbers less than the number of the first quote you want to use. So, if you want to start numbering at 200, type 195 so you have a few numbers to use to test the process. Choose File, Save As and save the file as a text file, calling it docNumfile.txt and save it to this folder: C:\windows. Close Notepad

To test the process, choose File, New, choose the template file and click OK. Now run the macro by choosing Tools, Macro, Macros, docnumb, Run. If you have everything right the document number will be inserted in the document.

When this is working fine, alter the macro so this process of inserting the document number happens automatically whenever you create a new document based on this template. To do this, choose Tools, Macro, Macros, click on docnumb and click Edit. Change this macro’s procedure name by altering this line of code:

Sub docnumb()

to read

Sub AutoNew()

Choose File, Close and Return to Microsoft Word. With the template on the screen, choose File, Close. Say No to saving your changes to this file but answer Yes to save the changes to your template file.

Now test again by creating a new file using File, New, choose your template and click OK. The document number should be added automatically to the new document.

If, in the process of testing you find you go past your starting document number, open Notepad and open the file docnumfile.txt, type a new starting number and save it again.

Helen Bradley

Sunday, February 18th, 2007

Autonumber a series of Word documents

Word does not contain any option for automatically numbering a series of documents with a consecutive number – the type of thing you might want to do if you are using Word to create invoices or numbered purchase orders. The solution is to create a macro to do the work for you.

Start with a template that has a macro that runs when ever the template is used for a new document. The macro should read a number stored in a file on your drive, add it to your document and then, to prepare the number for the next time it’s required, the number should be incremented by one and be written back into the file.

To create the solution, create a new document (or open an existing one to use as a template) and click where you want the sequential number to appear, and choose Insert, Bookmark, type docNum in the Bookmark name area and click Add.

Save this file as a template by choosing File, Save As, from the Files as type list choose Document Template (*.dot), give the file a name and click Save. With the file still open, choose Tools, Macro, Macros and type the name of the macro docNum and, from the Macros In list choose the template file name for the file you just saved and choose Create.

Type this macro as shown, the sub and end sub lines should be there already:

Sub docNum()
Dim MyString, docNumber
FileToOpen = “c:\windows\docNumfile.txt”
Open FileToOpen For Input As #1
Input #1, docNumber
Close #1 ‘ Close file
ActiveDocument.Bookmarks(“docNum”).Select
Selection.InsertAfter Text:=docNumber
docNumber = docNumber + 1
Open FileToOpen For Output As #1
Write #1, docNumber
Close #1 ‘ Close file.
End Sub

Now choose File, Close and Return to Microsoft Word. With the template on the screen, choose File, Close and answer Yes when prompted to save your changes.

Now open Notepad and type a number 4 or 5 numbers less than the number of the first quote you want to use. So, if you want to start numbering at 200, type 195 so you have a few numbers to use to test the process. Choose File, Save As and save the file as a text file, calling it docNumfile.txt and save it to this folder: C:\windows. Close Notepad

To test the process, choose File, New, choose the template file and click OK. Now run the macro by choosing Tools, Macro, Macros, docnumb, Run. If you have everything right the document number will be inserted in the document.

When this is working fine, alter the macro so this process of inserting the document number happens automatically whenever you create a new document based on this template. To do this, choose Tools, Macro, Macros, click on docnumb and click Edit. Change this macro’s procedure name by altering this line of code:

Sub docnumb()

to read

Sub AutoNew()

Choose File, Close and Return to Microsoft Word. With the template on the screen, choose File, Close. Say No to saving your changes to this file but answer Yes to save the changes to your template file.

Now test again by creating a new file using File, New, choose your template and click OK. The document number should be added automatically to the new document.

If, in the process of testing you find you go past your starting document number, open Notepad and open the file docnumfile.txt, type a new starting number and save it again.

Helen Bradley

Monday, February 5th, 2007

Using special characters in Word documents

I write for UK magazines so I often have to use pounds symbols and my mum’s and brother’s surnames have an ‘e’ with an accute accent – unfortunately neither is on my keyboard. So, to make things easier to write, I use a macro to convert a word to a typed character.

Here’s a sample you can use and adapt. It converts the words cents, pounds, degrees and division to their character equivalents and you can use it to replace almost any word or character with another single character, word or phrase of your choosing:

Sub ConvertText()
FindAndReplace “cents”, “¢”
FindAndReplace “pounds”, “£”
FindAndReplace “degrees”, “º”
FindAndReplace “division”, “÷”
End Sub

Sub FindAndReplace(FindThisWord, ReplaceWithWord)
Set EditRange = ActiveDocument.Content
EditRange.Find.ClearFormatting
EditRange.Find.Execute FindText:=FindThisWord, ReplaceWith:=ReplaceWithWord, MatchCase:=0, Replace:=wdReplaceAll
End Sub

Helen Bradley

Page 1 of 212