Tuesday, January 10th, 2012

Winter Photography Tip #3 – get in close


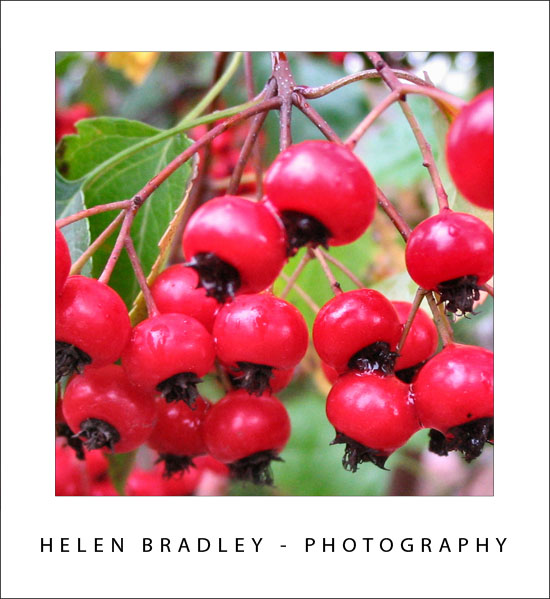
Often it is the small things that offer the most creative opportunities in winter photography.

Look for the little things around you such as a drop of water hanging from a leaf, or a steaming cup of cocoa.

To capture small objects use the macro setting on your camera which is indicated by a flower shape icon. Get in close to the item that you want to shoot – your camera’s manual will tell you how close your camera can focus with macro enabled.

Helen Bradley

Saturday, January 7th, 2012

Winter photography Tip #2 – Grab the Color

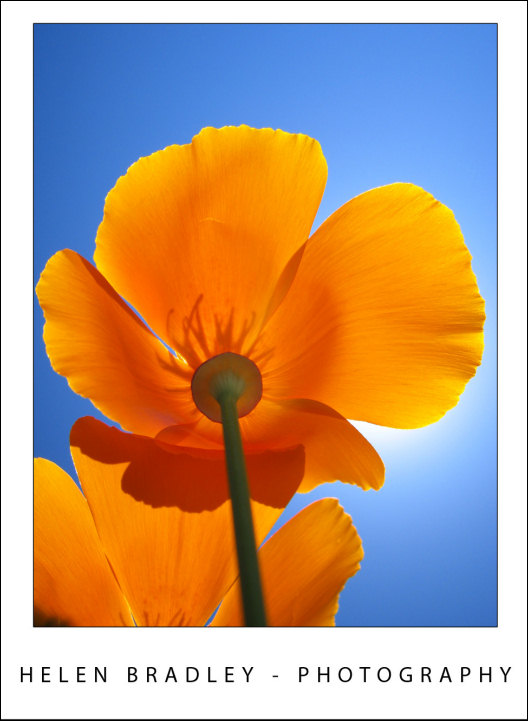
Any splash of colour in a winter scene will show up beautifully and can be the makings of an attractive image.

Look out for things as simple as a blue sky over a snow covered mountain or a skier’s jacket.

The colour will be the first thing that the viewer’s eye will go to in the photograph so make sure to place it in an appropriate position in the shot. Draw an imaginary tic-tack-toe board across your view finder and position the colorful item where two lines intersect to get a more vibrant photograph.

Helen Bradley

Wednesday, January 4th, 2012

Winter photography tip #1 – B&W

Most digital SLRs and point and shoot cameras can capture black and white images. Winter is a good time to experiment with this feature because of the general lack of color.

Find and enable this feature on your camera and then head out looking for suitable subjects.

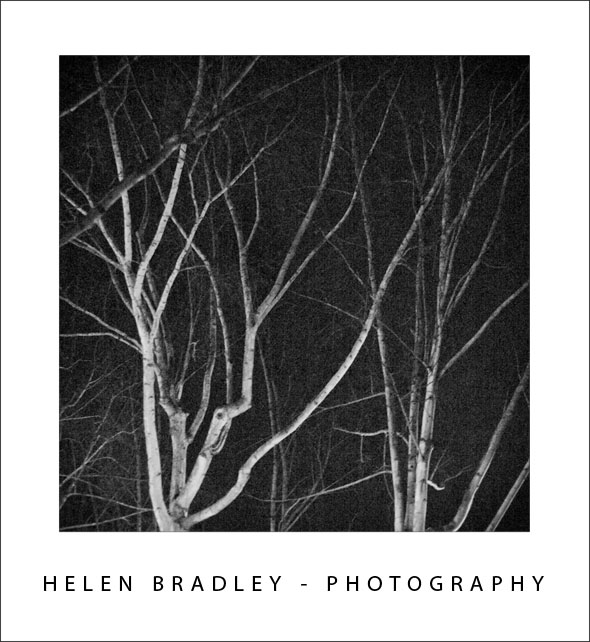
This early morning scene shows the mystery of the branches lit by a streetlight against the dark predawn sky.

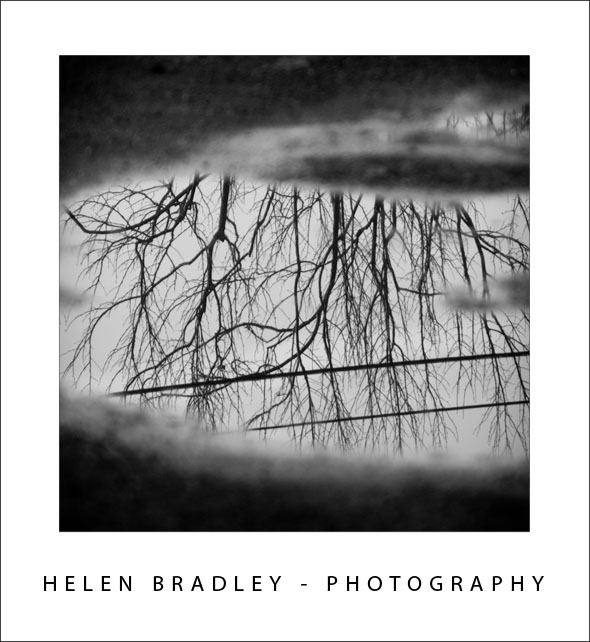
Because you will not be capturing any color from your images, look for a scene that shows the contrast between light and dark elements. You may also find that foggy scenes where everything is not only by nature monochromatic but also biased towards mid tones is a great option for black and white photography.

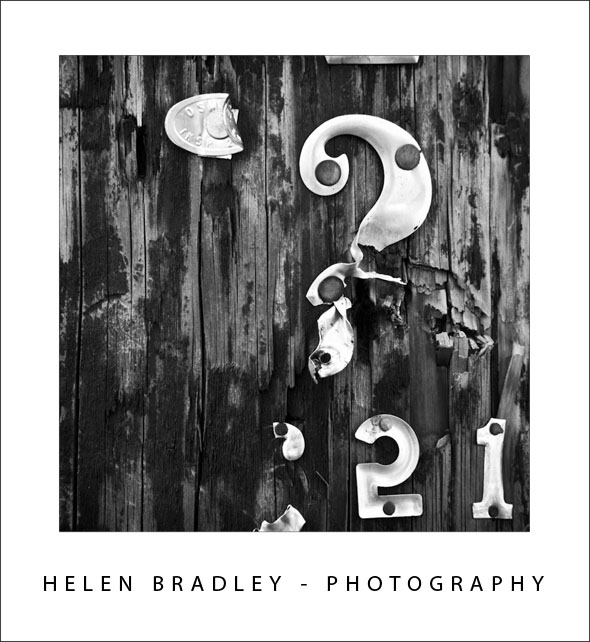
Another topic which can be rendered interestingly rendered in black and white is texture and repeating elements – the lack of color will enhance the texture and draw attention to the repeating elements.


In this image the texture and contrast between the rough wood and the metal letters is more apparent when captured in black and white.

Helen Bradley
Monday, October 10th, 2011

Recover images from a damaged SD card

A friend turned up recently with a curly question. She’d been using a SD card in her point and shoot camera for some time and now the card had stopped functioning. If she put it in her computer she was told to format the disk to use it – sensibly she didn’t do this. However, she was sure she’d lost the shots she’d taken on her recent vacation.

She took the card to a camera store and was quoted $25 to look at the card and then $15 for every 25 pictures recovered from it. Even though she only wanted the most recent images – some 30 or so – she’d have to pay for all the images they recovered. As she had over 1,000 images on the card – the math wasn’t pretty – over $600 to get her images. The shop owner explained the process was time consuming and complex – hence the cost.

For my friend, the thirty or so photos just didn’t justify the expense. Luckily she called by to ask if she should she simply put the disk in the trash or was there an alternative? I grabbed the disk and sent her to get coffee – before she got back I had her images off the damage disk and burned to a DVD.

Here’s what I did:

The program I used is called Zero Assumption Recovery or ZAR. You can find it at www.z-a-recovery.com. I opted for this program because it allows you to recover digital pictures from digital camera memory free of charge – for other uses it is a for fee program.

Start out by downloading an installing the ZAR Recovery software. Insert the damaged disk in the card reader and launch the software. When prompted that antivirus software may impact performance, click to accept the warning and go and disable your antivirus software.

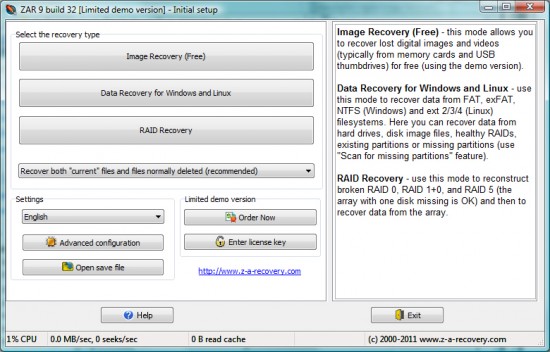
When prompted, click the Image Recovery (Free) option.

The program looks for devices that are installed. This is probably the most confusing portion of the exercise because you’ll need to identify which of the devices in the list is your camera card. It’s not really that difficult and, in my case, Disk 4 shows as an SD card with 1,876 MB of data on it – pretty clearly it is the SD card. Select the disk and click Next.

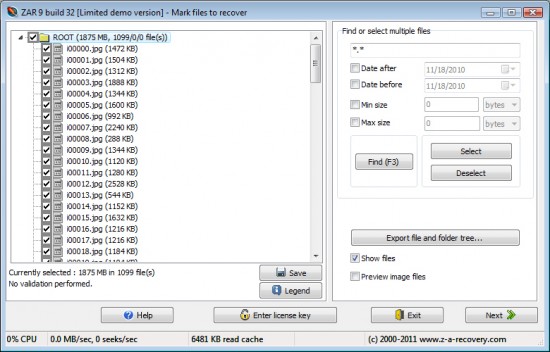
Wait as the program analyzes the disk. You’ll see a list of the recovered files. In my case I wanted all of them because not only did I not know which images she wanted but this dialog really isn’t the place to start getting fussy about which images you want and which you don’t – it’s simplest to take them all. So click the Root checkbox to select all the images.

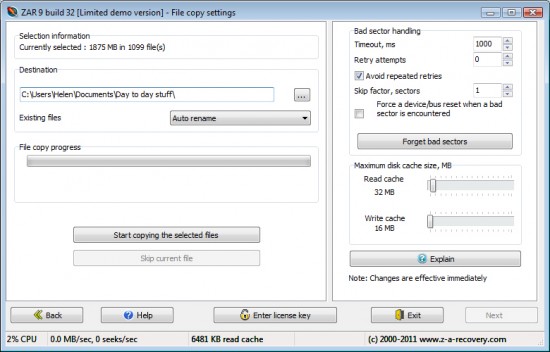
Click Next and you can then select the folder into which the recovered files will be placed. Because I selected the Root folder on the SD card these images will all go automatically into a subfolder called Root. Make sure you always recover files onto a disk other than the one they came from – it sounds self-evident but the busted SD card is not the place to put the recovered images.

I left all the options set to their defaults and simply clicked Start Copying the Selected Files. The software copied 1099 files to my hard drive in a few minutes.

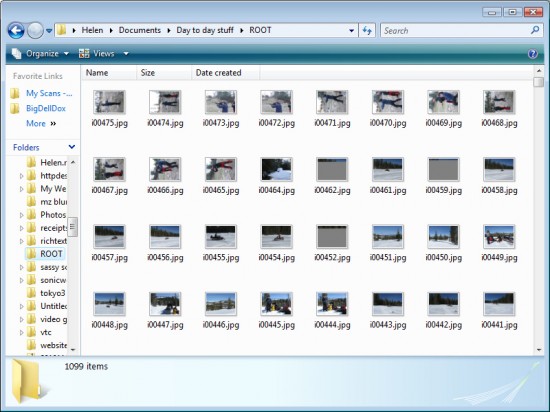
Open the folder in Windows Explorer and set it to view thumbnails to see what you have. I found a handful of images were unreadable and a few images were only half full of data with half the image missing but well over 1000 of the files were there and most of those my friend remembers taking on her vacation.

The moral of this post is to never throw out a camera card until you’ve tried to recover the data from it. There is good and free software out there that can do the recovery for you and it isn’t difficult or time-consuming to attempt it yourself. Oh! and don’t format a card if it has images on it that you want to download –  even if your computer prompts you to do so – it’s not being helpful and the results might reduce your chance of recovering your  images.


Helen Bradley

Monday, August 8th, 2011

Port Isaac Cornwall – home of Doc Martin

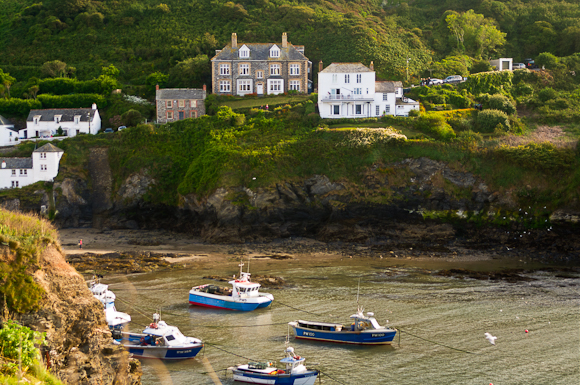
In spite of some minor hiccups in getting here, I am now in Port Isaac, Cornwall. I’ve walked for miles up hill and down and here are the shots from the first day – click here or click the photo:

Helen Bradley
Monday, August 8th, 2011

Amsterdam – Day 1

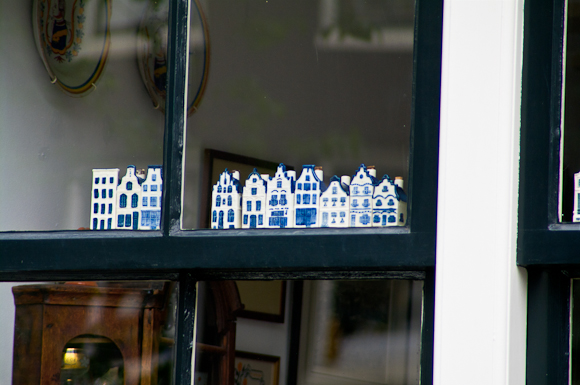
Here is a slideshow of images from Day 1 in Amsterdam – click the image or click here to view it:

Helen Bradley
Monday, June 13th, 2011

A tripod that works with you!


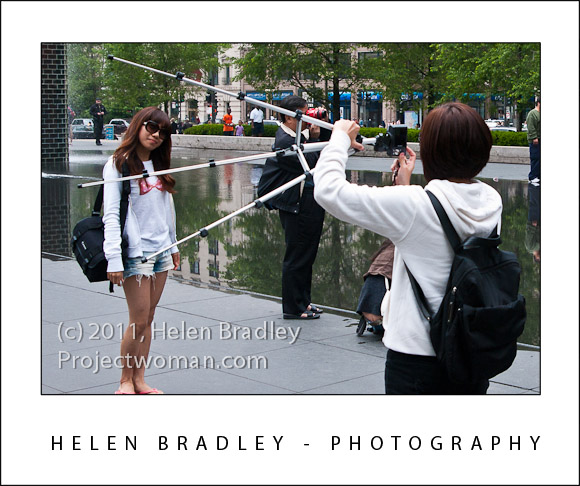
I want one of these tripods. No more bending down to look through the viewfinder because it never winds high enough. No more adjusting the camera to change from shooting landscape to portrait.

This tripod works with  you. It does just what you want it to when you want it. It’s on my list for Santa this year, for sure.

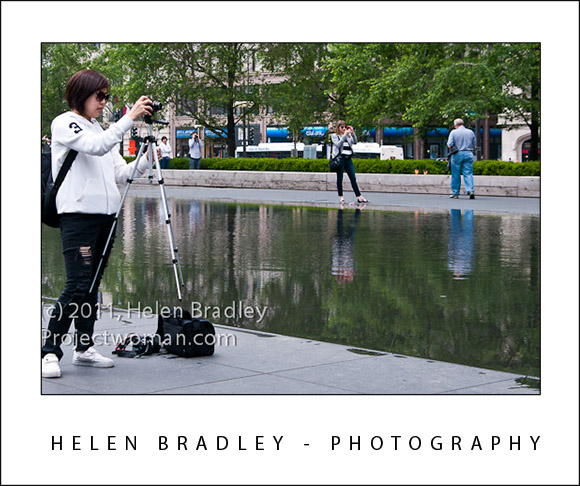
P.S. What the heck was this girl thinking? I never once saw the tripod touch the ground. It really was very funny to watch. Here she does another portrait orientation shot with it – notice how she’s rotated the camera to get the tripod in a more accommodating position.

Helen Bradley
Sunday, June 12th, 2011

Have Patience – it will be rewarded – guaranteed!

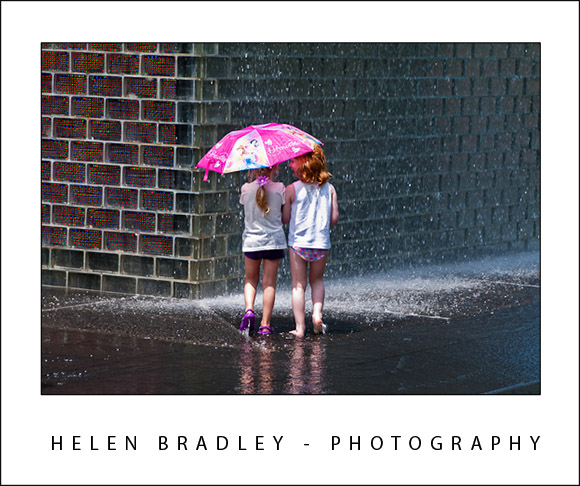
Something I’ve been thinking about lately is patience. The secret to this image isn’t the place although it was pretty cool or the weather – a hundred feet above the buildings are surrounded with grey fog. It isn’t my camera – it’s good but not great or my skills, anyone on Aperture priority sitting where I was would have got the same shot. No! the secret of this one is patience.

I spent about an hour shooting kids playing in 1 inch of water at this fountain. Waiting. Watching. Hoping for something to happen. I found a good location, got comfortable, and waited. I got a lot of good shots but when this kid opened the umbrella I knew I was onto something. I pressed the shutter and kept going – I didn’t stop when I thought I had the shot I just kept shooting. When I got home, the shots I thought were great were good.  This was the winner,this was the shot that keeps me going out every day… looking for magic.

Next time you’re out shooting – be patient. Find a good spot and wait until magic happens for you.

Helen Bradley
Saturday, June 11th, 2011

When is the art yours and when is it not?


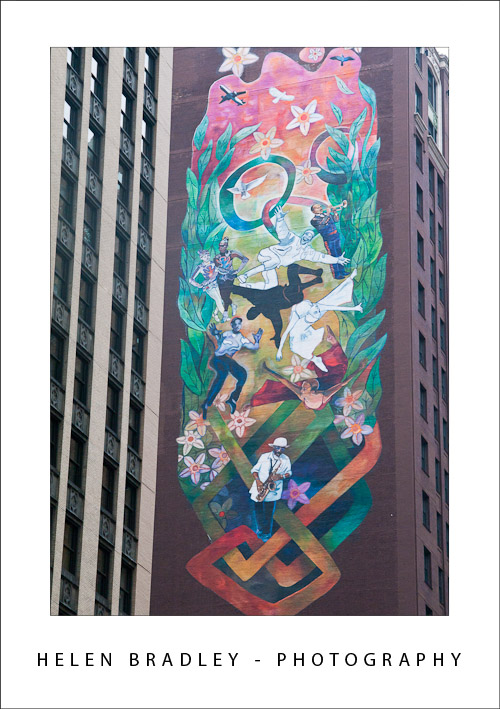
I’m not talking copyright here but rather, when is a photo about your vision and when it is just recording someone else’s. I think that when you take a photo of something someone else created it’s probably more about the recording process than that the result is truly art. Take this image below – it’s a piece of building art that I photographed but really, beyond placing myself in position to capture the image I didn’t contribute any of my vision to the result.

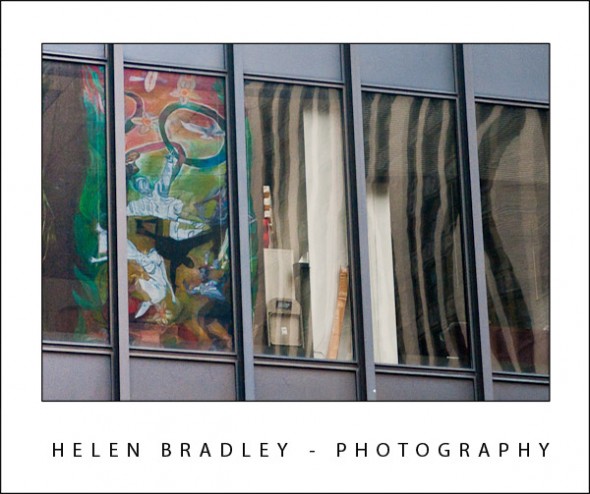
However, the image at the top of this post is something else indeed. Here the same piece of art appears but it looks very different. I had to find this image – it was a reflection in the windows of a building across the street. Here I made a creative choice about what I captured and what I left out, where the reflection appeared and how the result would look. I contributed my artist’s vision to the photograph.

Ask yourself next time you’re out photographing – are you recording someone else’s work or creating your own?

Helen Bradley

Tuesday, February 22nd, 2011

Photography – why you should use a polarizer

Polarizer.jpg

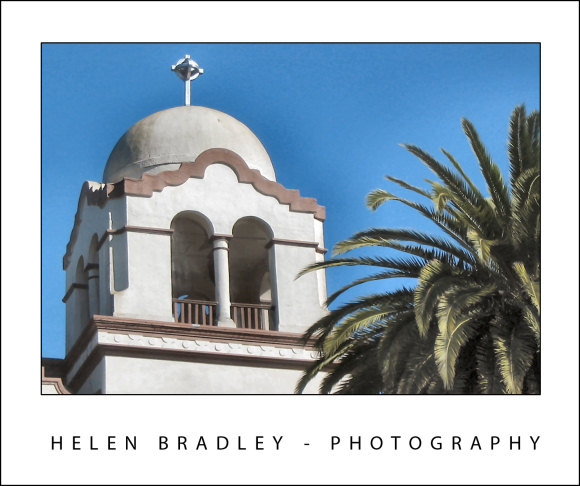
Using a polarizing filter on your camera’s lens ensures crisp blue skies and saturated colours even as here, when shooting into the sun.

You may have already noticed that you can encounter problems you’re capturing photos in very bright sunlight. On the beach, for example, you may find your camera exposes for the lighter areas leaving the remainder of your photograph underexposed and very dark.

In bright sunlight you can benefit from using a Polarizing Filter over the lens of your camera. These filters are obtainable for most DSLR cameras and simply screw onto the lens.

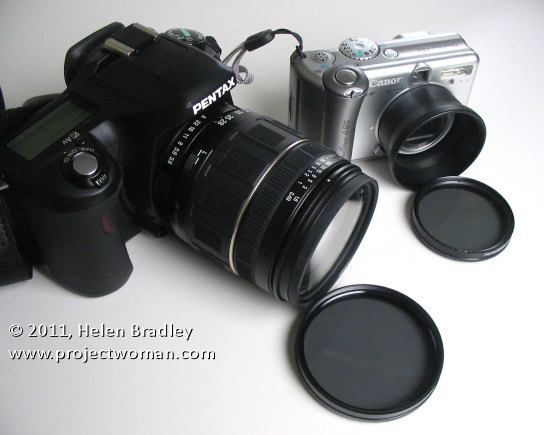
For a point and shoot camera you’ll need to determine if it can take a polarizing filter either on a bracket that screws into the camera’s tripod mount or, in some cases using a special adaptor called a tele converter that screws over the lens and that has a screw mount for the filter.

Image showing a polarizing filter for a dslr and one for a point and shoot which uses a tele converter to mount it

How to buy

When purchasing a polarizing filter for a digital camera you will generally want to purchase a circular polarizer. The other option is a linear polarizer – however circular polarizers are typically recommended for cameras that meter through the lens (TTL) which is what a digital SLR does.

When using your polarizing filter notice it has a marker on it that you can use as a reference point for adjusting it. Look through the viewfinder and turn the filter slowly. As you do this you will notice that the preview will change.

At some point of the rotation it may have no effect at all and at other points it will have an increasingly strong effect. Turn it until you get the effect you are looking for which is good rich color and no washed out skies. When you find the sweet spot go ahead and capture your photo.

A polarizing filter will give you better colour saturation and brighter, bluer skies. It’s also a good filter for photographing things under water from above the water surface such as a tropical reef or seaweed because it cuts out the sun’s reflection on the water surface allowing you to capture the underwater detail.

This blue sky would have been washed out if the photo had not been captured using a Polarizing filter:

An image shot using a polarizing filter to ensure rich blue skies

Helen Bradley
Wednesday, February 16th, 2011

A cool resource for understanding Av and Tv

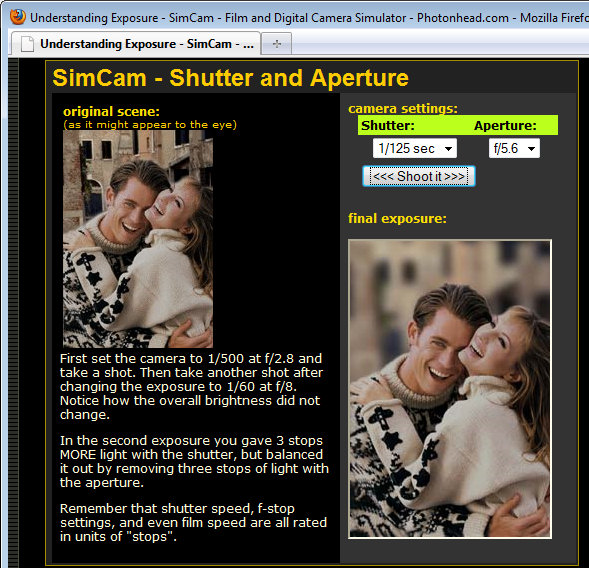
photon simulator showing how shutter speed and aperture relate when taking photos

I’ve been explaining recently why you might shoot in Av (Aperture Priority) or Tv (Shutter Priority)  mode.

Sometimes it can be hard to understand these things so I’ve found a cool tool you can use to see how these interact. Click here to visit the hands on simulator.

The simulator is an interactive camera that you can use online to experiment with aperture and shutter speed. You get to set the speed and the aperture and take your shot – the preview shows you what the image will look like with those settings.

Helen Bradley
Thursday, February 10th, 2011

Valentine’s Day photography – Capture the Essence of You

Whether you’re basking in the first throws of a new relationship, newly hitched or coming up to your silver anniversary, February is a time to focus on your relationship with your husband, partner, or significant other. It’s a time to bring the two of you to the forefront and what better way to do this than in your photos?

If you haven’t done this before, the ‘future you’ will appreciate the time you spend now in chronicling the little things in your relationship. Think how wonderful it will be, tucked up in your rocking chair one day, to look back on the early days of your relationship?

There are lots of ways you can make a photographic record of your lives together. While visiting a professional photographer for a custom portrait will give you a lasting showpiece, some of the best shots can be captured yourselves. These are photos of things that are meaningful to you both and that capture the things that are important to you and your relationship.

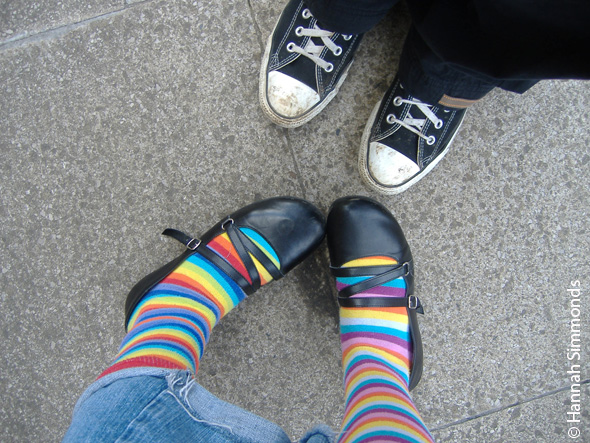
Look around at the day to day things in your life. Take photos of your shoes, side by side in the hallway, the favourite mugs that you use each morning or the magazines you each read. Capture the good and the bad – such as your hands clasped together, the favourite shirt he loves but you hate, and the assemble it yourself furniture that nearly caused you to divorce while putting it together!

Take the time to photograph each other too. It’s a fun way to spend some time together and to get some great photos to boot. Try to capture his goofy grin and get him to catch you with that dreamy look in your eyes he tells you that you get when you’re imagining yourself in a new pair of Jimmy Choo’s.

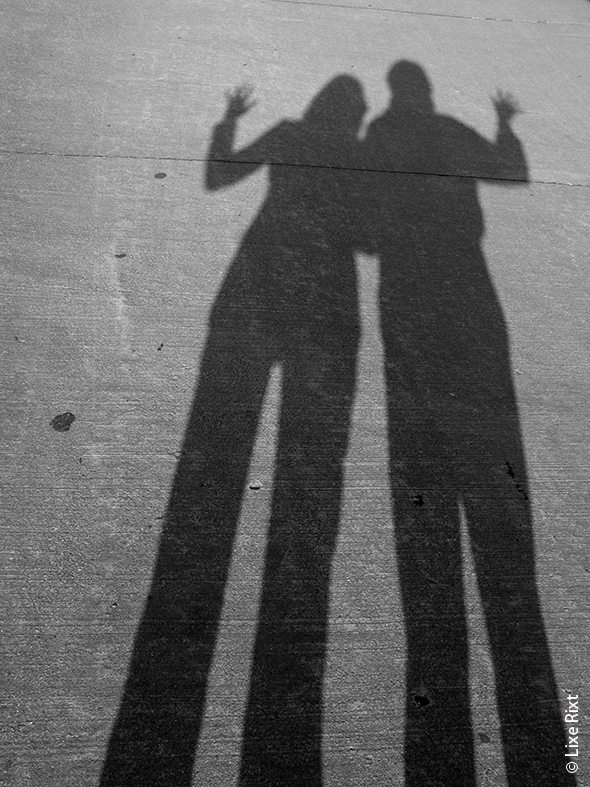
For “together” shots, use the camera’s delayed shooting mode. Have your partner sit or stand in place and set up the camera on a flat surface making sure it’s focused on them. Enable the delayed shooting mode (check your camera’s manual if you’re unsure how to do this) and join your partner for the shot. Repeat as often as desired to get that perfect shot.

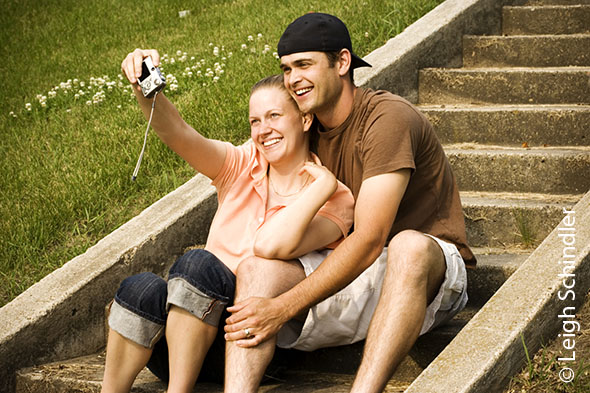
You can also take “together” shots by standing really close and holding the camera up in the air in front of you facing towards you. Snap away as you pose or enjoy a joke. This is a more “hit or miss” approach but it’s possible to get some fun photos this way.

If you have one of those fairground photo booths nearby, spend a couple of pounds and take a strip of photos of the two of you – just the physical effort of jamming yourself into the booth is enough to guarantee ear to ear smiles and a sense of fun.

For a more romantic portrait of your lives, take a photo of your partner lit with candle light or soft lighting at home. You can do this by placing lighted candles where they will light his face and, if desired, use some other soft lighting such as a small lamp but keep it out of the photo. Turn off the camera’s flash or it will ruin the shot and set the camera to night shooting mode. If you can set film speed on your camera, opt for 400, 800 or higher so that the camera will be more sensitive to the light that is available (and the photo will have a wonderful grainy look too). Ask your partner to sit very still as the shot might take a second or more to be captured. Use a tripod to steady the camera because you won’t be able to hold it still this long. You will find that the candlelight will throw a lovely coloured light into the shot and give your partner’s features a soft look.

Helen Bradley

Tuesday, February 8th, 2011

Understand your camera’s settings – Part 3 – ISO

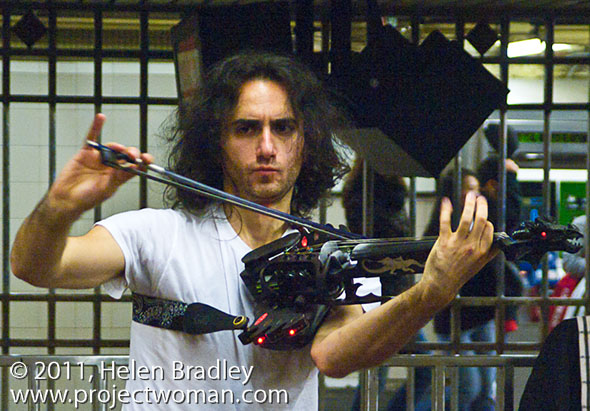
Image: ISO3200, f5.6, 1/80s – the high ISO gives good sensitivity to light allowing this image to be captured quite fast in a relatively dark NY subway station.

In part 3 of this series on understanding your camera’s manual settings I’ll explain how to combine a choice of ISO settings when varying Aperture and Shutter speed.

In addition to Aperture and Shutter speed you can also configure your camera’s ISO setting. You would do this to adjust for the situation where there is not enough light for a shot or where there is too much light.

ISO is the camera’s sensitivity to light and small ISO values such as 80 and 100 indicate low sensitivity so the camera needs more light to take the photo. High values like 400 and 800 (and even up to 6400 and beyond) increase the camera’s sensitivity to light and can be used when you need more light, for example, where the shutter speed or aperture you want to use can’t give the light you want.

Take care when using very large ISO values as these are susceptible to noise so, using a value of 1600 or more might give you a good exposure but the image may have a lot of digital noise as a result.

Small values like 100 and 200 should show little noise at all.

Image: ISO100 f/4.5 1/500s – in bright summer sunlight, the ISO 100 value reduces sensitivity to light still allowing for a fast shot.

Of course, even excessive amounts of noise are preferable to getting a blurred image because you couldn’t hold the camera steady long enough to take it.

While the Auto setting on your camera will ensure that you get a good photograph most of the time, for creative purposes being able to configure your camera to adjust either the aperture or the shutter speed will give you more and varied options for getting even better images.

Image: ISO 1600, f/5.6, 1/15s – At dusk in a NY street, the high ISO gives good light sensitivity and the slow shutter speed allows the cars in the background to be blurred nicely.

Helen Bradley

Thursday, February 3rd, 2011

Understand your camera’s settings – Part 2 – Shutter Speed

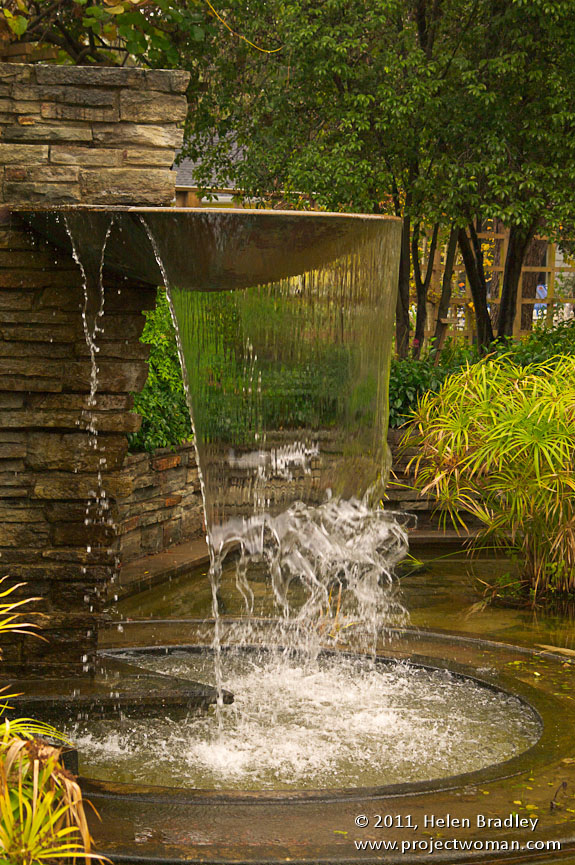
Image: 1/320s, f7.1, ISO 1600

In part 2 of this series on understanding your camera’s settings I’ll explain working in Shutter Priority mode.

Shutter speed can be controlled manually by switching to Tv mode. You can then select the shutter speed yourself so you adjust the time the shutter is open for and the camera will adjust the aperture to give you a good exposure.

How to use shutter speed

Setting shutter speed is a creative tool too. You might choose a fast shutter speed when photographing a moving object and where you want to freeze its motion. The image at the top of this post, for example, was captured at 1/320s.

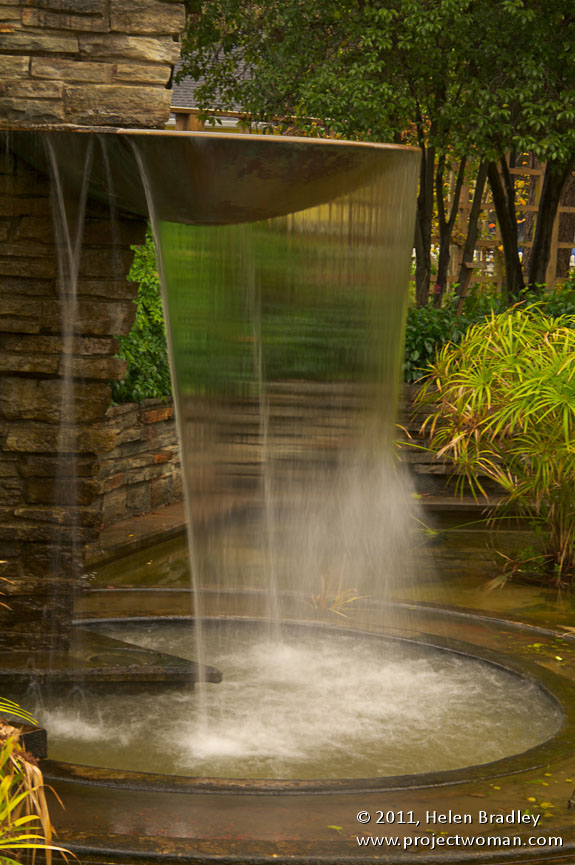
On the other hand, where you want the water in a waterfall or fountain to appear as a silky stream you would use a long shutter speed. Shutter speeds such as 1/250 of a second will freeze motion and shutter speeds of 1/30 a second or slower are considered to be slow.

This second version of the same fountain was shot at 1/3s at f/25 and the water is much silkier:

When you select shutter speed, your camera will show the aperture so you can preview this – on some cameras you may have to press the shutter release mechanism down halfway to see this.

If the camera doesn’t have a large or small enough aperture for the speed you’ve chosen it will indicate this using some warning system allowing you to adjust your shutter speed setting.

Using a tripod

Take care when selecting slow shutter speeds. Anything slower than 1/60th of a second will make it hard for you to hand hold the camera and keep it steady. If you’re using long lenses on a digital SLR, for example, you may not be able to hand hold the camera successfully at even quite fast shutter speeds.

A good rule of thumb is to use a tripod for shots slower than 1/the focal length of the lens so a 70-200mm lens at full zoom would need a tripod for shutter speeds slower than 1/200th second.

Helen Bradley

Thursday, January 27th, 2011

Understand your cameras settings – Part 1 – Aperture

All digital SLRs and many point and shoots can operate in manual or semi-manual modes. If you capture most of your photos using Auto mode it’s time to look at some of the benefits you can get by switching to semi-manual operation.

With these modes you control the aperture or shutter speed and you get a chance to capture more creative photos. So how do you do this and what settings do you use? In this series, I’ll explain your camera’s Aperture Priority and Shutter Priority (Av and Tv) modes and also explain why your ISO setting  is important to understand too.

If your camera can operate in manual mode you’ll have settings such as M, Av, Tv and P on your camera’s dial. The two settings we’ll focus on are Av and Tv where you set the aperture or shutter speed yourself.

What is Aperture?

This begs the question, what is aperture and what is shutter speed? Aperture is, very simply, the size of the hole through which light enters your camera. The larger the hole, the more light gets in.

Aperture is described using an f number which is calculated using a complex formula. A rough rule of thumb is to think of aperture being a fraction so an f number (often called a f-stop) of f/2.8 is bigger than f/22 for example.

Understanding aperture

Aperture not only has a direct relationship to the amount of light let in to the camera, it also affects depth of field. When you use a large aperture such as f/2.8 you will get a small depth of field so only a small distance in front and behind the point of focus in the photograph will be in sharp focus and the remainder of the image will be out of focus.

Depth of field is a creative tool that many photographers use to their advantage. For example, when photographing a beautiful flower, you’ll want the focus to be on the flower and not the things behind it. Using a large aperture such as f/2.8 throws the background out of focus. The photograph at the top of this post is an example of a large aperture and a small depth of field.

On the other hand, using a small aperture such as f/8 or f/11 gives you a large depth of field so everything in the photograph will be in focus – useful when photographing landscapes for example.

The relationship between Aperture and Shutter speed

When you set the aperture using the Av setting on the camera, the camera sets the shutter speed to an appropriate value. This is because there is a direct correlation between aperture and shutter speed.

When you use a small aperture, only a small amount of light comes into the camera so you need to compensate for this by using a slow shutter speed to ensure you capture enough light.

On the flip side, when you use a large aperture such as f/2.8, you get lots of light so the camera will set a fast shutter speed.

When you use Av mode, you’re effectively saying, I’ll set the aperture I want and you – the camera – are to adjust the other settings to give me a good picture. When you are in Av mode, there will be a dial or other option you’ll use to set the desired aperture value.

Helen Bradley