Friday, August 7th, 2009

Cool Photo Apps #3 Create a life poster


Not all good applications come in big shinny boxes like Photoshop and Photoshop Elements. Many cool photo apps are available on the web and they’re free.

These apps do things that other programs don’t. They are fun to use and practical. In this Cool Photo Apps series I’ll show you some of these.

Popularized by the Mac and its iLife software, life posters are a collage of images arranged in a grid layout. Life posters look best when you use square images. On the PC you can create a life poster using the tools built into Picasa which you can download from http://picasa.google.com.

Here’s how to do it:

Step 1
Start with a new album by selecting File > New Album and give the album a name like Life Poster.

Step 2
Add the photos to the album that you want to use for the life poster. The order in which the images appear in the album are the order in which they will be arranged into your life poster so the first images appear across the top line of the poster and the next series of images will appear through the next row etc.. If you predetermine how big your grid will be, such as 4 x 4 images or 5 x 5 images you can determine which photos will be next to which other photos.

Step 3
When you create the poster, Picasa will automatically crop the images to a square format. If there are images that you would prefer to crop yourself, double click the image to open it and crop it to a square shape before beginning.

Step 4
To create your life poster, right click the album name and choose Select all pictures. Click the Collage button at the bottom of the tray area and choose Picture Grid from the Type list. From the location dropdown list choose a folder in which to save the finished collage image. Check the preview and, if you’re happy with the result, click Create to create the poster.

Step 5
You’ll find the image ready for printing in the folder you selected. Of course, having created your poster, you could convert it to a wall size poster ready for downloading and printing. Here’s a blog post that will show you how to do it: Cool Photo Apps #2 big huge photo prints

Helen Bradley

Saturday, August 1st, 2009

Cool Photo Apps #2 big huge photo prints


Not all good applications come in big shinny boxes like Photoshop and Photoshop Elements. Many cool photo apps are available on the web and they’re free.

These apps do things that other programs don’t. They are fun to use and practical. In this Cool Photo Apps series I’ll show you some of these.

For resizing images to very large size, there are a couple of handy tools you can use. One of these is Rasterbator which you can find at http://homokaasu.org/rasterbator/. You can use this tool online or you can download it to your computer and use it from there. One benefit of downloading is that you’re not limited in the size of the starter image you use.

Rasterbator upsizes your image to anything from regular poster size to a gigantic 25 meters in size.

Here’s how to use the online version:

Step 1
Click Rasterbate Online and select to upload an image from your computer or use an image from the web. There is a maximum upload size of 1 MB. Once the file is uploaded, you can crop the image although you’re really better off doing this before you upload it.

Step 2
Select the Size option and select the final print size for your image. Each of the grid squares is one sheet of paper and you can add more sheets or reduce the number of sheets by clicking the More Sheets or Few Sheets buttons. The finished size of the project appears below the image so you can juggle the size to fit your needs.

Be sure to select the paper size as Letter and use either a vertical or horizontal orientation as required. It’s important to select your page size here as it will be too late once you’ve created the PDF file. Click Next to continue.

Step 3
The program will warn you how many sheets of paper the project will require and, if you’re happy to continue, click the Continue button – you’re not actually printing yet, just confirming you want a document that big created for you.

Step 4
Set the options such as drawing a border around the rasterbated area which will give you cutting lines that you can use later on to cut out the images before assembling the panel. Select the dot size to use from the list or use the default size. You can choose to create the image in black and white, some other colour and white or colour.

Step 5
Click Rasterbate when you are done and wait as the PDF file is created for you.

Step 6
Download and save the pdf file and then print, cut and hang and enjoy your masterpiece at your leisure.

If you liked this post, you’re sure to like the other posts in the series:

Cool Photo Apps#1: The Warholizer

Helen Bradley

Sunday, July 26th, 2009

Cool Photo Apps #1


Not all good applications come in big shinny boxes like Photoshop and Photoshop Elements. Many cool photo apps are available on the web and they’re free.

These apps do things that other programs don’t. They are fun to use and practical. In this Cool Photo Apps series I’ll show you some of these.

Let’s start at the online site bighugelabs.com – it has lots of good niche applications and the one we’ll look at today is the Warholizer. Find this at http://bighugelabs.com/flickr/warholizer.php. Here you can upload a photo and the site will create a series of nine mini Warhol like images from it.

If you don’t get great results, try increasing the contrast in your photo before you upload it to see if that gives you better results.

You can use the Warholizer with images you upload from those stored on your computer, you can grab pix from your Flickr or Photobucket account, or use an image located on the web by providing its URL.

Helen Bradley

Wednesday, July 22nd, 2009

5 tips for taking Great Summer Photos

Summer is here and the warm weather brings with it good photographic opportunities. There are plenty of things to shoot and, if you’re lucky, you’ll be traveling to fabulous places, new and old, for your holidays. To ensure that your summer photos are all they promise to be, here are some summer photo shooting tips that will guarantee good photos even in the most challenging of conditions.

1 Warm your images


The harsh summer sunlight, particularly in the middle of the day, throws a bluish cast on your images which, in spite of the heat that you’re shooting in, actually makes them look cold.

Luckily, you can easily warm them up and make them more inviting by changing your camera’s settings. This works well for summer portraits and for landscapes too. To do this, set your camera’s white balance setting to Cloudy even though you are shooting in full sun.

The cloudy setting compensates for the blue-green cast of filtered sunlight and gives your images an instant subtle pink/orange cast which is more attractive and inviting.

2 Summertime is flash time


Although it sounds counterintuitive and you would think that in the bright summer sunlight the last thing you need is your camera’s flash, in fact it is the first thing to know how to set properly.

Your camera’s flash will not fire on a bright sunny day if you are shooting something which is lit behind by a strong backlight, for example a person at the beach. Your subject will be thrown into deep shadow unless you use the camera’s flash.

The camera’s flash provides a fill light which lights your subject without affecting the background which is too far away to be affected.

To use the flash to provide fill light for your subject you must set it so it is forced to fire. Use this forced flash too if you’re sitting in a shady position with a light behind your subject such as sitting under an umbrella. Without the flash you’ll get harsh shadows and with the flash you’ll get a much more attractive portrait.

3 Crisp blue skies


When everything is very bright around you, the camera has a lot of trouble capturing the full amount of tonal detail in the scene. Quite often you will find that what was a bright crisp blue sky looks anything but that color when you get the photographs home.

If you are using a digital SLR camera invest in a polarizing filter for shooting in bright sunny conditions. The polarizing filter filters our reflected light so the camera captures only light coming directly into the lens. The result is that your colors will look more saturated and brighter.

The polarizing filter must be adjusted for the best results so, when you look at it, check for a small mark on it indicating its start position. Twist the filter a small distance to the left or right to fine tune the effect of the filter until you get a look that you want.

4 Photographing at the beach


If you’re sunning yourself on the beach this summer you will have plenty of opportunities for capturing great photos. Use your camera’s macro setting to capture small details in the shells washed up along the shoreline.

If you are clambering through rock pools a polarizing filter will let you capture the details in the bottom of the rock pool by minimizing the reflections bouncing back off the surface of the water.

If you are looking for a challenge, feeding gulls will give you practice at capturing images of birds in flight. Set your camera to a fast shutter speed and follow the movement of the bird with the camera to get best results. So the bird does not fly out of the frame, reduce the zoom on the camera so you capture the full bird rather than risk losing a wing tip for example because the bird has moved. You can always crop the image later on to get in closer.

5 Shooting in tourist locations


If you’re off to popular tourist destinations for your summer holidays you’ll get plenty of photographic opportunities. You’ll also come up against the problem of capturing both the monument and the person in front of it both in focus.

If you’re using a digital SLR, set the aperture to a value around f16 or f22. This ensures that everything in the image will be in focus. On the other hand if you want the person to be in focus and the monument attractively out of focus, set the aperture to around f2.8 or f3.6. Make sure to focus on the person and use the camera flash to light their face. With a large aperture like this you will get a small depth of field around the subject with everything else in the image thrown out of focus.

Whenever you want to capture a very large object like a monument and a person in front of the monument, you run the risk of capturing the monument at a good size and the person will be so small as to be almost unrecognizable in front of it. There are a couple of ways to avoid this happening. One is to bring the subject very close to the camera so that you get both at good size in the image. The other is to take more than one photo.

Capture the monument at full size and then place your subject closer to the monument in front of an area which has interesting detail in it. Take the second image this time focusing on the portrait aspect and using the monument details as a pleasing background.

Helen Bradley

Monday, July 13th, 2009

Summer – 10 cool photo ideas

It’s summer time and if you’re a creative photographer you might be wondering just what to shoot. Look no further, here are some cool ideas for topics for summer photography:
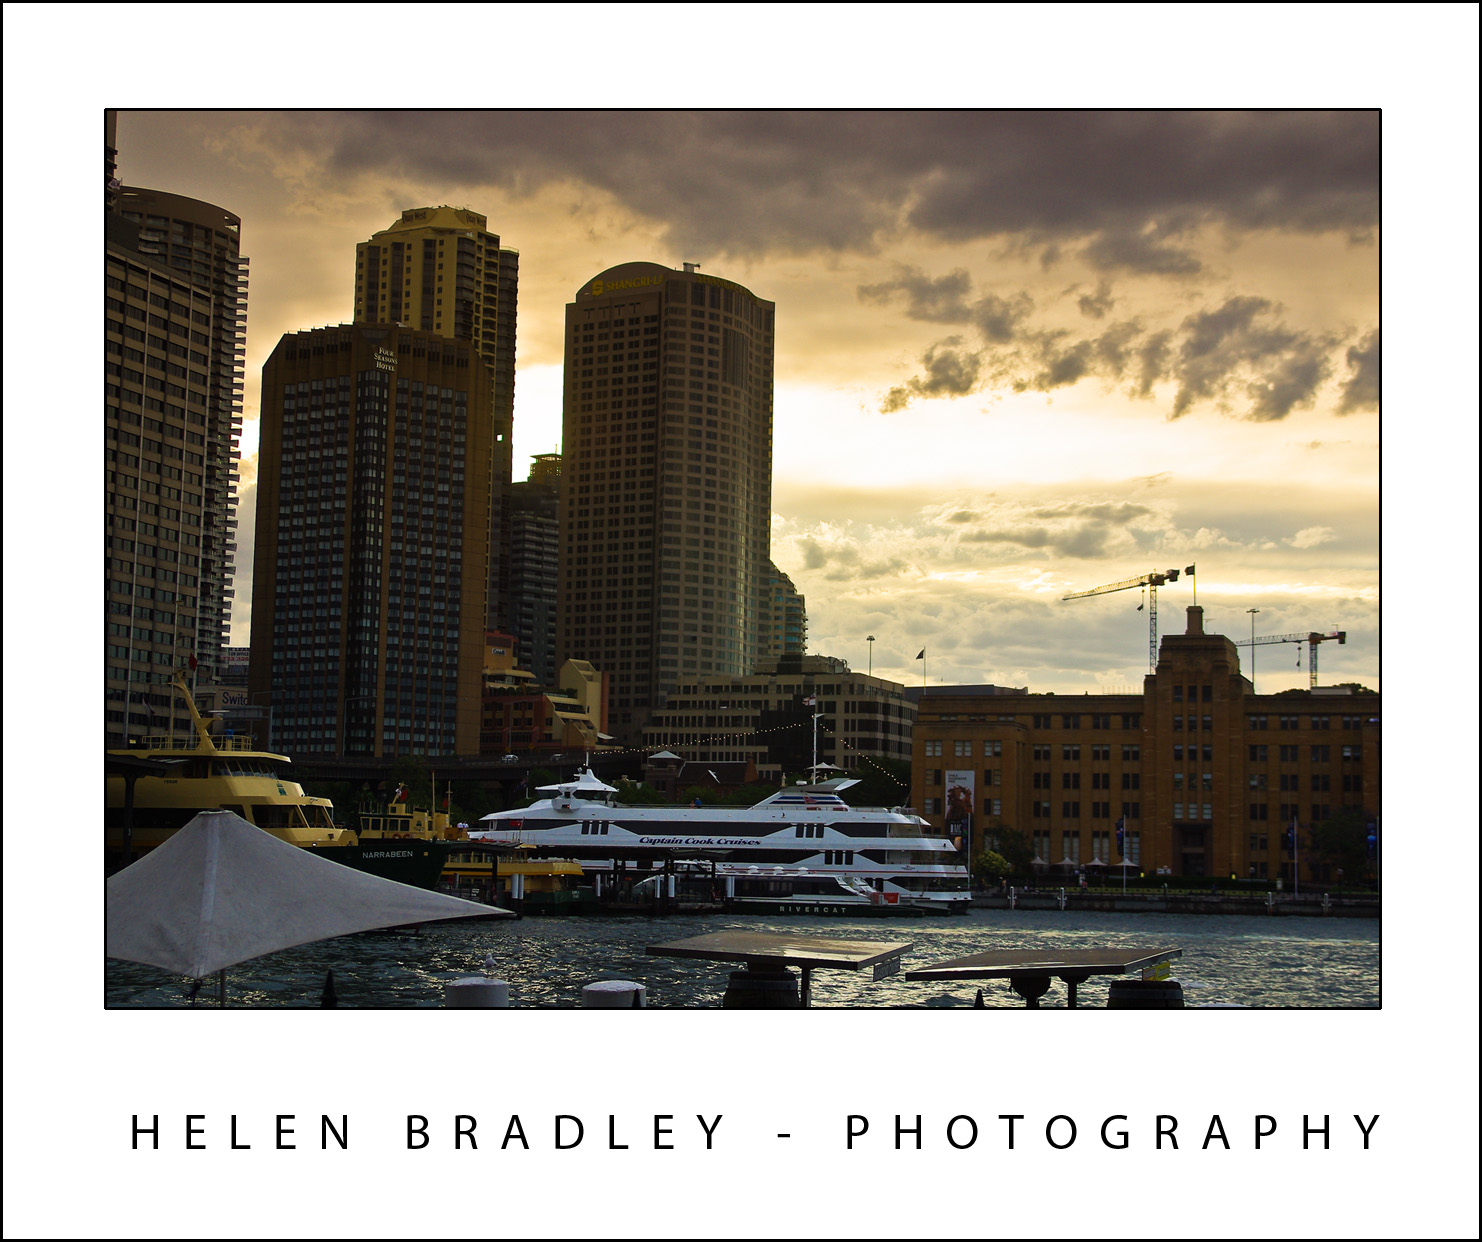
1 Perfect Sunsets


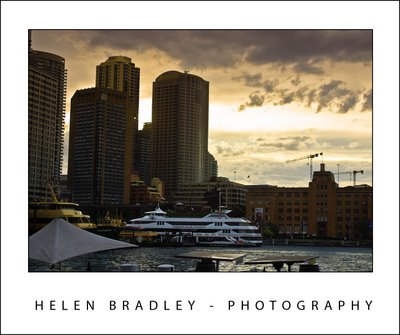
The optimal shooting time in summer is in the early morning and the early evening at sunrise and sunset. At these times of the day the light is much softer and it has a pleasant color cast to it which will warm the image.

To take advantage of these light conditions set your camera’s white balance setting to full sun – do not allow it to sit on Auto White Balance or the camera will remove the beauty of the color of sunset when it attempts to neutralize the color cast in the image. Setting the camera to full sun which doesn’t have a color cast means the camera won’t adjust the image so you’ll get great sunsets and sunrises.
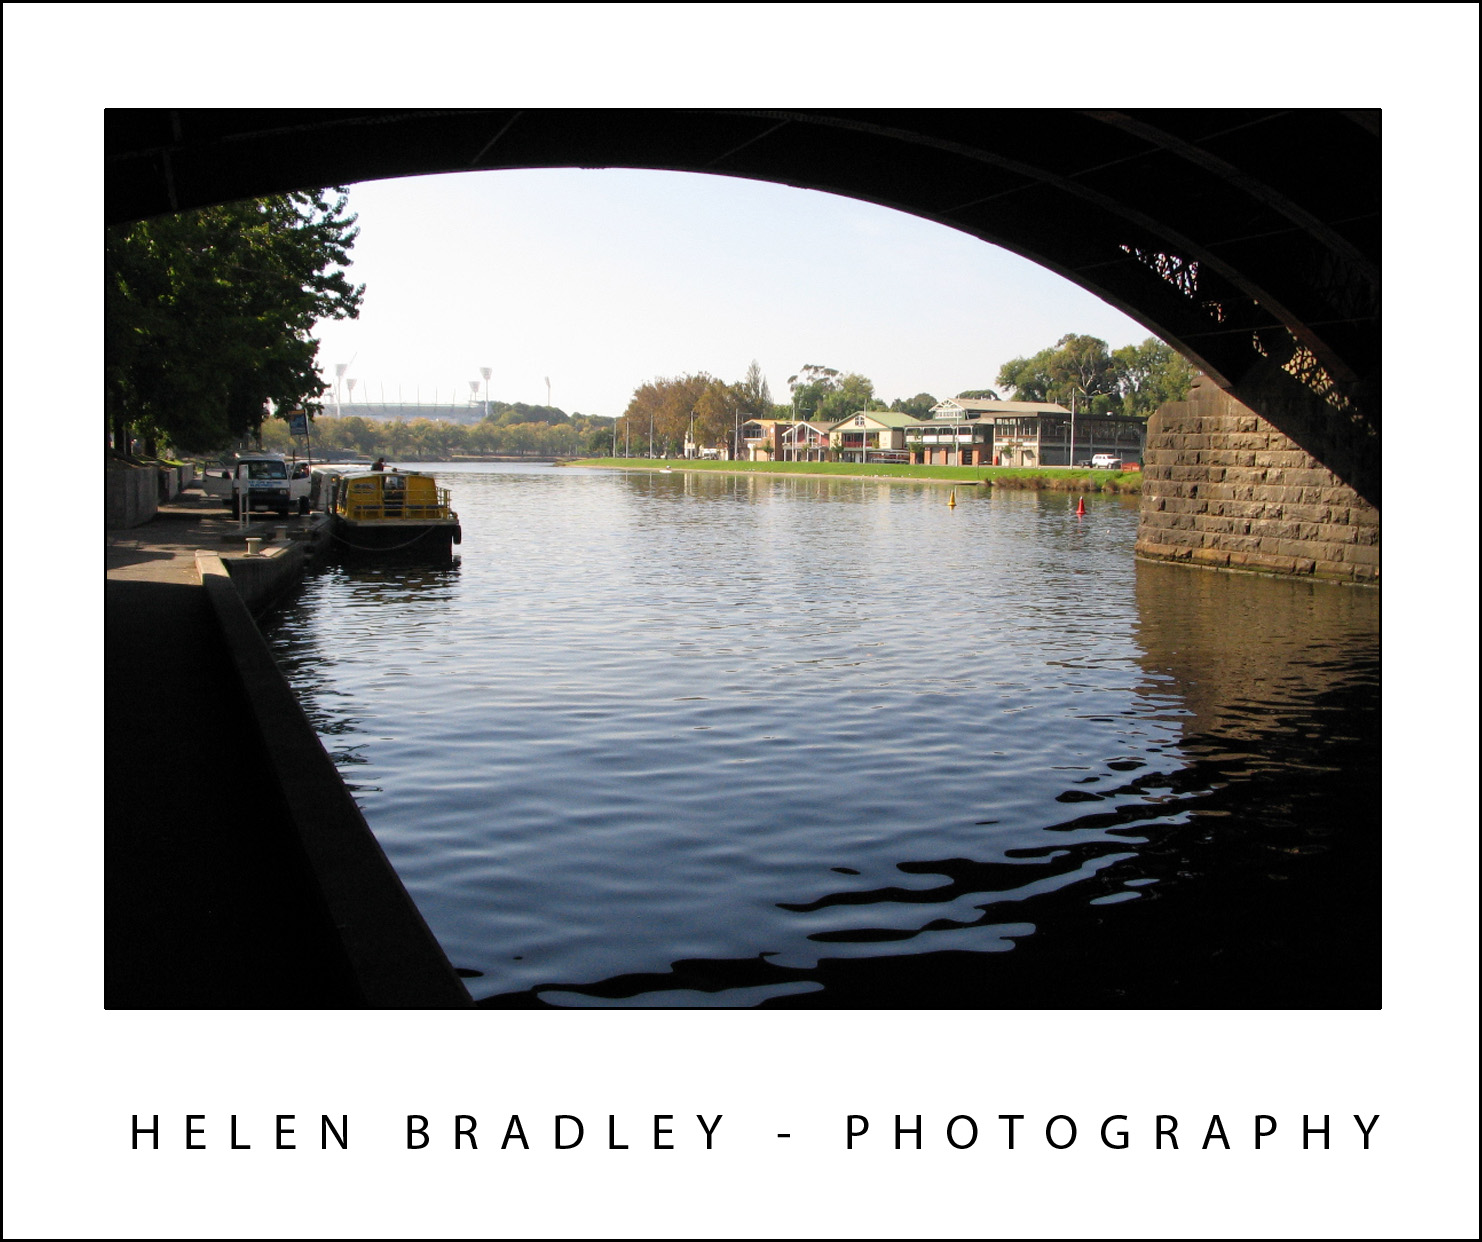
2 Water reflections


Some of the best summer photos can be captured by looking down rather than across a scene. The reflection in the water as it washes over sand can give spectacular and unexpected results. Even objects set well back from the water can be caught reflecting in it.

If it is safe to do so, position yourself where the waves break over the sand facing back up the beach – make sure you have a good stretch of wet sand in front of you and check to see what reflections you can capture.

3 Capture running water
When you are shooting running water such as a fountain or a waterfall you have a couple of options for capturing the water. If you use a fast shutter speed you can freeze the action. You do this by adjusting the manual settings on your camera using the shutter priority setting (indicated by a T or TV setting). Set the shutter speed to a fast setting such as 1/250 or 1/500 of a second to freeze the action. When you do, you will see water drops in the fountain or waterfall.

On the other hand if you use a slow shutter speed – for example, 1/10 of a second or less you will get a silky even flow in the water. The slower the shutter speed the more silky the effect will be as the camera will capture the movement rather than freezing the action.

Experiment with different shutter speeds to get different results. Be aware that slow shutter speeds will require you to use a tripod to steady the camera. As a rule of thumb, the slowest speed you should handhold a camera at is 1/focal length of your lens so, for a 200mm lens anything slower than 1/200 second should be captured with a tripod.
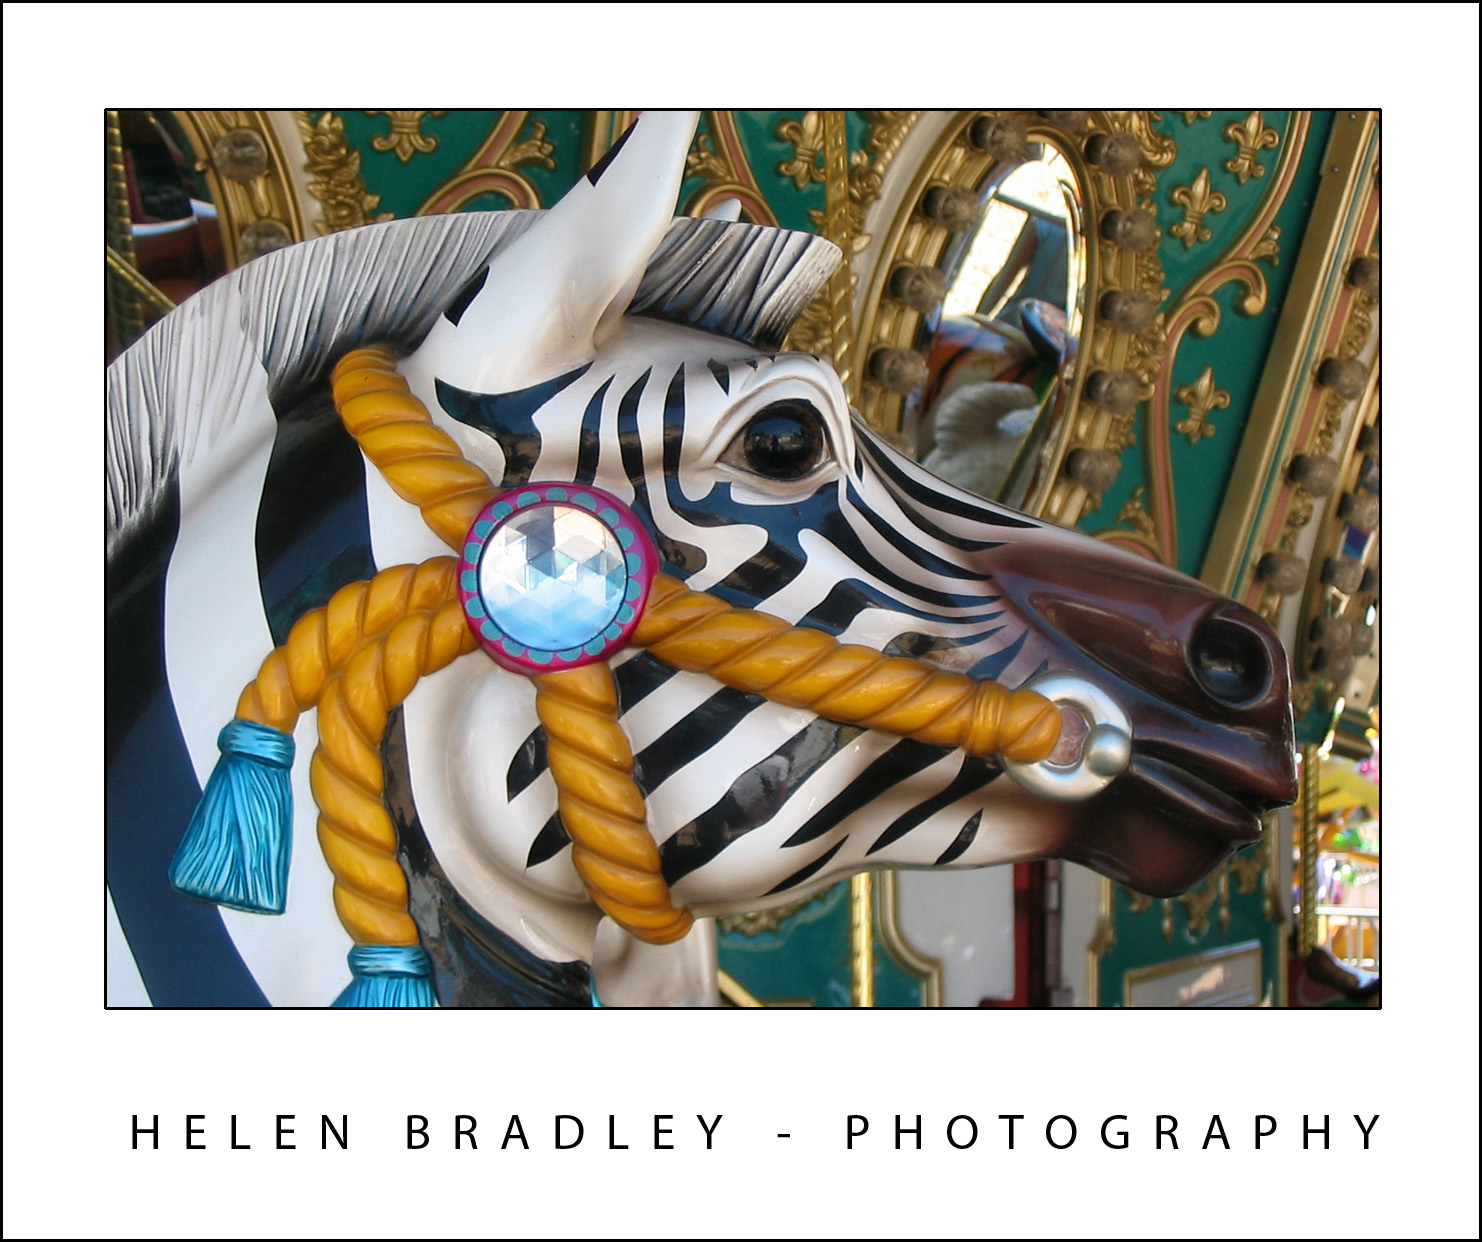
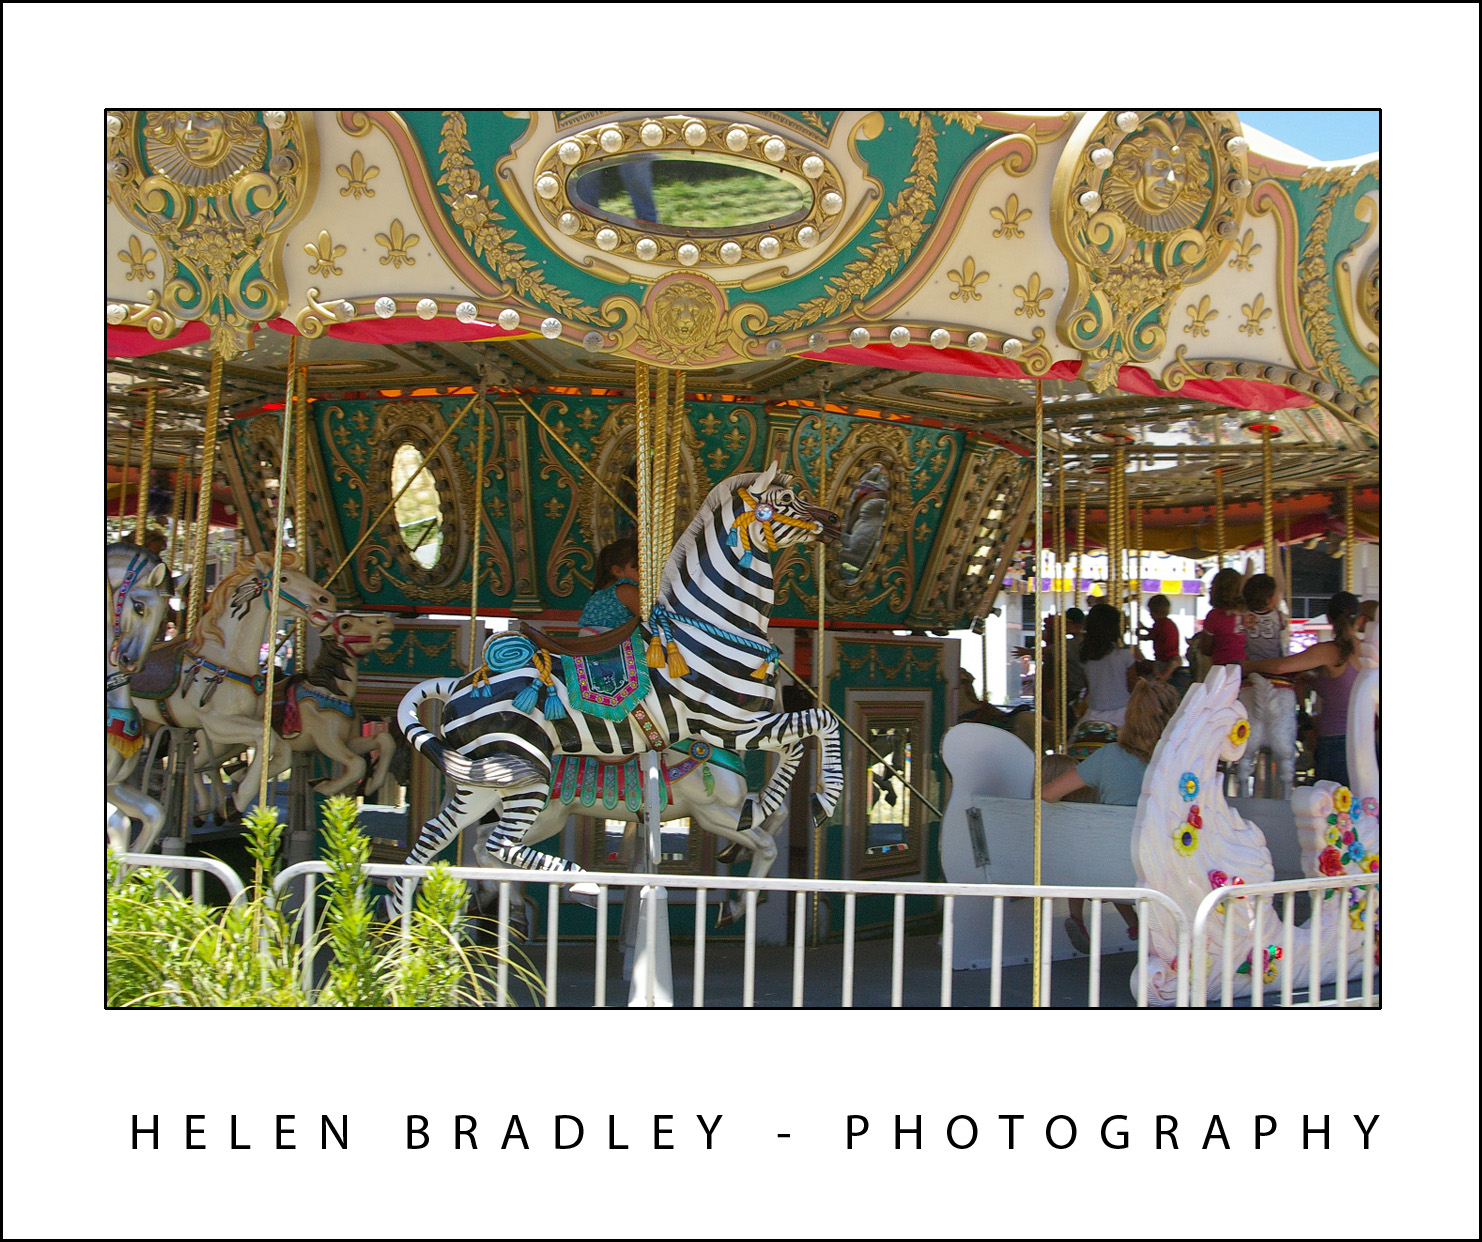
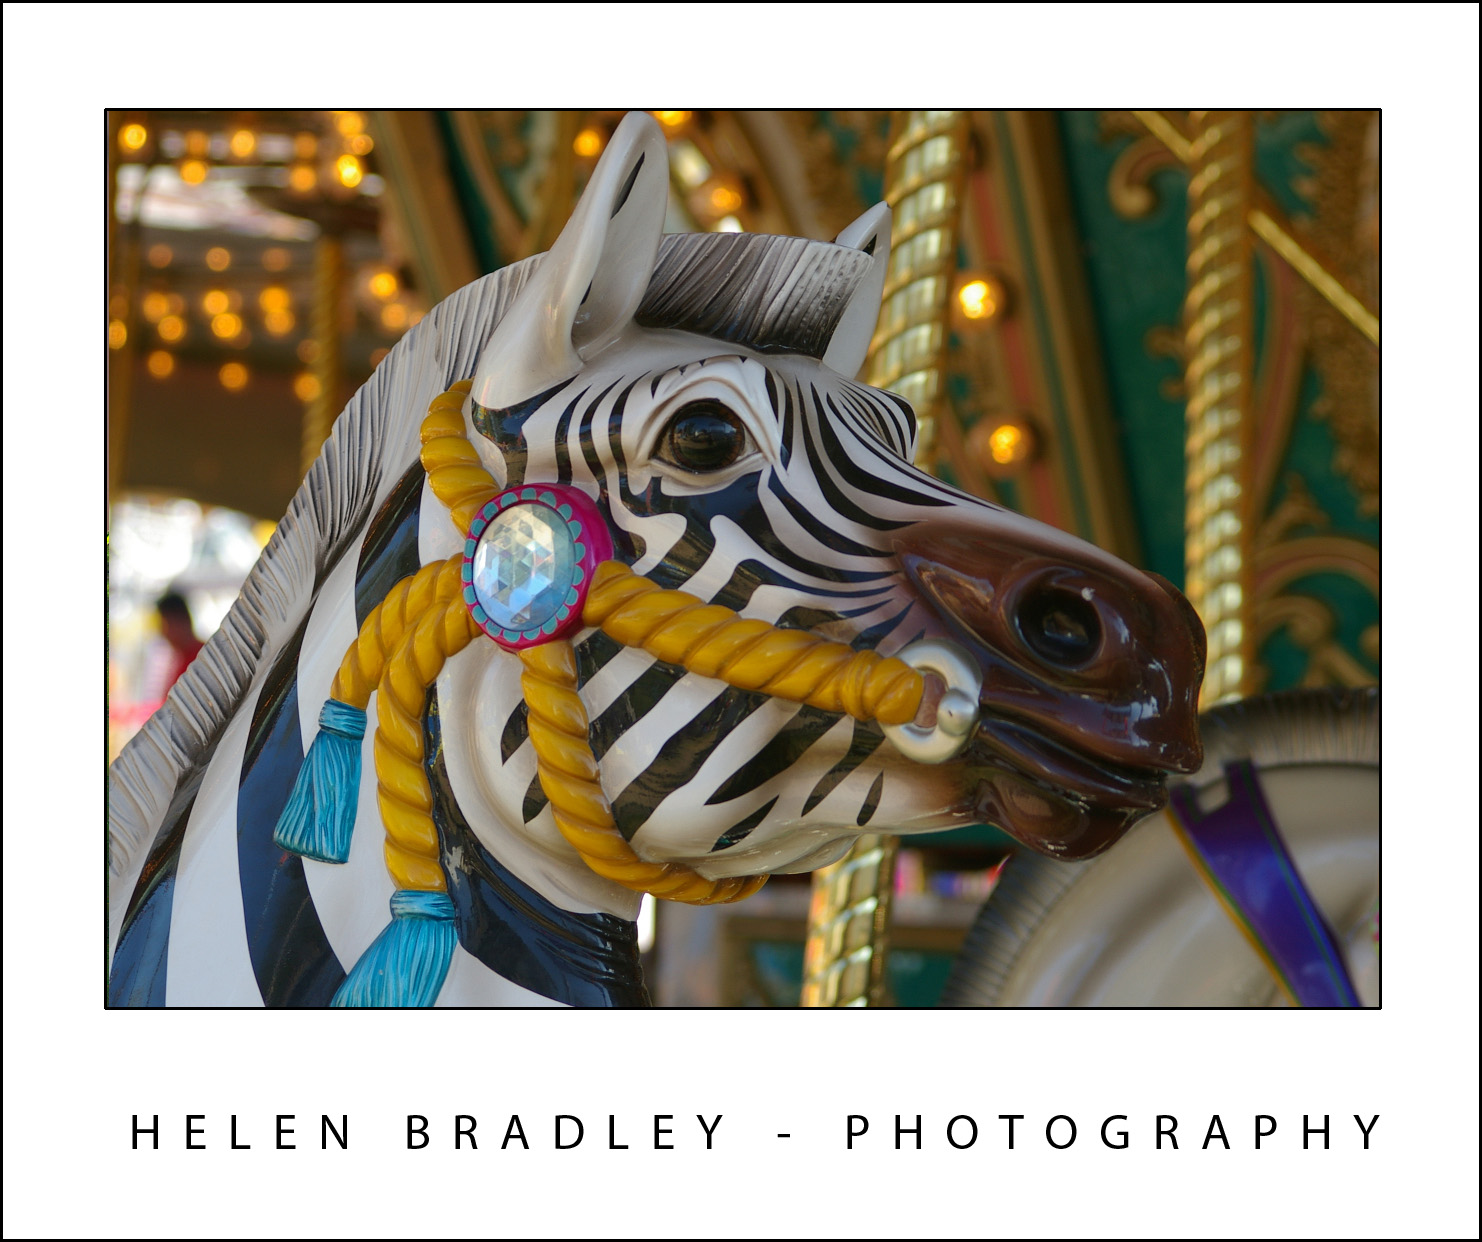
4 Fairground fun


Summer is a great time for county and state fairs. Even if you’re not someone who rides the rides you can still capture all the color and fun of the fair. Look for creative opportunities such as capturing the Ferris wheel at night using a small aperture such as f8 and a long exposure will let you pick up the light trails in the Ferris wheel as it turns.

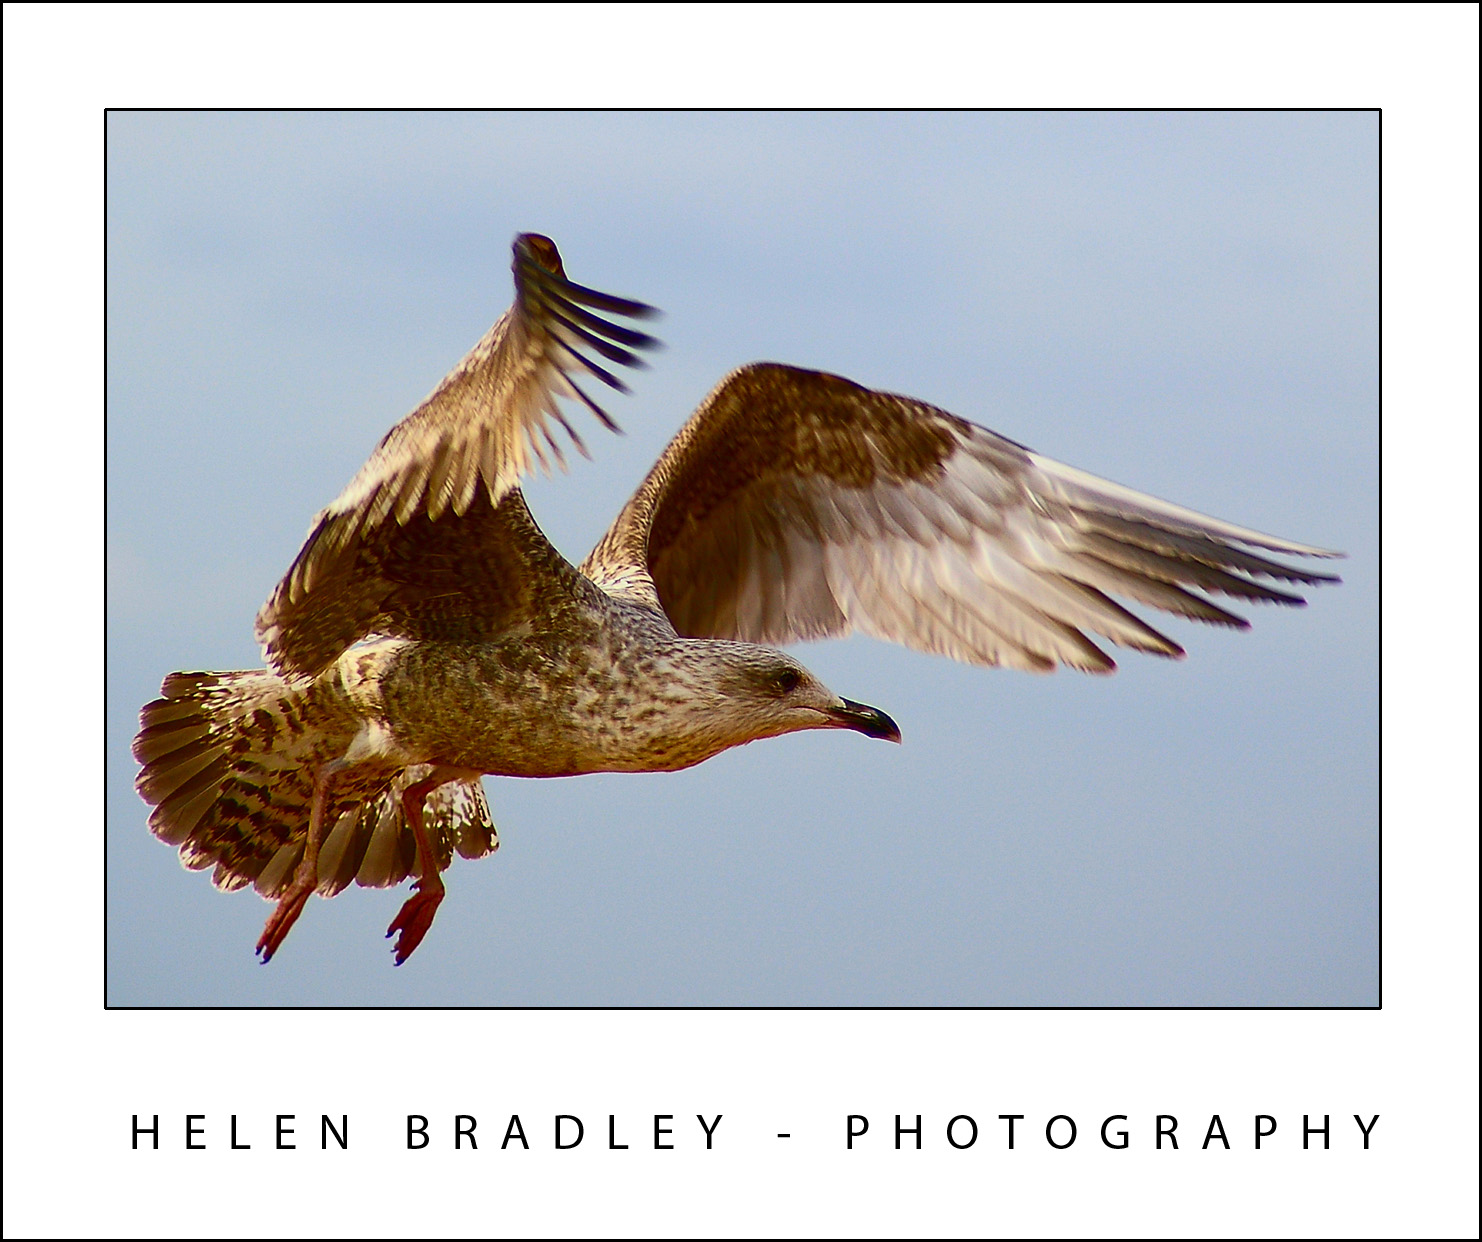
The carousel is also a good place to capture some stunning close up images. If the kids are riding fast rides use your motion capture skills and a fast shutter speed and move the camera with the movement of the ride to capture the kids clearly and blur the background attractively.
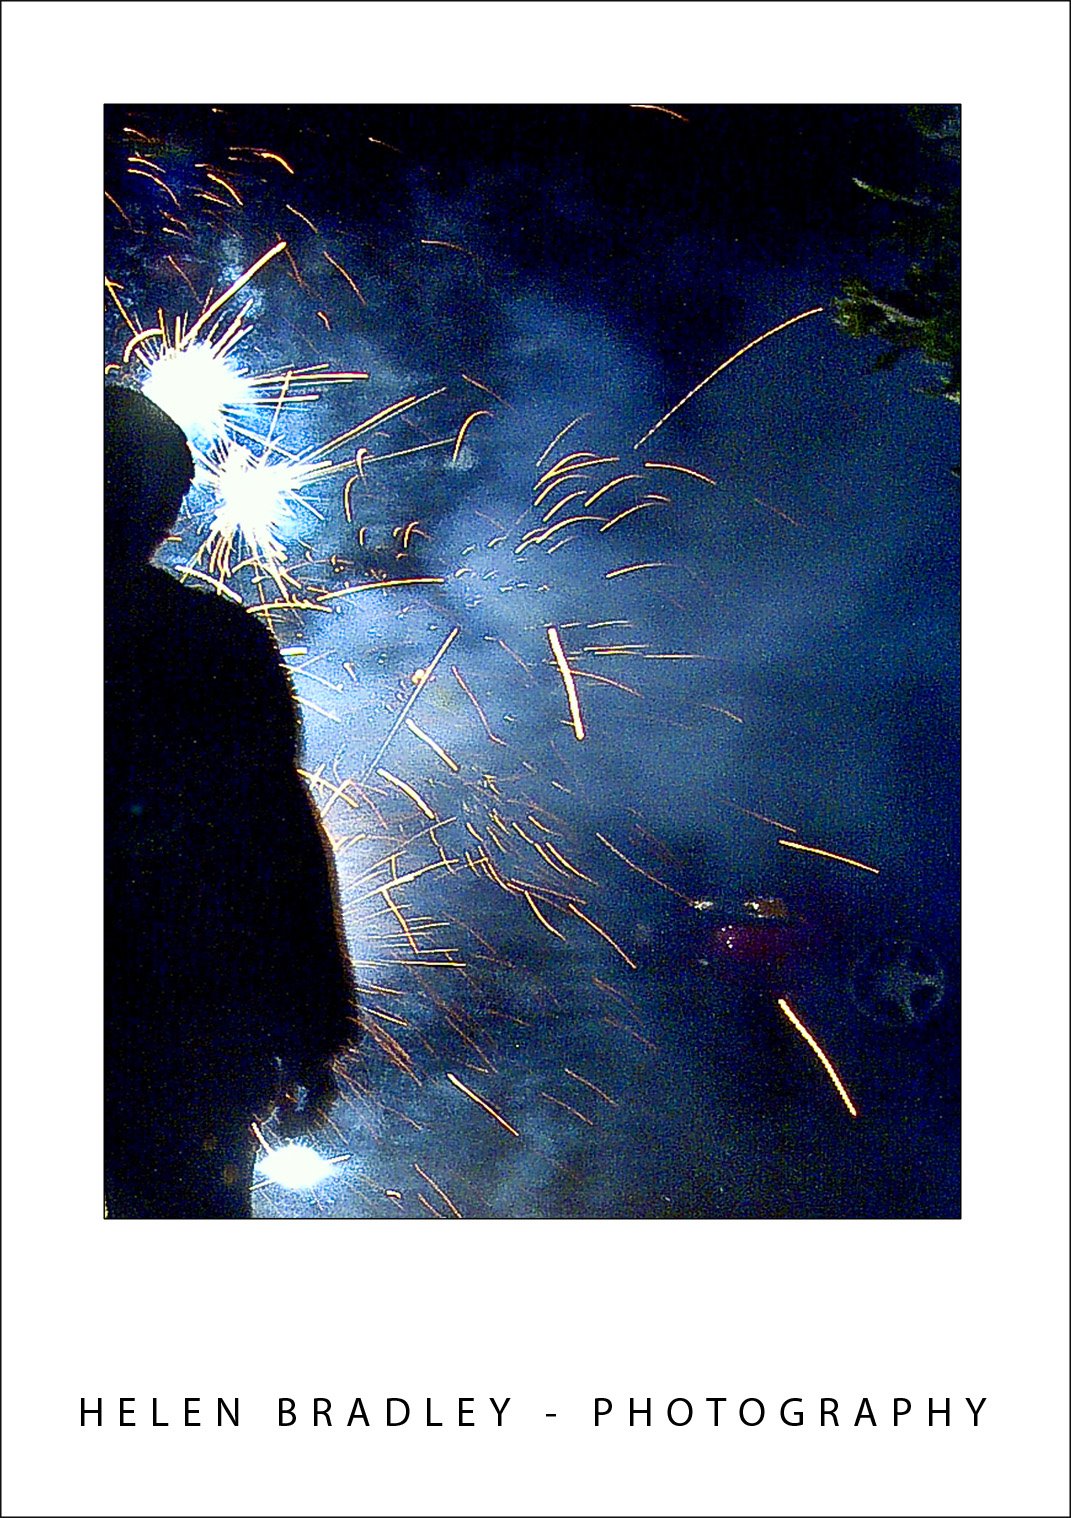
5 Fireworks


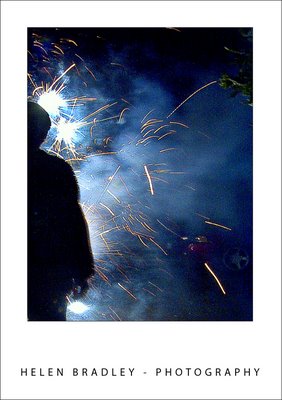
Summer and July the 4th are synonymous with firework displays. To capture fireworks you will need to turn off the camera’s flash and set it to a long exposure. Set the camera on a tripod and out of the way of bright local lights which will ruin the effect because they will provide light at the expense of the fireworks themselves. Set the aperture to a value of f8 or f16 and experiment with different exposure times to find something that gives you a sky full of fireworks color.
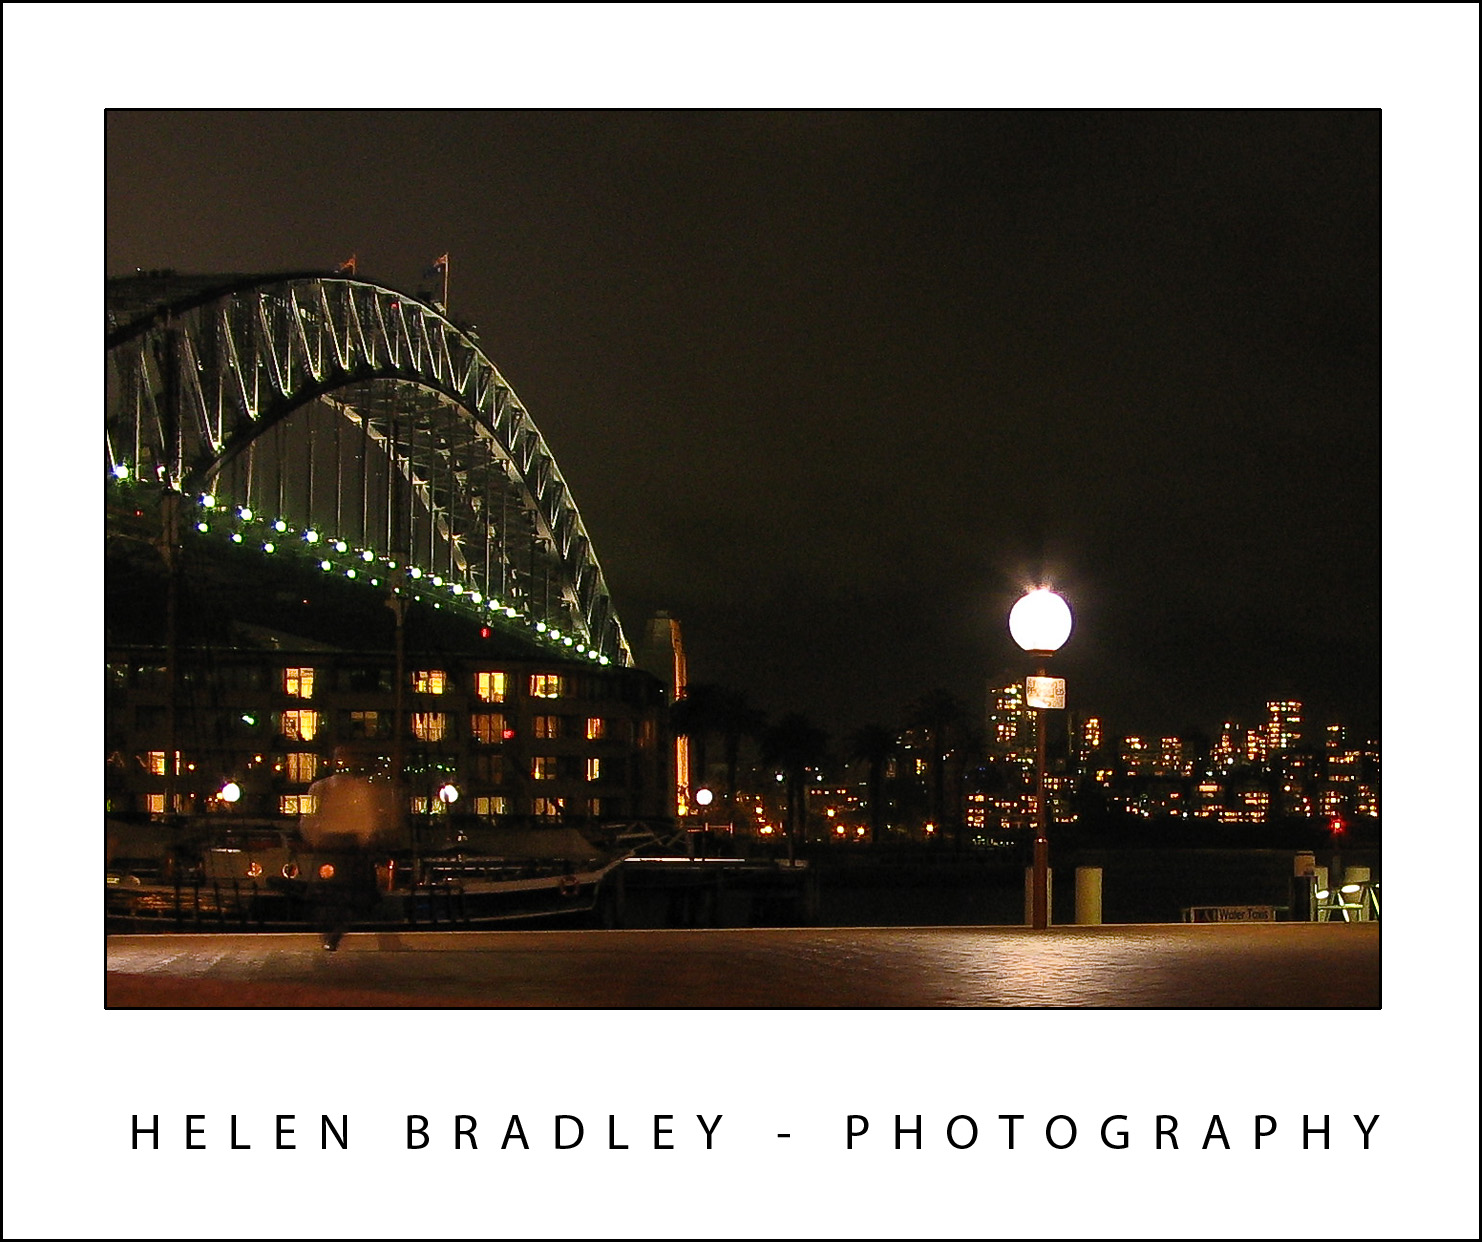
6 Nighttime lights


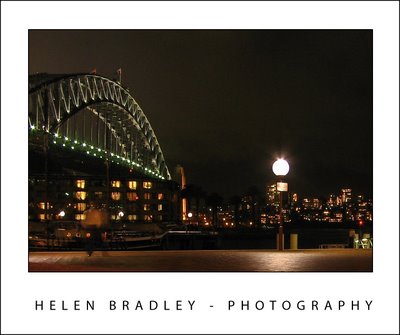
Good weather is a good excuse for getting out in the evenings and carrying your camera is a must do. With the light lasting until quite late in the evening you have good opportunities for capturing a mix of nighttime lights and activity. Set the camera on a tripod and use the flash curtain settings and a long exposure to capture the background night lights with the flash lighting the subject close to the camera.

Most cameras let you set the flash curtain so it either goes off when the shutter opens or just before it closes. Depending on the effect you want to create, you can place a subject close to the camera and light them with the flash. Because the shutter remains open, you will then capture the detail in the lighted scene behind them which would otherwise be black. This way you can capture two different types of images at the one time.

7 Window seat


When you’re flying across country and if you have a choice of seats make sure to get a window seat on the side of the plane that is not looking directly into the sun. This way you can capture images from the airplane window. Avoid using the polarizing filter on your camera in these circumstances or you’ll get funny rainbow colored reflections on your images. Everything from a summer thunderstorm to patterns in the landscape make for wonderful photo opportunities.

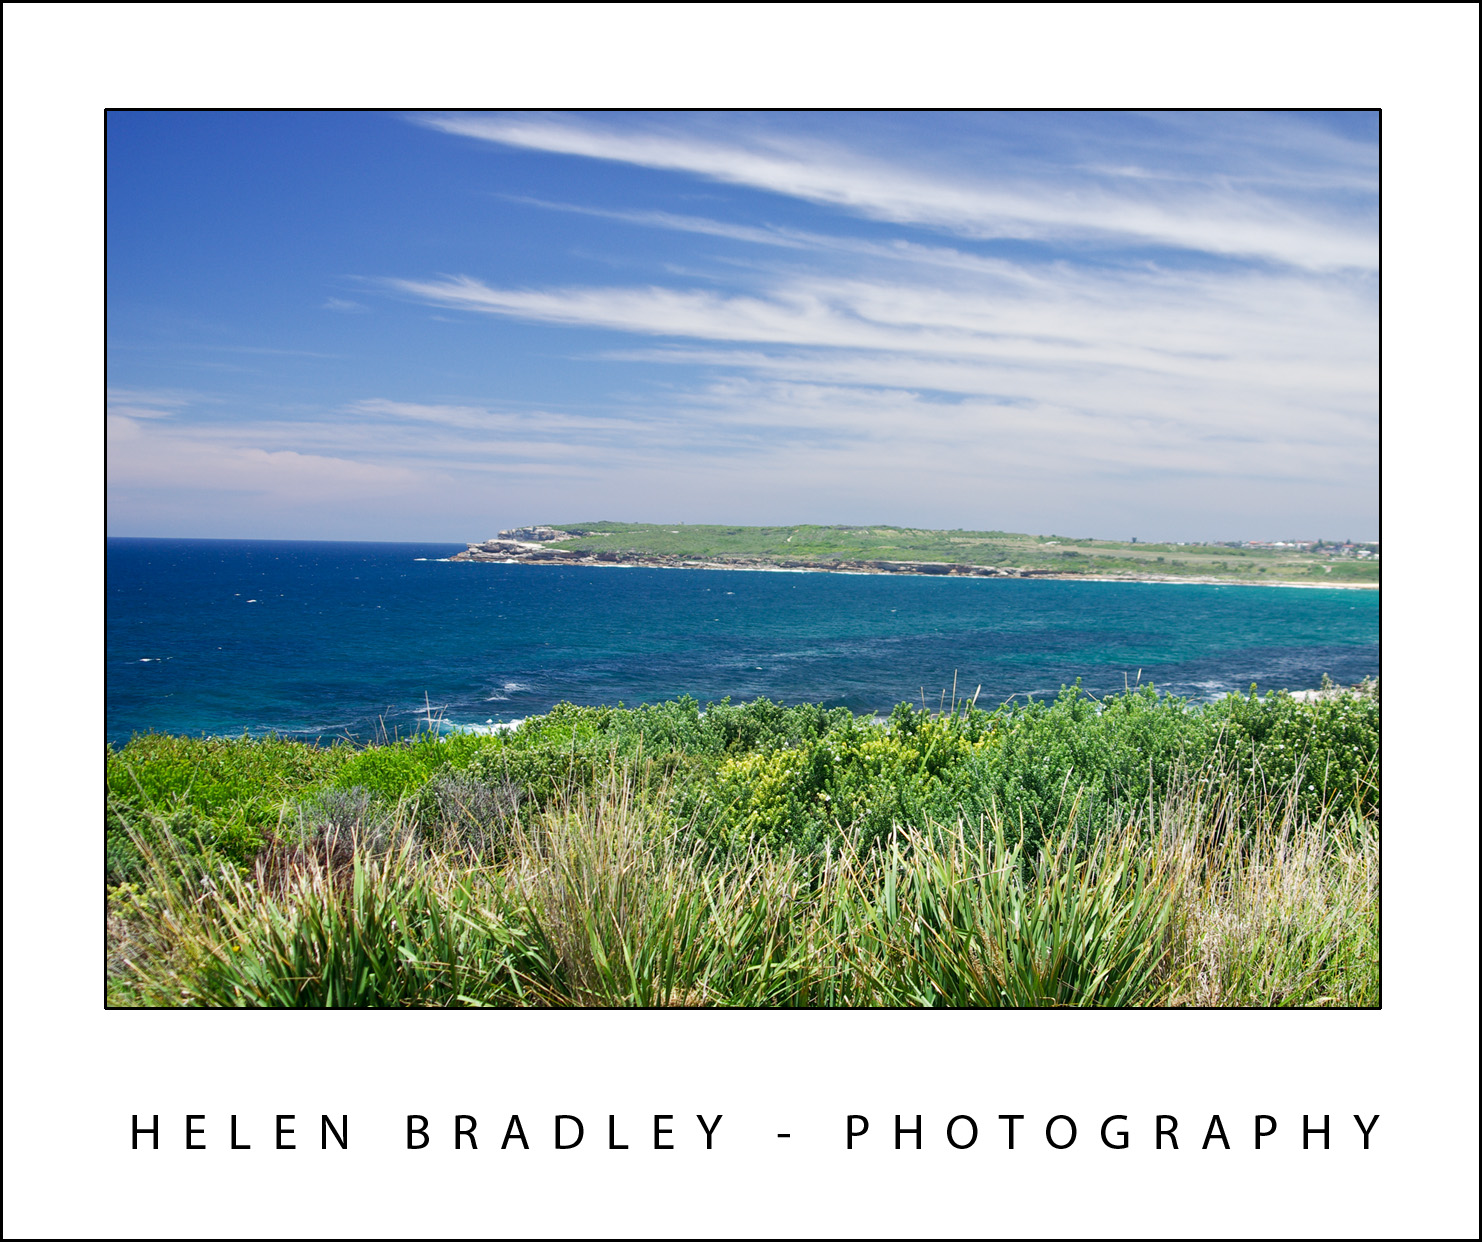
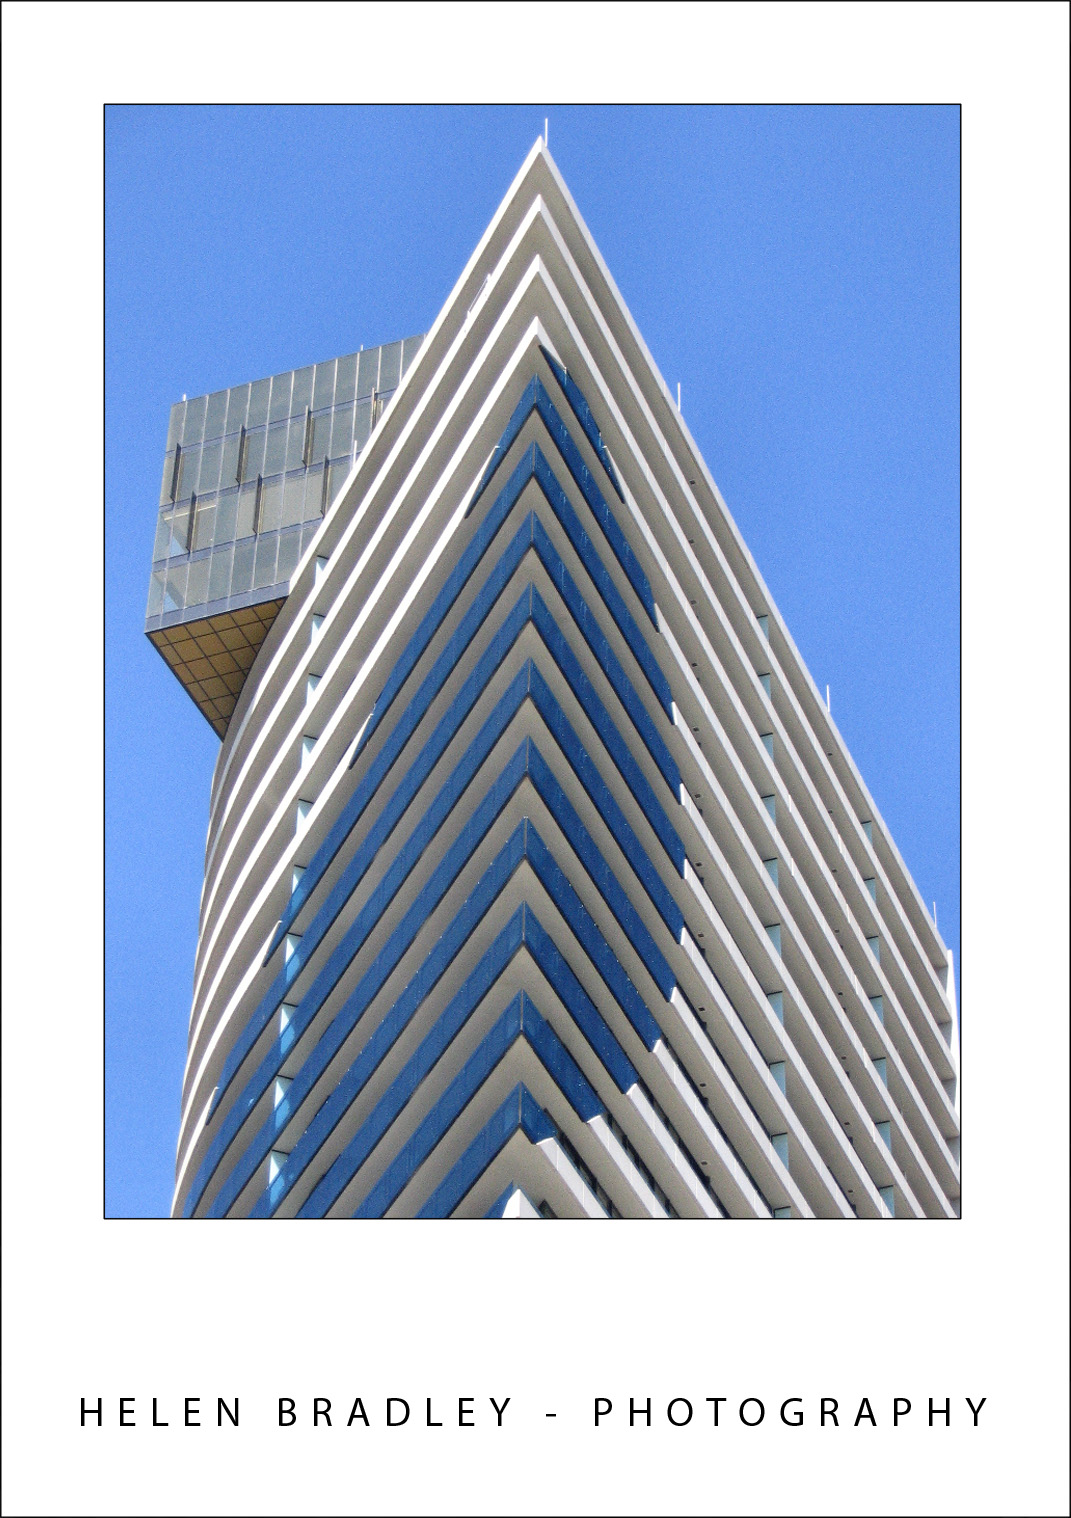
8 Build your sky portfolio


The photos you shot in fall, winter and in inclement weather typically lack the crisp blue skies you see in summer. Summer, therefore is a great time to capture great skies to add to your skies portfolio. Then they’ll be ready for you to use later in the year to replace the poorer skies in your other photos.

To build your skies collection, take time every time you’re shooting to look up at the sky. When you see an interesting sky whether it be a crisp blue sky or one peppered with clouds, photograph it and store these images in a special skies folder. Later in the year when the skies are lackluster use these skies as replacements so you can produce photos with wonderful skies all year round.

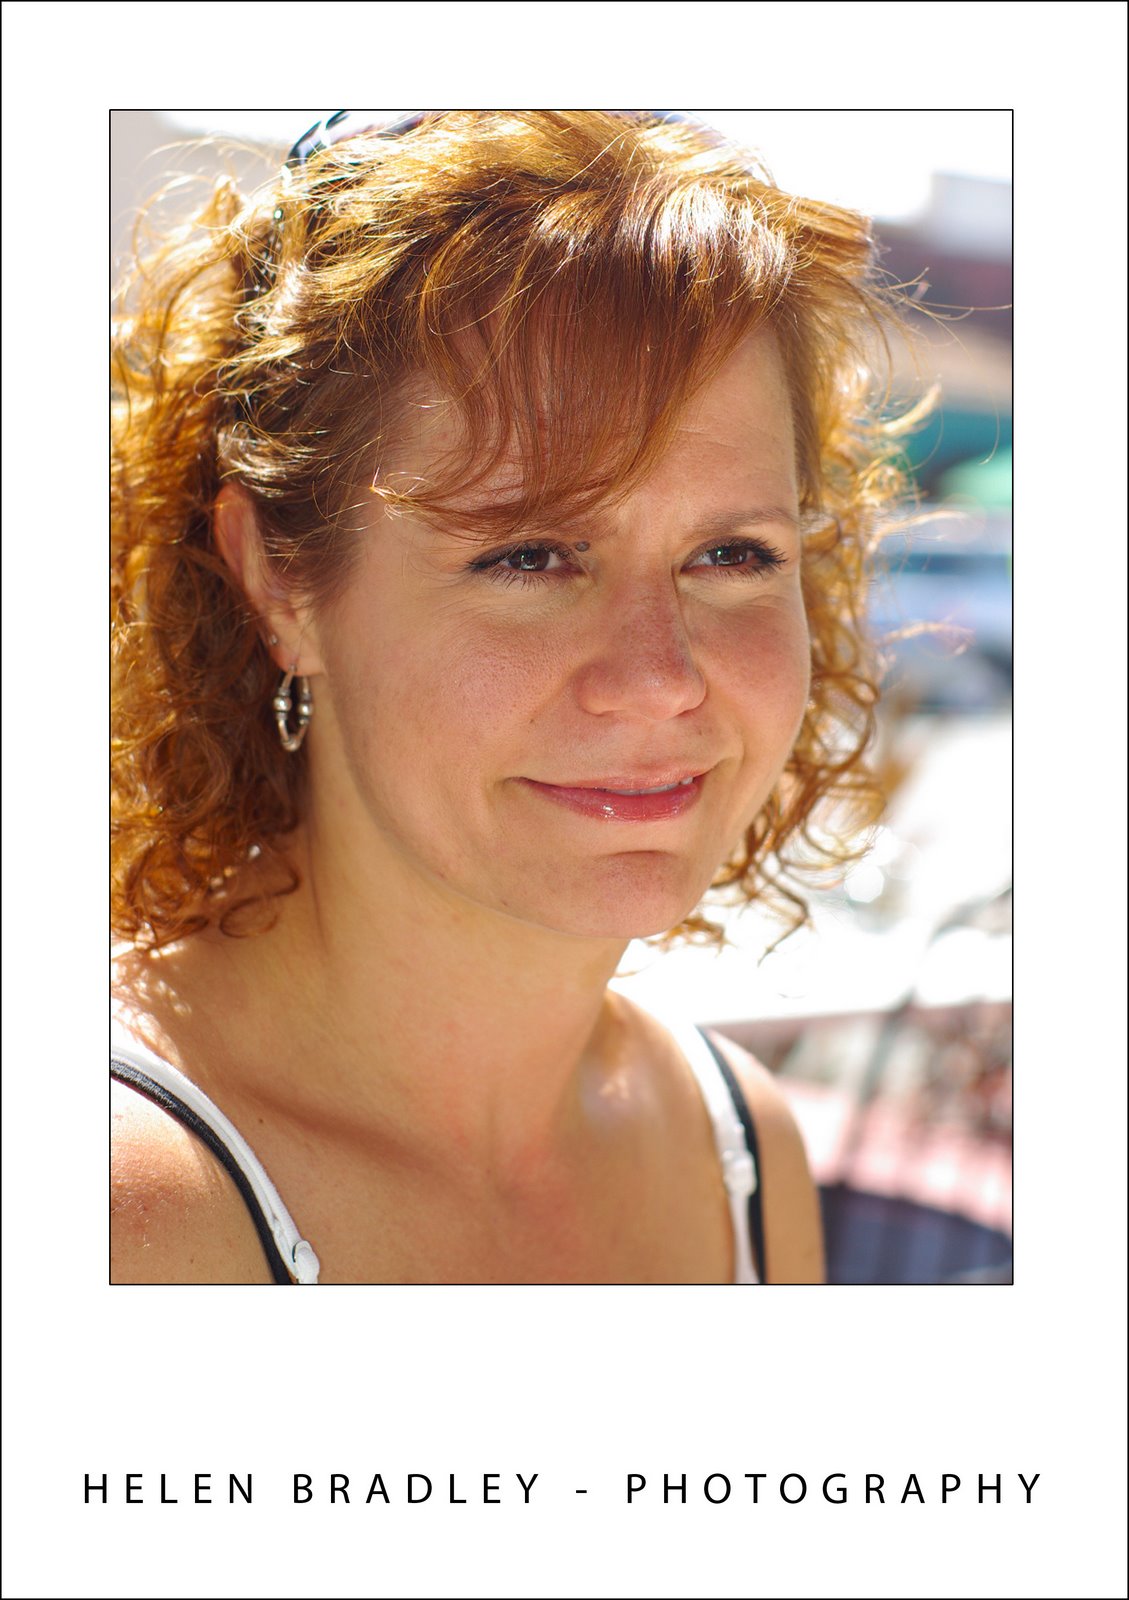
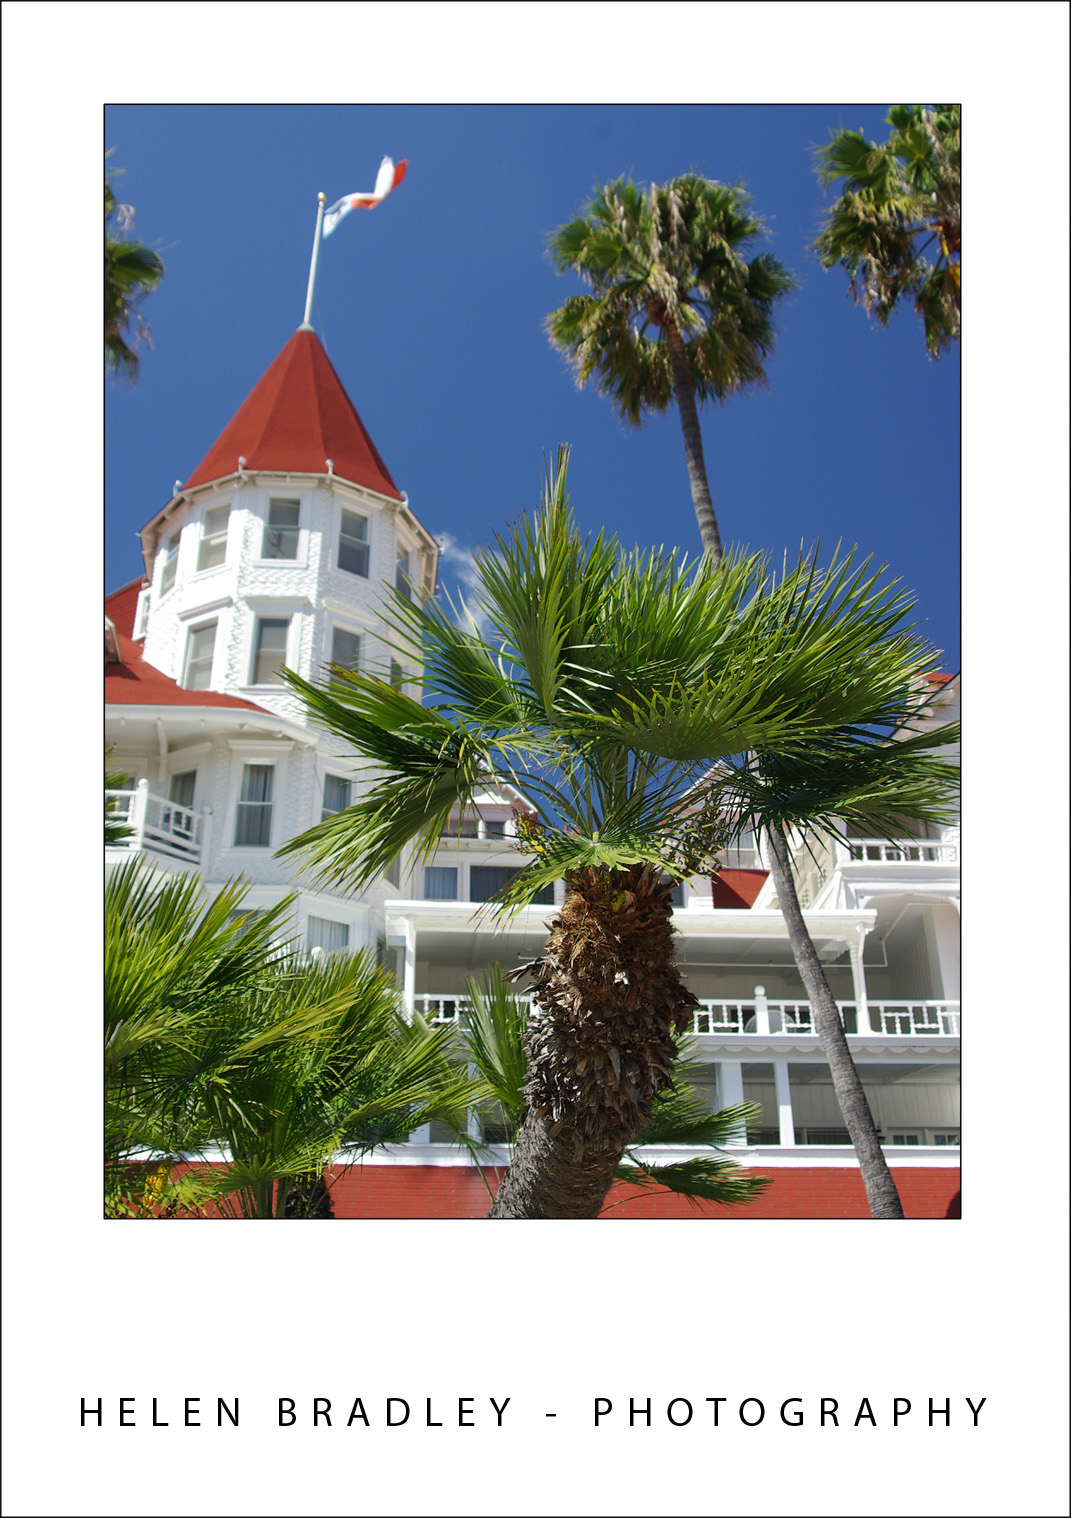
9 Capture silhouettes
Summer is a great time to capture silhouettes because of the very bright light and long twilights. The essence of a silhouette is placing your subject in front of a bright sky or a sunset or sunrise. You’ll want your subject to be in deep shadow with the rest of the image properly exposed. This is one time you’ll turn your camera’s flash off so it does not fire.

With the subject between the light source and the camera, take the shot and check to see if you’ve got a good silhouette or if the subject is still too well lit. If the subject is too light, use the camera’s exposure compensation to underexpose the shot by setting it to a negative value. Reducing it to even as little as -0.5 will be sufficient to get a darker silhouette and still have the sky nicely exposed. Good subjects for silhouettes include palm trees in front of sunsets, striking elements such as a person’s profile in silhouette and even masses of electric light wires can make for an interesting image.

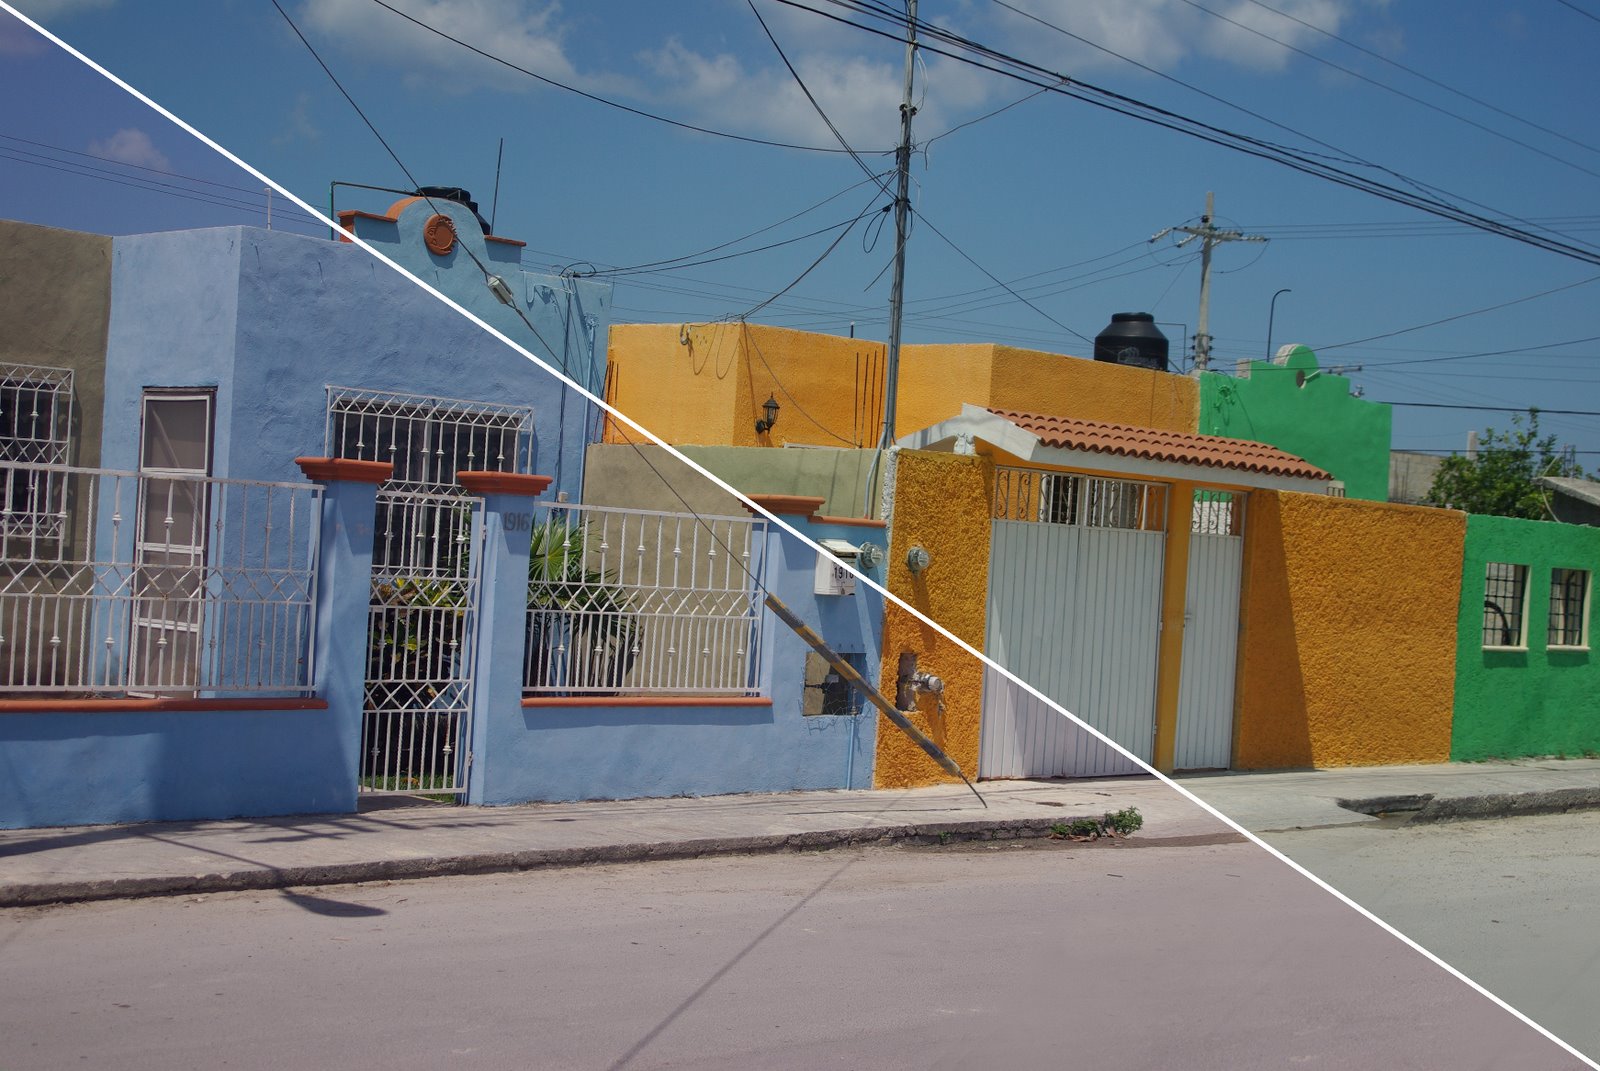
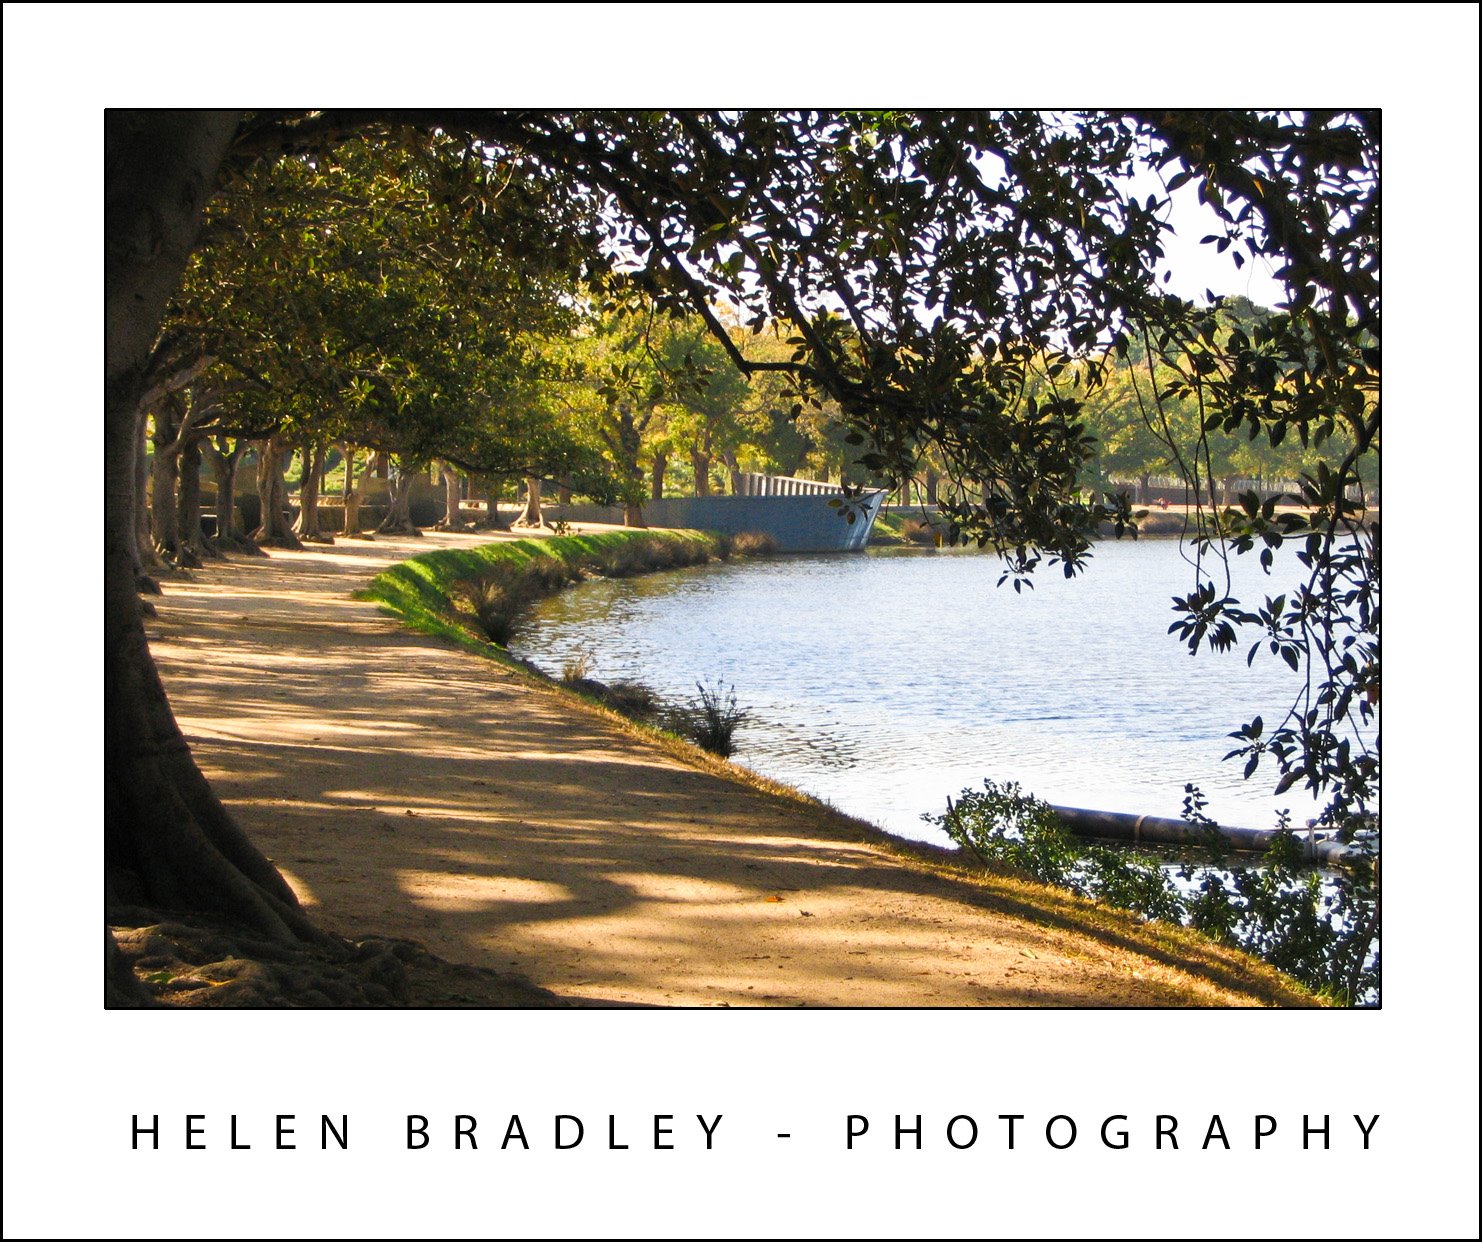
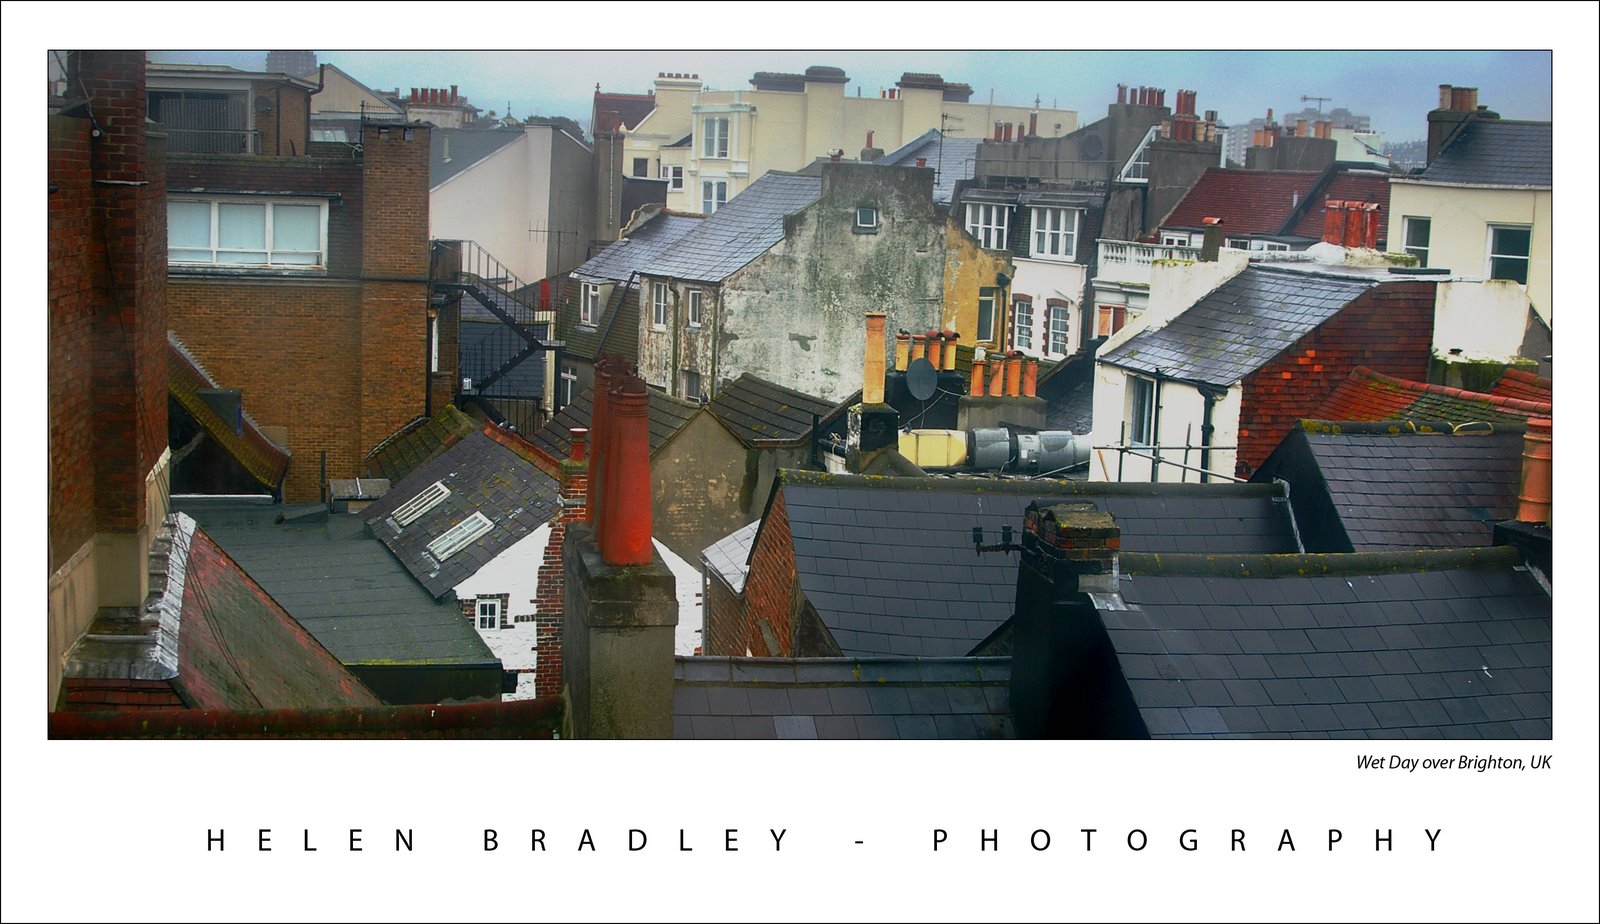
10 Capturing harsh light


One of the downsides of shooting in summer is the harshness of the light. Because the sun is in the same hemisphere and overhead the light is very crisp and very bright. Shooting at midday is fraught with difficulties because you’ll get areas which are very bright and some which are in deep shadow.

On the flipside, this is a good opportunity to capture images which make the most of the mix of light and shadow. Instead of looking at the scene itself, look for the play of light and shadow and for interesting shapes and patterns in the shadows cast by objects such as trees. It’s a great time of the year to capture creative images which showcase the harshness of the light.

Helen Bradley

Monday, July 6th, 2009

Big Occasion Photography


When you are a deft hand at taking photographs you’ll find that you’re asked to help out or be the main photographer at big occasions. If you’re helping out, you can focus on taking candid shots leaving the professional photographer to take the rest. If you’re “it” then you have a big job ahead. So, when you’re about to photograph group of people at an occasion such as a wedding, birthday party, graduation, or retirement party, here are some ways to ensure a successful assignment.

Know Your Place
At a wedding where there is a professional photographer already employed, leave the photographer to take the big shots of the bride, bridal party, and key guests and concentrate on everyone else. At key events during the ceremony such as the cutting of the cake and the bridal waltz, use your camera to capture the reactions of the other guests to what is going on.

At the reception, concentrate on taking candid shots of guests and casually composed shots of groups of guests interacting with each other. Ask small groups of people to take a minute or two to organize themselves into a close huddle in front of a mutual or some other attractive background. Take two or three photographs, first warning them that you intend to do so. Don’t hesitate to ask people to stop and pose for you, you’ll find that, with a little extra care, you’ll get much better quality shots of the guests and your photos will complement the more formal photographs taken by the professional photographer.

When You Are It
When you are the key photographer for an occasion when there are lots of people involved, your key responsibilities will be to get a mix of group and individual shots and some photos that set the overall scene for the occasion. Organize larger groups by having everyone line up in two or three lines with the front row seated and, if necessary, a group seated on the floor at their feet. Again, warn everyone that you intend to take a number of photos so that everyone is well prepared. Frame the shot carefully, ensuring you don’t leave out the people at either ends of the group and making sure you don’t chop off the heads of the people in the back row.

Where very small children are involved, encourage the parents to hold the children on their knees to keep them steady for the photograph. If the occasion is a birthday party or, for example, a retirement party, take one or two photos with everyone else looking at the guest of honour. Don’t forget to take a photo of any special food or gifts like a retirement plaque or the birthday cake. If it is a child’s party, take some photos of the decorations and the table so the child, in the years to come, can recall what their party was like.

© AngelIce, istockphoto.com

In addition to the main group photos, work around the occasion asking smaller groups of people to pose for you. If you are knowledgeable about who’s who in the guest list, you can encourage partners and close friends to pose for a photograph together making the finished spread of photographs a more attractive collection not only for the people who were at the event but also the guest of honour. Often occasions like birthdays and weddings are times for families that rarely see each other to come together so look out for opportunities to capture family groups and photos of multiple generations.


Image © Rosemarie Gearhart, istockphoto.com

When you’re organizing people to pose for you, ask them to stand close together and, where appropriate, to put their arms around each other or interact in some way. The warmth of the composition will show through in the final photograph. When posing two people, have them stand side-by-side and arrange three people into a loose triangle for ore visual interest.

Know Your Equipment
Before embarking on any project involving groups of people at an occasion that is unlikely to be repeated, make sure that you know and understand your equipment. Practice taking photographs indoors if that is where you will be taking them or out of doors in the full sun if that’s where the party will be. Pack your supplies carefully ensuring that you have a camera card with plenty of space available on it, a backup card, backup batteries, a tripod, and everything you need to take great photos.

Having an assistant or a volunteer to assist you in getting everyone organized will let you focus on composing the photograph and getting a good shot without needing to manage a large group of people at the same time.

When you’re done, download all the photos to your computer and burn them onto a series of CDs. If you hand a bunch of CDs to the party organizer or guest of honour, everyone who wants one can have one. You’ll find it easier and cheaper to burn a few disks than print mountains of photos for everyone.

Helen Bradley

Sunday, June 28th, 2009

Take your photography up a notch


Owning a digital camera isn’t a panacea for taking bad photos. In fact, all too often, having a digital camera means you take many more bad photos – you just don’t pay to have them printed. Take a quick look through the photos you’ve taken recently and see how many great photos you’ve taken compared with how many you’re disappointed with.

If you’re erring on the side of having too many photos in the not so good category, then read on! This month I have some great tips for taking much better photos and they’re simple solutions that don’t need special tools or expensive cameras. In fact they’re techniques that are guaranteed to take anyone’s photography up a notch.

Cut the clutter
When your photos are marred by untidy backgrounds and general clutter, there are two simple solutions. One is to move closer. Most people shoot from way too far away from their subjects so it’s inevitable that there will be other extraneous detail in the shot. You can tell if you’re standing too far away if you look at the photos you take and identify how much of the surface area of the photo the subjects take up. If it’s less than 50% you’re not getting close enough.

Next time you’re about to take a photo, take one good big step towards your subject and check the LCD screen. Mentally calculate how much of the photo area is covered by the subject, if it’s not at least half, then take another step and check again. At the same time, ensure that the scenery behind your subject is attractive. If not, move yourself or the subject until you have a more attractive background (or move in closer still), and then take your shot.


Getting in close to this carousel turns the shot from ho-hum into wonderful.

No more blur
Blur in photos is great when you want it and disastrous when you don’t. When you want a sharp, clear photo and all you’re getting is blur, there are some things to check. One is that you’re not too close to your subject. Your camera’s manual will tell you the ideal range at which the camera can focus – if you’re closer than recommended then your photos will be blurry. The solution is to move further away from your subject so the lens can focus or switch to macro mode. Macro mode is indicated by a small flower icon and it is used for close up photography. Again, check your camera’s manual to see just how close you can be to your subject in macro mode – you will find this is usually a minimum of around 5cm. When using macro mode, zoom out (not in) as the camera generally won’t focus in macro mode if you’re using the zoom at the same time.

If the blur cannot be attributed to being too close, it might be caused by camera movement. When taking a shot, hold the camera in both hands and brace yourself. Take a breath, push the shutter release half way down to allow the camera to focus on the subject. Then push the shutter release the remainder of the way down to take the shot before breathing out again. Taking and holding a breath will avoid a lot of camera movement and pressing the shutter release half down gives the camera’s auto-focus mechanism time to focus correctly before you take the shot.


The camera moved a little as this shot was taken resulting in a slight blur.

When your subject is moving, taking a sharp picture is more difficult than when it is stationary. In this situation, switch the camera to sports mode so the shot will be captured faster and so there is less chance of the movement causing a blurry shot. It will also help if you adjust your placement so the movement is occurring towards you and not across the path of the shot. Of course, in some situations this is not possible, for example, standing in front of horses racing around a track is generally not possible, however it will give a clearer shot!

Too much light or too little
When your photos are repeatedly too light or too dark, adjusting the camera’s exposure may help. To do this, check your camera’s manual to see if it has an exposure compensation option. Generally you can adjust the exposure up or down by approximately 2 stops – these are marked -2, -1, 0, 1 and 2 on a scale. Zero is the value that is used by default and, to get a darker image, set the value towards the negative, generally around minus one third to minus half a stop is sufficient. On the other hand if your shots are too dark, adjust the setting to a positive value of around one third or one half. Exposure compensation settings are often lost when you turn off your camera so you should check it each time just in case.


If you’re shooting in bright daylight, and particularly if you are shooting portraits or a person standing in front of a scene, use the forced or fill flash setting on your camera. This forces the flash to fire in circumstances that it would generally not be required. The flash will light the person’s face and give a much nicer portrait shot and the background will still be captured just fine too.

Helen Bradley

Thursday, June 25th, 2009

When to use your camera’s flash and when not to

Depending on how you use it, your camera’s flash might be your best tool for lighting a shot or the fastest way to ruin one. It’s all in how you use it, and when.

In this post I’ll show you how to tame your camera’s flash to ensure it works for you and not against you.

Configure the flash
The first step for using the flash on your camera is to knowing how to configure it so you can, in an instant, turn it on or off as required. If you’re unsure, check your camera’s manual to see the flash options you have, how to identify what the current flash setting is and how to change it.

This is vital even if you only ever shoot out of doors in full sun – that is, surprising as it might seem – one time you should use your flash and it’s one time your camera won’t default to using it. So, you need to know how to force the flash to fire.

When you are checking for flash options you’re sure to find that your camera has a redeye reduction flash option. This makes the flash fire twice, one low strength flash and one full strength flash. The first flash shrinks the pupil size of your subject so that you’re less likely to get a redeye effect in your photo.


The image on the right was shot with a fill flash to light the young girl’s face – it is a better photo than the one on the left.

Unfortunately your subject often misinterprets the purpose of the first flash and thinks the photo has been taken so they move away and you lose the shot.

It is often a better solution to disable the redeye reduction flash and use your photo editing software to remove redeye later on. You can reduce the redeye effect other ways too, one easy option is to increase the room lighting – the lighter the surrounds are, the less likely you are to get a redeye effect.

Some cameras also have a flash intensity setting so you can set the fill flash to flash but not at full power so you don’t blow out your subject’s skin but you still get a nice light.

How far can you flash?
If you’ve tried using a flash at a night time sporting event or concert you’ll know it is pretty ineffectual. The range of your camera’s flash is around 3 yards/metres so unless you’re very close to your subject it will be of no use at all.

In this situation, turn off the flash and set the camera to night mode. Brace the camera using a tripod or on something steady and take the photo – without the flash. It might take a second to capture the shot but the result will be much better.


Using the flash too close to this small baby has washed out her face, turning the flash off gives a better result.

Should you use your flash on a sunny day – YES!
When you first start taking photos you’ll think that the last place you need to use a flash is in full sun. Long time photographers, however, know that full sun is misleading and someone standing in full sun in front of a landscape, streetscape or beach won’t be correctly lit unless you stand close enough to them and use the flash to light their features. The flash won’t have any effect on the background but it will improve how your subject looks – one hundred percent.

Check your camera’s manual – some cameras have a special daytime fill flash which you should use for this situation and, if not, just use the regular flash.

Too much flash
With many point and shoot cameras the flash has a tendency to be too strong and it will wash out your subject. You have a couple of choices in this situation, either move further away from your subject so the flash has lost some of its power by the time it reaches them or diffuse the flash.

To diffuse the light, place something in front of the flash to reduce the light – a small piece of wax paper taped over the flash is one option or you can hold a small piece of shiny white cardboard underneath the flash angled upwards to bounce the light upwards – this will create a more diffused lighting effect.


This little girl was photographed in a shady place with no harsh shadows and she was relaxed cuddling a favourite toy.

Knowing when to use the flash, how to work when you can’t use it and when it’s best turned off will help you take your photography skills up a notch. You’ll be able to take great beach shots, you’ll get photos of your favourite bands at their concerts and your friends across the dinner table.

Helen Bradley

Monday, June 22nd, 2009

Capture great cell phone photos

You’ll probably never win a major photographic award with a photo snapped from your cell phone. But that doesn’t mean you can’t get some wonderful photos if you work within its limitations. Most cell phones lack most of the features of even an entry level point and shoot digital camera but, when you know what it can do (and what it can’t), you can capture some fun and dare we say it, artistic photos.

Let’s start with the limitations of your cell phone. First of all it probably doesn’t have a flash and, if it does, it’s range will be so small that it will be next to useless. So, taking shots in poor light or at night is seldom an option unless your cell phone has a night mode or unless you can light your subject some other way. If your cell phone has a night shooting mode, use this and hold the phone very steady to shoot in the low light as the shot will take longer to capture and any movement will ruin it. On the other hand, the cell phone probably won’t do so well in extremely bright sunlight either without some help. If your cell phone takes photos that are blown out in sunlight, see if you can adjust the exposure levels so the photos are darker and less blown out. If not, move around your subject to find the best place to shoot from – often moving around so the sun falls in a different place will be the difference between a well exposed shot and an average quality one.


As you probably won’t have a zoom on your cell phone, you need to get up close – that means moving closer to the subject so it fills the viewfinder and then some. If you’re used to having a lot of room around your subject’s face, move closer so that their face totally fills the viewfinder. Don’t worry if you cut off a person’s ear or part of their head as you do this, the photo will be all the better for doing so. If your cell phone shoots landscape mode photos, turn it on the side to shoot portrait or vice versa – the difference can have an impact on how much you fit into your shot.

Shooting right
When shooting with your cell phone, hold it steady – like any other camera the shot won’t be in focus if you move. Forget taking a photo holding the cell phone with one hand out from your body, instead, hold it close to you and, where possible, with both hands or brace it against a fence, wall or tree. Just before you shoot, take a deep breath and hold it as you take the shot, then breathe out.
© Matthew Ludgate, istockphoto.com

When looking for things to capture, concentrate on fun and whimsical subjects and think of your photos as being a be a visual diary of your life. You can snap informational subjects like bus timetables and train routes, restaurant menus or a picture of the wine label of a bottle you like and want to buy again. Instead of sticky notes, capture a picture of the note so you have the information with you. Most cameras let you use an image as the wallpaper for the phone and you can use anything for this – fun to look at or practical to use – it’s your choice.

When photographing small things that are close to the ground like pets and children, get in close – bend your knees, kneel or sit at the same level to capture the shot. The results will be more compelling when you do.

Many sites are popping up with tools and features to help you download your camera photos and do something with them. For example, Yahoo Flickr has a tool you can use to email photos direct from your camera phone. Sites like this overcome the problem with many phones of having to organise to be near a computer to download your images.

Always edit your photos where possible on your computer rather than using your phone’s tools simply because the tools available on your computer are far more sophisticated than those on your phone. Some programs like the new Microsoft Digital Image Suite 2006 have special fixing tools for camera phone photos – this removes any colour cast and noise and adds some sharpening to make the image clearer.

If your phone offers a choice of quality for capturing your images, it’s best, where possible, to choose the highest quality. Although you may not notice a difference in quality when viewing the photo on your phone, you will notice it if you’re viewing it on a computer screen or if you capture a really nice shot that you want to print.


If you’re interested in just what shots people are taking with their camera phones, visit this Flickr cell phone stream and check out the gallery there. You’ll find a range of subjects and you just might be inspired to try some of them yourself.

Helen Bradley

Friday, June 19th, 2009

Photographing buildings


Buildings are a great subject for photographers. Buildings don’t move and that’s a big plus when you’re starting out. They also reflect changes in light throughout the day so photograph a building in the early morning and return at midday and you’ll have an entirely new perspective on it. However there are some tricks to composing good shots of buildings and the first step is to consider what you’ll photograph.

When you’re photographing a building there are a couple of possible approaches to take. One is to give the building some context by including elements around it in the photo so you get a feeling for where it is situated and how it relates to its environment. For example, when photographing a small old building in a big city – the image will look most compelling if you show the building dwarfed by the skyscrapers around it. Farm buildings can also look great when captured as small dots on a landscape of grass and trees – but they also look great close up if you fill the shot with their architectural details.

On the other hand, some buildings benefit from being closely cropped so they are the clear focus of the photo and so the viewer is invited to imagine the world beyond the edge of the image.

When you’re photographing in the city, consider including pedestrians to give the photograph a sense of the busyness of the city. If you’re in a foreign city then buildings with interesting colours and signage make for great photos and help to capture the essence of the country you’re visiting. Look for colour in buildings too. Quite often you’ll find a building painted a different colour to those around and the contrast between the bright saturated colour and dull grey makes for a great shot – but remember that you’ll need to include some of the grey buildings for the coloured one to really pop.

In some situations, it’s the small architectural details of the building that are most compelling. Features like small altars built into the walls or gargoyles make a wonderful shot. In other cases, look for repetitive elements such as a bank of same size windows or arches – while one arch is nice and two is ok, three or more creates a repetitive pattern which makes for a more interesting photo. If you can shoot it so the pattern starts close up and then recedes into the distance, all the better.

It is also possible to photograph a building through an arch, and when you do, you’ll find the arch shape is nicely dark and in shadow, providing a simple frame for the building.

Other features that are great subjects for a photo are windows, doors and staircases. In the old part of many cities you’ll find interesting old wooden doors and cute windows, in some cases you’ll find that the inside of the building or a reflection in the window gives some interesting detail and context for the image. Staircases and paths draw the eye along the direction of movement and into the photo.

When photographing swimming pools such as at a hotel, either capture part of it framed in the landscape around it or get up high and photograph it from above. If you do this in the early morning before anyone is around you’ll get a very different photo to the one you’ll capture at midday in summer.

Bridges are also great to photograph – for these, either get far enough away to shoot the entire bridge, perhaps jammed with peak hour traffic or look for a different view. Perhaps a close up of an architectural detail or the city framed in its shape. As with all subjects, any building is best shot either early in the morning or late in the afternoon and not at midday. The exception to this is where there are some interesting weather details that throw a different colour or type of light and which will help add warmth and interest to the photo.

Night time opens up a world of possibilities as even the most ugly skyscraper takes on a magical glow as the sun goes down. The trick with night photography is to take long enough exposures so you capture the detail. Start by using a tripod and set it to night shooting and disable the flash (its range is only around 3 metres so it’s useless for long shots). If your camera allows you to take timed exposures, experiment with different timings. With a long exposure time, set a small aperture such as f/16 or f/22 to minimize overexposing the strongest lights in the scene. Alternately, use a shorter exposure with a larger aperture such as f/2 or f/3.5. When you combine a small aperture and a long exposure time, you will capture delicious streaks of light from car tail lights and the lights of city buildings will give the photo a great glow.

Some buildings or streetscapes are simply too wide to capture in a single shot. For these, put your camera on a tripod and capture a series of shots of the buildings from left to right overlapping each by about 20% so you can stitch these into a panorama later on. If your camera has a panorama function, use it to help line up the successive shots.

Photographs of buildings taken with digital cameras will often display perspective problems and the top of the buildings will be narrower than the bottom. This can be fixed in your graphics software later on but, when you’re taking the shot, allow for this correction and capture some extra detail either side of the base of the building so you have plenty of image to work with when you’re straightening the photo later on.

Helen Bradley

Page 11 of 11« First7891011