Tuesday, October 13th, 2009

Find a new perspective


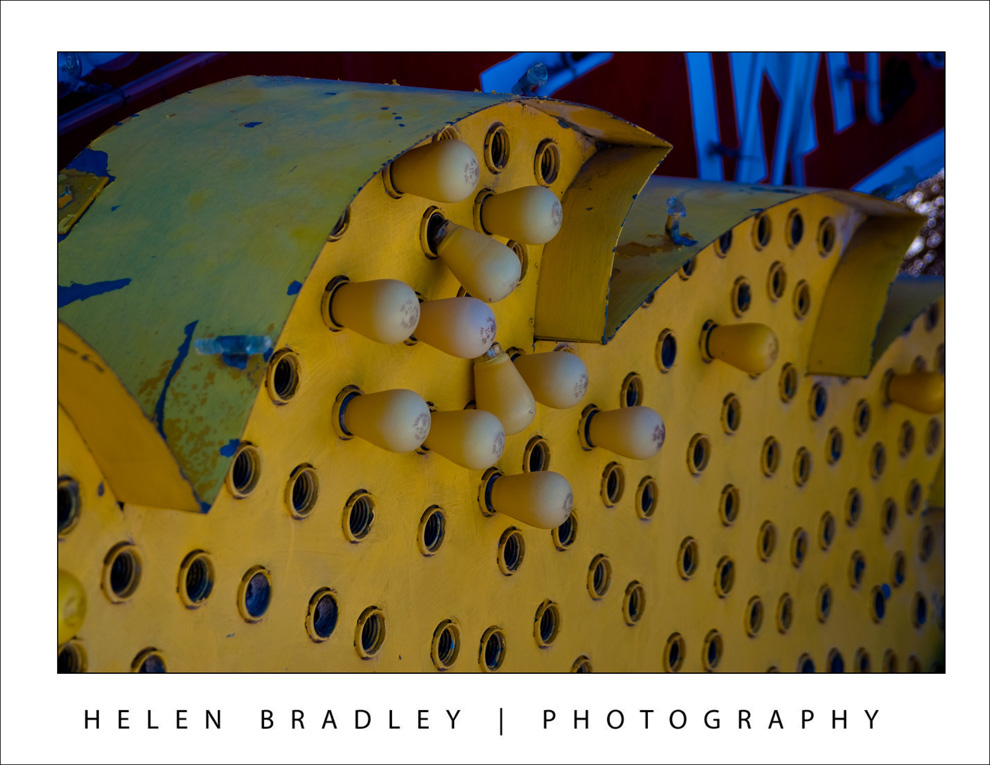
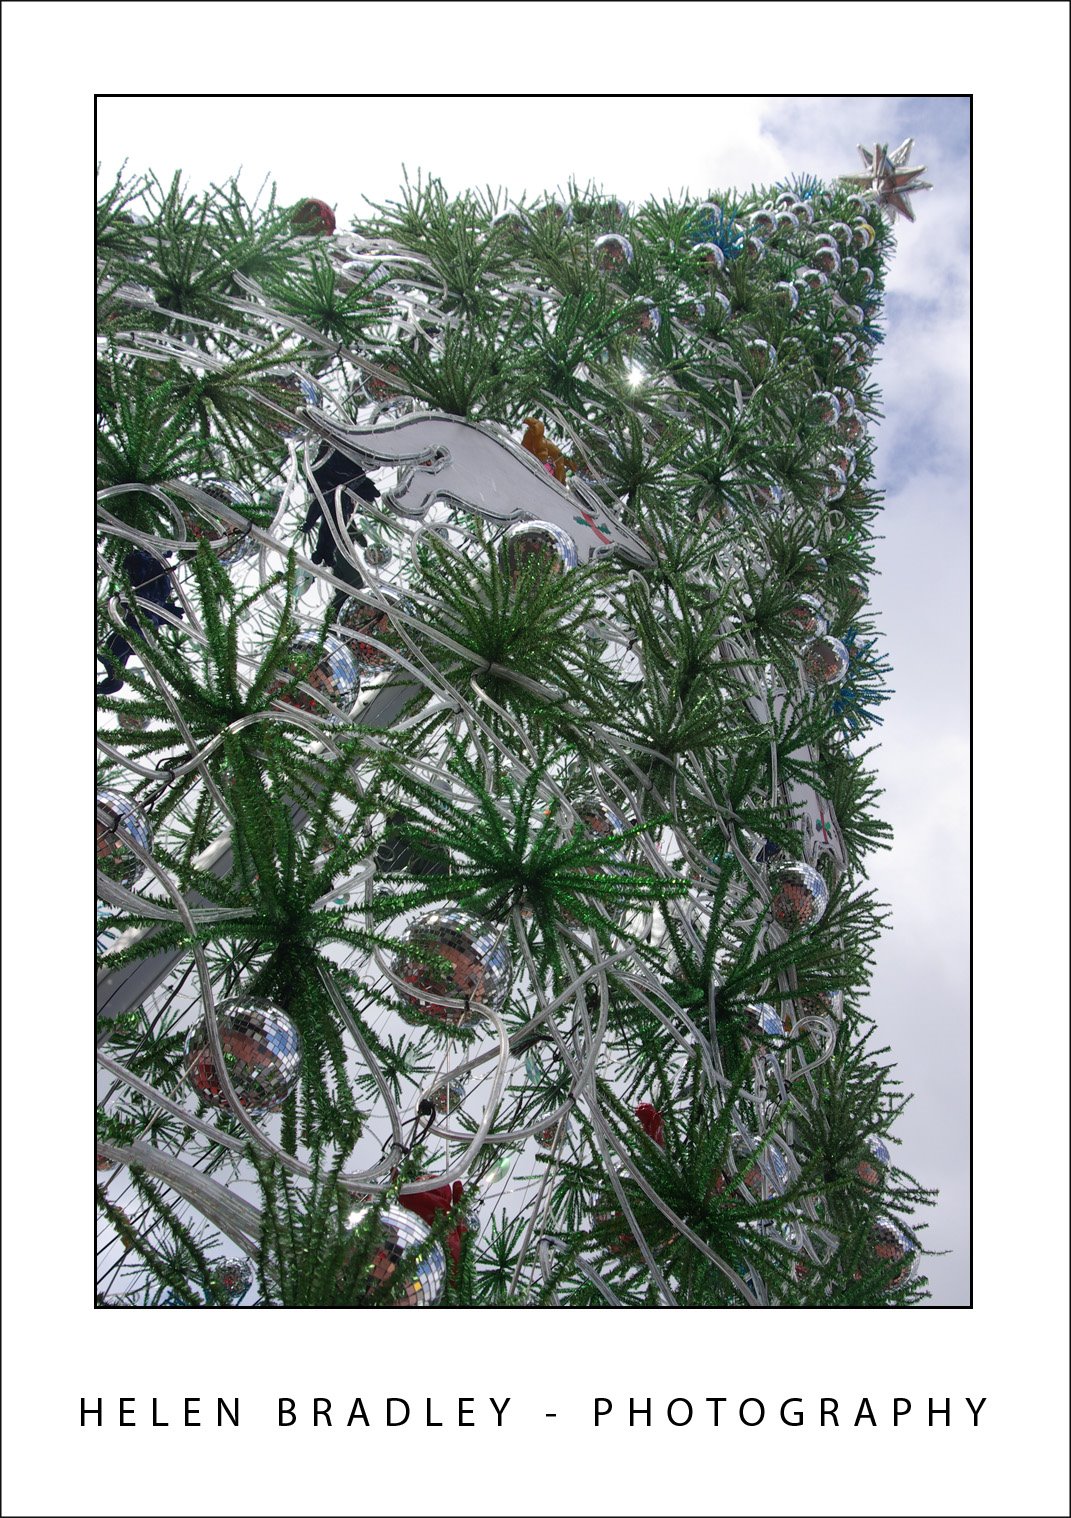
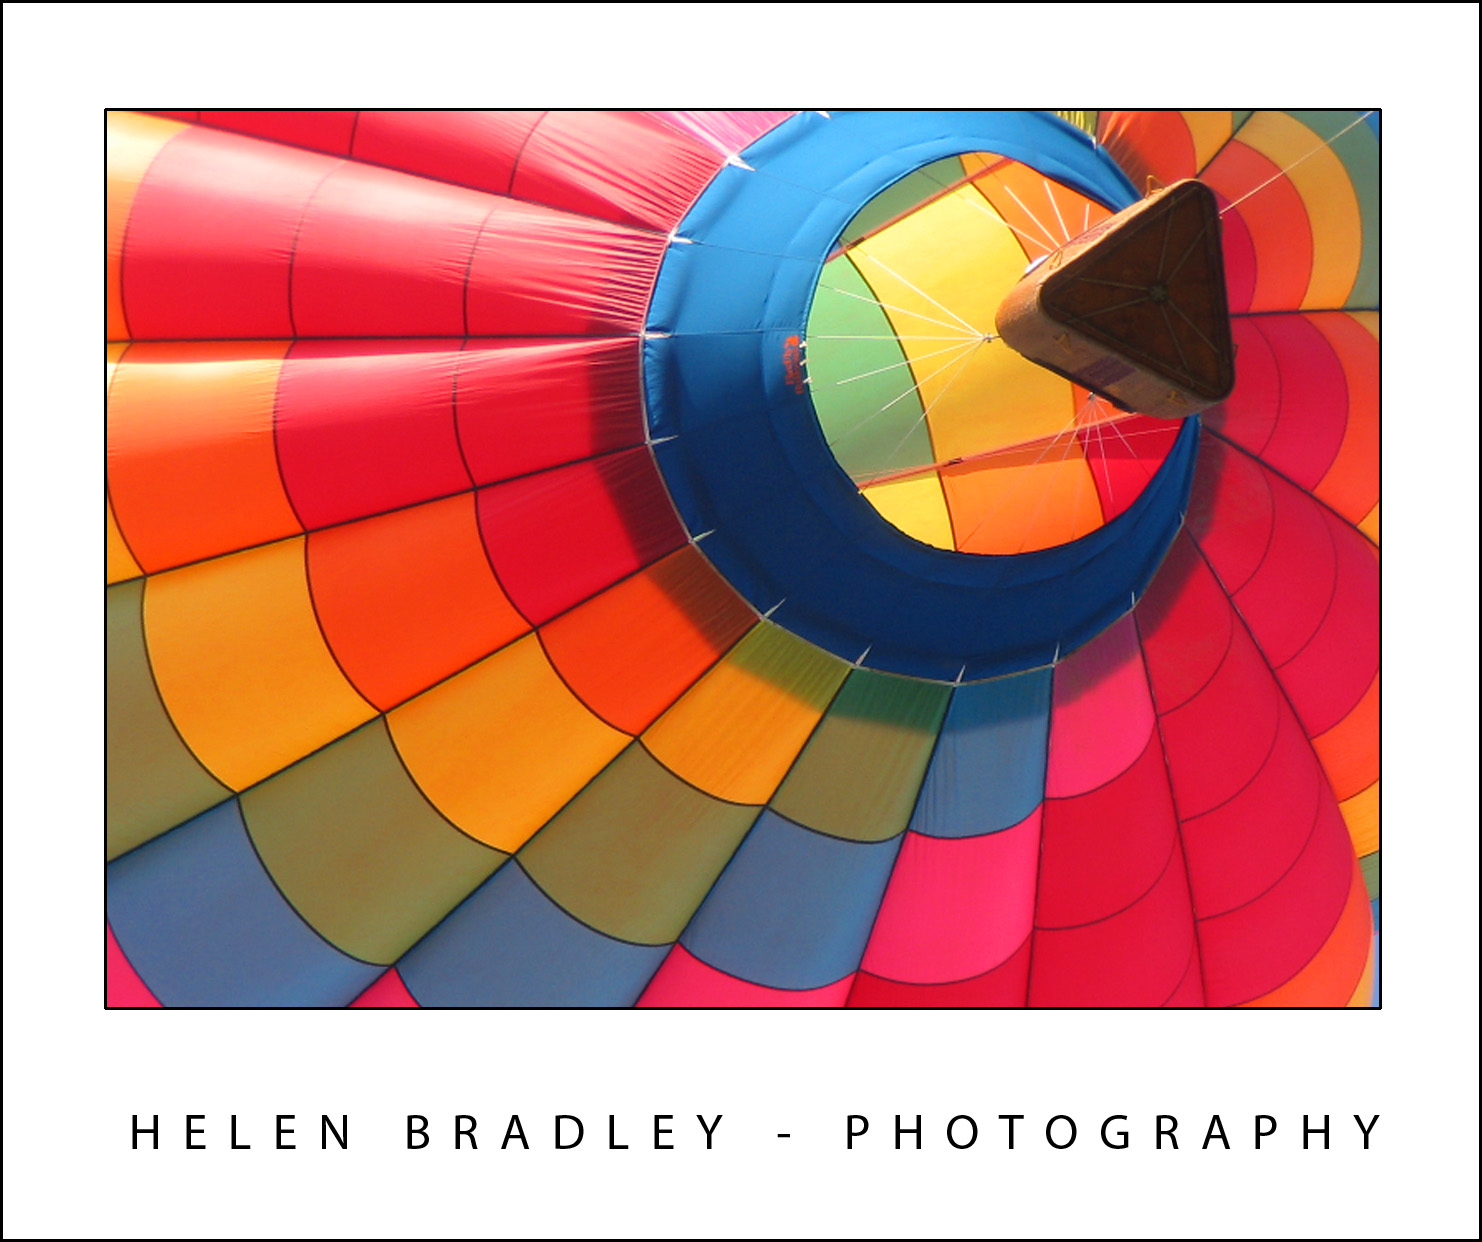
While balloons are typically shot from the side, this underneath shot ensures the entire photo is full of rich colour

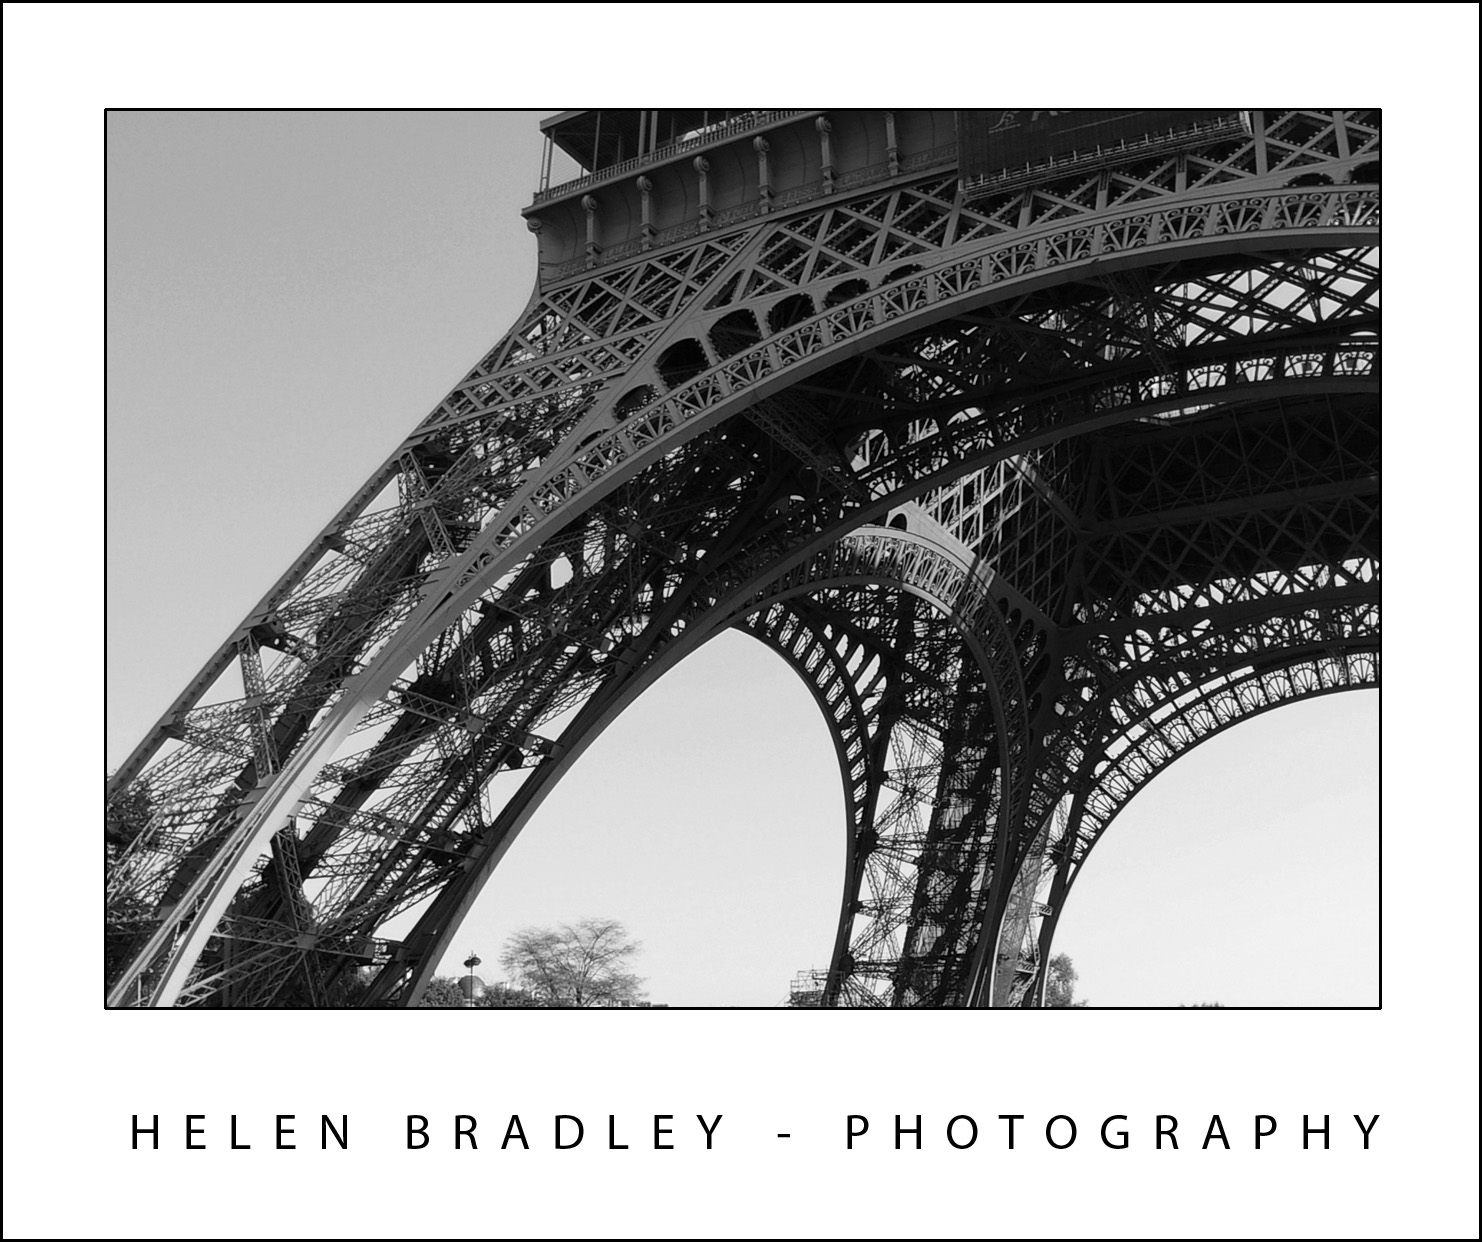
Most of us learn to take photos from right in front on to our subject. It makes good sense, you want to capture someone’s face or the Eiffel Tower so you stand in front of it, line it up in your viewfinder and, take your shot. The problem is that after a while all your photos begin to take on the same look. When you’re ready to give your photos a shot in the arm, try a different perspective.

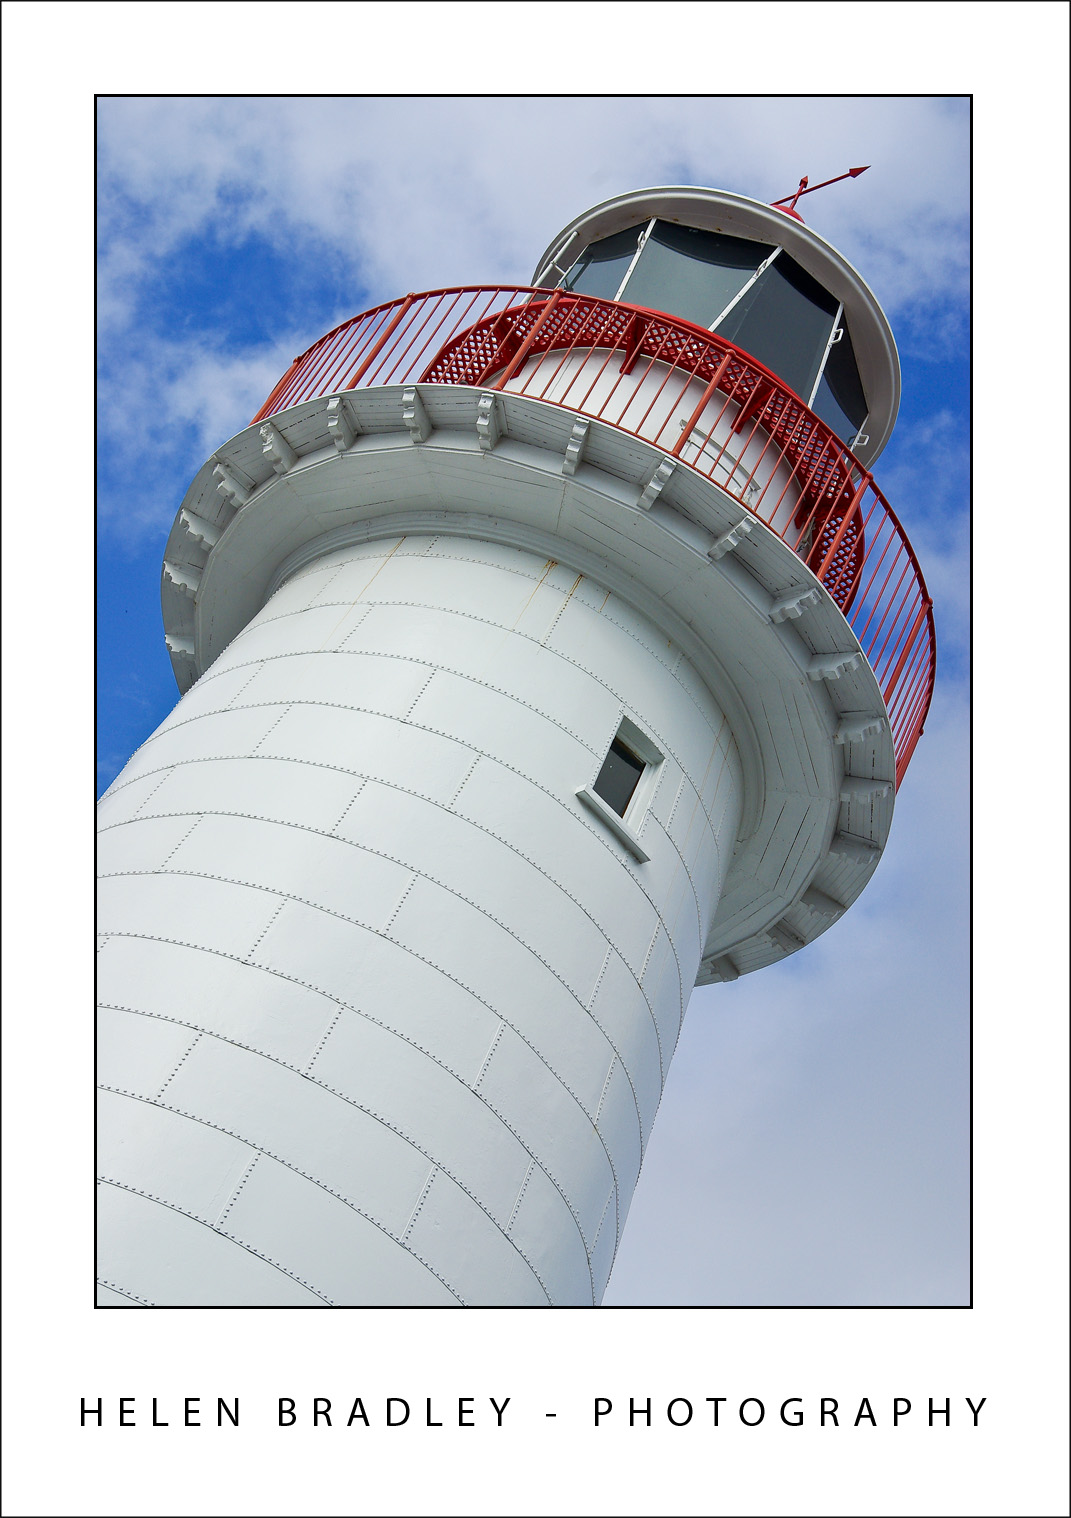
Often you can capture a more interesting photograph when you choose a different angle to shoot from. It’s not difficult to do this, move a little to one side or stand higher or lower than your subject and you can turn a ho hum photograph into one which really sings.


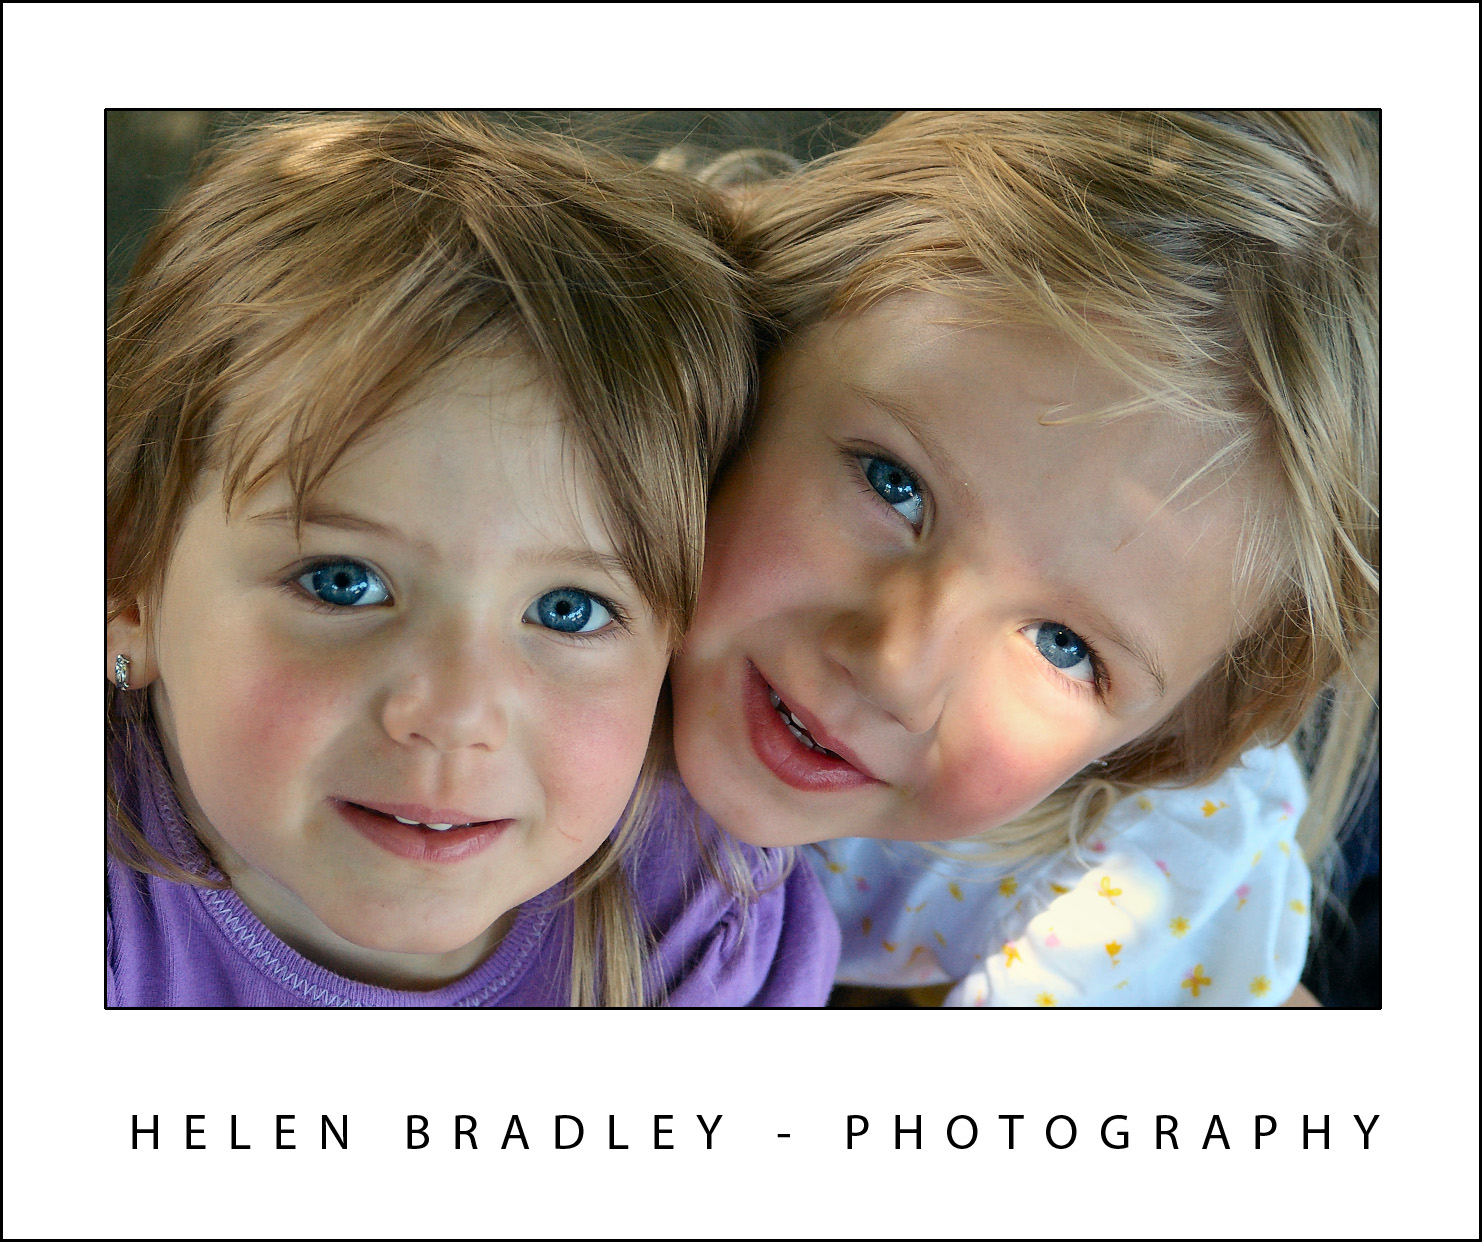
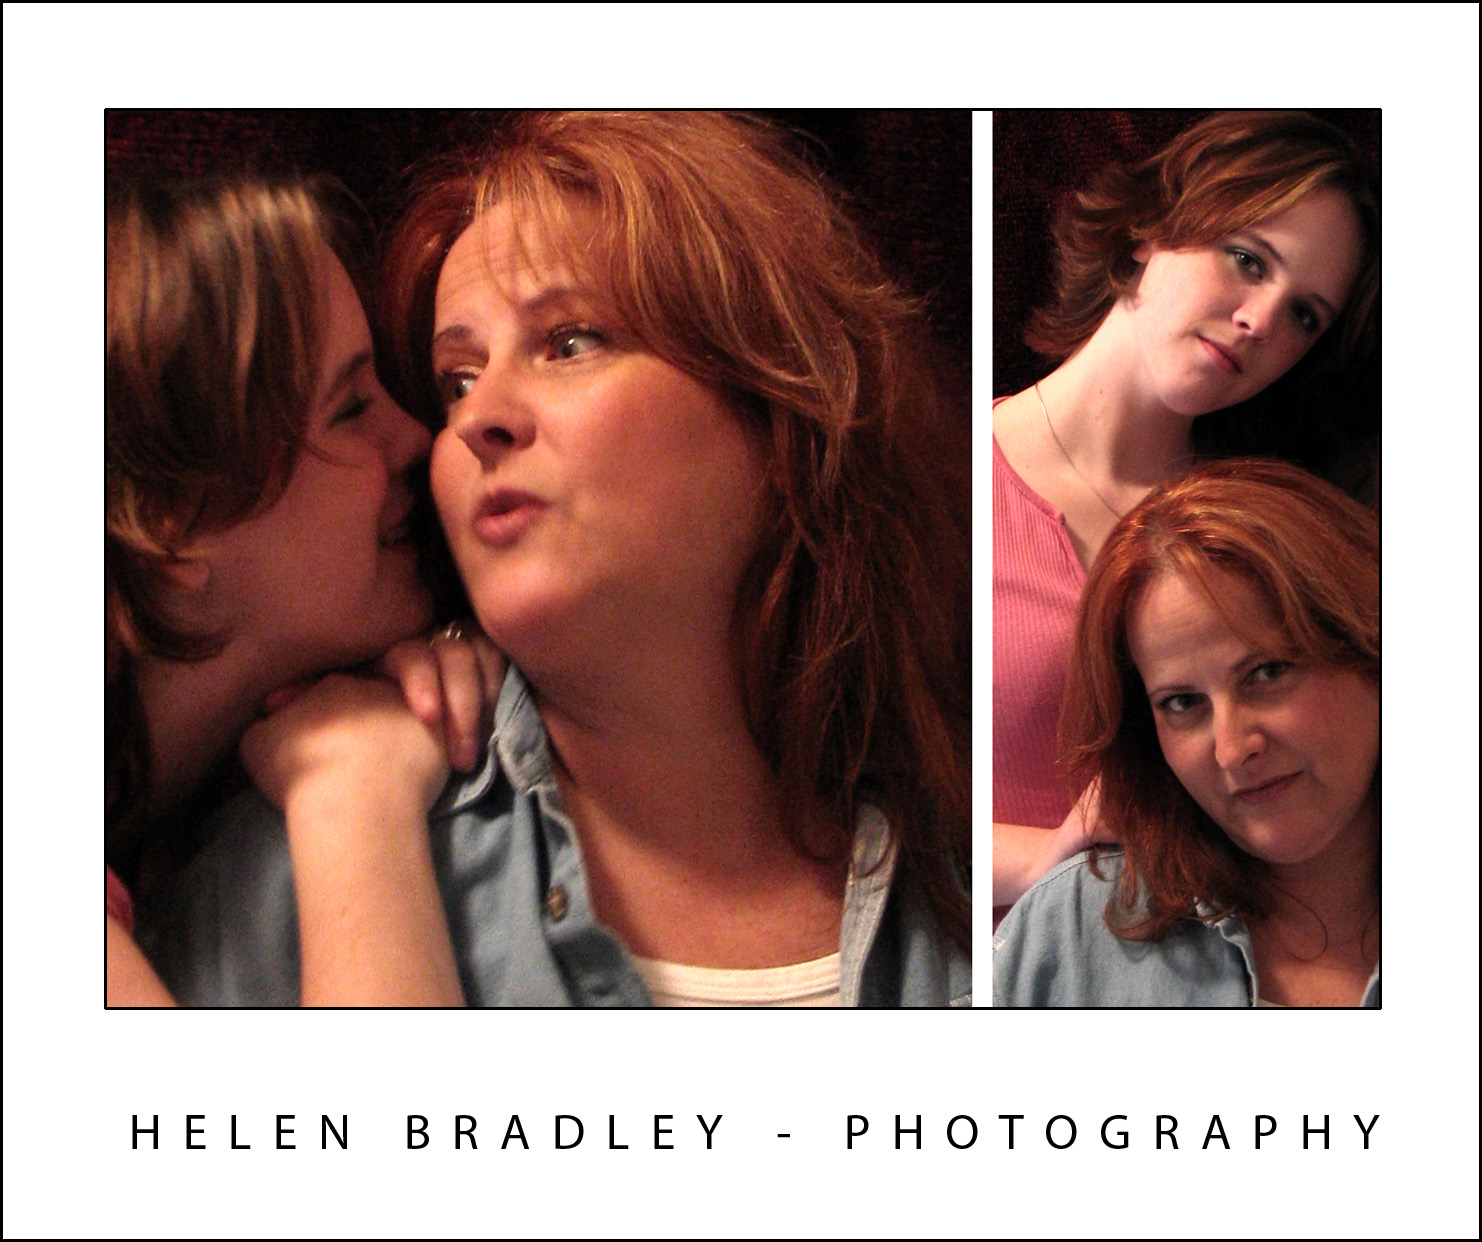
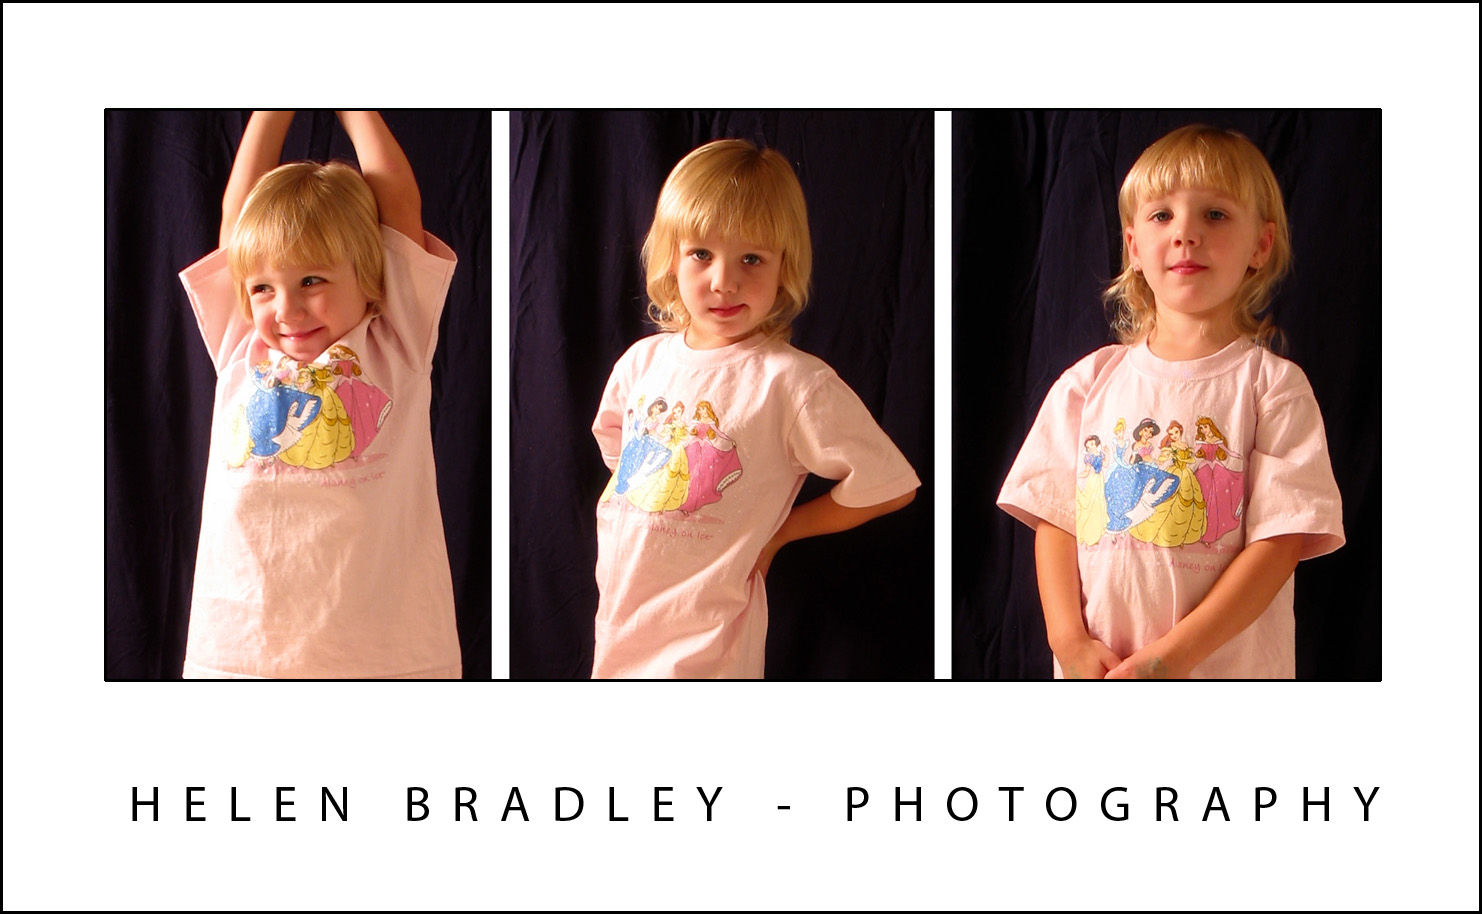
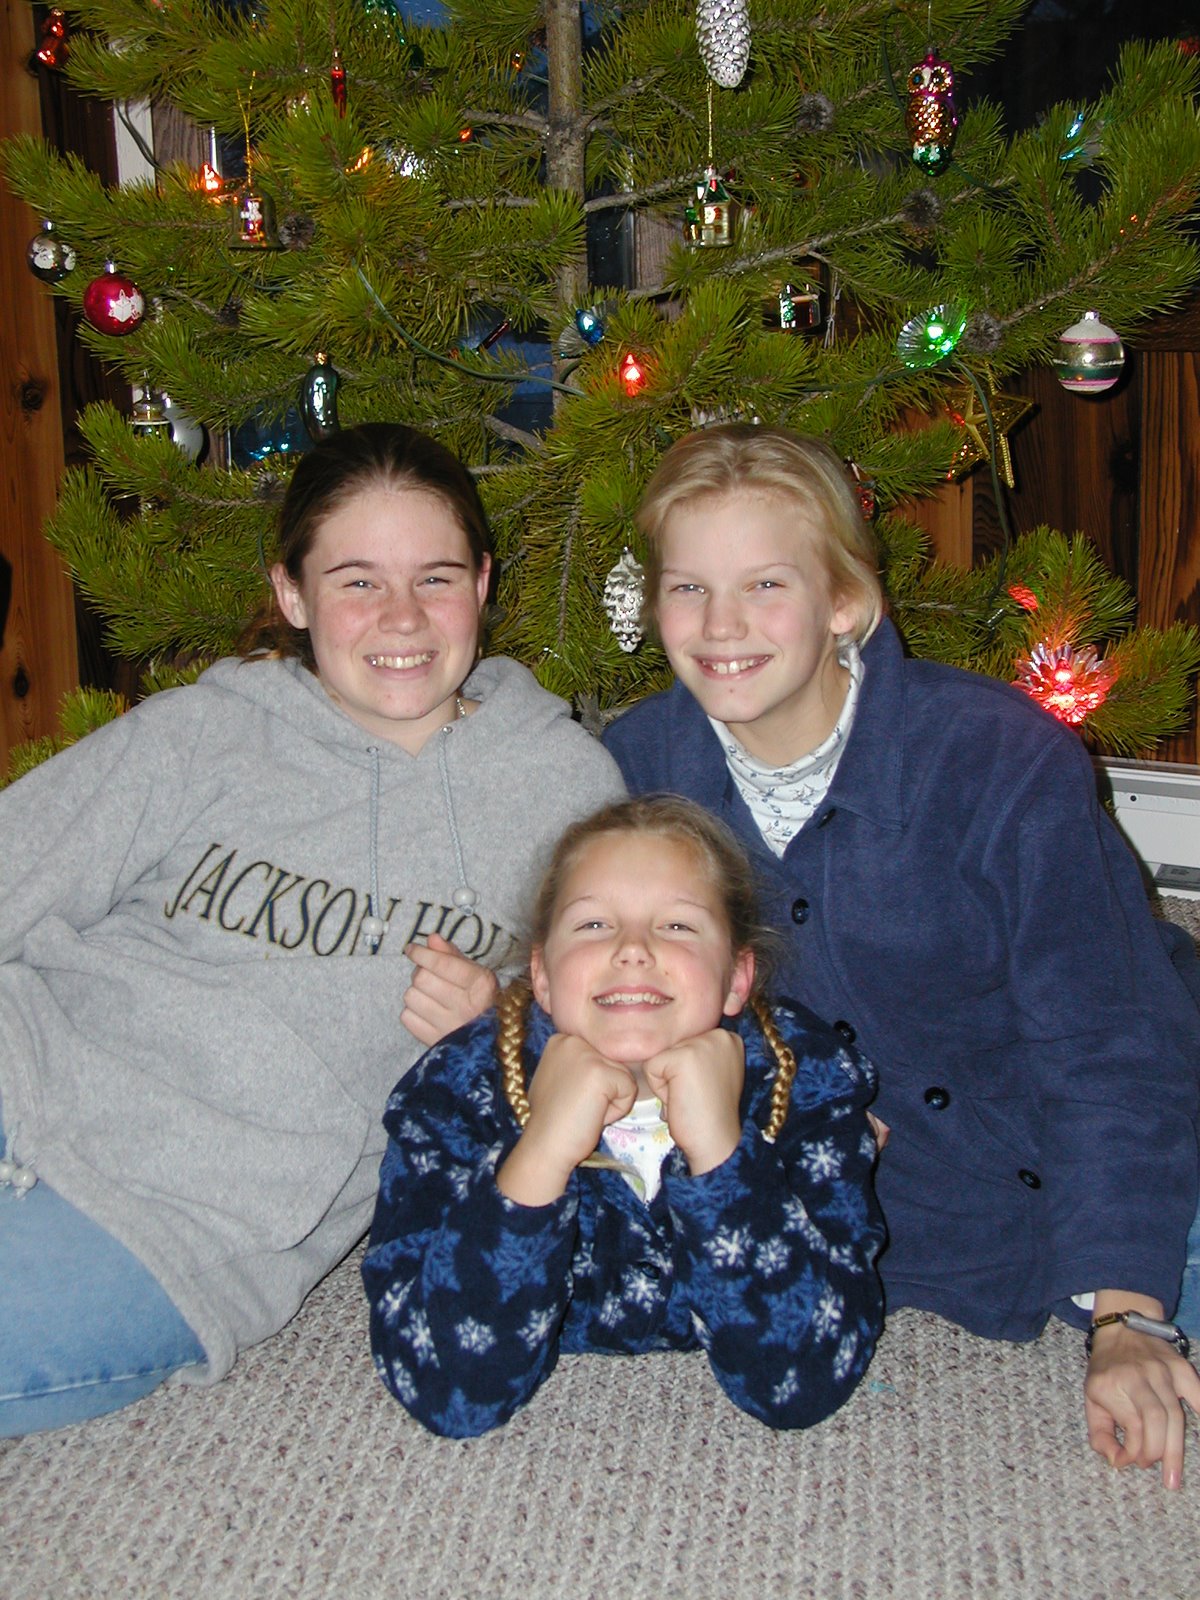
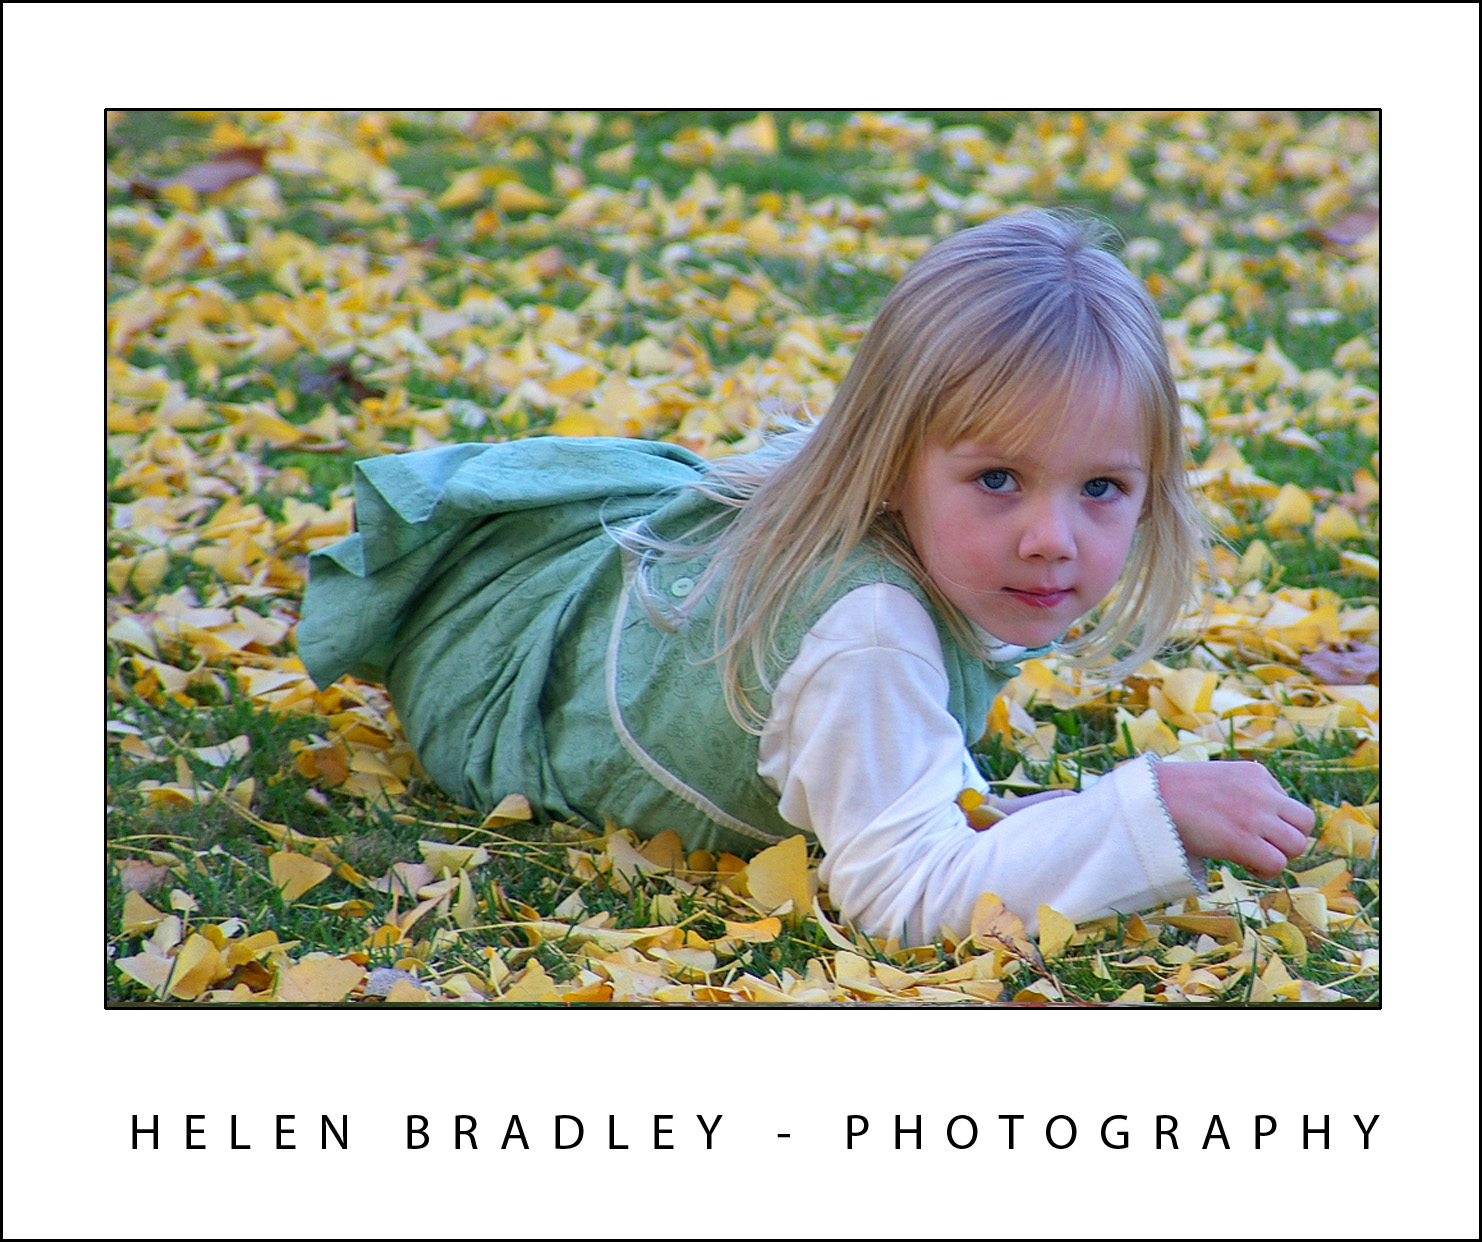
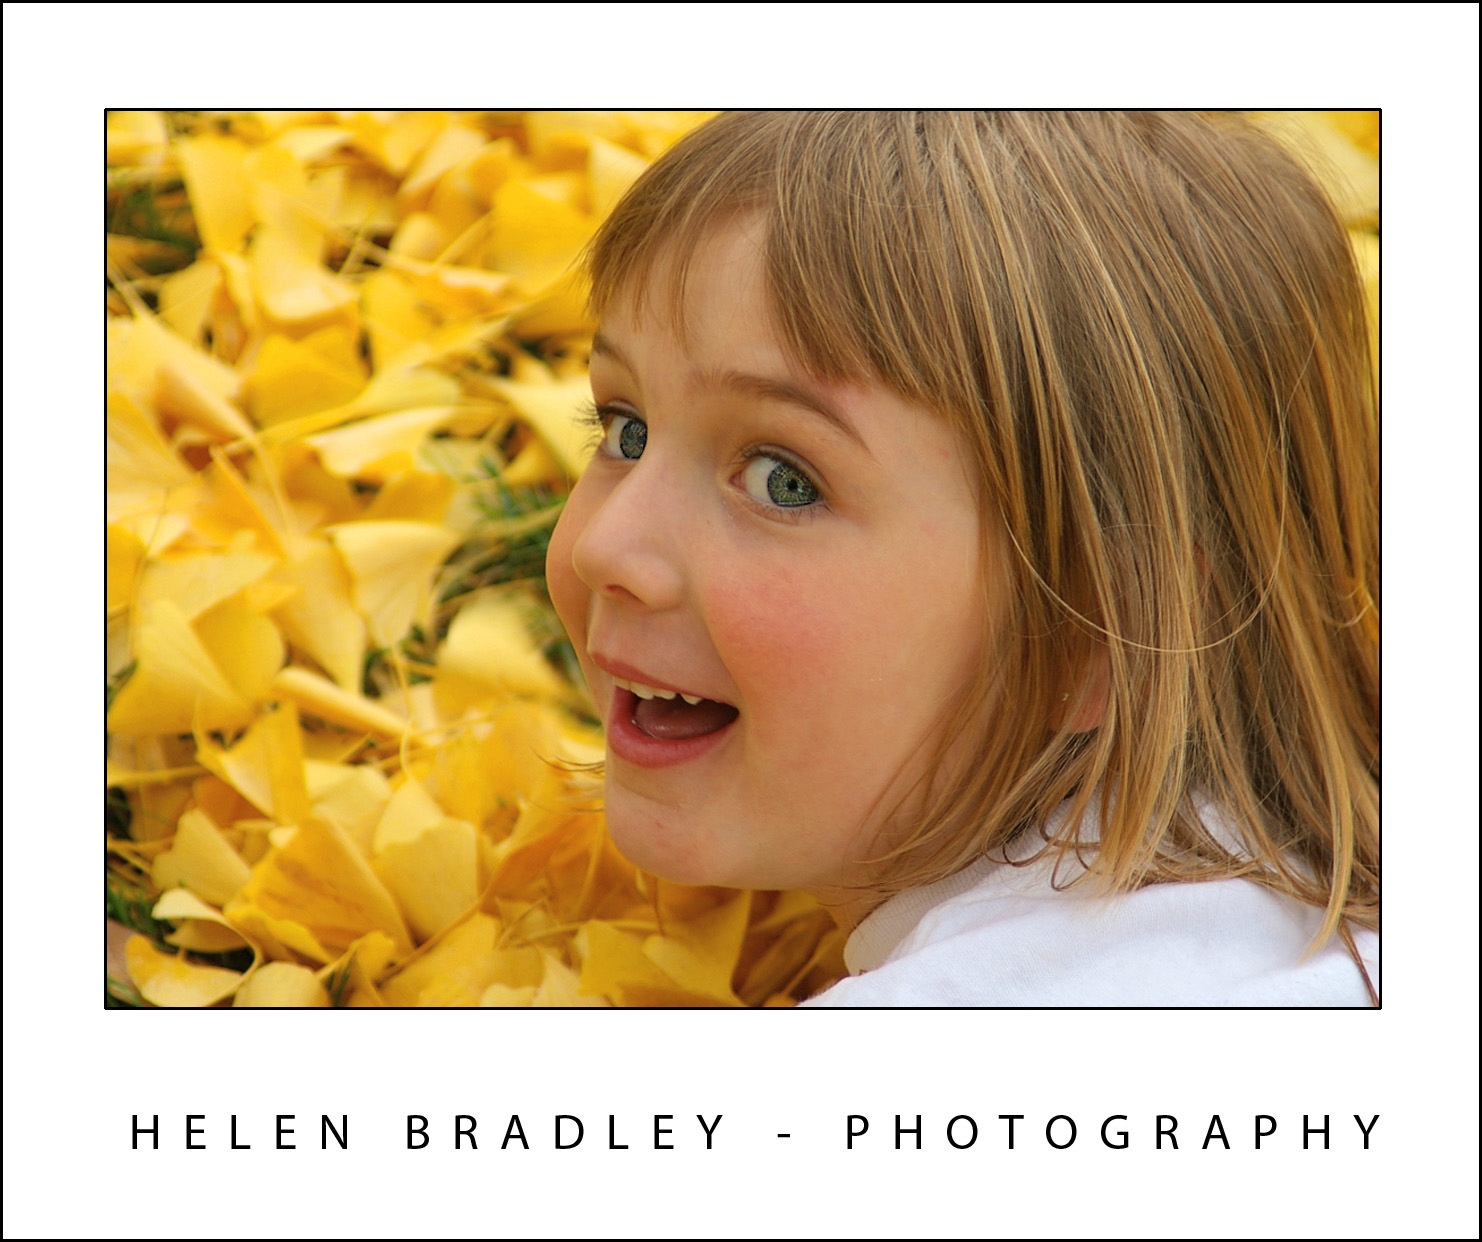
The girls were asked to look up as I captured this photo from a vantage point just above them.

So, next time you’re taking a photo of the kids, why not stand on a chair or a fence or find a vantage point higher than they are and shoot downwards towards them? Or get the kids to sit on the ground while you take the photograph from above. If the difference isn’t great enough, get them to lie on the ground while you shoot from above.

You can shoot upwards too. When you’re shooting upwards, put the child on a table (if they are old enough for this to be safe) while you crouch on the ground and shoot upwards at them. You can do this for adults too – lie down on the grass or crouch very low and shoot facing upwards. As you shoot from high or from a low position, you may find some shots aren’t as flattering as they might be. For example, heavier people don’t look so good photographed from below but look good when photographed from a higher position – with a little practice and experimentation you’ll work out what you like and don’t like.


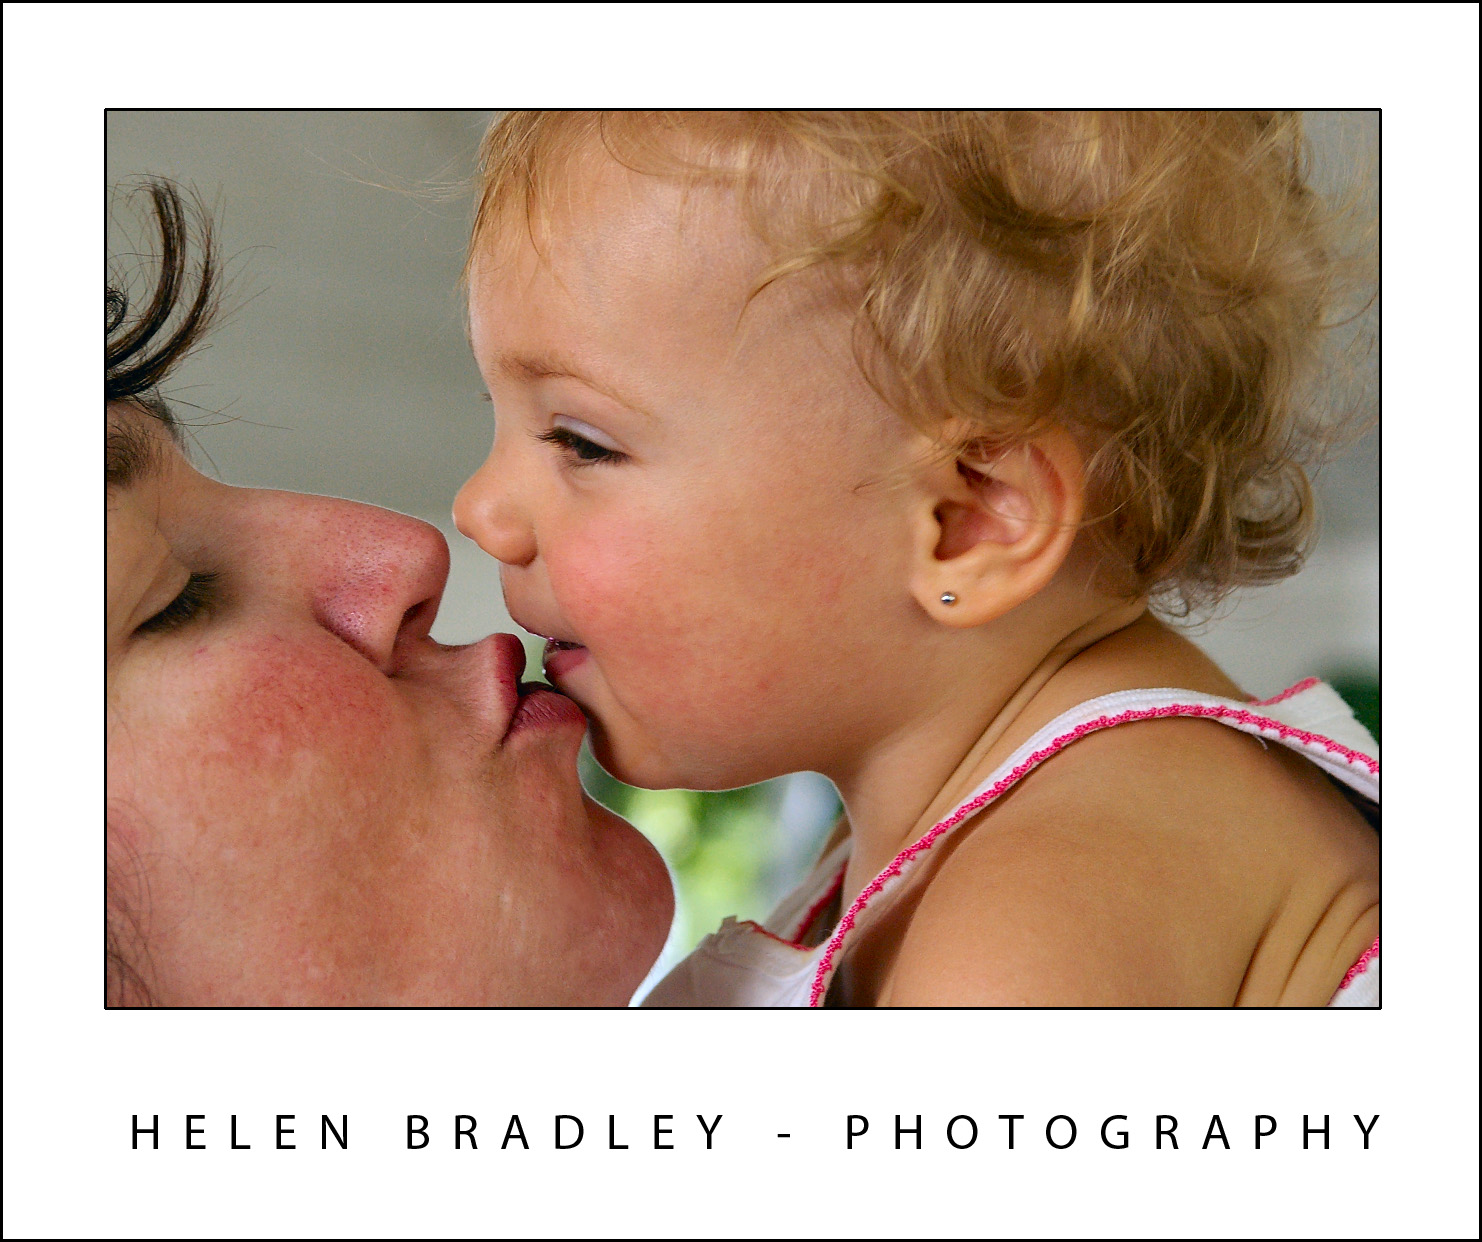
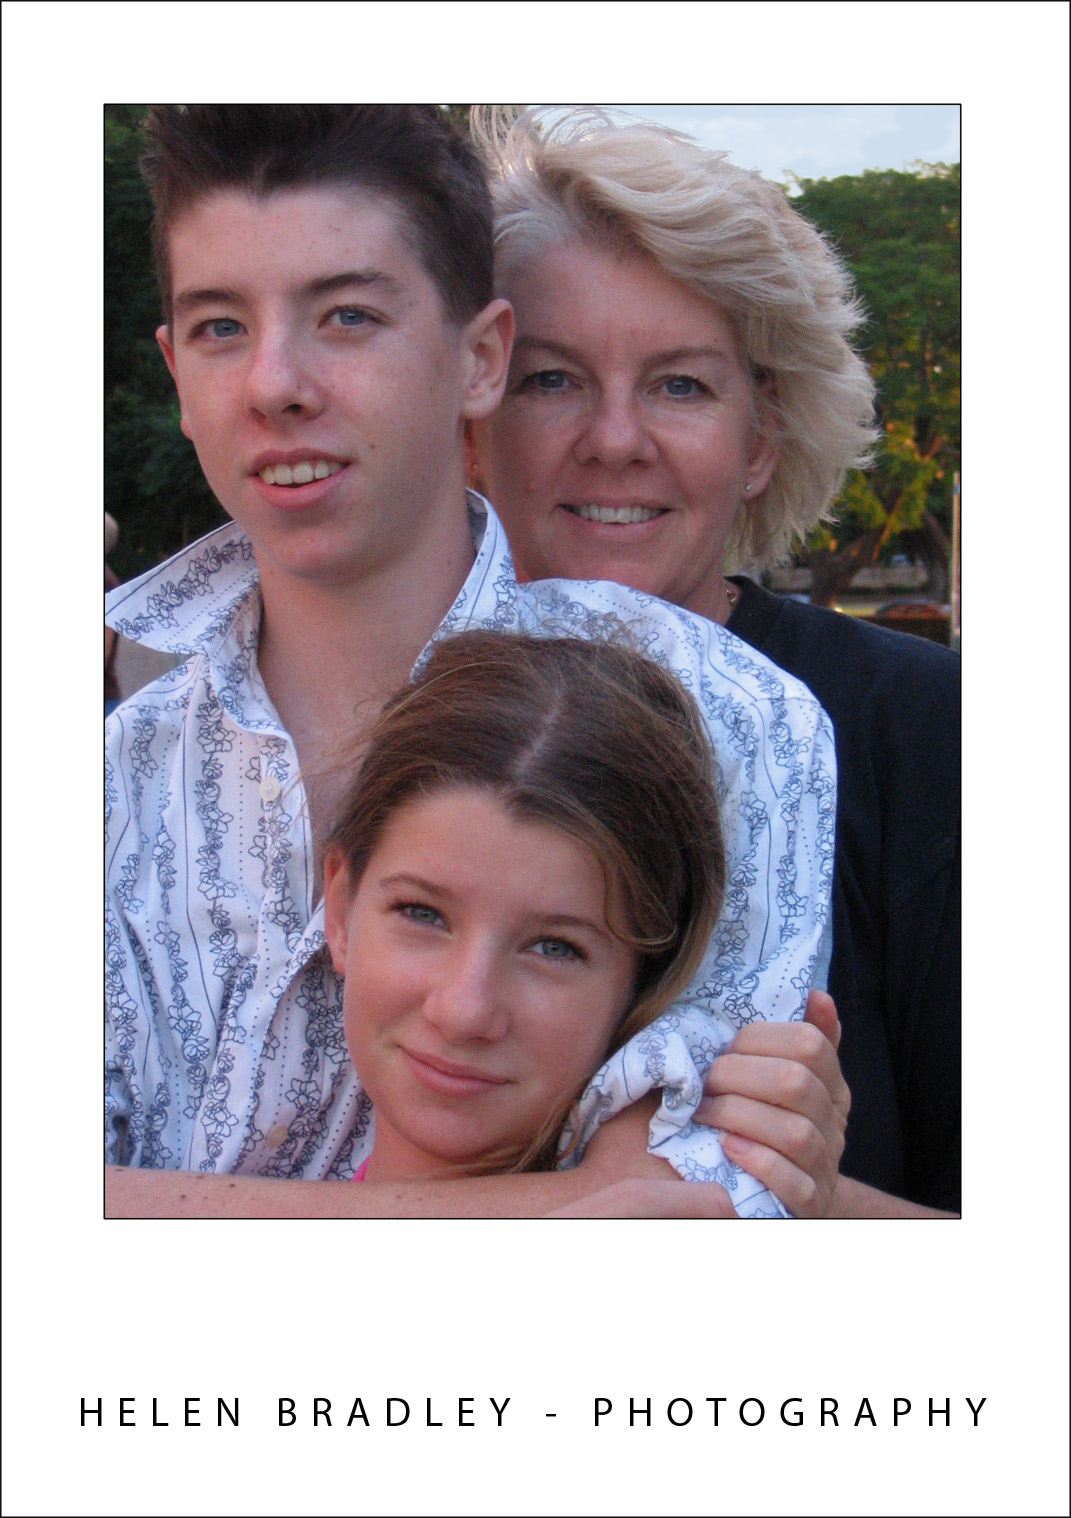
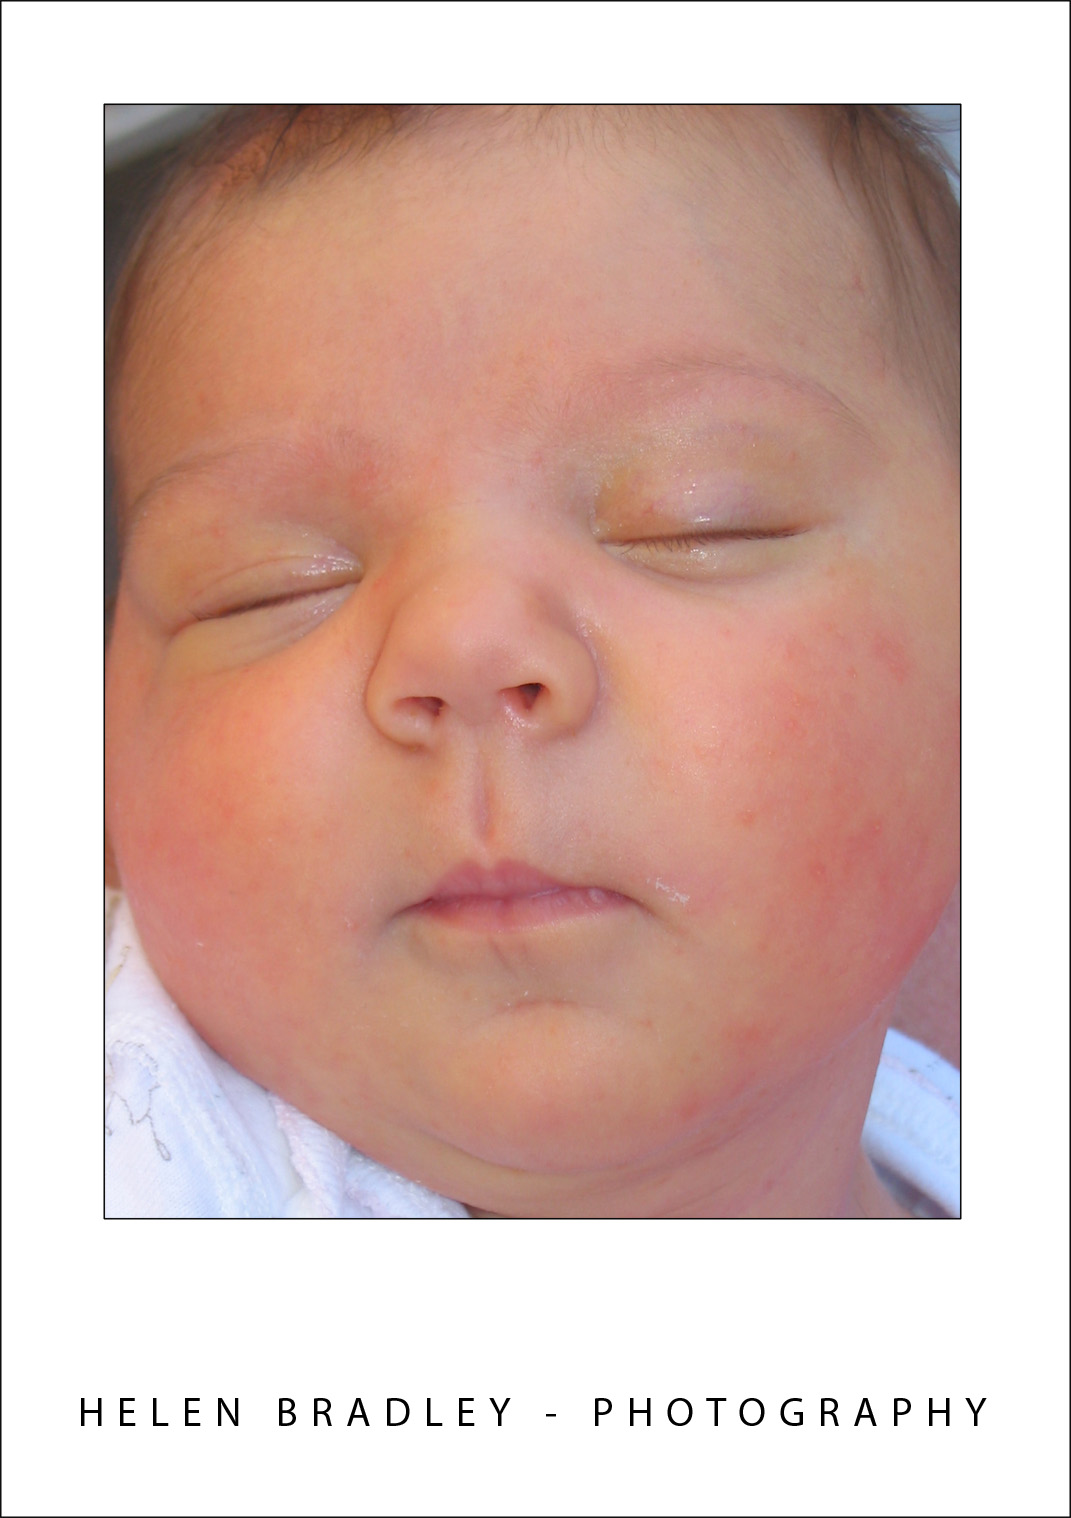
As her mom held young Katyann high above her head for a kiss, I captured this wonderful shot of mother and child.

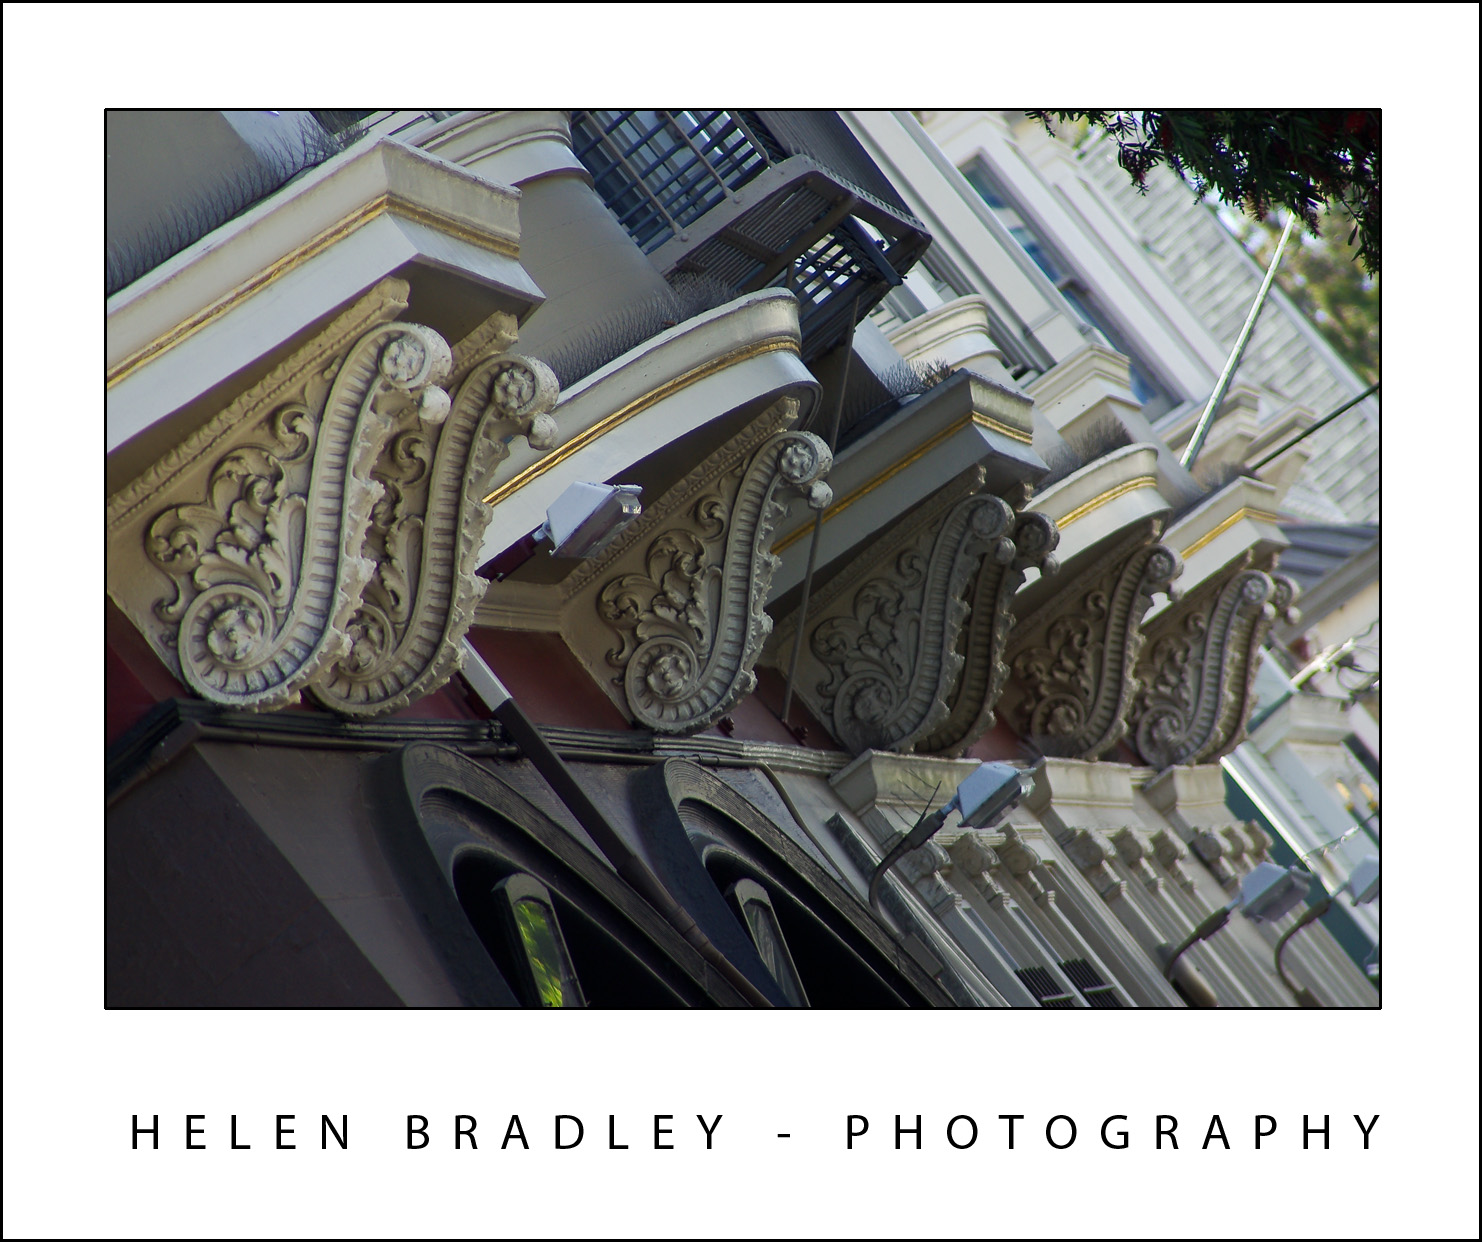
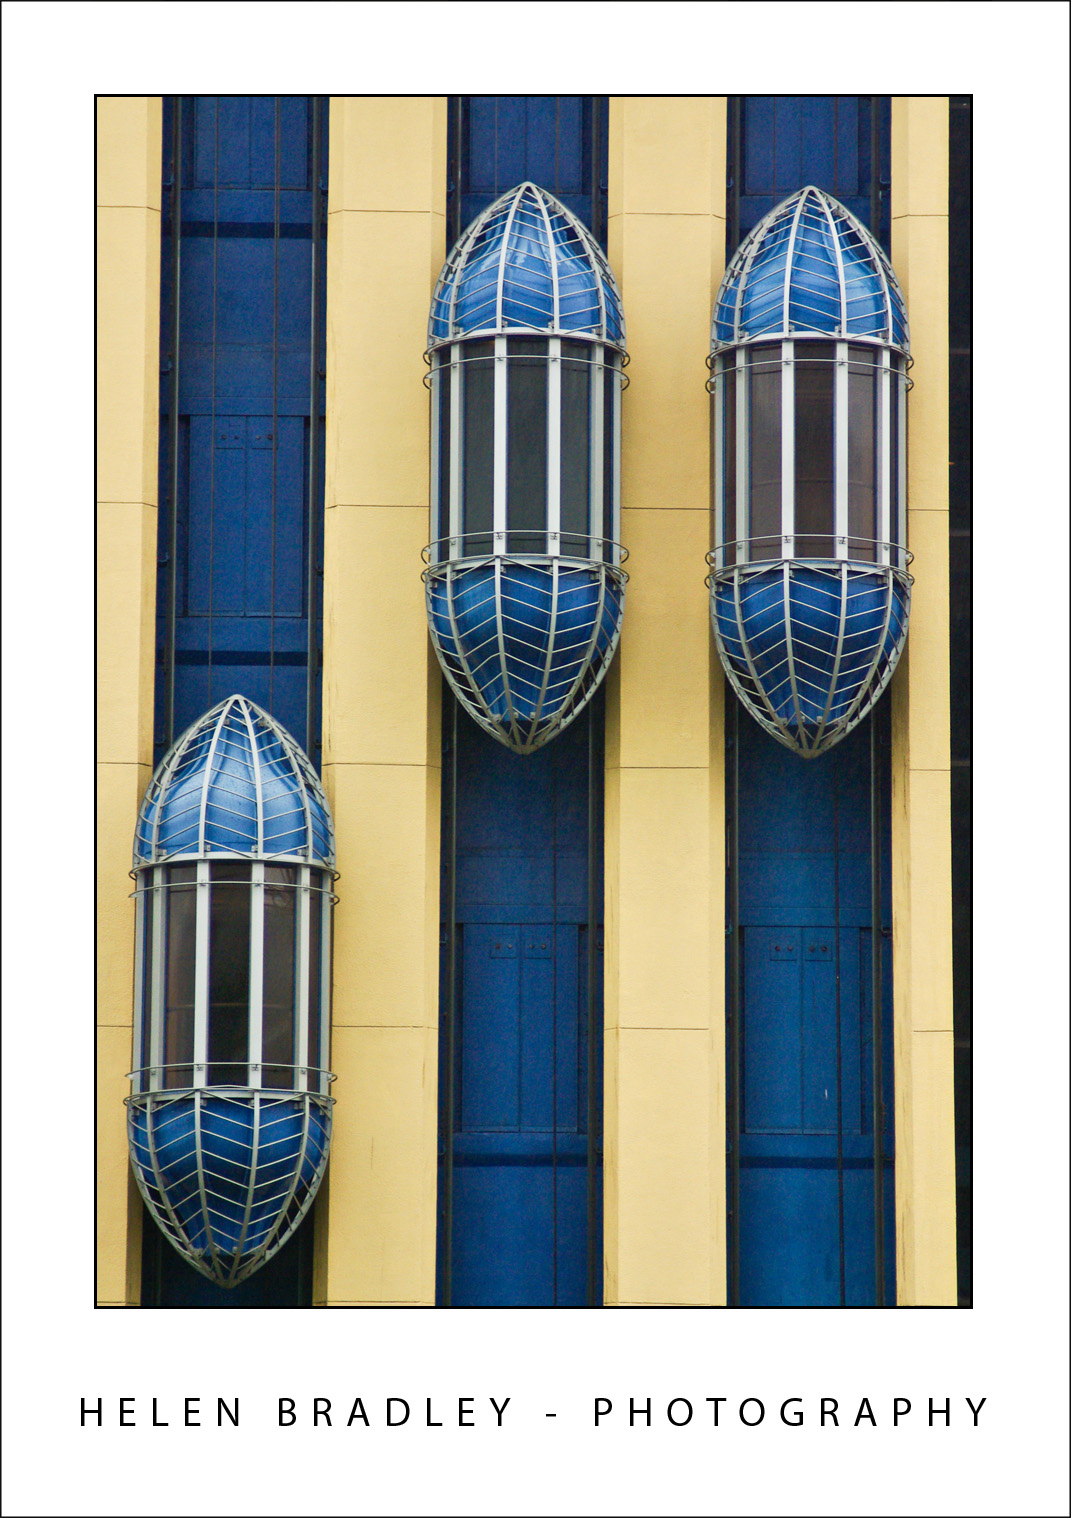
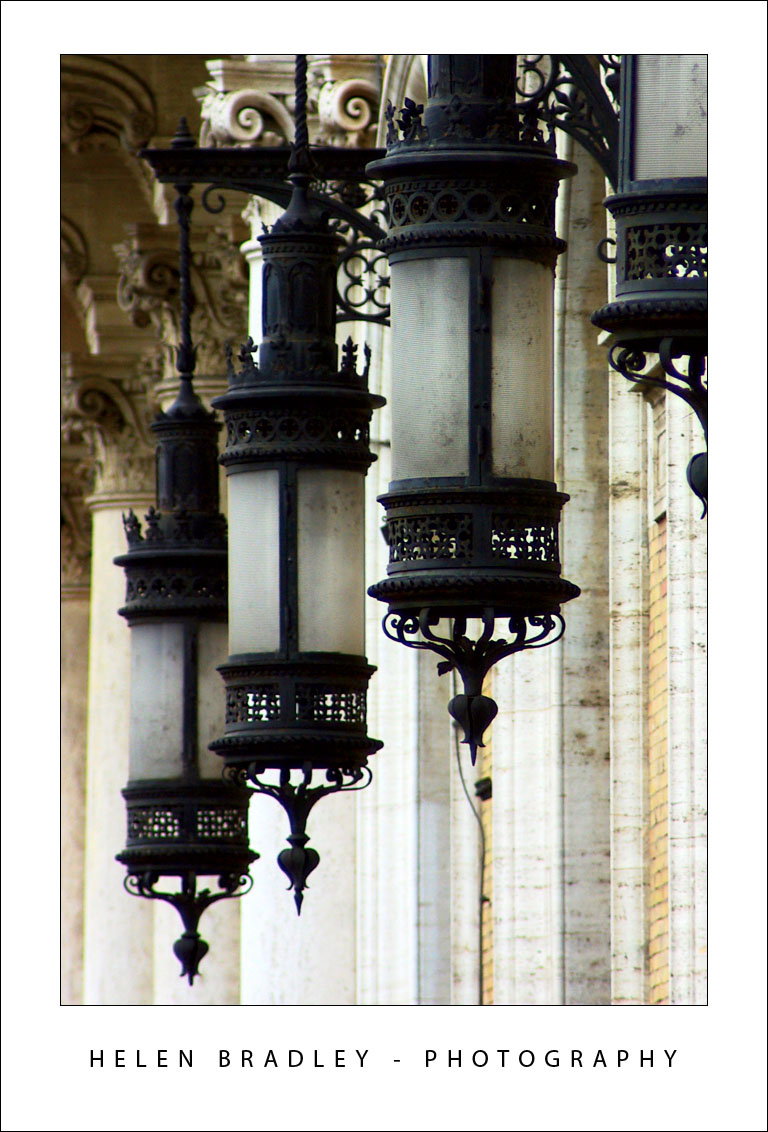
These same tricks work when shooting buildings and nature. When you’re in a forest, photographing trees try the classic technique used by nature photographers around the world and shoot upwards into the tree canopy. To do this, walk into the trees, get down low, hold the camera towards the sky and take your photograph. The further away the tree canopy is, the better the effect will be as the tops of the trees will bend in close to each other all around the photograph. You can achieve the same result in the middle of a large city and you can do it with a circle of friends – place the camera in the middle and capture the shot.


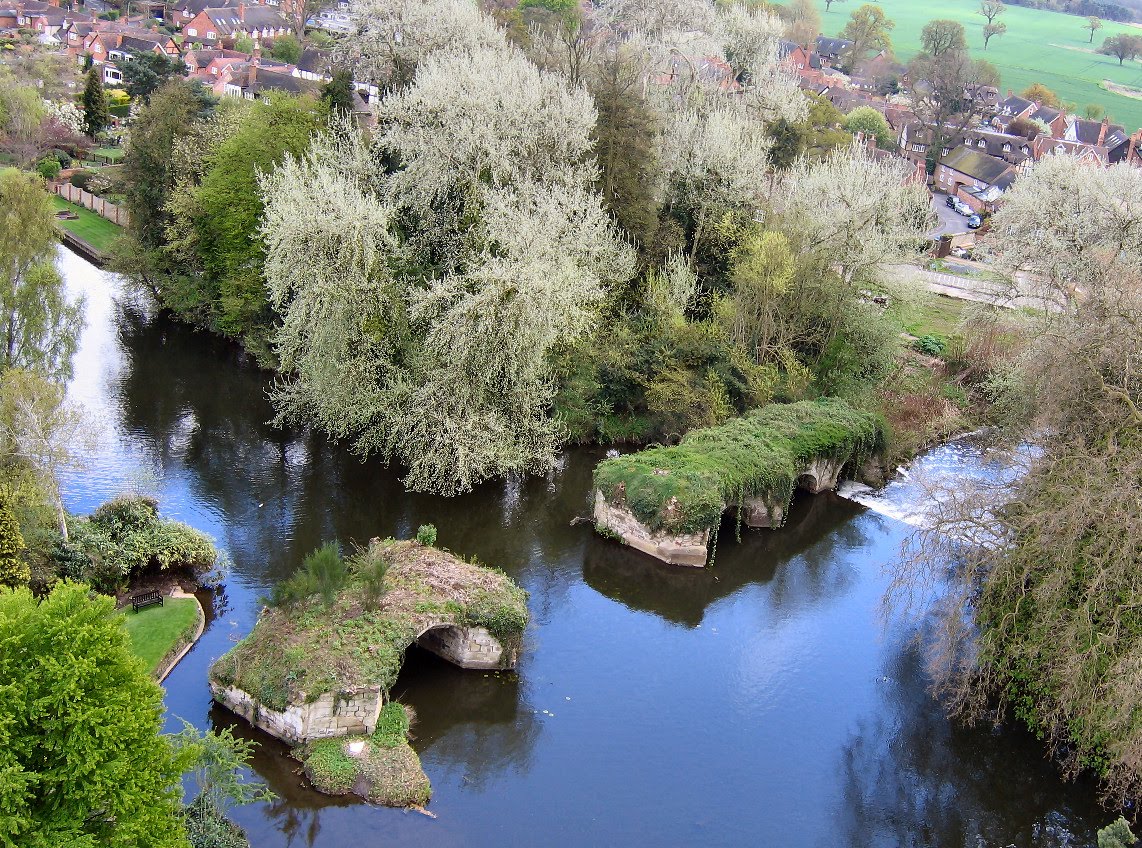
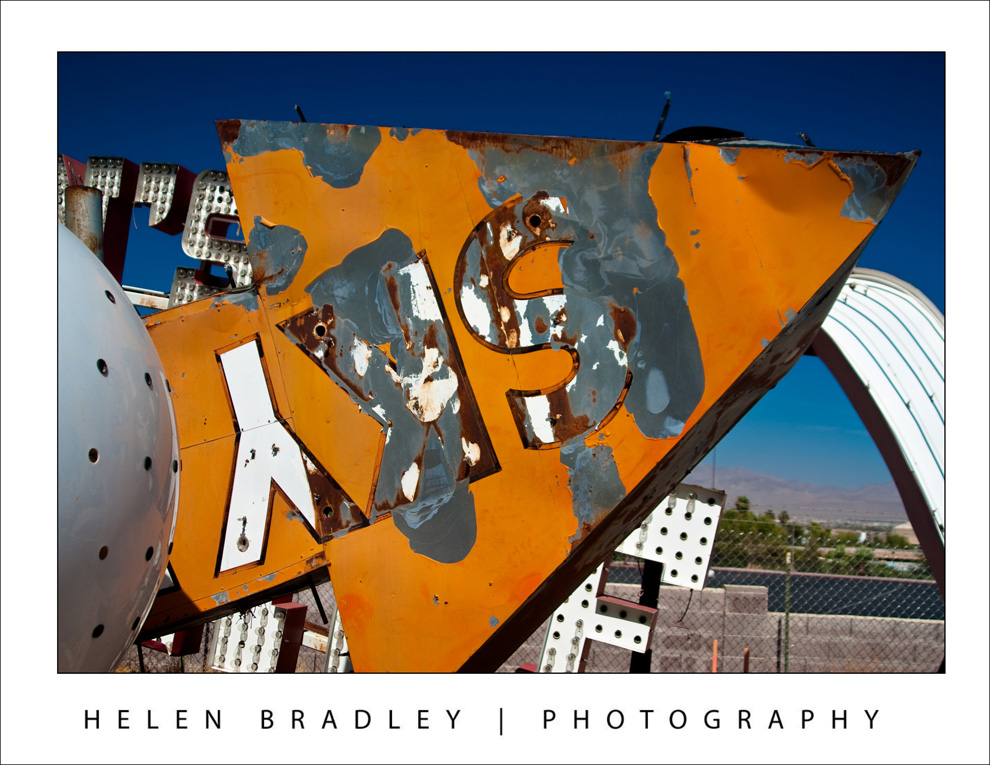
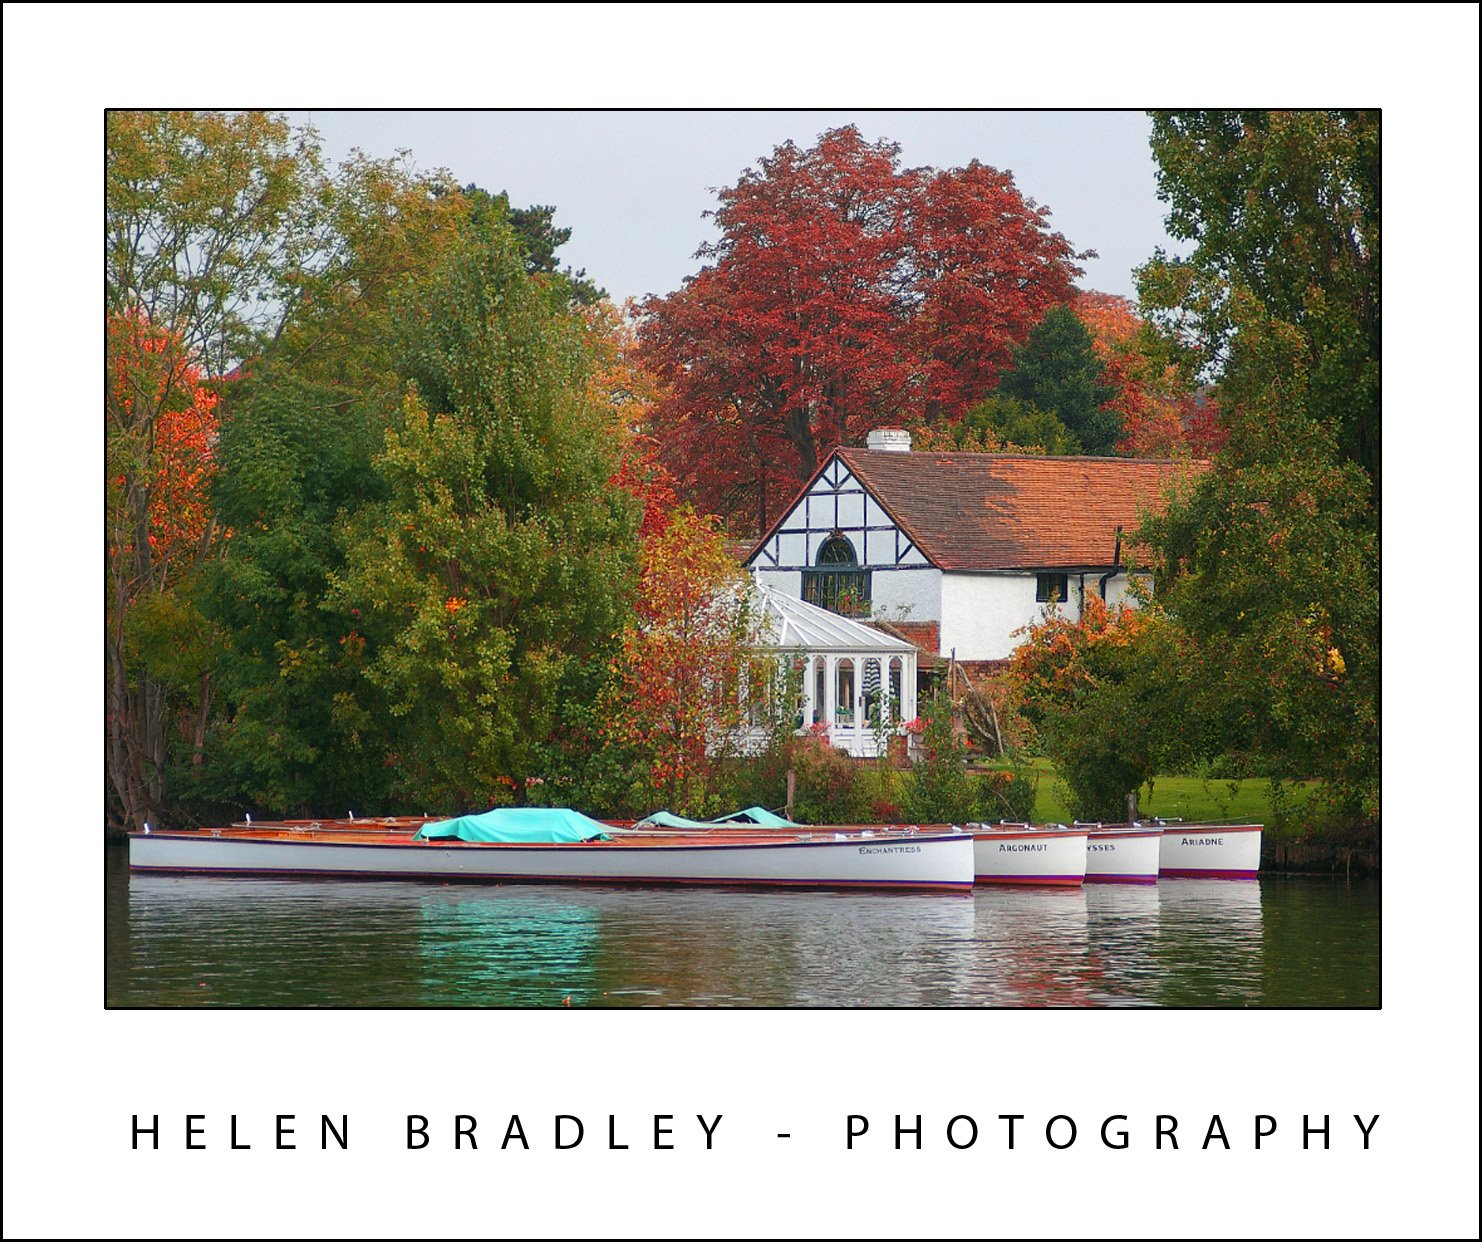
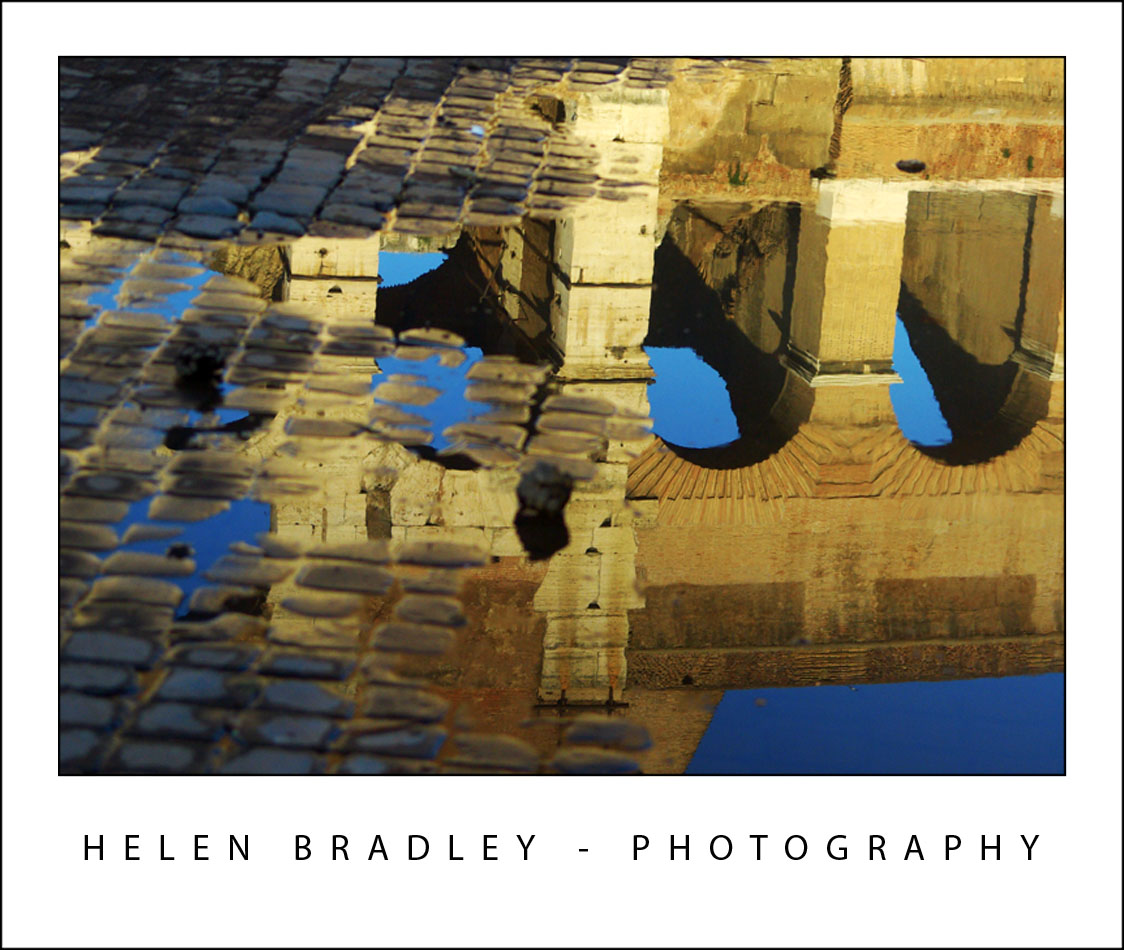
This high elevation gives a very different perspective on this river and an old broken bridge.


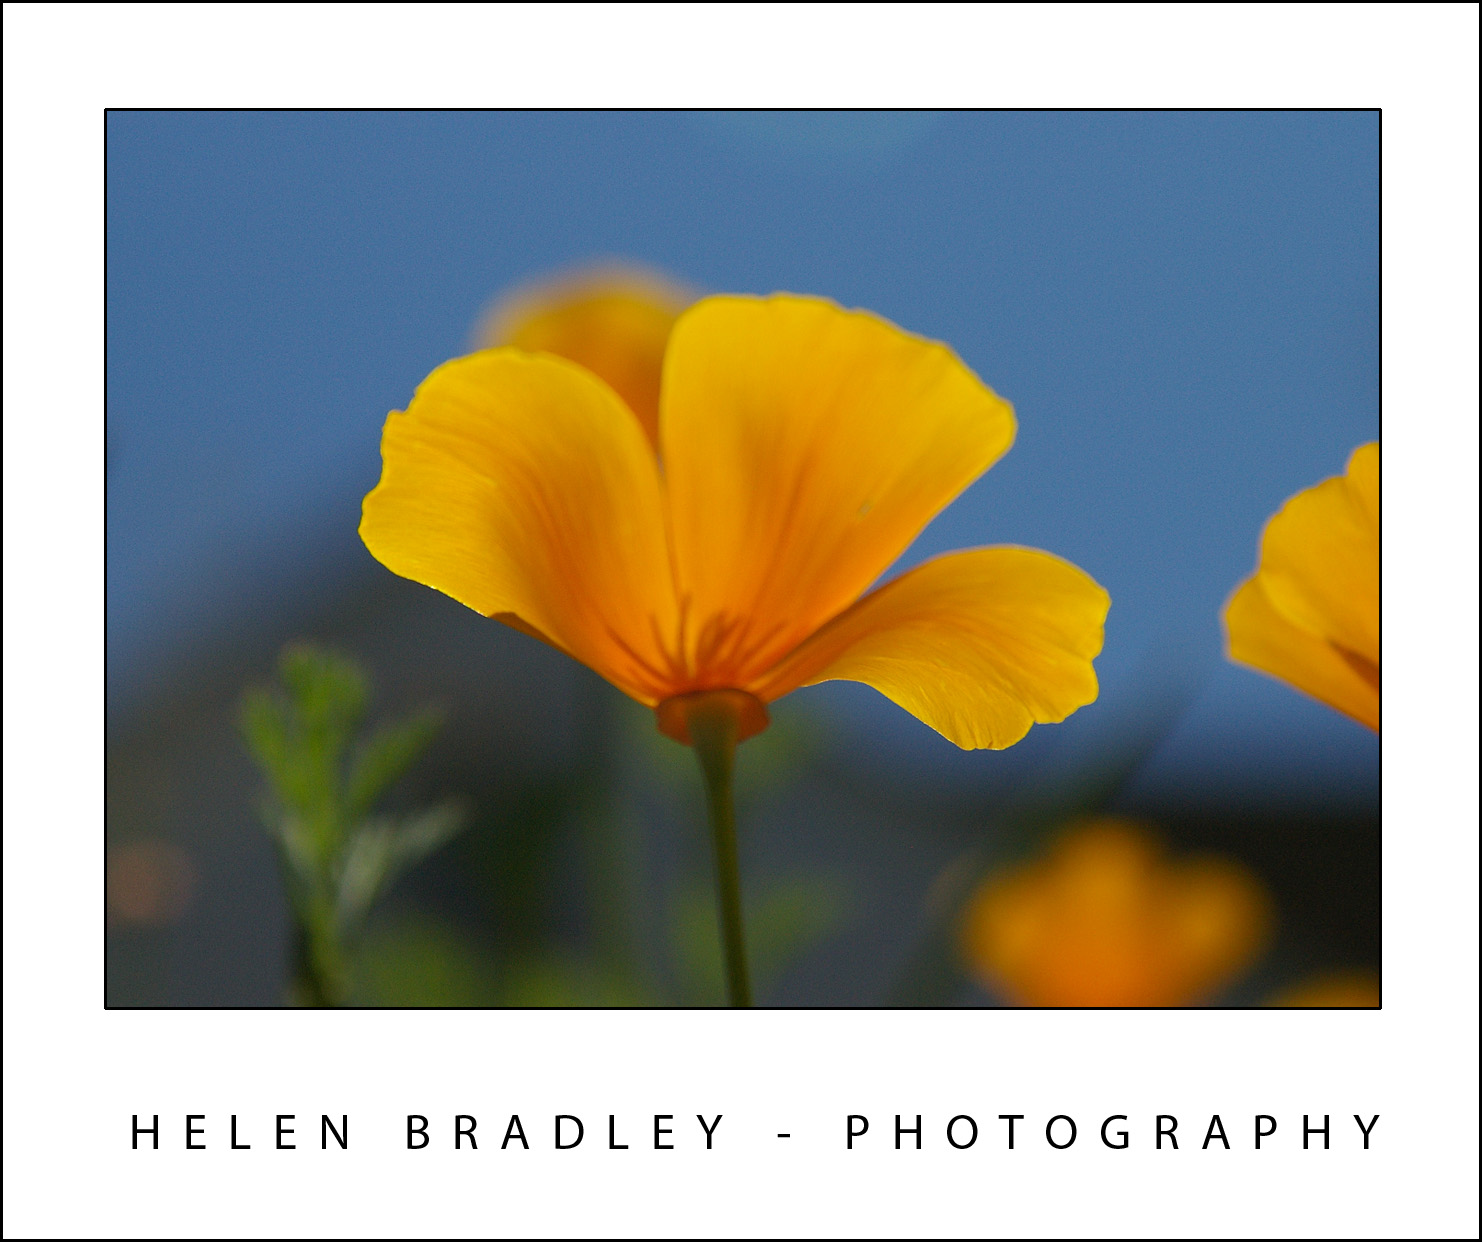
Shooting blind from under this flower, the combination of blue and orange is spectacular.

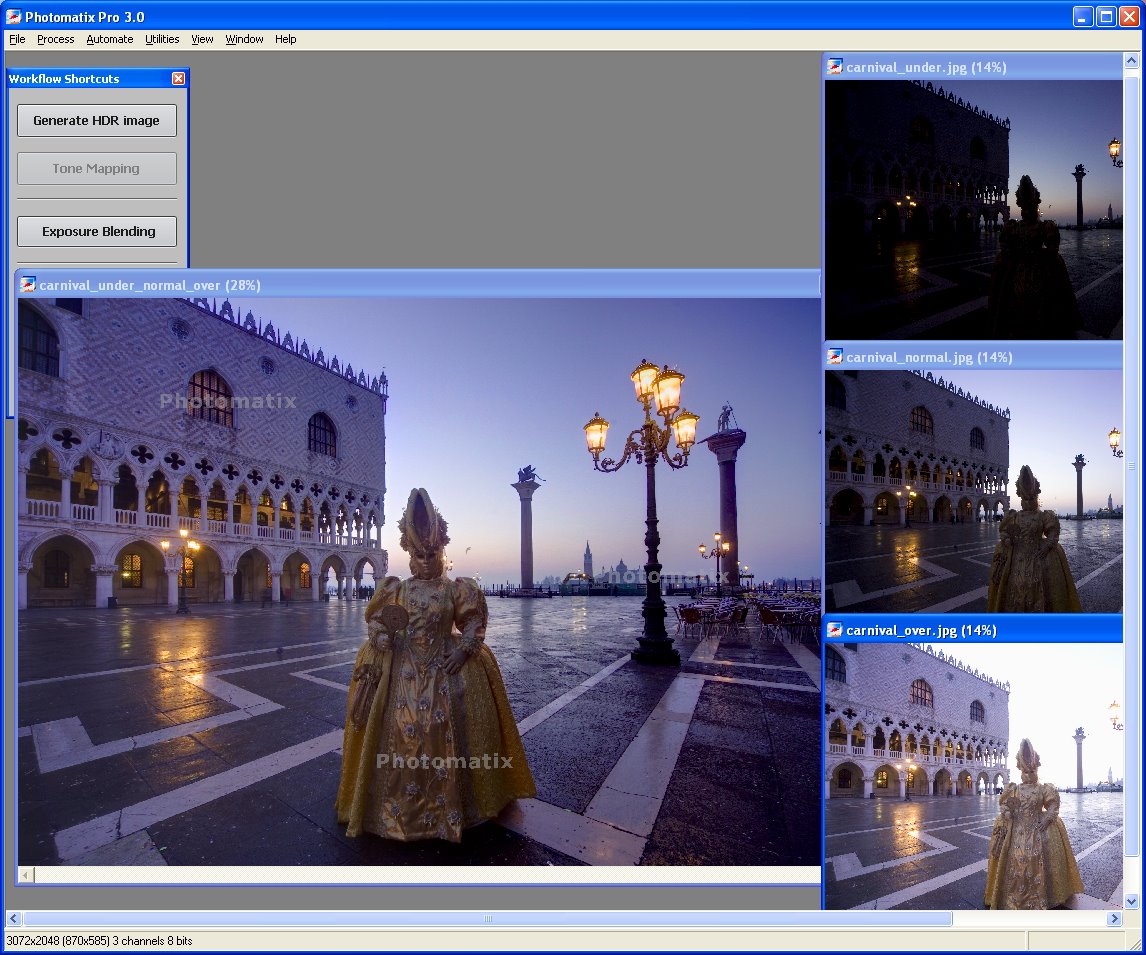
Some flowers that are semitransparent in the sunlight can be shot from underneath giving not only a different view of the flower head but also capturing a wonderful swag of deep blue sky. When you’re shooting upwards into the sky invest in a polarizing lens for your camera – this filters out a lot of the glare on a bright sunny day and gives the sky a bluer colour. Without a polarizing lens you may find the skies are blown out and an unattractive washed out light colour.


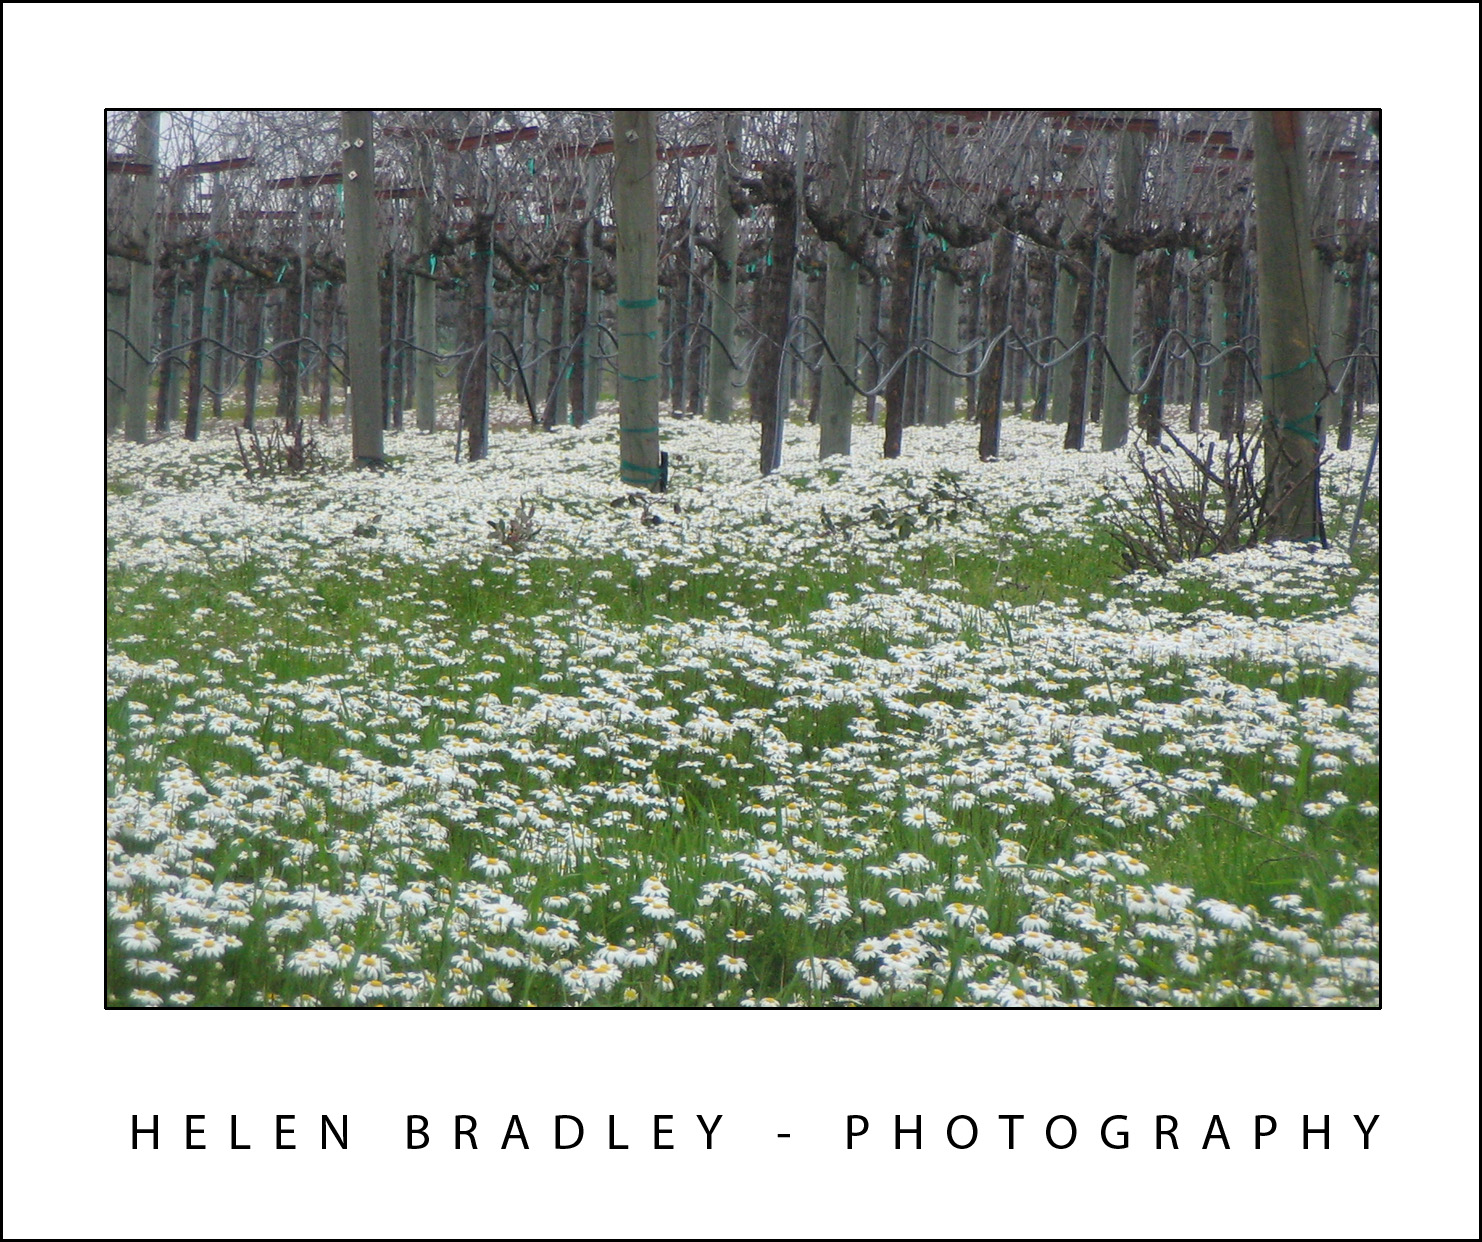
These winter flowers growing between old vines was captured from ground level to create the look of a forest.

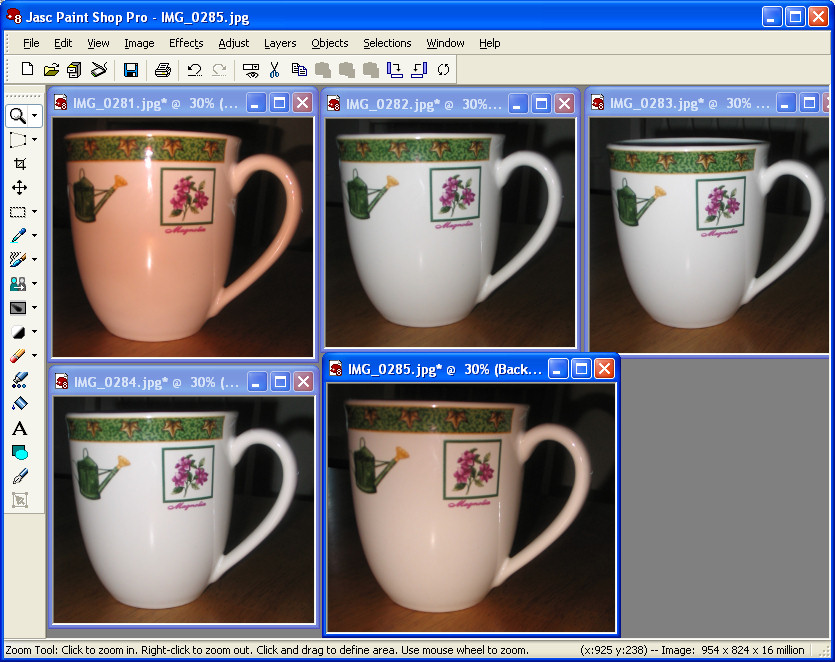
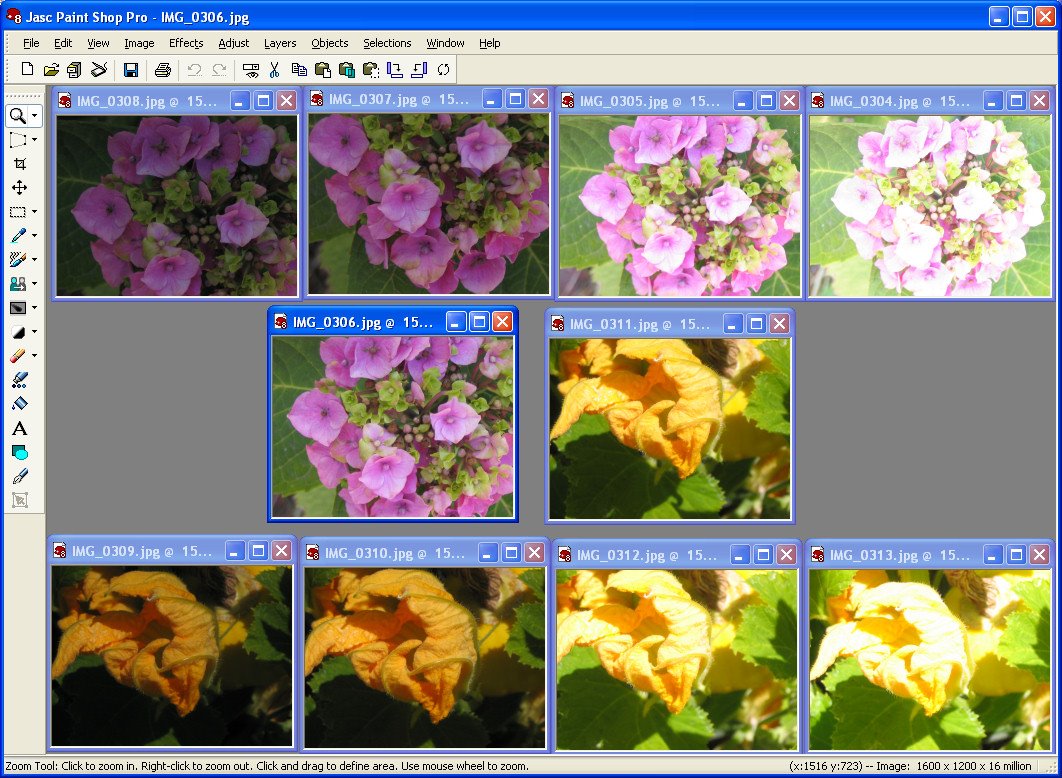
If your camera has a swing out LCD screen, you’ll be in luck when shooting from under an object as you’ll be able to see what you’re about to capture. If not, just work on a trial and error basis, take a shot, check it and then resituate the camera and try again.

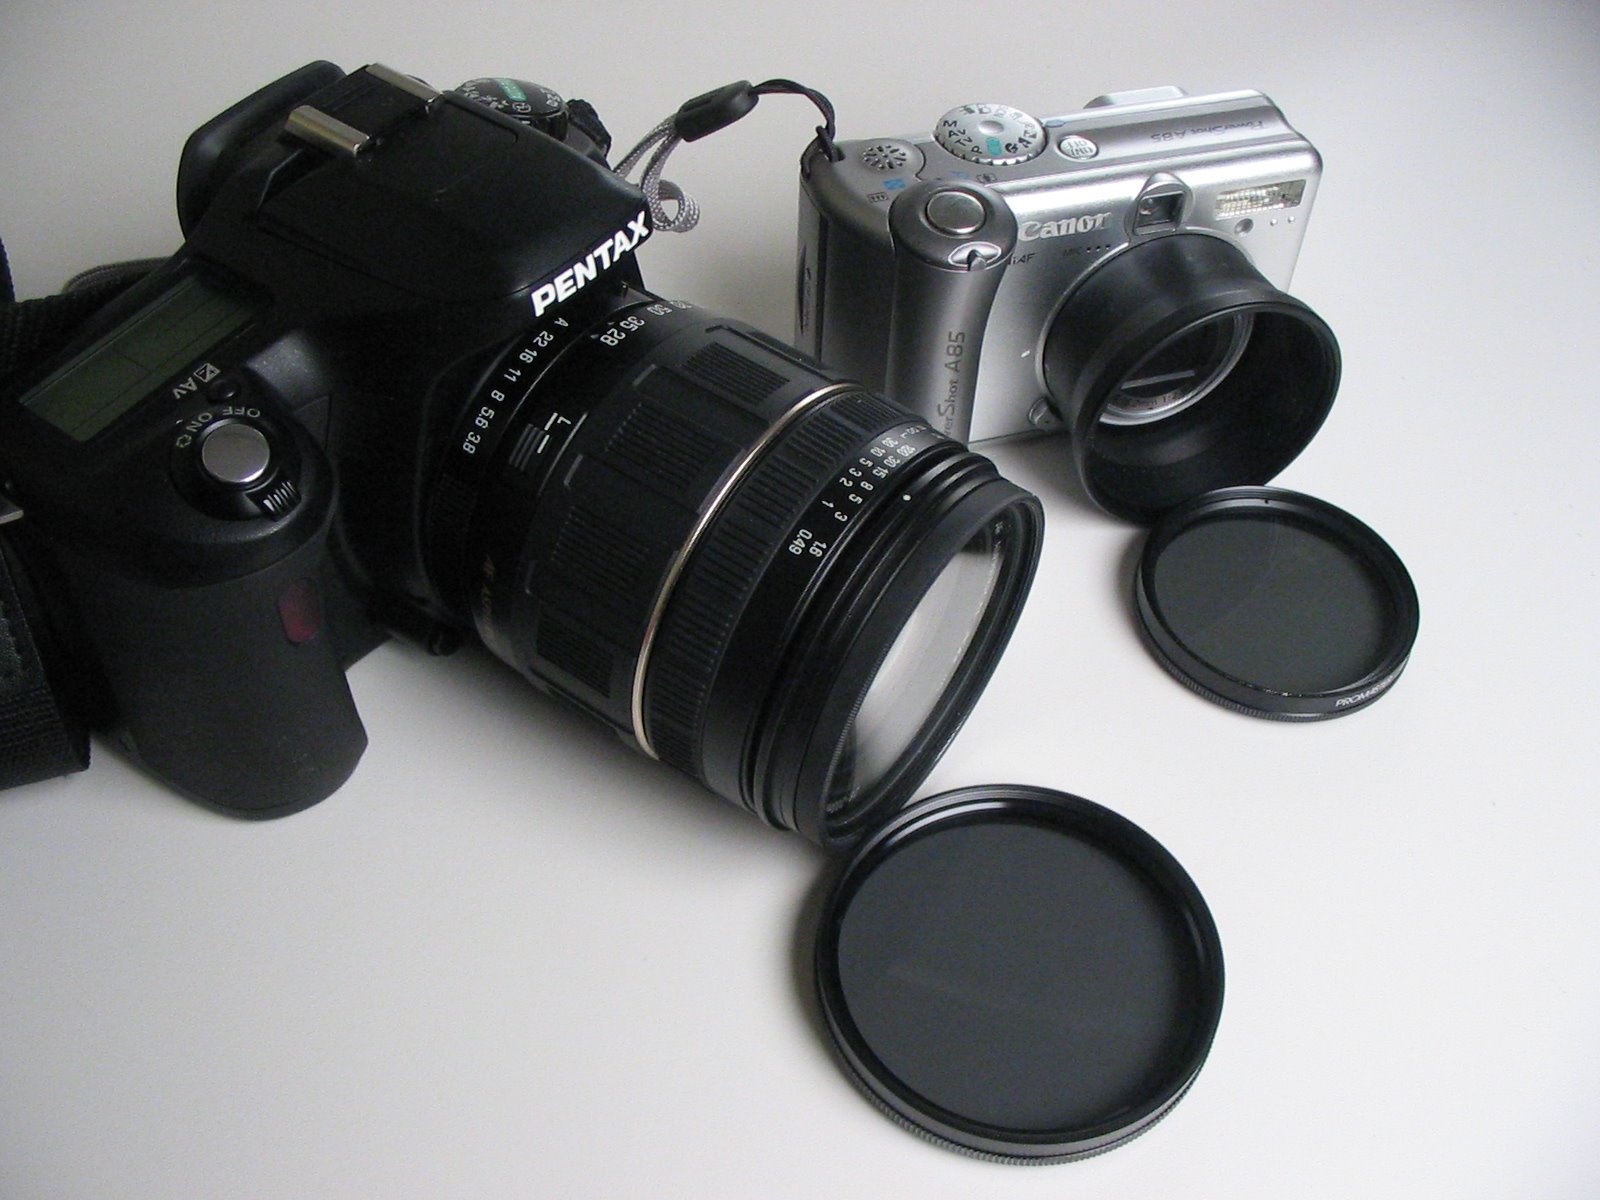
If your camera has interchangeable lenses, when shooting from underneath an object looking upwards towards the sky, use a wide angle lens for best results. If you’re using a point and shoot camera, back off the zoom so you get lots of foreground interest in the photo as well.

When you are next out taking photos, instead of taking a photo face onto your subject, look around and see if you can find a different and more interesting angle. You’ll find that, with practice, you approach your photo taking in a new way and you’ll see the world in a more interesting light.

Helen Bradley

Friday, October 2nd, 2009

Neon Boneyard

The Neon Boneyard in Las Vegas is home to old neon signs discarded from Las Vegas casinos. Has to be about the most wonderful place to go visit in Vegas.

Here are some images of the old signs:


Helen Bradley

Wednesday, September 30th, 2009

Plan a Family Photo Shoot


These candid photos where shot inside in front of a shawl hanging over a picture rail as mother and daughter played around and posed for the camera.

Are your memories of a family photo shoots memories of dressing up in your best clothes and sitting for hours in a hot studio blinded by the camera flash? Or were you a bridesmaid at a wedding where you endured hours of being photographed in a dress that resembled a lousy Christmas tree decoration? If so, you may not have fond feelings for photo shoots. They don’t have to be this way. With a digital camera and a sense of fun, you can turn a family photo shoot into fun for everyone.

Why digital rocks
A digital camera is a big plus at a family photo shoot – it’s so easy to get great pictures so there’s no pressure to get a perfect photo each time. If someone blinks or coughs or if your son makes donkey ears behind your daughter’s head – take another shot. You don’t have to print anything that’s not great.

Prepare well
However good a digital camera is, it can’t perform miracles! You need to prepare.

* First (and most importantly), make sure you know how your camera works. If you’re not comfortable with it, practice first until you are confident using it.

* Make sure you know how to set the delay timer if you plan to set up the camera to shoot on its own.

* Have a tripod handy to steady the camera.

Play dress ups
Organize every one’s clothes so they coordinate. A simple solution is to get everyone into a white or black T-shirt and blue jeans. Alternately, plan for clothing colors that work well together – all pastels, all darks etc.

Settle for solid colours in preference to patterns or florals.

Avoid clothes with logos on them unless there is a really good reason to wear them.

Location, Location, Location
Scout out a suitable location to use, here are some ideas:

* a local park in springtime is a good place because there are plenty of flowers to add color and there will be chairs and tables or swings and roundabouts that everyone can sit on.

* If you must shoot indoors find a room with light walls, lots of natural light and shoot on a sunny day with all the windows and blinds open.

* make sure you have an uncluttered and neutral background behind your subjects. Place people close to the light source to ensure they’re well lit.


Encouraging everyone to move in very close resulted in this photo that shows the close relationship between these siblings and their mum.

Never at night…and flash in the day
Never do a family photo shoot at night if you don’t have to – the flash will wash out the colours in everyone’s faces and the photos won’t be flattering.

On the other hand, if you’re photographing outside on a sunny day, turn your flash on (yes, On!) so it is forced to fire. When you do this, you will ensure that people’s faces aren’t marred by unsightly shadows.

Let kids be kids
If young kids insist on taking their favourite doll or toy with them, all the better – they will be more comfortable if they have familiar items around them.

When shooting, spend time with each child and take a series of photos of them by themselves (with and without the toy).


Although shy at first, this youngster soon warmed up to the task of being photographed as these pictures show.

Pair up the children too and take photos of them interacting with each other. Provided you have plenty of storage on your camera’s card, shoot lots of pictures taking time out occasionally to make sure they are focused and framed attractively.

If you’re shooting active young children, put your camera onto sports mode to speed up the shots so you freeze the action and don’t get out of focus pictures.

Enlist the help of a friend to look after the younger children while you take photos of the older ones. If that friend is also able to use the camera, he or she can take photos of all the family together.


When photographing a baby, have one parent hold the child and then photograph up close.

If your make your shoot fun and if everybody is laughing and enjoying themselves, you will get some wonderful candid shots that show your family as they really are.

Don’t forget to take plenty of photos – any empty space on your memory card at the end of the day is a wasted opportunity.

Helen Bradley

Wednesday, September 23rd, 2009

Photographing Indoors

Here are some tips for capturing great indoor photographs anytime:

Day time indoors
When photographing indoors during the day and when there is some light available, use it to light your subject.

Open the blinds or curtains on the side of the house which has the most light and put your subject where they will be lit by what sun or light there is available.


Use the light you have – here a skylight has provided all that was needed for a great daytime indoor photo.

Always check the background for the shot – cleaning up messy backgrounds is a task you can avoid by not capturing them in the first place.


Here the photographer, my friend Brenda, composed the photo in the camera’s viewfinder and used the Christmas tree as an alternative to a more distracting background.

Night time indoors
At night indoors, you need to use what light you have available. You may have already have discovered that your camera’s flash doesn’t always flatter your subject. If you can, use overhead lights and strategically placed lamps to light the scene and give it some warmth.

Place desk lamps and other directional lights outside the camera range and use a table lamp to give the scene a visible light source and to provide a warm glow to the subject’s skin.

You can also use candle light to produce a warm glow in your photos – just take care when you use them.


Another shot from my friend Brenda, here the lamplight adds a friendly glow to this image making it look warm and comfortable even though there’s snow outside.

Camera settings
When you shoot in low light you may find your point and shoot camera keeps the shutter open for a longer than the usual period of time to capture the scene. Often this is too long for you to hold the camera still.

Place the camera on a tripod to steady this, this helps you take longer exposure images and reduces the chance of the camera moving. If you don’t have a tripod, place the camera on table or bookshelf to steady it.

When you are taking images using a longer exposure, ensure that the person being photographed understands this so they stay still long enough for you to capture the shot.


Flash light isn’t a bad light all the time – here it compliments this subject and produces a great night time portrait.

Helen Bradley

Friday, September 18th, 2009

Understanding the need to White Balance

When filming indoors using light such as tungsten globes or florescent light, the color of the light will show in the photo.

Tungsten globes cast an orange colour on your photo and florescent light will give it blue/green look.

Your camera will have a setting that will let you compensate for these different color lights – it’s called White Balance.

While light settings peculiar to shooting on a sunny day or a cloudy day are probably easy to find on your camera, the settings that adjust for artificial light are usually tucked away elsewhere.

Check your camera’s manual to see how to adjust for artificial light so you ensure your photos don’t have a distracting colour cast. Most cameras, when they adjust for the light, show the adjusted image in the preview display so you can check you’ve got the right setting.

When using a flash you won’t generally need to adjust for the colour of surrounding light as the flash will cancel this out.

** In the image above, the same cup has been photographed in tungsten light with two different camera white balance settings. The right hand one (tungsten) correctly balances the orange color cast the one on the left (Auto, the default setting) leaves a bad color cast.

Helen Bradley

Saturday, September 12th, 2009

Better Travel Photography #5 – Get in close

Do your travel photographs look just like everyone else’s?

If you wonder why you bothered lugging your digital SLR half way around the world and didn’t just settle for buying postcards, it’s time to revisit the way you photograph your travels. Here is part 5 in my new series of Better Travel Photography – a guide to getting great travel photos that don’t look like everyone else’s..

Today’s tip: Forget the big picture and get in close

Some attractions are just plain difficult to capture close up – if you’ve visited the Eiffel tower you know as soon as you’re down the bottom of it, there’s no way to capture all of it. It’s just too big.

In this situation, look for some interesting detail to shoot and forget about trying to jam everything in.


These are the feet from a statue of Caesar in Rome, while the entire statue makes a great photo, his feet make an even better one.

It’s surprising how little of an object you need to capture for it to still be unmistakably recognizable as, for example, the Eiffel tower but, at the same time, to look more artistic and less run of the mill.


You know this number plate is very old – you don’t need to see the car to know this – the image carries the message.

Helen Bradley

Tuesday, September 8th, 2009

Is your camera manual a door stop or a useful reference?


In the first flush of excitement of owning a new digital camera you’re probably like the rest of us and you read the camera manual. Well, you don’t actually read it but you sift through it far enough to find the ‘important bits’ like how to turn it on and how to view your images. You might also learn how to use a few of its settings and then you put it away. As long as you’re taking pretty good photos, is there any reason the manual shouldn’t stay on the shelf? Yes, there are. Your camera manual is chock full of good reasons for getting it down off the shelf. Reading it will show you more about the features it has for improving the quality of your images and for shooting special effects.

Improve image quality
Not all cameras come configured for shooting in the highest quality mode or for saving images with the lowest loss of data. This is because the memory cards which come with most cameras are so small they don’t hold many high quality/low compression images. If you’ve replaced your camera’s card with a better one (and chances are that you have), you will want to take images at the best possible quality. So, check your manual so you understand what quality settings are available and how to configure your camera to use these. Also ensure you’re using the lowest compression mode so that more data is not lost than is absolutely necessary when your photos are saved to the memory card. This is particularly important if you’re using an older camera with a low number of mega pixels – you want to retain as much image data as possible.

Changing ISO
If your camera is capable of some manual operation one of these features might be the ability to alter its ISO equivalency. ISO is a method of rating film’s sensitivity to light. The lower the ISO number the less sensitive the film is and it’s said to be slower film because the shutter must be open longer to make up for this lack of light sensitivity.

At the other end, high numbers indicate a high sensitivity to light and the film is said to be faster. Typically the film (or camera ISO equivalency), you’re most likely to use is in the range 100-400. So why wouldn’t you use ISO 400 all the time? While 400 film is fast and while it can freeze action and is handy where the light is poor, the downside is that the images it produces are grainy. In fact, the higher the ISO number, the more grainy the images are and this is true of film and digital images.

If your camera supports different ISO values – use higher numbers (400), on cloudy days or indoors – you might even find you can do without a flash with this setting. On a bright day, use 100 or 200 to get better results in the bright light.

This photo can be captured with a low ISO as the background is very light. You can also step up the exposure to ensure the subject is well lit even though the sky will be blown out.

White balance
Most cameras have a white balance adjustment which lets you adjust the image for the kind of light you’re shooting in. Sunlight has a different colour to the colour of the light you use when shooting indoors. If you don’t adjust white balance you will find images which you take indoors will have a yellow or a blue cast depending on what type of light source (incandescent or fluorescent) is used. You can adjust for this colour cast by setting your camera’s white balance setting to match the type of light you’re using.

This is one object photographed with a range of white balance settings – choose the one which gives the most desired effect.

Exposure controls
When shooting objects on light backgrounds or people standing in front of very light or back lit backgrounds you may find the object or person is too dark. This is because the camera is taking into account the light background when it’s setting its exposure. Even if your camera has no manual exposure control, you can generally increase or decrease exposure by one or two stops using an Exposure Value adjustment. Increase exposure to lighten the subject (even at the expense of ‘blowing out’ the background) or decrease it to darken the subject if there’s too much light.

From left to right are the central image shot using -2, -1, +1 and +2 exposure value settings.

Other features
There are numerous other features your camera has available and which you may not have realised were there when you purchased it. Look for options such as shooting in black and white or in sepia. In many cases a simple snapshot can take on the look of a work of art when shot in black and white. Look out too for opportunities to shoot in black and white in the early morning (just after sunrise) or when shooting close ups of children or animals.

By selecting the macro setting on your camera you can capture items close up and they will still be crisply in focus with a sophisticated depth of field effect.

Your camera may also offer a slower than usual shutter speed setting. This will require you to use a tripod to ensure the camera is kept steady while you’re shooting. Using a slow shutter speed gives great results at night or in low light situations where a flash doesn’t have the required range. For example use a slow shutter speed for fireworks to get the benefit of the shower of lights coming after the firework has exploded or to capture tail lights from moving vehicles.

Your camera will have a setting for saturation which you can boost to get wonderfully saturated photos like this.

Information on all these options can be gleaned from reading your camera’s manual. At the same time, look out for other options such as the ability to use PAL output format so you can plug your camera into a TV to replay your images on the TV screen. You can also purchase a power adapter for most digital cameras which lets you use mains power to save batteries in some indoor situations.

So, when should you read your camera’s manual? I suggest you read it when you first buy your camera so you’re able to get started using it. A week or two later, revisit the manual – you’ll be ready to learn more about other features at this time. Then, look at it again in about six months, by then you’ll have taken some shots you’re not happy with for one reason or another. You’ll be ready to look at more advanced tools such as white balance or exposure control to see if these would help avoid repeated problems in future.

Helen Bradley

Friday, September 4th, 2009

Better Travel Photography #4 – Find a new angle to look from

Do your travel photographs look just like everyone else’s?

If you wonder why you lug your digital SLR half way around the world and still come home with postcard images, it’s time to revisit the way you photograph your travels. Here is part 4 in my new series of Better Travel Photography – a guide to getting great travel photos that don’t look like everyone else’s..

Here’s today’s tip – Find a new angle to shoot from
A great way to enhance your travel photography is to turn the camera forty five degrees and capture the objects at an angle.

So, for example, capture tall buildings and lighthouses at just the right angle and you’ll have an image seldom seen before.

Even rows of buildings shot on an angle give you a double bonus, repeated elements and a new angle on capturing them – the result is something very special.

Helen Bradley

Tuesday, September 1st, 2009

Capturing Autumn Colours


With cool autumn days comes a change in colour in many of the trees around us. While here in California we don’t have the great swashes of autumn colour that they enjoy on the east coast there are still patches of colour to capture that you won’t encounter any other time of the year.

So, it’s time to grab your camera and head out to make the most of the season. If you’ve got little people in your life (or you’re just a big kid yourself), you’ll find piles of golden leaves that just beg to be rolled in or thrown high in the air!

The best time to capture the colours of autumn is when the colours start appearing. The time frame between the best of the autumn colour and bare branches can be very short. A brief thunderstorm or burst of strong wind is all that separates a beautiful tree laden with autumn colour from being a pile of leaves on the ground. It’s all too easy to wait too long for the perfect day that never comes and, along the way, miss out on some great shots.


When capturing autumn colour look for contrasts such as the play of a golden tree against a bright blue sky. While banks of yellow and gold make great photos, a sharp contrast between two colours can make for a great image.

If you miss the best of the colour, and if there aren’t a lot of leaves around – get up close and shoot those leaves that you can find. Even a few splashes of colour can capture the feel of the season.

Use a filter
If you’re using a SLR (single lens reflex) camera with removable lenses you will be able to purchase and use filters with your camera. In addition, some point and shoot cameras can also take these filters. If yours can, then consider investing in a Polarizing filter. There are two types of polarizing filters, for a film SLR camera you will use a linear polarizer and for a digital SLR or point and shoot, you use a circular polarizer. These filters screw into the front of the lens and they work in a similar way to your polarized sunglasses by cutting the glare and giving you better and more intense colours particularly when the sun is very bright.

Don’t forget to remove the polarizer when you have finished shooting – you won’t want to use it indoors, for example or in low light conditions. Of all the filters you can purchase, a polarizing filter will give you results you can’t duplicate using software fixes.


The Digital SLR on the left has lenses that take filters like the polarizing filter shown. You can buy the special adapter shown for some point and shoot digital cameras such as the one on the right – you simply screw the filters on to the adapter.

Finding good shots
The sun in autumn is lower in the sky than it is in summer when it is almost overhead. This low angle of light makes for long shadows which give you great photo opportunities.

Also look out for autumn colours reflected in still water or buildings. The contrast between the autumn colours and other objects in the water or the angular shapes of a building are an interesting contrast.

If you live in the city, chances are that your local park has trees that will change colour with the season so look for opportunities to capture the colours there. If you’re shooting the kids as they play among the leaves, get down to their level so you’re looking directly at them and not at the top of their heads. Alternately, capture them as they gather up leaves and throw them into the air. To get best results with action shots like this, use your camera’s sports mode so the action is frozen. If your camera has a burst shooting mode this is handy too as it will fire off a series of shots in quick succession so you capture all the action. You can also simply use the autumn colours to provide a background to your portraits. If you use a large aperture setting of around f2 the background will be blurred and the subject will be in sharp focus. Smaller aperture settings will give you more of the photo in focus.


When you’re shooting in autumn, remember that all the standard techniques for taking great photos apply. You should compose your images carefully so it’s clear what the subject of the photo is. Avoid placing the horizon directly across the middle of the photo and, instead move it up or down to create a more interesting shot. Make sure to check the background of your photos so you don’t capture light poles and other distractions that will ruin the shot.

Autumn is all about looking for the opportunities that the season provides and taking advantage of them.

Helen Bradley

Friday, August 28th, 2009

Cool Photo Apps #6 Create HDR images


Not all good applications come in big shinny boxes like Photoshop and Photoshop Elements. Many cool photo apps are available on the web and they’re free.

These apps do things that other programs don’t. They are fun to use and practical. In this Cool Photo Apps series I’ll show you some of these, today it will be how to create an HDR image.

Once of the limitations of digital cameras is that they are only capable of capturing an image with a fairly narrow dynamic range. You can, however, create images that have a higher dynamic range if you take a series of images at different exposures and combine them by selecting the best exposed pieces of each.

To do this, ideally, you need images shot using a tripod so there is no movement between images. In addition, the camera settings should not change from one image to the next – except, of course for the exposure settings.

While you can assemble the series of images manually, good software makes it much easier to do. Programs such as PhotoImpact and Photoshop have built-in tools to do this but you can also purchase standalone programs to do the work.

One specialty program is Photomatrix Pro 3 which you can find it at www.hdrsoft.com. Download and install the trial version and, if you don’t yet have suitable images to work with, download a set of sample images at the same time and unzip them.

Step 1
Launch Photomatrix, select Exposure Blending > Browse and load the images shot with different exposures.

Step 2
When the Exposure Blending dialog appears you will see the composite image appear and you can select fine tuning options such as Average, Highlights & Shadows – Auto, Highlights & Shadows – Adjust etc.. Select and compare the various options and adjust the sliders until you find a result you like.

Step 3
Once you’re done, click Process and the images will be compiled into a final HDR image.

Step 4
The program also includes a Generate HDR Image option which involves a more complex process than Exposure Blending.

Helen Bradley

Wednesday, August 26th, 2009

Better Travel Photography #3 – Repetition – over and over again

Do your travel photographs look just like everyone else’s?

If you wonder why you lug your digital SLR half way around the world and still come home with postcard images, it’s time to revisit the way you photograph your travels. Here is part 3 in my new series of Better Travel Photography – a guide to getting great travel photos that don’t look like everyone else’s..

Here’s today’s tip – Look for repeated elements
When you’re photographing in tourist locations, look for repeated elements and focus on capturing them.

This can be as simple as a row of street lights or lights on buildings.

Our eyes love to see repeating elements and anything that you can find three or four of is a great topic for a photo.

Helen Bradley

Saturday, August 22nd, 2009

Cool Photo Apps #5 Making photos bigger


Not all good applications come in big shinny boxes like Photoshop and Photoshop Elements. Many cool photo apps are available on the web and they’re free.

These apps do things that other programs don’t. They are fun to use and practical. In this Cool Photo Apps series I’ll show you some of these.

Occasionally, you might want to resize an image by increasing its size – for example, when you need to make a cell phone photo large enough to print letter size!

While photos generally downsize well, upsizing them can be fraught with difficulties because you’re trying to create content that doesn’t exist.

One tool which does a good job is Reshade.com. You can use the program online or download an offline version to install on your computer.

Here’s how to use the online program:

Step 1
Click the Start Here button in the 4Online Image Resizer box.

Step 2
Click Browse to select the photo to upload from your computer. Click Open and then click Submit.

Step 3
Once the image appears on the sites elect the size to upsize the image to and you can also select to Smooth, Sharpen, Crop or Stretch the image although some of these require you to register on the site and high resolution resizing can be purchased for a small fee.

Step 4
When the process if complete you will see the resized image on the screen. Right click and select Save Picture As to save the image to disk.

Helen Bradley

Wednesday, August 19th, 2009

Better Travel Photography #2 – Glass and puddles are your friend

Do your travel photographs look just like everyone else’s?

If you wonder why you bothered lugging your digital SLR half way around the world and didn’t just settle for buying postcards, it’s time to revisit the way you photograph your travels. Here is part 2 in my new series of Better Travel Photography – a guide to getting great travel photos that don’t look like everyone else’s..

Today’s tip: Glass is your friend (not the lens type of glass either!)

If what you are photographing is in a busy location you can capture unusual detail by turning your back on it and find ways to capture it reflected in surrounding windows.

While the object’s details might be less well defined when reflected and while you’ll get a combination of the window detail and the object itself, the collage effect can make for a unique image.

If it rains as you travel, celebrate the opportunities available in shooting reflections in puddles. Capturing a popular tourist destination reflected in water is a way of seeing things that are there all the time but which few people ever really “see”.

When you shoot reflections, in windows or in puddles take care to make sure your camera is focusing on what it is that you want it to focus on.

You’ll want the detail in the reflection to be visible and in sharp focus with the surrounding area out of focus.

If you’re used to using a polarizing lens on your camera – which you should when shooting in sunlight conditions – remove it when you’re shooting reflections.

One of the roles of a polarizing filter is to cut out a lot of reflected light from entering your camera and, when you’re shooting reflections that’s exactly what you want to capture.

Helen Bradley

Saturday, August 15th, 2009

Cool Photo Apps #4 Build your own camera


Not all good applications come in big shinny boxes like Photoshop and Photoshop Elements. Many cool photo apps are available on the web and they’re free.

These apps do things that other programs don’t. They are fun to use and practical. In this Cool Photo Apps series I’ll show you some of these.

One of the neatest things about the digital camera revolution is that, in embracing all the fun there is to be had in photography as a hobby, many people are looking look at film cameras in a different light.

Corbis, a company better known for stock images, offers enthusiasts a series of downloadable printable pinhole cameras that you can construct yourself from cardboard and which use regular film. It’s the ideal partnership between technology and creativity.

You simply download a PDF file which contains the camera template and instructions and print the pieces. You assemble the camera over a recycled cereal box using a few simple tools that you probably already have.

Slip in a roll of ISO 200 film – which, if you’re like me, you probably have stuffed away in your fridge door – and you have a fun “grass roots” camera that’s guaranteed to give you hours of entertainment.

I’m willing to bet you’ll be scurrying to your nearest camera shop to get the photos printed just so you can see how cool they are. Find the Corbis pinhole cameras at www.corbis.readymech.com/en.

Helen Bradley

Tuesday, August 11th, 2009

Better Travel Photography #1 – take the road less traveled

Do your travel photographs look just like everyone else’s?

If you wonder why you bothered lugging your digital SLR half way around the world and didn’t just settle for buying postcards, it’s time to revisit the way you photograph your travels. Here is part 1 in my new series of Better Travel Photography – a guide to getting great travel photos that don’t look like everyone else’s..

Today’s tip: Move out of the way
If you’re tempted to stand alongside other photographers to capture photos of popular tourist destinations then it’s time to move away.

The really unique photographs are those that you take when you look at something through your eyes rather than following what everyone else is shooting.

Look for things that are different and interesting to you in the place you are visiting..

For example, when photographing fountains look for something other than the big picture.

Get in close to the fountain to capture close-up detail or wait for something to happen.

It might be a child splashing in the fountain, a couple sharing a kiss or it might be something as unusual as a bird perched on a statue.

Even in the most popular tourist places there are great and fun and unusual things to capture.

Helen Bradley

Page 10 of 11« First7891011