

Friday, November 21st, 2008
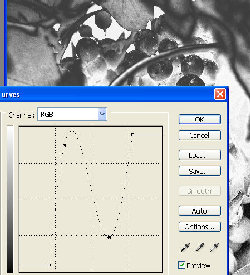
Smarter Photoshop Crop
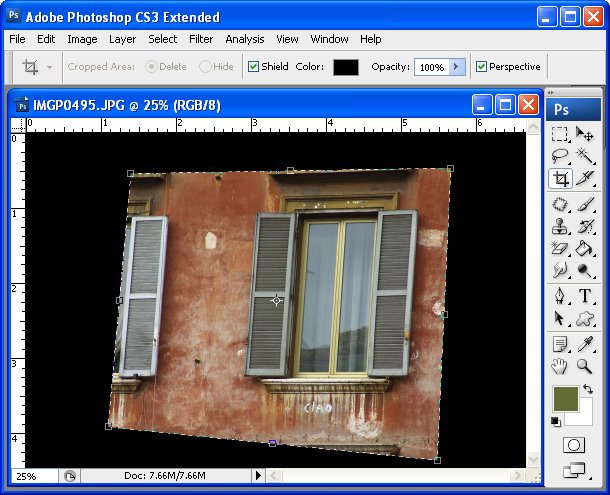
Before (above), After (below)
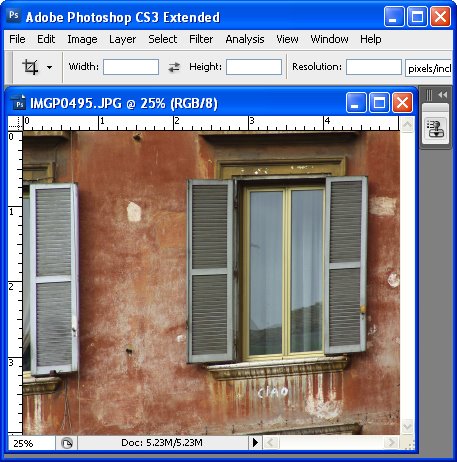
There is more to Photoshop’s crop tool than meets the eye! Read on to learn everything you didn’t know about using it:
Shield color and opacity
When you click the crop tool and drag the crop marquee over an image in Photoshop you will see a shield around the area of the image that will be removed when you commit the change. You can change this shield color from the Tool Options bar to make it any color you want. For example, click in the color selector and make it white, gray, black. You can also Adjust the opacity of this shield to make it, for example, 100% so it totally masks out the unwanted area of the image. This lets you see more clearly the portion of the image you have selected.
Rotate your crop
Rotate the crop marquee by dragging on one of its handles to change the angle of the rectangle and make an angled crop from your image. This way you can make a diagonal crop without having to first rotate the image.
Perspective crop
This option is way too cool! Click the Perspective checkbox on the tool options bar and you can crop an image in perspective. So, drag the corner handles into any four sided shape you like – each corner operates independently of the others when this option is enabled. Then click the Commit button and the unwanted part of the image will be discarded and what remains will be reshaped and deliciously distorted to a rectangle.
You can use this feature to fix keystone perspective problems with images such as tall buildings (which tend to be wider at the base and narrower at the top) or you can use it for creative purposes.
So, next time you select the Crop tool, check out these features and put them to work on your images.
Labels: crop, Perspective Crop, Photoshop
Friday, November 21st, 2008
Find Office Documents faster
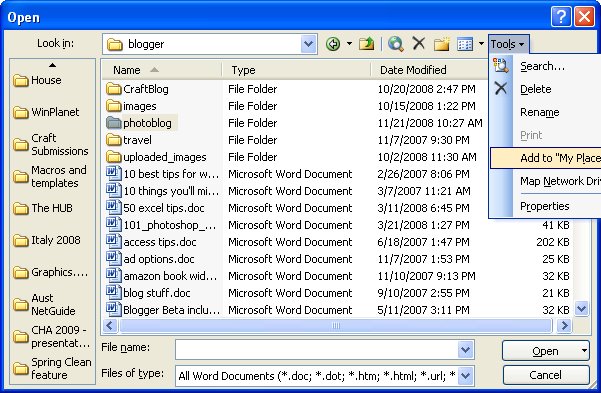
The My Places feature in Microsoft Word and other Office applications makes it easy for you to find documents quickly by adding the folder that they’re stored inside as a link on the left hand bar of the File Open and File Save dialogs.
So, when you’re working on a project even a short-term one, navigate using the File Open or File Save dialog to the folder that the files for the project will be stored in. With the folder selected (don’t open the folder), in Office 2003 and earlier click the Tools button on the toolbar and choose Add to My Places. In Office 2007, right-click the left sidebar and click Add folder name.
This adds the folder at the bottom of the list in the left sidebar making it easy for you to navigate to that folder by simply clicking its name in the list.
If you’re using a combination of Office 2003 and Office 2007 you will notice that the left hand panel of each of the File Open and File Save dialogs are different. However, if you’re working in Word 2003, for example, the same sidebar appears in Excel 2003.
If you have lots of links in the sidebar – I have around 20 – right-click the panel and select Small Icons to make the links smaller so that everything fits better.
Labels: My Places., Office 2003, Office 2007
Tuesday, November 18th, 2008
10 ways to Go Green with Microsoft Office
Saving paper is easy with Microsoft Office. Here are some cool ways you can save paper when printing (other than the very obvious option to not print in the first place!)
1 Use Shrink to Fit in Word’s Print Preview to size your document down so it takes one less page.
2 Use the options in Excel’s File > Page Setup dialog to select the number of pages wide and tall to print onto – the document will be scaled down to fit.
3 Use Print Preview – every time – before you print. Check your document thoroughly to make sure there aren’t errors in layout or design before you waste paper finding out!
4 Print in duplex (double sided) where possible and if your printer allows.
5 For documents which you’re printing for archive or reference purposes – print 2 up so you get 2 “document” pages on each sheet of paper – if you duplex this you’ll get 4 pages per sheet.
6 Use Internet Explorer’s Send to OneNote 2007 feature to save web pages for reference to a OneNote notebook rather than printing them.
7 Install the Office 2007 PDF writer and save documents as PDFs to email instead of post. Find it at: http://tinyurl.com/2v77sn
8 Instead of printing Slides in PowerPoint one per page, use the Handout option to print up to 9 per page.
9 Email documents to other users when working on documents as a team. Use the Track Changes feature in Word to mark up changes so they can be seen, shared and evaluated.
10 To print only part of a worksheet, select the area to print and choose File > Print > Selection.
Wednesday, October 22nd, 2008
OneNote – Send it to me!

OneNote is one of those underused applications which really should have a place in everyone’s day.
Planning a trip? Researching a topic? almost anything you are doing, OneNote should have a place in your toolkit. With OneNote 2007 installed you have better than ever integration between OneNote and, for example, Internet Explorer or Word. In Internet Explorer, find a site you like and which you want to keep the information from and you can. With the page visible, choose Tools > Send to OneNote and Internet Explorer sends the page contents and the URL to a new page in a OneNote notebook. It’s all stored ready for you to use when the time comes you need the information.
It’s fast and smart.
In Word 2007 you have a OneNote printer. Open a document and choose to Print it but this time, select the Send to OneNote 2007 printer and the document gets sent automatically to OneNote.
It’s a great place to store all your stuff, check it out. It was, from its inception a fantastic piece of programming and a leader in its field. It rocks even more in the new 2007 version.
Labels: OneNote 2007, OneNote integration., send to OneNote
Wednesday, October 15th, 2008
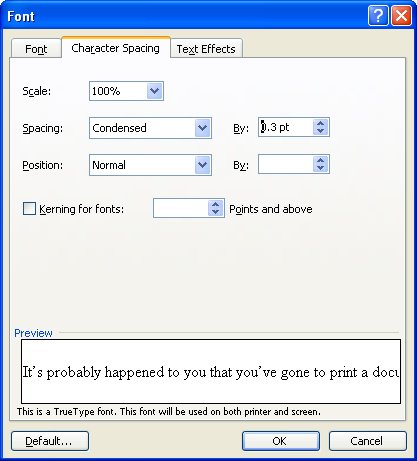
Better character spacing in Word
First the explanation:
Look at any book and the characters in it don’t look quite like those you print on your printer. The reason? the characters in the book are placed closer together than those on your printed page.
Now the technical stuff:
Character spacing is the amount of space between characters of type. If you reduce the amount of spacing just a bit, you get a nicer look to your font, it just looks that little bit more professional.
Now the how to big:
To alter the spacing between characters, select the text to alter and select Format > Font > Character Spacing tab. From the Spacing list box select Condensed and in the By: textbox set the reduced spacing value to somewhere between .1 pt and .3 pt – the results will be subtle but noticeable and your text will look lots nicer.
Labels: character spacing, condensed, Microsoft Word
Friday, October 3rd, 2008
Borderless printing in Microsoft Publisher – Yay or Nay?
Before you go looking for borderless printing and margin settings in Publisher 2003 – give up – they’re not there.
Simply put, Publisher does not do borderless printing.
While on the face of it this is a nuisance, to say the least, there is a workaround that will get you going. Here’s how:
1 First of all set up your Publisher document so that it has everything on it that you want to print borderless. For example, I like to, when I’m using a template for a calendar, for example, stretch the background filled shape to fill the entire document so that there is color all the way to the border.
2 Save the document as a publication (*.pub) file so that you can come back to it later on if necessary and edit it.
3 Now create the print version – to do this, save the document as an image. Choose File > Save As and from the Save as Type dropdown list choose an image format such as Tagged Image File (*.tif) and give the file a name.
4 Now crank up your graphics software, set up your printer using the printing options for borderless printing and print the image.
Not pretty but it works!
Labels: Borderless printing, Microsoft Publisher, save as an image
Friday, September 26th, 2008
Movie Maker Beta goes Live
In the spirit of making key applications available online rather than as standalone programs on your desktop, Microsoft has launched Windows Movie Maker Beta live.
Find and download it from: http://download.live.com/moviemaker
It’s a long time since Windows Movie Maker was updated – in computer terms it’s almost geriatric! It will be good to see it given a makeover and some added functionality.
Labels: Beta, download, Microsoft Windows Movie Maker
Wednesday, September 24th, 2008
Seriously weird stuff
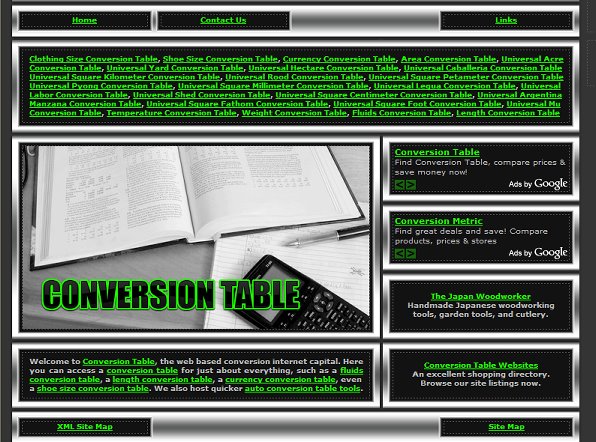
I know how to convert acres to hectares, I know how to convert feet and inches to centimetres and even centimeters but this site is scary weird with what it can convert: Conversiontable.org.
It can convert things I never heard of and certainly can’t spell. And who knew there were such things as Barns and Bunders (hint: they are units of measure), or Labors, Hundreds, Homesteads and Hides?
If you’re ignorant of the finer measures in life, head over to this site and check it out. It’s deliciously retro in design with a Matrix colour scheme of blindingly monochromatic CP/M green and black.
On the practical side, you can convert currency, shoe sizes, liquids and land – just about anything and everything is covered here.
If you’re just a helpless geek like me, check out the wonderful world of units of measure – it’s way more riveting a dinner party conversation than what’s on TV this week. Oh, and as an aside, if you’re at one of my dinner parties, please don’t get me started on the shipwreck they’re making of the US adaptation of the award winning Australian TV series Kath and Kim.
Hint: Check out the original Oz version and plan to clean your bathroom on Oct 7 – it’ll be much more fun!
Labels: conversion, Kath and Kim
Tuesday, September 16th, 2008
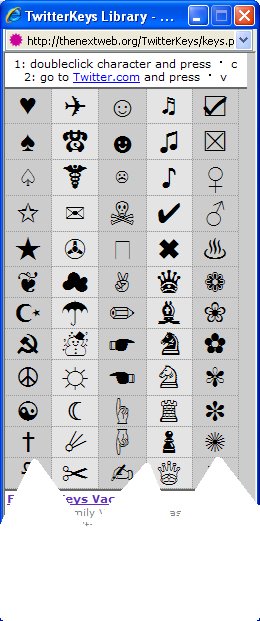
I ♥ Twitterkeys
I love Twitter – I love staying in touch with everyone I am following and I love to see what they’re doing. I’m also getting lots of cool information from Twitter folk – cool recommendations and contacts. In fact I’m about to start guest posting on Digital Photography School blog courtesy of a contact made with Darren Rouse through Twitter – how cool is that?
Today, CraftyChica had a note saying thank you to someone for some cute Twitterkeys she was using. Twitterkeys? What are they I asked myself?
The answer can be found if you cruise over here to http://thenextweb.org/2008/09/16/twitterkeys-enhance-your-twitter-conversations/ and grab yourself a link to them. It’s a small window you open (and leave open) which gives you some cool icons to use in your Twitter tweets. And which work in blog posts too!
I ♥ Twitterkeys.
If you’re looking for me at Twitter, you’ll find me by searching for HelenBradley – call by and say hi!
Labels: tweets., Twitter, twitter.com, twitterkeys
Wednesday, September 10th, 2008
What a Star! Photoshop World videos
I’ve just come back from Photoshop World in Las Vegas. My head hurts so bad with things I’ve learned.
One fun thing that happened amongst everything else is that I got interviewed by Dave Cross’ daughter and the clip was used in the conference closing video – second time it’s happened to me – must be the red hair!
So, it’s now up on YouTube and here’s the link (I’m the red head – duh! 19 seconds into the video) how cool is that?
I will be posting some tips and tricks I’ve learned in my Photoshop blog real soon.
Labels: Helen Bradley, Photoshop World Las Vegas, video, YouTube
Tuesday, September 9th, 2008
Tags in Twitter – why and how to use hashtags
One issue with Twitter is that there can be things happening in Tweets that you’d be interested in reading but which you may not know about. So, for example, people you don’t follow may be talking about subjects of interest to you or, as happened to me this week, I was at Photoshop World and I wanted to read other people’s tweets from the conference although I may not choose to follow those folk on a more permanent basis.
So, when you want to share information relating to a particular and discrete topic you can use hashtags. Hashtags were, so far as I can understand, first supported via a website called hashtags.org. Provided you add hashtags to your Twitter posts and you Follow hashtags on Twitter, hashtags.org tracks the tweets that you post that have hashtags in them and makes them easy to find. A hashtag is simply the hash character (#) put in front of a tag name.
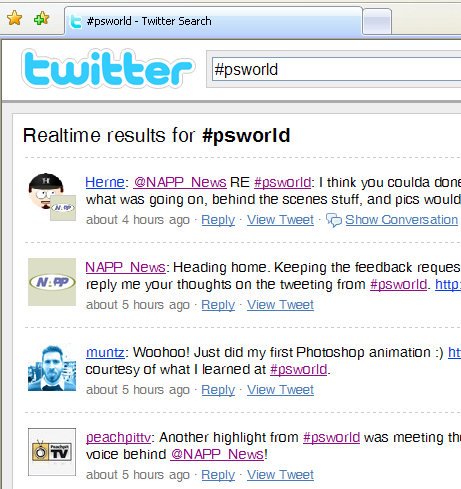
So, for example, at Photoshop World in Las Vegas, the tag #psworld was used to discuss things relating to the conference by attendees using Twitter. By following hashtags, any posts that you created that had the #psworld tag in them would be tracked automatically by hashtags.org and could be viewed on that site or followed using an RSS feed. However, it seems that although this should work in theory, it didn’t in practice and still the #psworld tag doesn’t appear in hashtags.
The simpler solution is to use Twitter itself to show you the tags. Simply visit http://search.twitter.com and in the search field type the tag you want to follow, for example #psworld and click Search. Now you’ll see all the tweets which include that tag. You can also grab a RSS feed for this query by clicking the RSS button in the search window.
When you track the hashtag information on either Twitter or Hashtags.org you can read tweets posted by anyone using that tag whether or not they are someone you typically follow. Of course, if you find someone posting regularly using a tag that you’re interested in then you can click their icon to see who they are and to follow them if desired.
So, here’s what I suggest:
1 Follow hashtags on Twitter (optional since its performance seems to be erratic)
2 Add #tag_name to your Twitter posts
3 Use search.twitter.com to find and read other’s posts on a particular topic.
4 If you’re attending a conference or tradeshow, try to find the hashtags used by other attendees so you can keep in touch with what’s happening.
Labels: groups, hashtags, how to, tagging, tags, Twitter, twitter.com
Wednesday, August 20th, 2008
My love affair with Visual Basic
OK, when I first fell in love with the Basic programming language, computers didn’t have much more than 4k of memory and my Basic version – on an old Amstrad – didn’t even do graphics. I programmed card games, databases and all sorts of small apps. It was love at first sight or first 10 Let x = 10 statement at least.
Wind forward a few years – OK – around 15 or more and I still love Basic. What’s nice is that as I’ve grown up so too has Basic and the newest tool I get to play with is Visual Basic Express Edition 2008. It’s free and available for download here.
What I like most about VB is that I get to program and get paid for it. I write columns about creating small VB projects. I only get one page, three images and around 900 words so everything has to be smart and clean – there is no room for wasteful code. It also has to be accessible so even someone who has never used VB Express before has to be able to follow along. Not the world’s easiest brief but one I love.
So, [insert shameless self promotion in here] I now have a body of cool VB articles built up using first of all VB Express 2005 and now using VB Express 2008. I’m now starting to move them across to Projectwoman.com so anyone can try out the project. So far I have a 2 part audio player complete with visual effects and a column on creating text and image rollovers for your VB projects. Over time I’ll add more – I’ve just finished part 3 of the most magical doodler application which is scheduled for Australian PC User magazine’s Oct/Nov and Dec issues so you won’t see that here anytime soon but there’s a web browser to come and some other cool stuff.
Labels: audio player, image rollover, text rollover, vb wma player, Visual Basic Express 2005, Visual Basic Express 2008
Saturday, August 16th, 2008
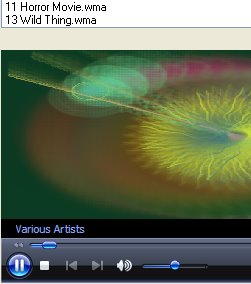
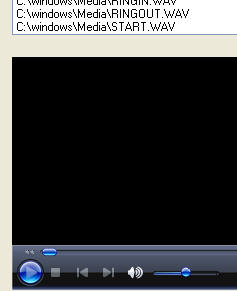
DIY Visual Basic audio player
I’ve been programming with Basic for years, more than I ever want to admit to.
Recently I’ve been using Visual Basic Express edition, 2005 & 2008. I’ve made a heap of wonderful projects to show how to use the language to do things from creating status bar programs to a sketch application and a music player.
Over the next few months I plan to add some of these projects to my web site. For now, the first of these is up – a simple audio player created in VBE2005.
You can find it here, there is a second part which will be added very soon. It adds more functionality to this player application.
Labels: audio player, learn, step by step, tutorials, Visual Basic Express 2005, Visual Basic Express 2008
Friday, August 15th, 2008
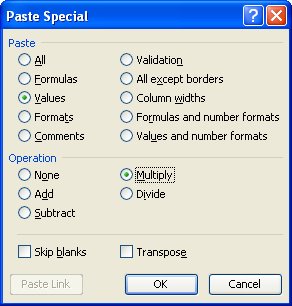
Excel – Multiply cell values inside the cell
This is totally cool. I had no idea you could do it but I just tripped over this Excel feature.
Scenario: you have a list of values in a column that you want to multiply by a second value. Type the multiplier in a cell, anywhere. Click the cell and choose Edit > Copy so it’s on the Clipboard.
Now select the cells that contain the values you need to multiply. Choose Edit > Paste Special and click Multiply and click Values and click Ok. Excel replaces the values in the selected cells with the result of multiplying the values by the constant. It’s all done in situ so you don’t have to create new columns, multiply then paste the values back.
Oh, and there are options for Add, Subtract and Divide too so you can do all your math inside the current cell. Gotta love that!
Labels: Excel, multiply cells by a value, paste special
Wednesday, July 30th, 2008
Excel Change the Default font
If the default font that Excel 2003 uses for all new worksheets doesn’t suit your needs – change it by selecting Tools > Options > General tab and set the Standard font and Size to your preferred choice and choose Ok.
In future, all new workbooks you create will be set by default to this font although those you have previously created will remain unchanged.
If you’re using Excel 2007 and you don’t fancy the new Calibri font, click the Office button, choose Excel Options and click the Popular group. From the Use this font dropdown list choose the font to use for your new worksheets and click Ok. You’ll need to close Excel and restart it for the new font change to be in force.
Labels: default worksheet font, Excel 2003, Excel 2007