Monday, May 17th, 2010

Worth the price of admission – CS5

There’s been a lot of excitement over the Content Aware Fill feature in Photoshop CS5 (Edit > Fill > Content Aware). It’s a big new feature but it’s often the little day to day changes that really make a difference. For me there are two big “little” changes that I love.

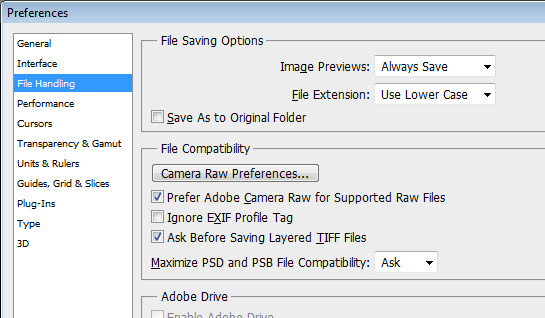
One is the ability to stop Photoshop wanting to save files to where they came from. So, now, when you choose Save As, Photoshop doesn’t have to default to where the file came from and it can be made to point to the last place you saved a file into. This could mean the difference between using Photoshop for day to day screenshots and not.

Until now I’ve used PaintShop Pro and I’ve done so for around 10 years because it defaults to the last save location which works best for me. Now, at last Photoshop can be configured to behave the way I want it to behave. You will find this setting in Edit > Preferences > File Handling – disable the Save As to Original Folder checkbox.

The other big plus is that the Ruler tool now includes a rotate feature. In the past you’d choose the Ruler tool, mark the horizontal line then go to Image > Image Rotation > Arbitrary to make the rotation. Now there’s a Straighten option on the tool options bar when you select the Ruler tool.

Still on my wishlist is a one step paste to new image option. I’d love to be able to have something on the clipboard and choose Paste to New Image and have a new image the size of the clipboard object automatically created for me. Shouldn’t be too difficult – really! For now I have an action which does it but it would be nicer to have a menu item.

Helen Bradley

Wednesday, May 12th, 2010

Harajuku and Yoyogi Park

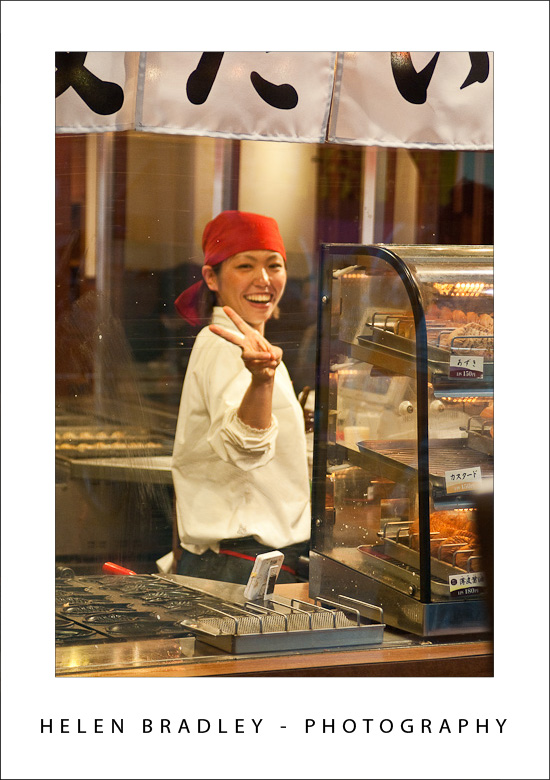
On Sunday I spent the day in Harajuku and walking with hundreds of Tokyo residents in the beautiful Yoyogi Park. The park is slap bang in one of the busiest areas of Tokyo within spitting distance of Shibuya and Harajuku and around 10 minutes walk from Shinjuku a major shopping area and with the largest railway station you ever want to get lost in. Yet this park is a peaceful oasis where kids run and play, people walk, sit and throw frisbies and laughter fills the air. The Japanese laugh a lot – and the sound of laughter is something that I really noticed here.

Harajuku didn’t offer up quite the wealth of photo opportunities I had hoped for but I still got some great images. Click here to view the final Tokyo 2010 gallery.

Helen Bradley

Saturday, May 8th, 2010

Neon and street art in Tokyo

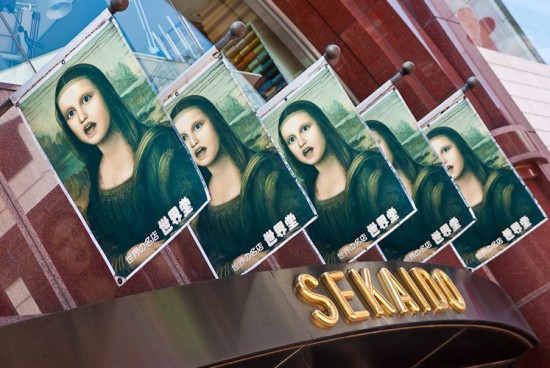
Yesterday I spent a few hours in Sekaido, a 7 storey art supply store in Shinjuku then headed out to Ginza as I hadn’t been there before. There are some seriously funky things here – it was Saturday so they close some of the main streets and put tables and chairs out for people to sit at. The neon is pretty amazing the shops – well let’s just say expensive and big name. In the Sony building the stairs play music as you climb them! All in all – fun and well worth a visit but it’s far from being my favourite place in Tokyo.

For my money, Shinjuku is far more interesting and colourful and there are way fewer tourists there. I’ve found some cool graffiti and sticker art around Shinjuku too which is an unusual find in Toyko.

But today is Sunday so I’m headed to Harajuku with high hopes of some amazing shots – it’s the centre of youth culture and dress up is the name of the game.

For now, click here to view a gallery of Ginza and Shinjuku street art images.

Helen Bradley

Thursday, May 6th, 2010

Ameyoko and the Tsukiji Fish Market

I visited Ameyoko last night to get some Japanese crackers that are hard to find and cost a fortune at the duty free store at Narita. This is an old market – used to be a black market in WWII and it runs along the Yamamoto railway line between two stations. In the evenings it’s busy with commuters stopping by to purchase food for dinner or to shop for clothes – new and second hand. It’s a fun and vibrant place to visit.

This morning – early – it was fish market time. I’ve missed  this the last two times in Tokyo once because it was closed to tourists and the other because it was closed for New Years. Today I got to see what all the excitement is about. It’s packed, noisy, smelly and so much fun. You really have to be on your guard as the market workers are there to work which means moving fish around at a blindingly fast pace and tourists aren’t given any priority at all!

Click here to view the first of my Tokyo galleries.

Helen Bradley

Wednesday, May 5th, 2010

Ohayou gozaimasu

Good morning! I’m in Tokyo for a few days and lucked into the best hotel I’ve stayed at here – ever. While I loved the Park Hyatt last time I was here, its location sucks big time. It’s a hike to Shinjuku station and then a total nightmare trying to find your metro  line – I’ve asked station attendants and all I’ve got is shrugs saying “I don’t know” when asking the whereabouts of lines I know stop in that station! So, I bypassed the horrors of Shinjuku and headed out to Shidome – what a blast. Lots of great hotels here so lots of people and great places to eat and right on two lines – just enough metro access without having to deal with the confusion of trying to find your  line.

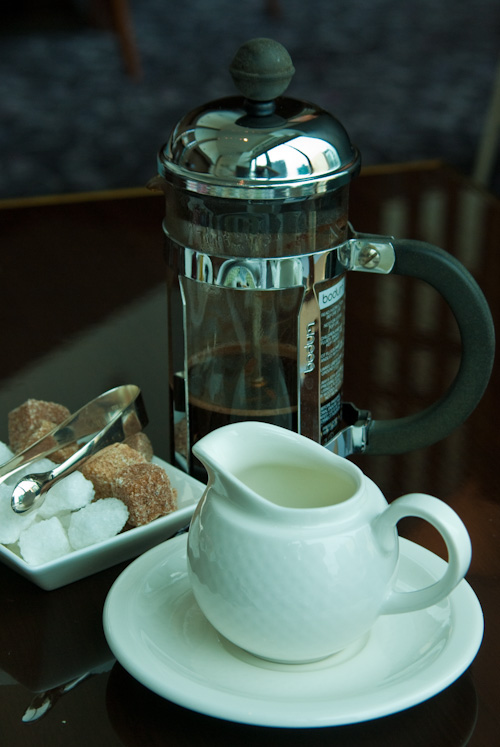
This morning was breakfast at the neighbouring Conrad Hotel at Chef Gordon Ramsay’s Brasserie – on the 28th floor with great views and a breakfast to match this great location – and they had french press coffee – what is there not to like about this place!

Helen Bradley

Tuesday, May 4th, 2010

Custom bullet layouts in Microsoft Word 2007

I don’t like Word’s basic bullet design and generally I’ll want bullets of my own liking. For example I’ll use bullet lists to create checkbox lists for things I need to do.

Bullet style

To get a checkbox list working in Word 2007 requires a little bit of list knowhow.If you’ve created your list items you can simply select the list and, from the Home tab, select the Multilevel list button and choose Define new list style.

You need to use this rather than the Bullet Lists > Define new bullet options because otherwise you don’t get control over the tabs and Word’s tab settings for bullets don’t always make good sense.

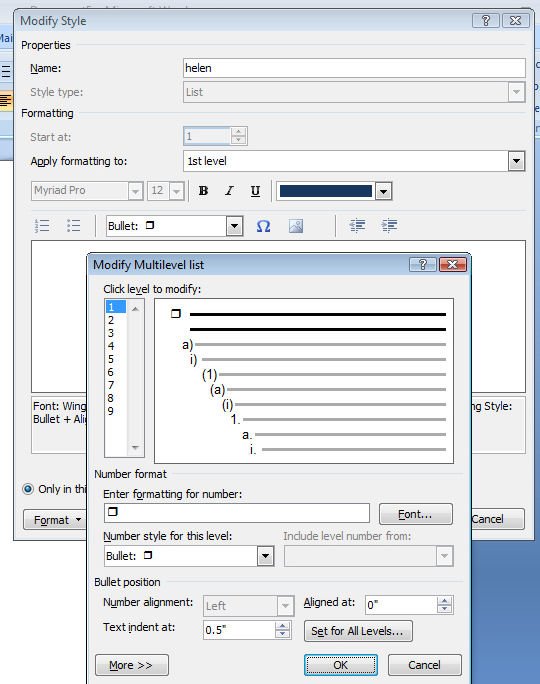
The Define New List Style option gives you the ability to control all of this. Start by typing a name for your list so that you can find it easily again later on. The select Bullets which is a small button to switch from numbers to bullet style. Click Insert symbol and select Wingdings as your font.

You can then select a bullet style such as a shadowed box, select it and click Ok.This is applied as the bullet style.

Spacing

To adjust the spacing between the edge of the page and the bullet and the bullet and the text, click the Format button and choose Numbering. Set the Aligned at value to the distance that you want between the left edge of the page and the bullet itself. I set this to 0 inches.

Set the text indent at a value to the distance you want between the bullet and the text. This is a hanging indent so it ensures that all lines of text are wrapped automatically to the value you set. I like to set this to .75 inches if I’m using large bullets. Click Ok. You can then click Ok again to set this as your bullet style.

You can ignore the rest of the numbering if you’re simply using a one level bullet. Click Ok.

To apply this bullet style to your document click the multilevel list and select the list style from the list styles area of the dialog. If you hold your mouse over it, you’ll see the list style appear in a small dialog with the name that you gave it showing. Click it to apply it to your list.


Helen Bradley

Tuesday, May 4th, 2010

Cropping in Lightroom

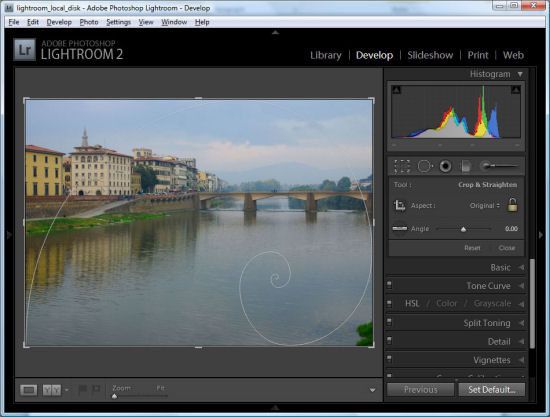
Ok, so it’s pretty easy to crop an image in Lightroom- just click the Develop module and click crop. But try to crop to 6 x 4 – there’s a 4 x 6 size but that’s not the same as 6 x 4 as you’ll soon find out.

Here is a link to a video tutorial that shows how to crop in Lightroom, including how to crop to that 6 x 4 and how to display handy crop overlays.

Watch the Video – how to crop in Lightroom.

Helen Bradley

Tuesday, April 20th, 2010

Lightening backgrounds in Lightroom

I was recently asked by photographer Rhonda Pierce to look at an image that she’d taken and to suggest how the background could be lightened to white in Lightroom.

This image raises an interesting question for anyone involved in postproduction and trying to understand when to use Lightroom and when to use Photoshop for editing.

Ultimately, if this image is to be printed at a large size then Lightroom really isn’t the tool for the job. There is too much wispy hair, particularly on the left side of the model’s face just opposite her mouth, which is cumbersome to work with in Lightroom. Selecting around the hair and doing a detailed job really isn’t possible or feasible in Lightroom. Ideally, Photoshop and a good extraction tool such as Vertus Fluid Mask would be the best combination to use.

However, if the image is not going to be printed at a large size and, for example, it’s destined for the web or if it is a preview image for a client where they’ll choose their favorite image from a series, then Lightroom is a good tool for the job. While Lightroom won’t do such a good job, it will do it very fast and, at the resolution we’ll be using the image we probably won’t see any real difference anyway. For this use, we can compromise on quality and harness the superior speed of Lightroom.

Later on, if this is the image the client chooses and if it will be printed at a large size, then we can wind back the Lightroom changes, export the image to Photoshop and do a proper job. We’ll only be spending time fixing those images that the client is actually paying for and that need a quality fix applied.

Lightening the background in Lightroom
So, assuming this image is destined for the web or for client preview purposes, let’s go back to the original question as to how the background can be lightened in Lightroom.

Any solution will require us to isolate the background. It’s not possible to lighten the background in Lightroom without affecting everything else in the image and that will destroy the rest of the image. The Adjustment Brush is the obvious solution.

Step 1
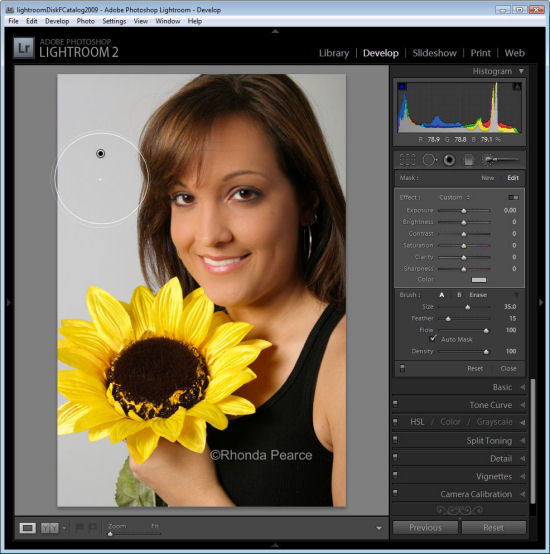
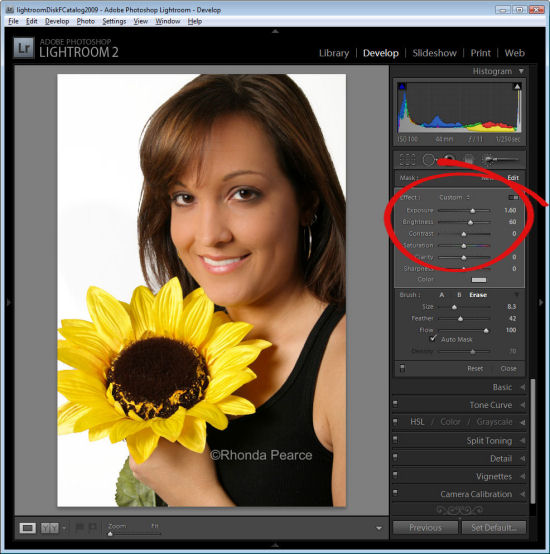
Click the Adjustment Brush in the Develop module and size Brush A so it is big enough to paint over the background. Add a small feather, and for this job, enable Auto mask so Lightroom will do most of the selection work for us. Set Density to 100.

Click and paint over the background with the brush. When you lift the brush you’ll see the Adjustment Pin. Make sure the cross hair in the middle of the brush stays on the background and then the Auto Mask feature will ensure that the brush doesn’t paint over anything but the background.

Step 2
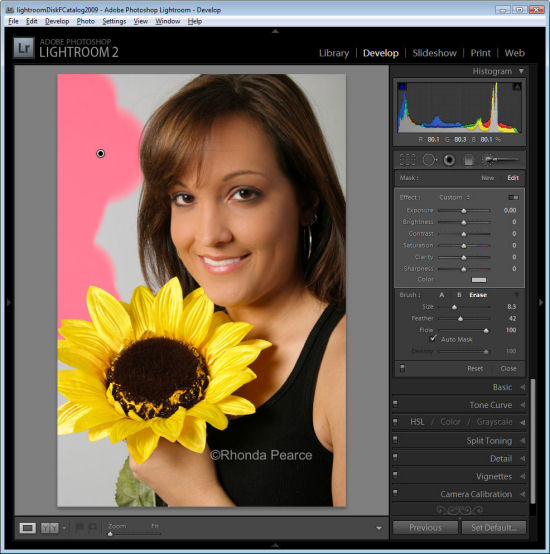
To see the painted area, press the O key and a red overlay will appear. This makes it easier to see where you are working.
Step 3
To get the background behind the very fine hairs you might be tempted to select a very small brush and try to isolate the areas manually. However, to do the job fast, it’s more efficient to size the brush very large so the center can be positioned over an area of the background and the rest of it extends over the wispy hair area. It might help to significantly decrease the density at this point to around 30 so that you only partially select the background in the wispy hair area.

Position the brush over an area of the background so the rest of it extends over the wispy hair area and click once.


Step 4
Return to 100% density and continue to work in the other background areas making sure to avoid the wispy hair.

When the area that you want to effect are selected, press O to hide the mask.
Step 5

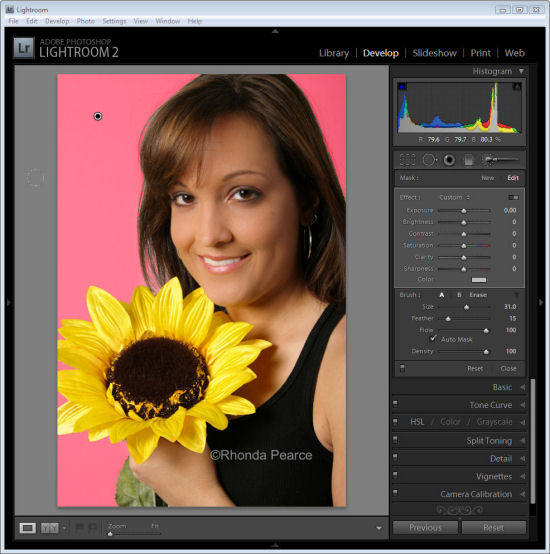
Now adjust the settings for the Adjustment Brush. Increase the exposure and brightness until the background is white.

Click Close to close the panel and deselect the Adjustment Brush.
Step 6
Check the wispy hair area and you’ll see that not all the grey has gone but, when viewed in context of the remainder of the image the results are acceptable.

Press the backslash key (\) to see the image before and after the fix.

Helen Bradley
Tuesday, April 13th, 2010

How to create an animation in Photoshop CS4

I recently posted a movie I had created in Photoshop CS4 Extended and I mentioned I’d do a post on how it was done. Here is the result. It is a video showing step by step the process of assembling the layered Photoshop file. How to clip the flash to the image, how to move the image using the 3D tools in Photoshop and then how to create the animation and render it as a mov file. It’s a pretty simple process once you know how and if you’ve had experience with making movies or animations before much of it will be familiar to you.

Click to go to Vimeo to view the movie

If you tried to view the video previously this is a replacement – the first version didn’t convert properly when uploaded to Vimeo.

Helen Bradley

Saturday, April 10th, 2010

Animations from Photoshop

One of the very cool things about Photoshop CS4 Extended is its 3D and animation features. I’ve been playing around with both and this video incorporates some 3D camera moves, animation techniques and Photoshop effects. The best thing of all is that it is all done in Photoshop – all the way from extracting the photographer, creating the flash, clipping it to the image,animating it and exporting it as a MOV file. I’m putting together a post on how it’s done – just thought I’d tempt you with the final results.

This is a 3D animation created in Photoshop. It is composed of multiple layers including the background photo, the guy taking the photos, his shadow and a faux flash. It’s pretty simple to create and showcases some of the features available in Photoshop CS4 Extended.

Helen Bradley