Monday, July 5th, 2010

Units of measure in PowerPoint

Units of measure in PowerPoint tied to regional settings

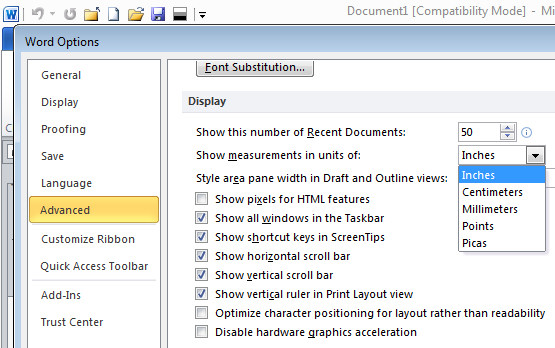
Ok, so its easy to change units of measure in Word by setting the Word Options to measure in inches or cm – depending on where you live. However, if you’re using PowerPoint don’t waste your time looking in PowerPoint for the setting – it ain’t there.

Instead, the measurements in PowerPoint are tied to your geography. If you live in the US you get inches, if you fess up to living else where you get your local units of measure. To change where you live, launch the Control Panel and look for a Regional settings option and set your location there.

For those of us who live in the US but who think imperial measurements suck big time and who yearn for the metrics of our childhood in the far off land of Aus, thanks to Microsoft we are s*** out of luck. You see, if I set my region as Australia or the Uk to get metrics, everything else goes pear shaped and Google starts serving up UK or Australian pages in preference to US ones, or I get £ by default in Excel. It’s all round not a good choice. So, I’ll have to suck it up and learn to embrace feet and inches – but provided you still call the land of your birth home chances are you’ll be just fine.

Helen Bradley

Thursday, July 1st, 2010

Don’t spell check this – Word 2010

do not spell check this text

I write a lot of code in Word documents, Excel spreadsheets and in PowerPoint slide shows. I’m not totally unusual in including macros in my files as well as detailing the macro code within the various documents.

However, as you can imagine, Office applications spit the dummy when they see code and everything gets squiggly lines under it. Which makes your documents look horrible when anyone who has Spell Check as you type enabled opens one of these documents.

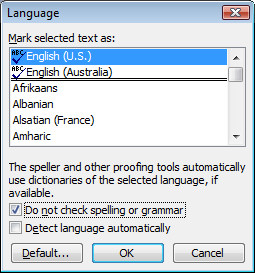
In Word 2003, 2007 & 2010 I can stop proofing by selecting the code, double click on the proofing language in the program Status bar and reselect the language to use and click Do not check spelling or grammar. For some reason if you don’t reselect your language in Word 2007 and 2010 the Do not check spelling or grammar option isn’t applied – go figure. It took me a while to work this one out.

In PowerPoint 2010 and 2007 just choose Do  not check spelling and it works fine. In PowerPoint 2003 where I spent this morning, there’s actually a language entry for No Proofing.. so select that and your text won’t be spell checked.

Helen Bradley

Sunday, June 20th, 2010

Word 2010 – print the current page

If you’re used to using Word you might remember that, when you want to print just the current page you need to click in the page and then choose to print it. The current page isn’t the one you are looking at – necessarily – it is the one where the insertion point is located.

Fast forward to Word 2010 – all of a sudden – all bets are off. When  you click File to move to the backstage view and click Print you see the print preview to your right. Whatever page shows there is the page that will be printed if you choose to print the current page. If that’s not the page you want to print, use the navigation tools to move to the  page to print and then click Print.

It’s smarter and it really is how it should work. It won’t cause problems for new users because they don’t know how Word used to work, it’s us old users who need to rethink the logic here. Lucky for us though the page where the insertion point was located is the  page that shows in Print preview by default.

Helen Bradley

Sunday, June 20th, 2010

Lightroom to Flickr

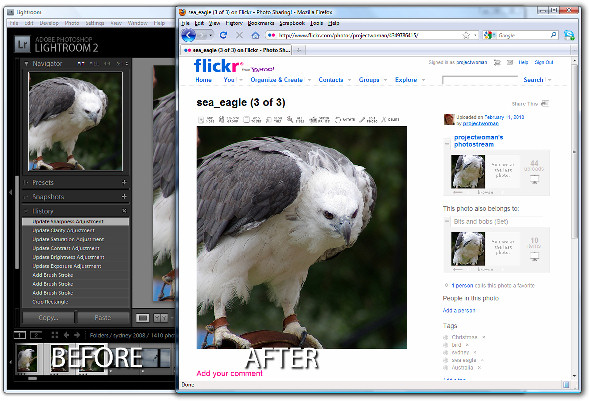
If you’re a keen photographer, chances are that you publish some of your photos to Flickr for sharing with friends and family. One of the disadvantages of Lightroom 2 is that it does not come with a built in tool for publishing direct to Flickr although this has been addressed in Lightroom 3 which does offer this ability.

There are, however, tools like Jeffrey Friedl’s Lightroom plug-in that you can use to do the job. Here’s how it works:

Step 1

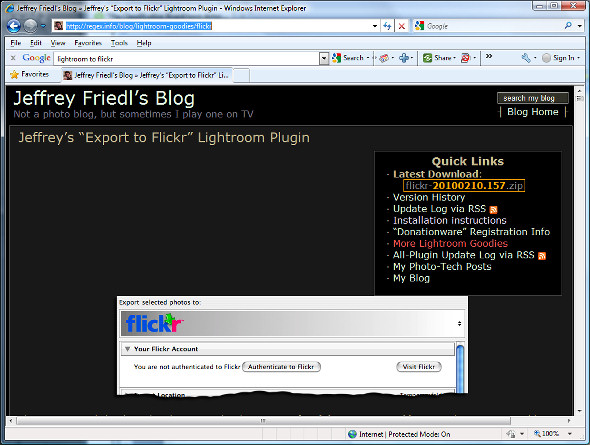
To download the tool, visit http://regex.info/blog/lightroom-goodies/flickr and locate the tool for your version of Lightroom. There are different downloads for Lightroom 1 and Lightroom 2 so get the right one.
Step 2

Download the zip file which, if you are using Lightroom 2 is via a link in the top right hand corner of the screen.

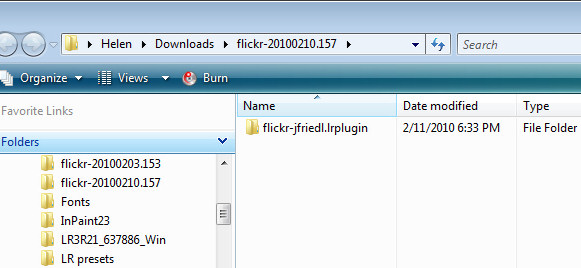
Unzip the downloaded file and, when you do, you will see a .LRPlugin folder inside the zip file.

You need the entire contents of this folder so drag and drop the entire folder from your Downloads folder into the place where you plan to keep it long term.

Lightroom isn’t fussy about where you place your plug-ins but it makes good sense to place them all in a central location where it is easy for you to find them. I suggest you place it nearby your Lightroom folder or in your Documents folder where it will be included in your regular system backup.
Step 3

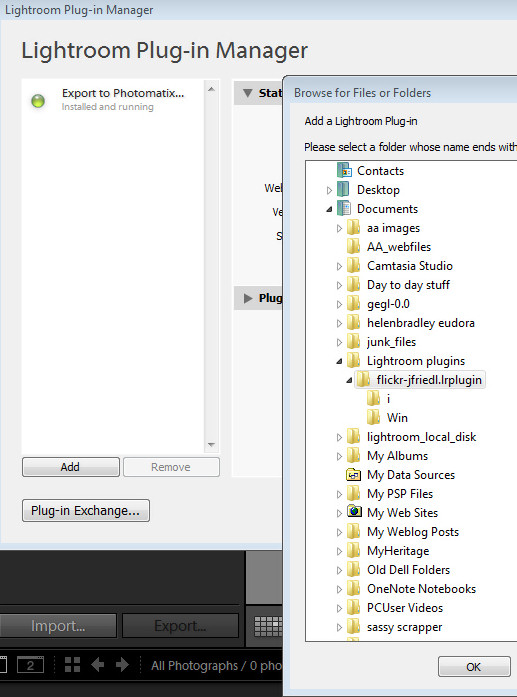
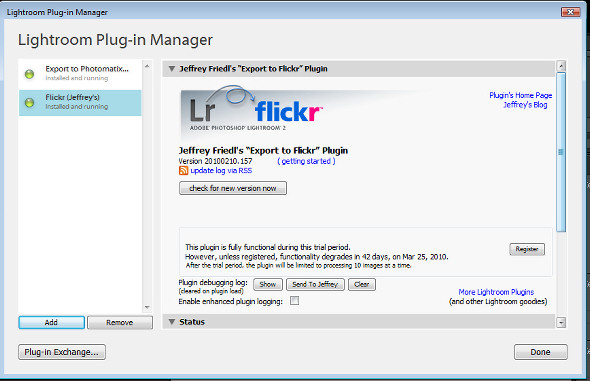
Now return to Lightroom and choose File > Plug-in Manager. This opens the Plug-in Manager dialog where you install your Lightroom plug-ins. Click Add and navigate to the folder that you stored the .lrplugin folder. Click the folder to select it and click Ok.

Click Update if prompted to update your catalog to support the plug-in. A dialog will appear with more instructions in it. Read the information and click Ok when you are done.
Step 4

The Plug-in will be listed in the plug-in list so click Done to exit the dialog.
Step 5

Now select a few images to upload to Flickr. Right click one of the selected images and choose Export > Export.

At the very top of the dialog you will see the Files on disk heading, click this panel and locate the Flickr (Jeffrey’s) option in the list.

Go ahead and (ignoring the Export Location settings) complete the other areas of the Export dialog as you would for any export task.

Pay particular attention to the file names, file format and quality because, when you click to Export the files they are sent direct to Flickr.

If you plan to resize the images select the Image Sizing options and choose the desired option.
Step 6

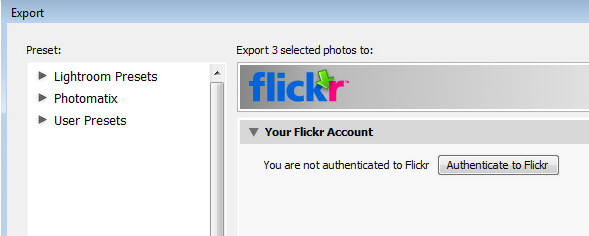
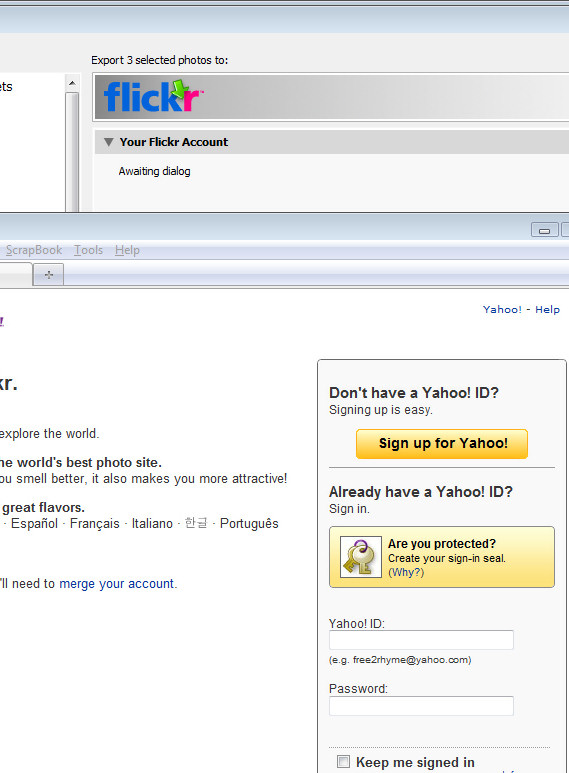
Click the Authenticate to Flickr button at the top of the dialog. You only need do this the first time you upload images. Your browser will open and you should sign in using your Flickr log-in and password.
Step 7

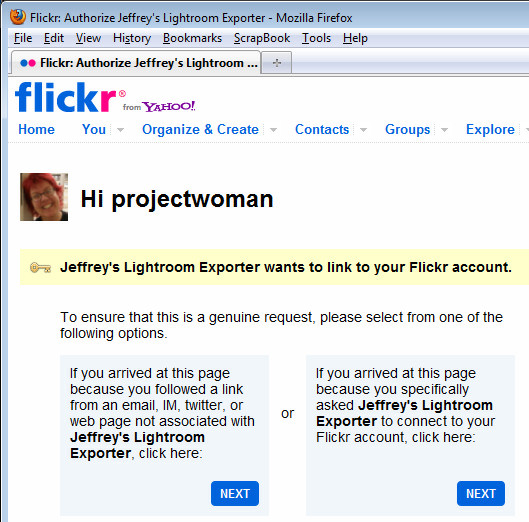
When prompted, click the second Next button to authenticate the connection then click Ok, I’ll authorize it if you are happy with the conditions displayed.

Once you have done this, close your browser, return to Lightroom and click the I’ve authenticated at Flickr.com button to confirm you have done so.
Step 8

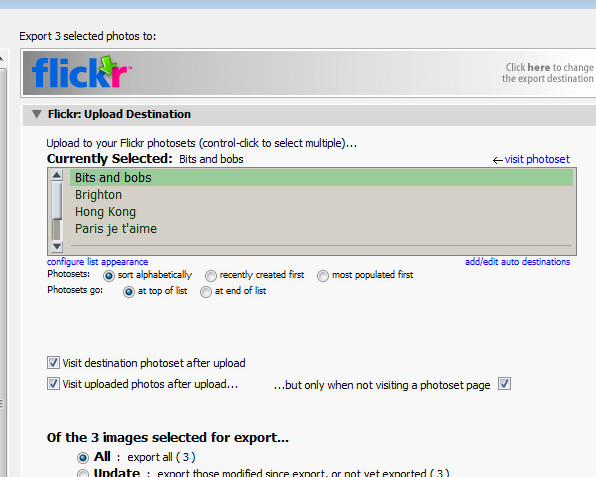
Once you are authenticated, additional options are available in the Export dialog. You can, for example, select the photosets for the images and ask to view the Flickr photoset when uploading is complete.
Step 9

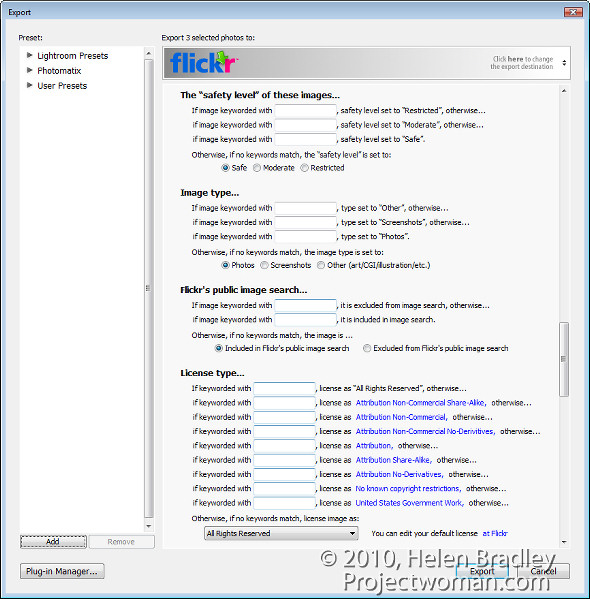
You can also set Licence types for the images, add keywords and configure a range of options for uploading.
Step 10

When you are done, click the Export button to export your images to Flickr.

This Lightroom plug-in is, what is called, donation ware. It is functional for six week and then you’re asked to register and make a donation one cent is the minimum PayPal fee. If you don’t register then functionality is reduced to uploading ten images at a time.

This plug-in works well and, until you upgrade to Lightroom 3 it is a smart addition to your Lightroom toolkit. For my money it makes the upload process seamless. And, because it saves me an entire step by rolling Export from Lightroom and upload to Flickr into a single step it represents the difference between things being left on my to do list and tasks getting a big black line drawn through them – and I like that!

Helen Bradley

Wednesday, June 16th, 2010

Problems with Excel formulas?

If you are having difficulty understanding how a formula is calculating in Excel – perhaps because it appears to give you the wrong results – you can step through it to see how it is working.

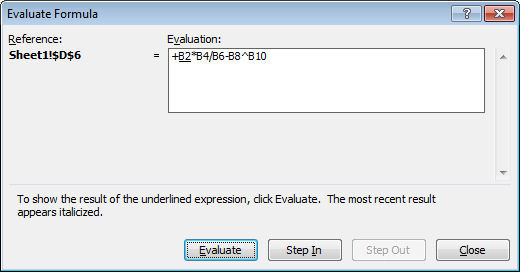
To do this, select the cell containing the formula and choose Tools > Formula Auditing > Evaluate Formula – in Excel 2007 find the Evaluate Formula option on the Formulas tab.

Click Evaluate and each time you do this, a portion of the formula will be evaluated and you can see it at work.

Use the Step In and Step Out options to see the actual values in place of any appropriate cell references.

This step by step processing should show you what is happening in your formula allowing you to troubleshoot any difficulties with it.

Helen Bradley

Saturday, June 12th, 2010

Create your own Excel startup page

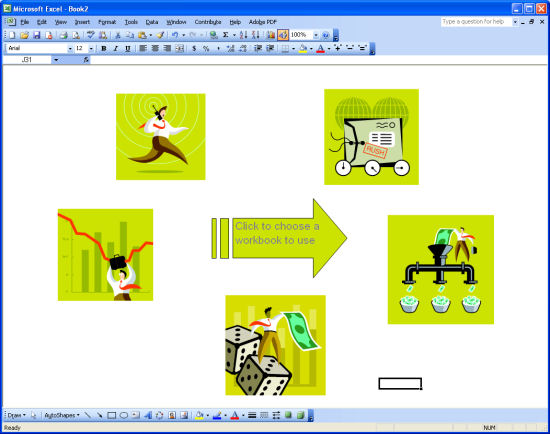
Here’s how to create a cool startup page for Excel – it has links to all your favorite workbooks so you can click on any of them to immediately open that file.

Step 1

To a new workbook, add one picture for every workbook you want to link to your startup page by choosing Insert > Picture > ClipArt. Size and arrange the images neatly. Choose Tools > Options > View tab and disable Gridlines, Row & Column Headers, Horizontal Scroll bar, Vertical Scroll bar, and Sheet Tabs.

Step 2

Right click one image, choose Hyperlink and link to a workbook you work with regularly. Type a description of the workbook in the Screentip dialog. Link each image to a workbook. Protect the worksheet by choosing Tools > Protection > Protect Sheet and click Ok.


Step 3

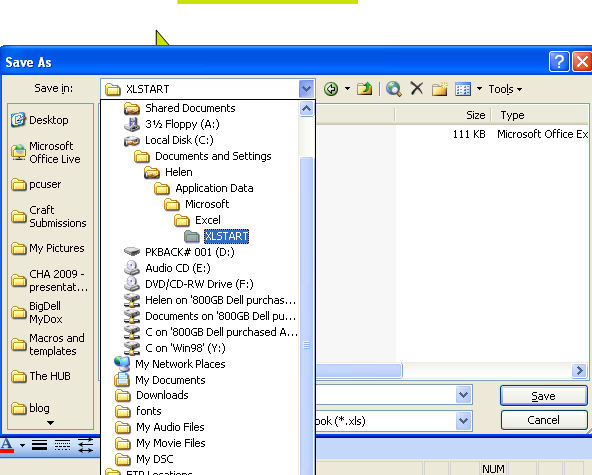
Choose File > Save As > and select your XLSTART folder which is likely to be: C:\Documents and Settings\<username> \Application Data\Microsoft\Excel\XLStart. Name your file menu.xls, close it, exit and restart Excel. The menu workbook will appear every time you launch Excel – giving you one-click access to your favourite workbooks.

Helen Bradley

Tuesday, June 8th, 2010

Inserting text in an Outlook 2007 email

The other day I came across an issue with Outlook which took quite a while to resolve and which really shouldn’t have done so.

In Outlook 2007, what I wanted to do was to insert an HTML page as a new email message. This is something that any organization running its own email mailing list may want to do.

Unfortunately, in Outlook 2007 there is no insert text option. You can attach things to outgoing emails, but on the face of it, you can’t insert them in the body of the email itself.

The solution is simple but, as I said, anything but obvious. To insert a file inside the body of an Outlook email message:

  1. from the Insert tab select Attach file.
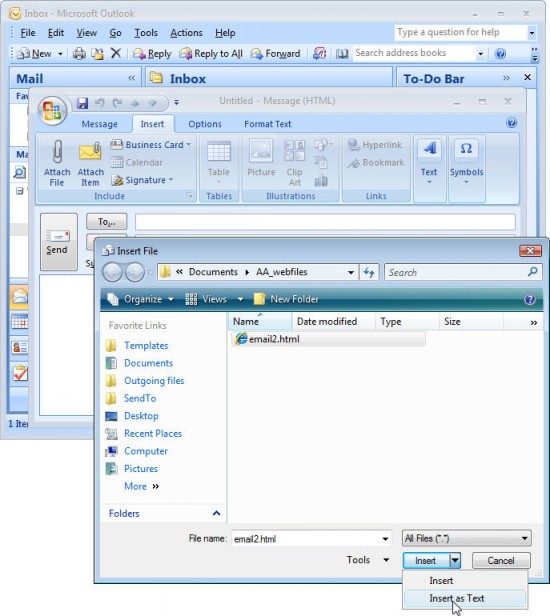
  2. Browse to locate your file but don’t insert it at this stage. Instead, click the down-pointing arrow to the right of the Insert button.
  3. Look for the Insert As Text Option. This is what you need, click it and the file will be inserted as a text object in your Outlook email rather than being attached to it.

 It’s a problem which should be far easier than this to solve.

Helen Bradley

Wednesday, May 26th, 2010

Step 10 Simple Photo-editing workflow – Fixing redeye

Redeye is caused by the camera’s flash and is often difficult to avoid. Some photographers, and I count myself in that group, would prefer to have to deal with redeye if that means we get good photos. Often the redeye reduction feature on a camera signals to your subject that the image has been taken before it has – they relax and start moving and you get unwanted movement in the shot. When there is a balance to be struck between redeye and movement – I’ll take redeye everytime.

If your photograph has a subject with redeye you can fix it using the redeye tool in Photoshop Elements.

Click the Zoom Tool and click and drag over the eyes in the image to make them large enough that you see them clearly.

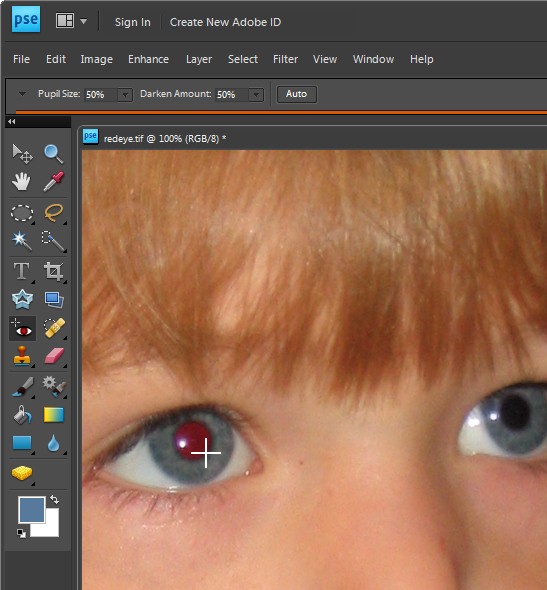
Click the Redeye removal tool and click on the red part of the eye. If necessary, adjust the Darken amount and the Pupil Size on the toolbar to get a good result. Fix each eye and then save the image.

Helen Bradley

Monday, May 24th, 2010

Step 11 Photo-editing workflow – Getting to black and white

Some images look much better in black and white than they do in colour.

Increasingly photo editing programs are shipping with very good tools for converting to black and white. These allow you to select which portions of an image become black and which become white which is necessary when you want to differentiate between colours which have the same intensity such as green and red values which would, otherwise, be converted to the same shade of gray.

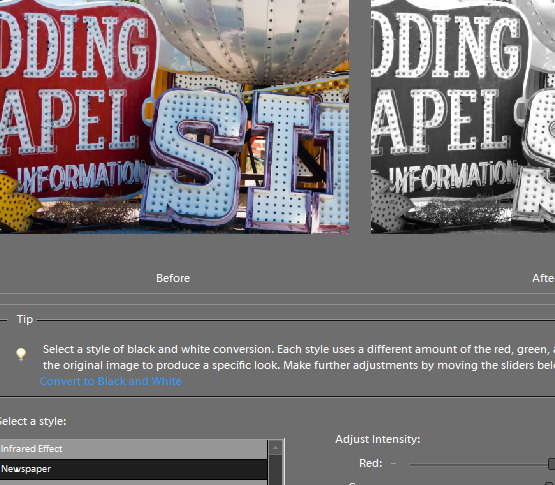
In Photoshop Elements, choose Enhance > Convert to Black and White and select a style from the list at the left of the dialog. These include Infrared, Newspaper, Urban Snapshots, Scenic Landscape, Vivid Landscape and Portraits. While the names suggest the type of image they are well suited to it is a matter of personal preference as to which you use.

Once you have chosen the image type you can select from options at the bottom of the image to adjust the various colours to darker or lighter shades of grey. You can also select the more or less contrast options to adjust the image contrast.

When you have a result that you like, click Ok.

Helen Bradley

Thursday, May 20th, 2010

Word 2010 opens in compatibility mode

New version of Word 2010 – same old WordArt. Yep, if you’ve previously altered your Normal.dotm file for Word 2007, chances are it is affecting your brand new 2010 version and all you can see is documents created in Compatibility mode.

To solve the problem search for Normal.dotm and either delete it or rename it. Then restart Word 2010 – nice huh? No more compatibility mode and all the cool features of word are available to you.

Helen Bradley