Monday, October 1st, 2012

Photoshop Create Plaids & Checks

Learn how to make plaids and checks in Photoshop very quickly. See how to save the plaids as patterns and how to  fill a shape with a pattern in all versions of Photoshop.

Check out all our tutorials on our YouTube channel.

Complete transcript of this video:

Hello, I’m Helen Bradley. Welcome to this video tutorial. In this video I’m going to show you how to create quick and easy plaids and checks in Photoshop. And this is going to work with pretty much any version of Photoshop. Before we start creating our plaid pattern let’s have a look and see exactly what we mean by creating plaids and checks. This is a simple sort of gingham style pattern that we’re going to create, and I’ve used it to fill a shape. And you’re going to see how you can do that as well. So let’s just tuck that away for now and let’s go and create our pattern. I’m going to choose File New and I’m going to create a workspace that is a fixed size and it’s going to be square. So I’m going to make this 200 pixels by 200 pixels because that’s going to be nice and easy to see. And I’m going to for this one create background contents as white because I actually want white as the basis of my pattern. So I’m quite happy to have white there. I’m going to choose View Rulers because I want to see my ruler right now. And I want to add two guides just to make sure that this is perfect. I’m going to choose New Guide and I’m going to make this 50 percent Horizontal and then add another one at 50 percent Vertical. These guides are going to help me draw in my shape. So I’m going to select the Rectangular Marque Tool and drag over one side of this shape. I need to work on a new layer so I’m going to click the New Layer icon here. And let’s choose a different color to the one we were working on before. Let’s create a sort of purple gingham this time. So I have purple selected as my foreground color, a brand new layer. I can fill this layer automatically with the foreground color by pressing Alt Backspace on the PC, Option Delete on the Mac. I’m going to add another layer. Still with this Marque Tool selected, this time I’m going to select the top area here, and I’m going to fill it again with the same color, Alt Backspace, Option Delete. And there’s the basics of my gingham check pattern. The only thing is is it doesn’t quite look the way it’s supposed to look yet. What I’m going to do is to make these layers both 50 percent opacity. And when I make both these layers 50 percent opacity you can see that we’re getting this sort of gingham check look. And I’m pressing Ctrl D, Command D on the Mac, to deselect my selection. To get rid of my guides I’m going to just click Clear Guides. So this is my gingham pattern. To make it a pattern I’m going to press Ctrl A or choose Select All to select everything and choose Edit and then Define Pattern. And I’m going to call this purple gingham and just click Ok. Now that pattern is created so I can just trash that document. But we might save it just for the moment because we might come back to that in a minute. Now let’s see how we could use our plaid pattern. I’m going to choose File New and create a letter size document with a white background. And here it is. Here I’m going to click the Custom Shapes Tool and I already have this rabbit shape selected. But you could select any shape. And I’m going to show you how to do this in any version of Photoshop because Photoshop CS6 is a little different. But the procedure I’m going to show you will work with any version. So with the custom shapes tool selected we’re going to make sure that we have path selected here. There are three options and they’re just different icons in earlier versions of Photoshop. But you want the Paths option. And we’re going to drag our rabbit shape. I’m holding Shift as I do so to constrain it to those proportions. Now in any version of Photoshop you can choose Layer New Fill Layer Pattern. Click to accept pattern fill and then you’ll find that it’s filled with the most recently created pattern which is the pattern we just created. If the scale of the pattern is too big, which it is really for me, I want to scale this down to 25 percent. I can just select Scale 25 percent and click Ok. And there is my rabbit filled with my pattern. Now in Photoshop CS6 you can do it a little differently. What we’re going to do is to choose a shape. And in this case we can fill our shape with a pattern. So now let’s grab our rabbit. And you can see that by default this is now created. It’s actually got a stroke on it. I don’t want any stroke. And with my pattern fill I can scale my pattern here in Photoshop CS6. So CS6 just makes it a little easier to do. But you can still do the same process in any version of Photoshop. Now let’s just go back for a minute to our original shape which is this one here. We could do some other things to make it a little bit more plaid like. For example I’m going to add a new layer, drag it to the very top, and I’m going to drag a very small stripe through here. And I’m going to fill it with a slightly darker version of this purple. So this is the foreground color, Alt Backspace, Option Delete. And then I could add another one again through here. This one I’m going to do twice. So I’m going to select the selection I have here and I’m going to Alt drag on it to create a couple of lines. Actually let’s do three. And I’m going to call that my new plaid shape. Having done that lets press Ctrl A to select everything, Edit Define Pattern. This is going to be my new pattern. It’s a little bit off in the spacing but I’m not going to worry too much about that. Let’s turn everything off here. Let’s go and grab a new shape. So for this one we’ll do a flower shape. And again, I’m just going to choose, well let’s go with Photoshop CS6. Let’s grab our pattern there and no stroke and just draw my flower shape holding Shift to constrain it to the shape. And you can see now that we have a more complex pattern fill for our object. We can again scale that down to 50 percent. But you can create plaids any way that you want to, and they’re going to fill any shape in Photoshop. I’m Helen Bradley. Thank you for joining me for this video tutorial. You can find more of my video tutorials on this YouTube channel and visit projectwoman.com for more articles on Photoshop, Lightroom and Illustrator.

Helen Bradley

Thursday, September 27th, 2012

Photoshop make stripes quickly and easily

Learn how to make colored stripes in Photoshop. This uses a mosaic filter to turn a regular image into blocks of color from which stripes are extracted. Once you’ve done that you can then create a madras check from this stripe image and I’ll show you how to do that too.

Check out all our tutorials on our YouTube channel.

Complete transcript of this video:

I’m Helen Bradley. Welcome to this video tutorial. In this tutorial I’m going to show you how you can create quick and easy stripes in Photoshop. And this is going to work in practically any version of Photoshop. Before we start and I show you exactly how to create this effect let’s have a look and see the kind of effect that we are creating. What I have here is a series of stripes in Photoshop. It’s a document that is full of stripes. And you can see here that I’ve also been able to create this as a sort of plaid look. So we’re going to look at both options here, and we’re going to create this set of stripes from a photograph really, really easily. So let’s just get rid of that document. And let’s go to our starter document. Now you can start with any document at all. I like to choose something that’s in the sort of range of colors that I want to see in my stripes. This is what I got my stripes from. So if you want pink and blue stripes then find an image that has say pink and blue flowers in it, or you could adjust it with a Hue/ Saturation adjustment later on. But we’re going to start with a filter. I’m going to choose Filter and then Pixelate and then Mosaic. And what the Mosaic Filter does is it turns this image into a sort of mosaic look. And what I want is nice big cells because that’s going to give me the stripes that I’m going to use in a minute, and the bigger the cells the less stripes I’m going to have. So I’m going to just choose quite a big value for us for now and just click Ok. And so there are the beginnings of my stripes. And now we’re going to use a tool, probably a tool that you’ve never used before and wondered what it’s purpose was, but this is this tool here. It’s the Single Row Marque Tool. And we’re going to click at the edge of a row because we want to take just one row of this image. And these are going to be the colors that we’re going to use. So I’m looking for something here with some blues and pinks and yellows in it. So let’s just select this one here. So I’ve selected a single row. And I’m going to choose Edit Copy because that’s copied that row. And now let’s create a new document. And I’m going to make it nice and big so let’s say three-and-a-half thousand pixels by three-and-a-half thousand pixels. And it can have white as its background. That’s Ok. I’ll click Ok. I’m going to add a new layer. And I’m going to paste my copied shape into it, Edit Paste. And it’s coming in here in the middle. It’s just such a small line, it’s almost impossible to see. But I’m going to target the Move Tool just by pressing the letter V. And now I’m going to drag it to fill the image because these are my stripes. And when I click the checkmark I now have my stripes. Now I’ve lost a bit of the yellow off the edge. So maybe I can just bring it in here. And I’ve got some slightly thinner stripes. And if I don’t like this color here I could just drag that off the edge and not even use it. So now I’m going to crop my image because I want to crop it to delete the cropped pixels. So I’ll just press Enter to crop it to size. And there is our stripe. So we could create this as a pattern if we wanted to use it over and over again, or if we just want to use it for now then we have it in place. So let’s see how we would make that into a plaid. I’m just going to duplicate this layer because I want to keep my stripes just in case I want to use them again later on. And what I’m going to do is reduce the opacity of this layer to about 60 percent, and then I’m going to duplicate it again. So I’ve got two layers each of about 60 percent opacity. And all I’m going to do is target this top layer, let’s grab the Move Tool, and I’m going to rotate it around 180 degrees. So I’m just going to hold the Shift key as I do that so it’s rotated to exactly the right number of degrees and just click the checkmark here. So now I have this sort of plaid madras sort of stripe pattern. I could change the blend mode if I wanted to by targeting the top layer and change the blend mode to something like Overlay. And that will give me a contrastier look. I could also try Difference or Exclusion. And that’s making a sort of otherwise brown and green pattern turn into a blue sort of pattern. So we have all sorts of options here. Here’s our original stripes garnered from our original photograph. And then what I’ve done is created two copies of it at an angle to each other and 60 percent opacity with a blend mode to create something that’s more like a madras stripe pattern. And this could be copied as a pattern or saved as a pattern by choosing Edit Define Pattern. We could use that as a pattern at any time. Before I create it as a pattern I’m just going to make sure that I’ve got rid of those pixels at the edge. I want it to be exactly square, and that’s not exactly square. But you can see the possibilities of working with stripes and patterns in Photoshop. I’m Helen Bradley. Thank you for joining me for this video tutorial. You can find more of my Illustrator, Photoshop and Lightroom videos on this YouTube channel. And visit projectwoman.com for more blog posts and Photoshop tutorials.

Helen Bradley

Wednesday, September 26th, 2012

Trevor’s Photoshop tip of the Week – Precision Painting with Caps Lock

(photo by: Benjamin Earwicker)

Would you like more precise control when using the Brush Tool?  You can change your Brush cursor to show as a crosshair by pressing the Caps Lock key on the keyboard. Repeat this to reset it.

Helen Bradley

Monday, September 24th, 2012

Photoshop CS6 Shapes, Paths, Vectors and Selections

Photoshop CS6 has new tools for working with Paths and Shapes. Learn how to use these and how to turn shapes into paths and how to fill and stroke paths and shapes.

Check out all our tutorials on our YouTube channel.

Complete transcript of this video:

Hello, I’m Helen Bradley. Welcome to this video tutorial. In this tutorial we’re going to look at the new vector tools in Photoshop CS6. And we’re going to answer questions like what’s a path, how do I find it, how do I turn a path into a selection, how do I make a path from a selection, and how I can work with the new vector tools.

Photoshop CS6 has some new vector tools and we’re going to have a look at those in this video. And we’re going to work out how you can use those tools to do exactly what you want to do.

Now the Custom Shape tool is in the position it always used to be and it’s sharing a toolbar position with things like the Rectangle, Rounded Rectangle, Ellipse, Polygon and Line tool. And all of these are Path tools. But we’re going to select the Custom Shape because it’s a little bit of an interesting tool.

And here are my Custom Shapes so I can select any of these custom shapes to draw on my space. Now I’m going to choose a filled shape such as this one here and just click it so it is selected. Now I can draw it on my workspace, but the way I draw it depends on what I have chosen here.

And I can choose a shape, a path or pixels, and we’re going to look at the shape and path options. So let’s start with shape. And let’s select some colors for this shape because when you’re working with shapes color is important. Now I have a shape selected I’m just going to drag this flower shape into my workspace.

If I hold the Shift key it’s going to be constrained to the shape of a flower that was originally drawn. If I don’t hold the Shift key you can see that I can make it wide or tall. And if I draw it with the Alt key pressed it’s going to be drawn around my initial starting point. Let’s just let go of that for now and let’s click and drag here to start drawing my flower.

Now if I want it placed around the initial starting point I’m going to press the Alt key and you can see that it jumps back into position. If I add the Shift key I can get it constrained to the right shape. And only when I let go the left mouse button does anything happen.

So what’s happening is I’m getting a filled flower. And we can see up here that the fill is the current foreground color, but it can be changed. While this shape is selected we can select a different fill for it. You can see that blue is now its fill but that’s not the foreground color for our workspace. And you can see that it has no stroke but we can add a stroke if we want to.

So let’s add a pink stroke to this shape. At the moment the Stroke is 3 points but we can increase that so we can make it thicker or thinner. And we can also change the nature of the stroke. For example we could have a dashed stroke or a dotted stroke. And there are other options that we’ll look at in future videos. But this shape is a path, so we can actually make changes to it.

I’m going to grab here the Direct Selection Tool because that allows me to select points on this path. And you can see by dragging over these points I can select anyone of these points. I’m just going to turn the stroke off for the moment because I think it might be easier to see the points without the stroke in the way.

When one of these points is filled and the others are empty this is the one that we’re going to affect. So let’s just drag out on that. And you can see that my shape has now changed shape because I have altered that point. So it is a path that is able to be adjusted. But still we can change the fill. And when we change the fill the fill of the entire shape is affected.

When we add a stroke back onto this the stroke of the entire shape is being affected by our choices. Now there are some other things that we can do with shapes. I’m just going to add a new layer to this image, just put it at the top, and I’m going to fill it with the red.

Now let’s consider the situation where we may want to for example cut out a shape from inside this red selection. So let’s go back and grab our custom shape tool. And we have our same flower shape selected. And I’m going to draw the shape onto my area. And because I was working with a red fill it has a red fill. But let’s just color it green so that we can see it clearly.

Now let’s consider the situation where really what we wanted to do was to create a path from this. Well, we don’t have to undo it and start all over again, particularly if this is a complex shape because what we can do is go to the paths palette. And here is our shape path, and we can do with that anything that we could do with a path originally in Photoshop.

One of the things that we can do is click on it and load that path as a selection. Now if that path is a selection then we can do things with it. For example we could come down to this red filled layer and we could poke a hole in this layer by just pressing Delete. And that will delete the contents of the layer where this selection is made.

One of the other things that we can do, I’m just going to Ctrl Z to undo that, one of the other things that we can do with selections is we can stroke them. So we could choose Edit Stroke and we could stroke this selection with a different color. So let’s stroke it around its inside.

Let’s press Ctrl D to undo the selection, and you can see that now we have a stroked flower because we’ve been able to stroke that selection. I’m just going to undo this again. And let’s go back to our shape up here. I want to just make sure that we just have a red filled layer here and we have our shape up here.

And here it is as a shape. And it can be moved around because it is a shape. So we can move it around the workspace. Let’s go back to the Path’s tool and there’s something else that we can do with shapes. What we can do in addition to loading the path as a selection is that we can stroke it with a brush. But to do this we’re going to have to make a work path out of the shape.

So what I’m going to do is with the shape selected I’m going to choose Edit Copy so I’ve copied the shape onto the clipboard. And now I’m just going back to this layer here and I’m going to do Edit Paste. And look what happens in my Paths palette. This time I have a Work Path. And a work path not only can be turned into a selection and not only can be filled with a foreground color, but I can also stroke it with a brush.

Let’s go and get my Brush and let’s go and get a brush to use. Now I’ve got lots of brushes here, but let’s create something like this particular little leaf brush. And I’ve got it at a fairly small size. I’m hoping that this is going to work just fine here for this particular image.

We’ve got a foreground color so I’m going to click Stroke Path With Brush. And what that does is it applies that brush to the current path. But we need to of course make that into a work path before that’s going to work. Now let’s have a look at how we can turn a selection into a path. Let’s just go and get another filled layer. I’m just going to get rid of everything that I have here right now.

Let’s fill this with white, and then we’ll just get rid of the Work Path as well. So I’m going to press Alt Backspace on the PC, Option Delete on the Mac, and I’m going to make up a selection here. So I’m going to make a rectangle, and then I’m going to go and grab the elliptical marque, and with Shift held down I’m going to add to that. So this is now my selection.

Now let’s say I want to make this into a shape that I can use over and over again. Well with the Paths palette open I can create a work path from this selection. So I’m just going to click to Make Work Path From Selection. And now this is a path. Now because it’s a path we can do all sorts of things with it.

For example we can click on it to select it and we can change its points. And we can also do things like turn it back into a selection, stroke it with a brush and fill it, and we can make it a shape. Let’s choose Edit and then Define Custom Shape. And this now becomes a custom shape in my shapes collection. I’m going to call that a Tab shape and just click Ok. Let’s get rid of our Work Path.

And now let’s go back into our shapes collection. So I’m going to click on Custom Shapes. And this time I’m going to make it a shape and I’m going to give it a fill and I’m going to give it a stroke. And let’s go into our shapes collection and let’s go and grab our new custom shape.

And now when I drag it onto the workspace it’s going to behave like any of the custom shapes inside Photoshop. It has this stroke and we can adjust the stroke size. We can adjust the type of stroke that it has. We could fill it with everything that we can fill a regular shape with.

So there’s the basic introduction to some of the new shape and path features of Photoshop CS6. My name is Helen Bradley. Thank you for joining me for this video. You’ll find more of my video training sessions on my YouTube channel.


Helen Bradley

Friday, September 21st, 2012

Photoshop Stitches and Dashes with Brushes

Learn how to make dashes and stitches in Photoshop using brushes and then how to paint with them and use them to stroke shapes.

Check out all our tutorials on our YouTube channel.

Complete transcript of this video:

Hello, I’m Helen Bradley. Welcome to this video tutorial. In this tutorial I’m going to show you how you can make dash lines and stitches using brushes in Photoshop. And this is going to allow you to not only paint with stitches but also to use these to stroke things. One of the really nice effects that you can achieve in Photoshop is the idea of having dash lines that might show as for example faux stitching on an object. I’m going to show you the basics of doing that now. The first thing I’m going to do is create a really small document. So I’m thinking about 300 x 300 because I want to create my stitches. It’s going to be transparent. Now stitches are a brush so the first thing I’m going to do is go and grab my brush. And I’m going to use a rounded rectangle for this. So I’m just going to select the rounded rectangle tool, and I’m going to draw something that I can use as a stitch. Now I’ve drawn it as a shape. So let’s just undo that and let’s go and draw this as just pixels. It’s a much better option. And I’m just going to call that my brush shape. Now you can get into more detail with your brush shape. What I’m going to do is just show you how you can use this to create stitches. So now that we have this shape I’m just going to Ctrl Click on it so I have a selected. I’m going to make it a brush by choosing Edit Define Brush Preset. I’m just going to call this Stitch and click Ok. And now I can get rid of that document. So now we’re ready to use of the stitches to draw around this shape and perhaps across it as well. So I’m going to select my Brush tool and I’m going to select the very last of my brushes which is my new stitch. And right now it’s not going to do really very much of what I want it to do. But we’re just going to undo that and let’s go and set it up to be a bit more friendly. We’re going to open the Brushes Panel to do this. And this is my brush. And this is the reason why it’s painting the way it is is because that’s the way it’s set up to paint. So I’m going to adjust its spacing so it looks a little bit more like stitches. And I can make them close together or far apart. I can also change the size of them because they’re pretty large right now. But I could make them considerably smaller if I want to. Now I can adjust Shape Dynamics as well. And we’ll just see right now how this brush is going to paint and see if we need to make some changes to it. Now I’m going to add another object to this design. Let’s just add a shape up here. Let’s go and fill it with a darker orange color, Alt Backspace, Option Delete, Ctrl D or Command D to deselect the selection. And now with my brush I’m going to paint with white, and I’m going to paint some white stitches across this shape. So I can either paint with my paintbrush or I can click once up here to start my painting and then Shift Click across the other side so that I get evenly placed stitches, Click once, Shift Click on the other end. Now as you can see the brush is not really following the shape of my painting so I want to change the way that this brush is behaving. But to do that I’m going into shape dynamics. And I’m going to make sure that Size Jitter is disabled because I don’t want it to change size. And I don’t want the diameter to change either so I’m going to remove that. I don’t want the Angle to change so I don’t want it to change as I paint. But I do want it to follow the direction of my brush. And I also do not want any Roundness Jitter. So I’m going to make sure that everything is disabled except that the controls are for the Angle is now following the direction of the brush. And now look how it’s painting. Wherever my brush goes it’s starting to follow that brush. So that’s a lot more of the way I want that brush to be painting. Okay, let’s face the problem of this circle. I’m going to actually just increase the size a little bit for this circle. Let’s turn that off. So now I have my brush selected and I want a stroke around the circle. So let’s just go and get this layer. And I can Ctrl Click on this layer to make a selection but I want a stroke inside the shape. So I’m going to choose Select Transform Selection because that allows me to transform this selection. And provided I now hold Shift and Alt as I drag in I’m going to actually drag in on the shape so that it now becomes a concentric circle inside the original circle. I’m going to click the checkmark here. So now I have a strokeable selection. But I want to stroke it so I’m going to choose Window and then Paths, and I’m going to turn it into a Work Path. And when it’s a Work Path it can be stroked with a brush. And this is the option here. So I have my brush selected, my color, my stitch, and it’s all set up. I’m going to click here to Stroke Path With Brush. And we’re seeing not only the path but also the brush so let’s just trash the path for now. And you can see that I now have a stitching line inside the shape. And because I have the angle correct the stitching line is going around the shape as if that shape were actually stitched. So there you have a way of creating brushes in Photoshop that you can use for stitching. You know how to make straight stitching lines and you know how to make stitching lines that follow your brush. And you also know how to stitch a shape by creating a path and then stroking that path so that you have this really nice effect. I’m Helen Bradley. Thank you for joining me for this video training session. Look out for more of my video tutorials on my YouTube channel.

Helen Bradley

Wednesday, September 19th, 2012

Trevor’s Photoshop tip of the week – Filling in with Background Color

(photo by: Anita Levesque)

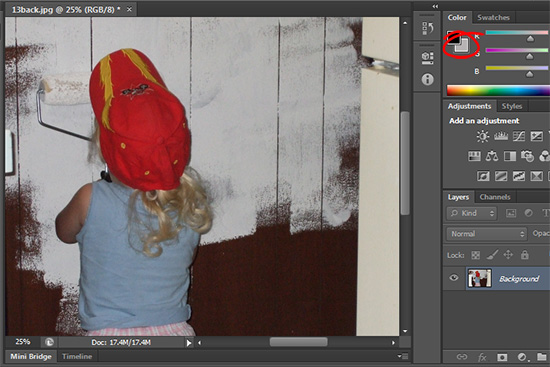
Want to fill your selection or layer with your current background color? Simply press Ctrl + Delete or Ctrl + Backspace on a PC or Command + Delete on a Mac and your background color will completely fill your selection.

Helen Bradley

Thursday, September 13th, 2012

Photoshop make brushes from photos

Learn how to make your own brushes from your photos in Photoshop and a trick to make sure brushes paint correctly with light paint on a dark background and vice versa!

Check out all our tutorials on our YouTube channel.

Complete transcript of video:

Hello, I’m Helen Bradley. Welcome to this video tutorial. In this tutorial I’m going to show you how you can create your own photo brushes in Photoshop, and this works in practically any version of the Photoshop. For the brush that we’re going to create today I’m going to use a photograph. And I shot this in Singapore and we’re going to use this god shape as our brush. So the first thing I need to do is to make my selection. And I’m going to use the Quick Selection Tool because that’s going to work reasonably well here. And what I want to select at this stage is either the statue itself or anything that’s not the statue. And it’s actually going to be easier for me to select the not a statute pieces. So I’m going to start with those. And then I’m going to fine-tune it a little bit because I can see that there are areas here where I have captured part of the statute and not the other bits. So I’m going to add back in the statute bits that I’m missing here by just selecting over these at a bigger zoom. And anything that’s been selected that shouldn’t be selected I can remove. So I’m going to work around this shape and just make sure that everything that should be selected is selected. You can see that there are some missing bits here as well. With the Quick Select Tool I can switch between selecting and not selecting by holding down the Alt key so that effectively reverses the tool that lets me work very quickly through this shape to make sure that I’ve got everything I want and nothing that I don’t want. I’ve got some small problems here. But really the Quick Select Tool does a really good job of making your selection for you. I think I’m just going to remove this bit here. Again, it’s taken too much so we’re just going to go back and just fine-tune around the edges to make sure that we’ve got the bits that we want. So let’s call that done. And let’s just zoom out again. So now I have selected the bits that I don’t want, and I don’t have selected the bits that I do want. So I’m going to choose Select and then Inverse and that’s going to give me my shape. So this is the area that I want to convert into a brush. Now a brush is a grayscale shape, but that’s okay because Photoshop is going to take care of that for us. So to convert this into a brush all I need to do right now is to choose Edit and then Define Brush Preset. And here you can see that the brush preset is created for us. Now I’m a little bit worried because it doesn’t look like there’s quite enough contrast in that. So I might just cancel out for a minute. We might build a little bit more contrast into our brush. Perhaps Levels will help us. And yes it certainly will. Let’s just lighten this. And I’m not worried about the background because I don’t intend using that for the brush. What I am interested in is a little bit more contrast in the shape itself. I don’t mind that I’ve got some black blacks but I do definitely want some contrast and a bit more lightness in this brush. So let’s click Ok and now lets recreate out brush, Edit Define Brush Preset. You can see it looks a bit better now. So I’m going to call this Hindu 1. Now the reason why I’m going to call it Hindu 1 is because I’m going to need Hindu 2 in just a minute. Let’s put that to one side and let’s create a new document. This is 3,000 x 3,000 pixels in size, and I’m just going to flood it with black. Now let’s go and get white paint and go and get our brush. So I’m going to click the brush preset here and go down to the very last brush because that’s my brush, and I’m going to just size it up nice and big and just paint with it. And you can see that the problem is that I’ve got a negative brush. Now that wouldn’t be an issue if we were painting on a white background. So let’s just create a white background. And now let’s go and switch colors, and this time I’m painting with a black brush. And you can see that that’s just fine for a white background but as soon as I try to paint light on dark I have some issues. That’s why I left this image open still because if I invert this I can now create a second brush. So let’s just go back to something that’s not a brush here, and what I’m going to do is invert the image. So I’m going to choose Image Adjustments Invert. And that turns it into a negative of itself. And now if I create a brush from it, I’m going to call this Hindu 2, and click Ok, we’re going to get a very different brush. Let’s go back now, add a new layer, fill it with black, again because black is the foreground color, just Alt Backspace on the PC, Option Delete on the Mac, switch to white as my foreground color, pick up my brush, go and get my new second version brush to size it up nice and big for my image here, and click once. And you can see now I’m getting a positive brush so I have a positive and a negative version of this image that I can use as a brush from now on in Photoshop. There is one thing to be aware of with brushes and that is that you’re going to lose this brush if you reset your Photoshop preferences. So for any brushes once you’ve created them from time to time you should come in here and choose Edit and then Presets and Preset Manager. What you want to do is go to brushes. Although there are presets for everything that you can create in Photoshop go to your Brush. And I’ve got two of them here, actually I’ve got a third one that I created earlier today. So I’m just going to select all three of these brushes and I’m going to save these. And I’m going to call them Helen set. They’re save as ABR files, and I’ll click Save. Now not only are they saved to disk but they’re also now in a format that I could share with others. So there you have photographic brushes in Photoshop. Don’t forget to make a positive and a negative one so that you can paint with any color on any color background in future. I’m Helen Bradley. Thank you for joining me for this Photoshop video. Look out for more of my video training on this YouTube channel.

Helen Bradley

Wednesday, September 12th, 2012

Trevor’s Photoshop tip of the Week – Quick Color Switch

(photo by: Jenny Kennedy-Olsen)

Working with two colors in Photoshop? We can switch between them by simply hitting the X key on the keyboard.

Helen Bradley

Monday, September 10th, 2012

Photoshop – make a Kaleidoscope

Learn how to create a Kaleidoscope in Photoshop. Video includes tips for a shortcut for copying and rotating a layer.

Check out all our video tutorials on our YouTube channel and subscribe to receive all of our tutorials as soon as they come out.

Transcript for video:

Hello, I’m Helen Bradley. Welcome to this video tutorial. In this tutorial I’m going to show you how to create quick and easy kaleidoscopes in Photoshop. Before we begin let’s have a look at the sort of thing that we can create. This is the kaleidoscope I created earlier from the image that we’re actually going to use. And as you can see I’ve layered various copies of the same kaleidoscope on top of it, changed some of the colors to create an even more distinct pattern effect. This was my original kaleidoscope. This is a second version of it on top and this is another version of it in the middle. So let’s get started with our image. This is an image I shot at the Neon Bone Yard in Las Vegas. The first thing I’m going to do is to convert this background layer into a regular layer just by dragging and dropping the lock icon into the trashcan. Then I’m going to move this image. So I’m going to first of all zoom out a little bit so I can see where I’m going. Then I’m going to select the Move Tool and I’m going to start transforming this shape. And what I want to do is to transform it through 60 degrees, some sort of 60 degrees, minus 60 plus 60. And what I’m going to do is drag this shape over the edge of the image here. I can resize it if I want to but I want it to only go over two edges of this image because I want to use the 60 degree angle that we have. So I’m going to save it. That’s good because I’ve got some nice texture in here and I’m just going to click the checkmark. So if we had a really good look at this we would see that there’s some anti- aliasing down here on this edge. So to get rid of it I’m going to click the Magic Wand Tool here. I’m going to click on this side of the image. And you see perhaps even on the video that there’s a little bit of a gap between the selected area and the image itself. So I’m going to choose Select Inverse to inverse the selection so I have only my corner piece selected and then I’m going to bring it in by choosing Select Modify Contract. And I’m going to bring it in one pixel and that should make it just a little bit smaller. And then so that I get just that piece I’m going to choose Image and then Crop. And this is the piece that I’m going to use to create my kaleidoscope from. So we have it on its own layer. But we need a bit more area to work in. So I’m going to select the Crop Tool. And if you didn’t know that you can do so you’re going to find out now that you can actually crop in a negative direction. So you can use the Crop Tool to add space to your image. So I’m just going to add a little bit of extra space around my image so we have a bit of a better area to work with. I’m going to select my layer with my shape and I want to flip it. So I’m going to choose Layer New Layer via Copy. And with this shape I’m going to transform it. So I’m going to choose Edit and then Free Transform. And I want to transform it around this side. So I’m just going to click on this side so it’s anchored here so that when I flip it over it doesn’t move. And I want to flip it over so it’s exactly mirrored which means that it’s negative 100 percent. So I’m just going to make that negative 100 percent and then I have an exact duplicate of this shape. And this is the piece that I’m going to rotate around to create my kaleidoscope so I’m going to merge these two layers together. I can do that by selecting both layers and choose Layer Merge Layers or Merge Visible, either of those would work. So too would Flatten Image or I could just press Ctrl E. But let’s choose the menu option. Now that we have our basic shape I’m ready to rotate it. And I’m going to do this the smart way so I don’t have to do every single one of them. I just want to do it once, Layer New Layer via Copy, Edit Free Transform. I’m going to anchor it at its bottom center point. And I’m going to rotate it around 60 degrees, and I’m going to click the checkmark here. And having done that once I’m now going to get Photoshop to do it automatically for me. And all I need to do to do that is to press these keys, Ctrl Shift Alt T, and that’s Command Option Shift T on the Mac. So I’m going to press all these keys and every time I do it Photoshop duplicates the layer and rotates it. So with four keystrokes I’ve now got the rest of my kaleidoscope. Again I’m going to select all these layers and Ctrl or Command E to merge them into one. And now I’ve got one layer I can make a duplicate of it. And then I can size it as we saw earlier. If I want to size it around its center point I’m going to hold Alt and Shift as I resize it. And now I can also rotate it. So I might rotate it for example 15 degrees. And then I might make another duplicate of this and do something similar to this duplicate layer, again holding down the Shift and Alt so I’m rotating or sizing around the middle point, place my shape in and then rotate it. This time I might choose say let’s go 30 degrees. And then for each of these I could add a hue/saturation adjustment. And that will allow me just to recolor the shape and perhaps get a more interesting effect in doing so. I’ll do that and just click Ok. So there is the basics of creating a kaleidoscope in Photoshop. Now you could use a different measurement than the 60 degrees that I used. You might want to try it with 30 degrees to get a more complex kaleidoscope. But basically once you get your flipped shape and you merge it you can get Photoshop to do all the copying and rotating work for you. I’m Helen Bradley. Thank you for joining me for this video tutorial. Look out for more of my Photoshop video training on my YouTube channel.

Helen Bradley

Thursday, September 6th, 2012

Photoshop Repeating Pattern

Learn how to create a half drop repeating pattern in Photoshop. Also see how to fill a layer with a pattern and how to scale a pattern in Photoshop.

Check out all our video tutorials on our YouTube channel and subscribe to receive all of our videos as soon as they come out.

Complete transcript from video:

Hello, I’m Helen Bradley. Welcome to this video tutorial. Today I’m going to show you how to create half-drop repeating patterns in Photoshop. To create a repeating pattern I’m just going to create a new document of a fixed size. So I’m going to make mine 100 x 100 pixels in size, RGB color with a transparent background and I’ll click Ok. I’m going to zoom in here so we can see it a little more clearly on the screen. And I’m going to use a path for mine but you could start with anything you like at all. And I’m just going to click and drag and then click and drag in this direction because I want to make a sort of boomerang shape and click back over the starting point. Now I’m going to select my Direct Selection Tool, click on this point because I want to adjust it and Alt drag to split these two handles from each other, Alt drag again so that I can create this sort of boomerang shape. And I’m thinking that that looks pretty good. So now I’m going to turn this path into a selection by clicking here on the Load Path as Selection. I’m going to display my Layers palette so we can see what’s going on here. I have a color already selected so I’m just going to Alt Backspace Option Delete on the Mac to fill this shape with my color. Now I’m thinking I would like a stroke around this as well so I’m just going to stroke it. I could stroke it from the work path but it’s easier just to stroke this selection. So I’ll choose Edit and then Stroke and then let’s select a darker version of this color for the stroke. And we’ll stroke it in the center. And we’ll stroke it by 2 pixels and just click Ok. So there’s my shape and now I can deselect my selection using Ctrl D or Command D on the Mac. So now I have my shape I’m ready to create my half-drop repeat. To create a half drop repeat I have to break this up into four pieces and put it in the corners of the image. Luckily Photoshop can do that for me. So I’m going to start by making a duplicate of this layer and I do that by dragging and dropping it onto the New Layer icon. So I now have two copies of the image. I’m going to turn off the background copy so I have only the top version visible. And now I’m going to choose a filter that’s going to do all the splitting work for me, Filter Other Offset. And the offset filter will break the shape up for me. All I need to do is to tell it what half the distance is of the vertical and horizontal size of this image. Now I set up my image to be 100 pixels by 100 so half of that is 50 x 50. And all I need to do is type 50 and 50 into these boxes. And you can see that Photoshop has now broken this image up into the required pieces. I set the undefined areas to wrap around and just click Ok. And there is the breakup for my half drop repeat. And all I need to do now is to drop this middle shape back into position. And this is exactly the pattern I need for a half drop repeat. So I’m going to choose Select All and then Edit Define Pattern. And I’m just going to click Ok. I could call it something if I want to. I’m not going to bother at this stage. Let’s hide this. And now let’s create an image with that half drop repeats in it. So I’m just going to get rid of these tools over here and let’s create a brand new image File New. Let’s choose a US paper, let’s do it letter size. But I’m going to do it landscape. No background, we’ll just do a transparent background and click Ok. And here’s our image that we’re now going to fill with our half-drop repeat. And we do that using Edit Fill. And here we have in the Fill dialog the option of choosing a Pattern. And your pattern is always going to be the very last one in the list. It’s the last one because you just created it and click Ok. And here’s our half-drop repeat. Now I’m just going to drop a layer in behind this and we’ll fill it with white so I’ll just make white my foreground color, Alt Backspace or Option Delete on the Mac. And there we have our shape filled with our half drop repeating pattern. Now if that’s not the half drop repeat that you wanted but it’s too small or too large we could use a different way of doing this. I’m going to choose Layer New Fill Layer Pattern. I’m going to create it just as pattern fill layer, just click Ok. And now what we’re doing is we’re filling it with our pattern. But since we decided our pattern was either too small or too large, let’s say it was too small, we can now scale it up to 200 percent by typing 200 percent in here and click Ok. And now we have a pattern that is much larger than the original. So there are different options that you have for using your half-drop repeat pattern once you’ve created it in Photoshop.

Helen Bradley

Wednesday, September 5th, 2012

Trevor’s Photoshop tip of the Week – Resetting Color Palettes

(photo by: Leroy Skalstad)

Want to quickly switch the colors you’re working with back to the default black and white? All you have to do is hit the D key on the keyboard and the color palette will be reset to the default black foreground and a white background.

Helen Bradley

Thursday, August 30th, 2012

Illustrator – recolor spirals and shapes part3

Learn how to find pieces of shapes and to fill with gradients and solid colors. Covers using the Layers panel to isolate shapes within a larger shape.

See all our tutorials on YouTube.

Text from video:

Hello, I’m Helen Bradley. Welcome to this video tutorial. In this video I’m going to show you have to recolor spirals in Illustrator and we’re going to do it the easy way. Before we start this tutorial I want to show you what we’re going to end up with. I have a shape here that I have been creating in the last few video tutorials. And I’ve showed you how to turn an oval and a circle into a shape like this using Pucker and Bloat and then Transform. And in this video tutorial I’m going to show you how we can recolor this shape. It may not be easy to see unless I point it out but this basic shape actually has a gradient fill in it. It’s a yellow to orange gradient. But the center of each of these flowers is colored orange. And some of these petals have been individually colored with solid colors. And I’m going to show you how you can create not only this Gradient Fill effect but also isolate different areas in this shape to apply different effects to them. So let’s get started. And here I have the basic shape that we’re going to work on. The trick with working with a shape like this spiral here which hasn’t been expanded so right now if I affect the colors on this particular shape I’m going to affect the colors in the entire spiral. The trick is being able to isolate the component parts. We’re going to start by applying our gradient. So I’m going to select the foreground fill and click Gradient. I’m actually going to select one of the built in gradients and we’re going to use orange to yellow gradient. Now it’s not working particularly well. But that’s fine because I’m just going to hide that dialog and go back to the Gradient Tool because now I can drag over the shape to apply the gradient the way I want it to be. If I drag from the outside across the shape the inside of the spiral becomes red and the outside is yellow. If I go the other way the outside of the spiral is red and the inside is yellow. And I just need to pick exactly what I want this shape to be. And by dragging smaller gradients I can affect more of the shape with red and less with yellow or drag the other way to add more yellow and less red. So I’m just going to find a sort of good intermediate position and call that good. The next thing I want to do is to isolate the middle of the shape and then isolate some of these petals. The easiest way to do that is to go to Window and then Layers. Now you may find that the Layers palette is a little bit confusing but it’s actually going to help us a lot here. So this is our main layer and it contains a group and the group has lots of little bits in it. So I’m just going to click these fly out menus so that I can see exactly what’s in my shape. And the thing I’m interested in right now is this bit because it’s the bit in the middle of my flower. So if I click this icon here I’ve isolated just that middle shape. And now I can fill it with whatever I like. So I’m going to choose green because it’s going to be really obvious that it’s happening. And this color is changing throughout the entire shape. Now I can isolate individual bits of my shape so I can select for example this piece here. And this is going to be this object. So I could apply a solid fill to it. I could also apply a gradient fill if I wanted to but I just want to isolate a few of these petals and just change their colors. Let’s have a look at this one. This is two around the path and that’s a good area for me to affect. I’m going to make that blue. And let’s have a look and see which this one is. It’s again two more around and I’m going to make it red. And now that I’ve finished with my layers I can just hide it. And let’s just click outside the shape and this is what we came to do. You can see that we have our gradient fill across the flower. The center of the shape is green and some of these petals have been refilled with solid colors. In future if I want to affect this shape I’m now going to have to be a little bit more discreet. If I want to affect my gradient I can come back in here, target my shape, go back to Window and then Layers and this time I’m going to hide the pieces that I don’t want to affect. So I’m going to hide the blue and the red and the green pieces. Now I have selected only the objects that are filled with the gradient fill. And now I can go back and grab my Gradient Tool and try and build up a different gradient effect for the image. I could even change the entire gradient, change the colors in it. And then when I’m ready to go back I can just redisplay these other pieces so that they are now visible. But you can see that because they weren’t visible when we applied the gradient they’re not actually being affected by it. So there we have our recolored shape. I hope you’ve enjoyed this video tutorial. I’m Helen Bradley. Look out for more of my Illustrator tutorials on this YouTube channel.

Helen Bradley

Wednesday, August 29th, 2012

Trevor’s Photoshop tip of the Week – Dropdown Menus in Palettes

(photo by: Vivek Chugh)

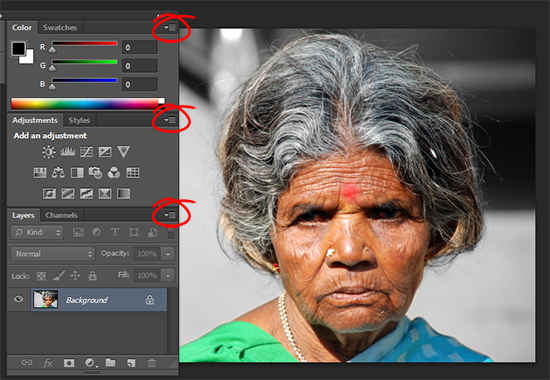
Almost every palette in Photoshop has a drop down menu in its upper right hand corner – click it to find options and tools for that palette.

Helen Bradley

Tuesday, August 28th, 2012

Illustrator – make spirals part2

Learn how to make spirals in Illustrator using the Transform Effect. This is part 2 of a series of tutorials on making shapes in Illustrator, making spirals from them and then coloring them.

See all our video on YouTube.

Transcript for video:

Hello, I’m Helen Bradley. Welcome to this video tutorial. Today I’m going to show you how to make spirals in Illustrator the easy way. Before we go ahead and make a spiral I want to show you exactly what it is that we’re going to be doing. Here I have a basic shape in Illustrator. I’m just going to show you this shape that I started off with. That’s this one here. I created it in an earlier video. And what I’ve done is taken the shape and created a spiral from it. And it’s very, very easy to do. So let’s go. I’ve got a brand new document here with my shape on it and we’re going to create a spiral. So I’m going to select my shape and choose Effect and then Distort and Transform. And we’re choosing Transform. Transform Effect allows us to do all sorts of things with our shape and we’re going to do quite a lot of the things that we have available to us in this dialogue. The first thing is I’m going to turn preview on so we can see it as we work. And because we want a spiral shape we want some additional copies of this shape and so I’m going to type in here 20 copies. So right now we have 20 copies of this shape but we can’t see them because they’re all stacked on top of each other. So we’re going to start by rotating them. And let’s rotate them through about 30 degrees. Let’s just type in 30. And as you can see already we have something happening. What we’ve got is 20 shapes each rotated by 30 degrees which has given us a something. Now we could stop at this point if we get exactly what we want, but since we came here to do a spiral this is only halfway there. The next thing I’m going to do because my spiral is actually a series of shapes which all have some movement in them I’m actually going to move these 20 copies. And I’m going to move each of them around 24 pixels horizontally and vertically. And what that’s going to give me is something sort of spiral like. We’re almost getting to where we want to be. My next step with my spiral is I would like things to get smaller as we go so I’m going to scale these in a negative direction. I’m going to reduce the size of them to 85 percent of what they were in the first place. So I’m just going to type 85 here and 85 here, and so each successive shape is 85 percent of the size of the one before. Now I think this is going to be all right but I need to do a couple of things to make this spiral look a bit better. Right now the shapes or the copies are rotating and coming out from the center of this original shape. If I change the location I’m going to get a spiral that’s a little bit more offset. The locations that are of more interest to me are anything that is sort of away from the original shape. So any of these would be just fine. I am however quite liking this one because that’s giving me a nice spiral shape. So there’s a spiral shape. One of the options I have selected already and that would make a big difference is this Scale Strokes and Effects. As you can see here I have a really strong, very wide stroke around my shape to begin with. And if I don’t do Scale Stroke and Effects than everything is going to have a 4 to 5 pixel stroke around it. And it’s very heavy when the shapes become very small. If I scale a Stroke and Effects then each of these little shapes has a much smaller stroke around it. Now there are other options such as Reflect Y or Reflect X. This is Reflect X by itself. This is Reflect Y by itself. This is Reflect X and Y. And you can see that we’re getting a sort of different spiral but certainly everything is going around and it’s getting smaller in the middle. That would be an option that you could choose. Once you’ve got the spiral that you want you can go ahead and just click Ok. So this is what we’ve come to. This is our shape. The spiral shape that we’ve created now it’s all based around this original image so if I click and drag on it with the Move tool I can move it into position. So don’t worry as you’re creating your spiral if it goes off the edge of the art board because you can bring it all back in later on because it’s all just attached to this one original shape. Of course if we want to treat it as an entire shape so that the whole spiral becomes the shape then we would just select Object and then Expand Appearance. You can see now that that our shape is in actual fact everything here. So all of these little nodes are editable. So we could come in later on with for example the A tool, the Path Selection tool and we could start working on these areas if we want to do something a little bit different with it. And we would need to expand its appearance to have access to these nodes or these anchors on our lines. But there’s the basics of drawing a spiral in Illustrator. Thank you for joining me. I’m Helen Bradley. You’ll find more of my Illustrator videos on this YouTube channel.

Helen Bradley

Friday, August 24th, 2012

Illustrator make complex shapes from simple pieces part1

Learn how to turn an oval into a flower and then some cool tricks for doing things with it in Illustrator. Covers using the Rotate tool.

Check out all our video tutorials on YouTube.

The transcript from the video:

Hello, I’m Helen Bradley. Welcome to this video tutorial. Today I’m going to show you how to make cool shapes In Illustrator the easy way. Before we get started on this video making shapes let’s have a look at the sort of things that we’re going to do. The first thing I’m going to show you how to do is to create this shape really, really easy. And then having created this shape all I did was duplicate it to make these shapes. And all of this is done with just an ellipse and a circle. And you’re going to see how all of these can be done really, really easily. Let’s get started with a brand new document. Now I’m just using a letter size document, RGB color space. So I’ll click Ok. Let’s just size the document and create an oval. Now I’m going to fill this oval with a purple color, and I’m just going to extend the stroke to about 4 points. Now I’m going to click the move tool to just position it where I want it to be and then select the rotate tool. Now this tool allows me to rotate the shape. And what I’m going to do is set the center point, which at the moment is here in the middle of the shape, and I want it down here. So I’m going to position my cursor there and Alt Click. And this allows me to now rotate around this location here. I want 13 petals on my flower. So I’m going to type 360 divided by 13 and Illustrator will make the calculation for me as to how many degrees I need to rotate this to fit 13 in exactly around the circle. I’m going to click Preview, make sure that it rolls forward, which is exactly what it’s supposed to do, and then click Copy. And now I’m just going to press Ctrl or Command D another series of times and each time I press one of things shapes is created and rotated. And I do that until I have my 13 petals. Now I’m going to add a center to the flower. So I’m going back to the ellipse shape. I’m going to drag in here to create a flower center. Now I want my circle over the middle of my flower so I’m just holding down the Spacebar as I draw it to make sure it goes in correct position. If I hold Shift it’ll be constrained to a circle shape. I’m going to let go now and I’m going to fill this with orange. Ok, I now have my flower shape so I’m going to select it all with Ctrl or Command A, and I’m going to choose Object and then Group. And this will group this object together so now I can operate on it as a single shape. And this is my starter shape. This is the flower that we were going to create. I’m going to select it again and this time Alt or Option drag on it because I want a few more copies of this shape because I want to show you what the possibilities are for working with a shape like this. And the first one we’re going to focus on is this one here, so let’s just zoom into it. I going to select the shape and now I’m going to transform it. I’m going to use Effect Distort and Transform Pucker and Bloat. And what this allows me to do is to create interesting effects. You can see that all I started with was an ellipse and a circle and already I’ve got a shape like this because I have my Preview turned on and I have Pucker and Bloat selected. And I can drag across here and create all sorts of different effects with my shape. If I didn’t have a really thick stroke then I wouldn’t have quite such strong black lines, but you can just determine exactly what you want. And this Pucker and Bloat will give you all sorts of shapes. Just a few extra percent and you’ll get a different shape entirely. So I’m just going to look for a good shape there and when I’ve got it I’m just going to call that done. So there’s one of the sorts of shapes that we can create just using a starting point of an oval and a circle, create a flower and then use Pucker and Bloat to create a shape like this. Let’s have a look at this flower. And this time I’m going to choose Effect Distort and Transform and I’m going to select Twist because twist allows me to twist this shape. You can see that I’m getting those curly ends to my flower. And I can go more or less. So let’s try say 30 degrees and see what that gives us. And it gives us a less of a twist. And if we go to 90 let’s see what we get there. We get a much greater twist. So you can do all sorts of things with your basic flower shape with that twist tool. And finally let’s have a look at another one of these effects. I’m going to choose Effect Distort and Transform again, and this time I’m going to select Tweak because what tweak does is actually fracture this image. You can see that we’ve got a horizontal and vertical setting of 10 percent here. And look what happens when I preview this and then go and really, really tweak it. If I choose between relative and absolute you could see I’m getting a sort of almost graffiti style effect. And it’s all done without having any skills at all in creating shapes beyond an oval and a circle. And you can experiment here with these sorts of options that allow you to get different effects from this tweak tool. So there we have a different effect from our flower. It’s obviously something very, very different but we could use this for example as a background for something later on. If we want to use this you’ll see that whenever we select it we’ve actually got our basic flower shape. Here’s a basic flower shape. Here’s our basic shape. If we want to use it elsewhere in Illustrator we may want to convert this. So we would choose Object and then Expand Appearance. And now we’ve actually got the shapes selected not the original flower, Object, Expand Appearance. And now we’ve got something the vector paths are actually around the physical shape not what it had been before we worked with at, again Object, Expand Appearance. And that would allow us then to come in and do things with the shape itself. Let’s just go and grab an object here and you can see that we can then start rescaling this portion or we can work with it in some way. But we can do things with it because it is no longer a flower shape. And we can do things such as dragging on points and making it all sorts of things. So I’ve totally messed that up there, but you get the idea as to what Expand Appearance will give you in terms of turning this flower shape into a something that then could be taken further in Illustrator, for example a repeat pattern. I’m Helen Bradley. Thank you for joining me for this video. Look out for more of my Lightroom, Photoshop and Illustrator tutorials on my YouTube channel.

Helen Bradley