Monday, February 21st, 2011

Replacing skies in Photoshop

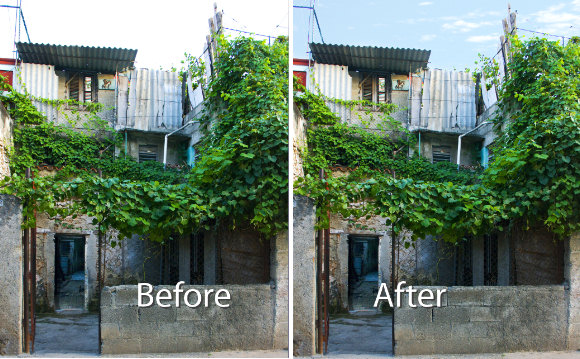
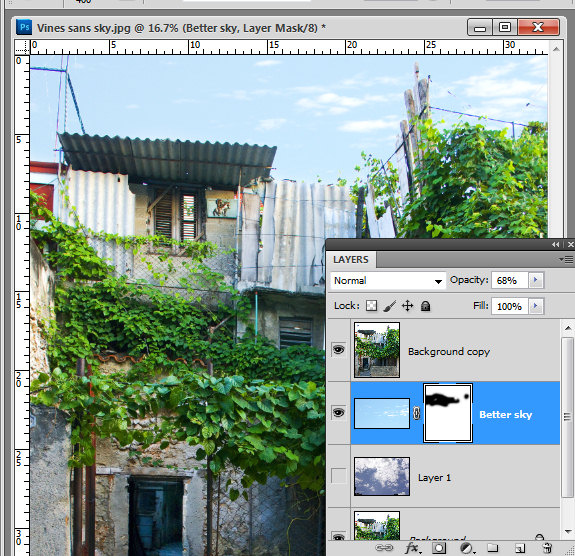
Reader Michael P. recently sent me an image he’s been working with – his challenge was to replace the sky in the image. The problem was that in replacing the sky the image had ended up with a lot of halos around the edges making the sky replacement look less than believable.

Kindly Michael sent me some of the images he wanted to work on to explain how to fix them more realistically.

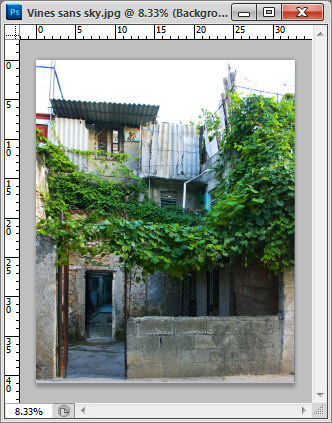
This is the building we’ll work with:

Here’s what I did:

Start by duplicating the background layer.

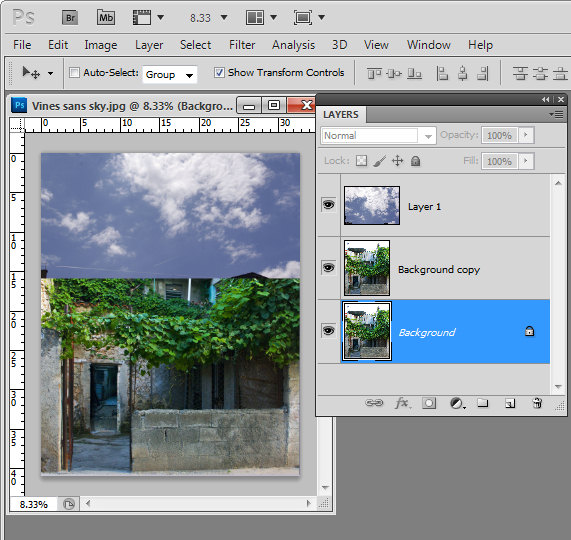
Drag the background layer from your sky image into your image – if you hold Shift as you do this it  will be positioned in the middle of the image.

Move this layer so it is over the blown out sky.

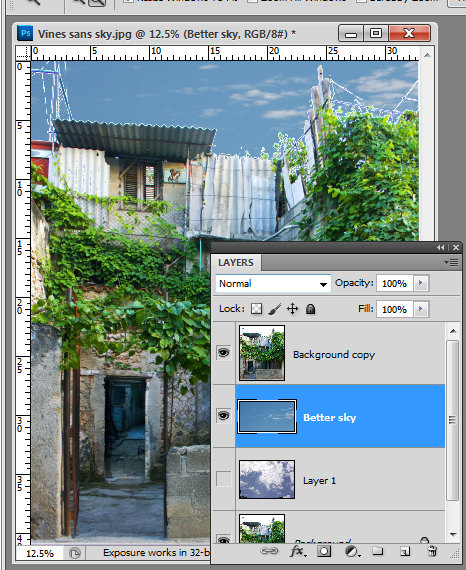
Move the sky layer so it sits between the two image layers.

Select the topmost layer of the image, select the Add a Layer Style icon at the foot of the layer palette and select Blending Options.

In the Blend If  area locate the This Layer bar and drag in from the right hand side of the bar. To split the adjuster in two, hold the Alt key as you drag one marker away from the other.

If you have a really blown out sky set the right side of the marker at 255 and the left side at a value that gives you a good blend effect for the sky – such as 248 or so.

Each image will require different settings.

Look at the result and see if the sky that you’ve brought in really suits the image.

Unfortunately I don’t think this sky works particularly well for this image and the image needs something a lot less dramatic.

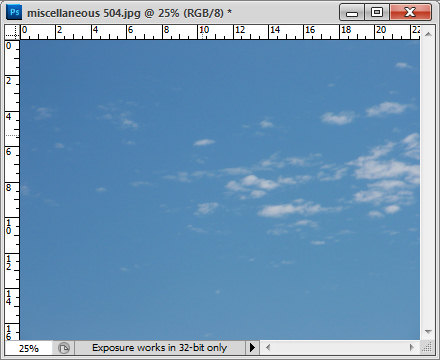
Here is a sky from my own collection which I think will work better.

I dragged it into the image above the first sky layer but under the second image layer. The original Blend If adjustment settings work just fine with this sky so there is nothing more to do there.

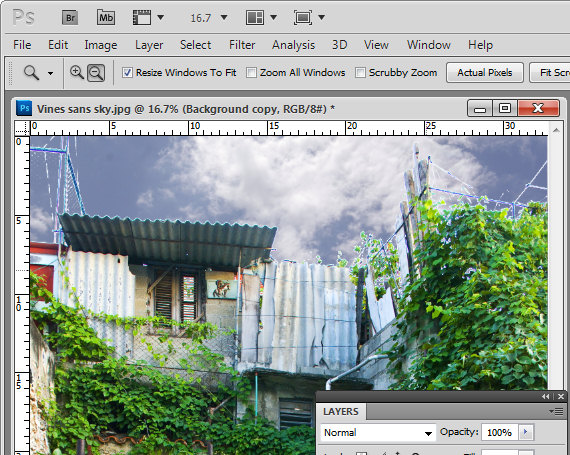
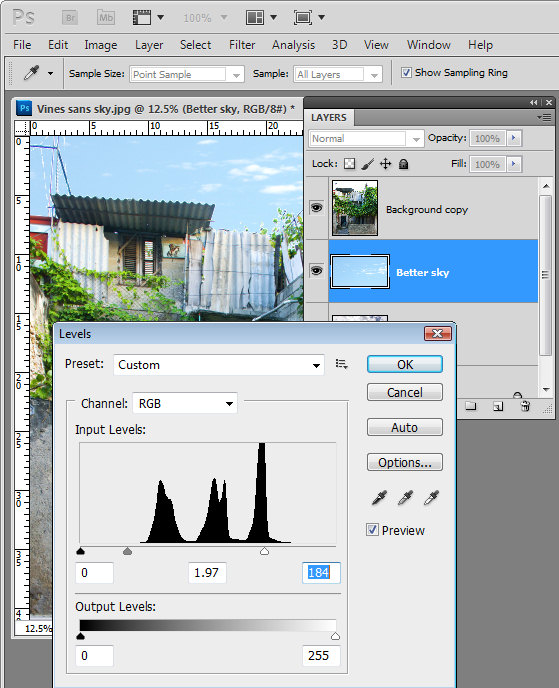
However, there are still problems along the skyline. These can be easily fixed by lightening the sky which I think is still way too dark for this image.

Select the sky layer and choose Image > Adjustments > Levels. What I am looking for here is to lighten the sky so that it blends in more with the image and looks more like it belongs.

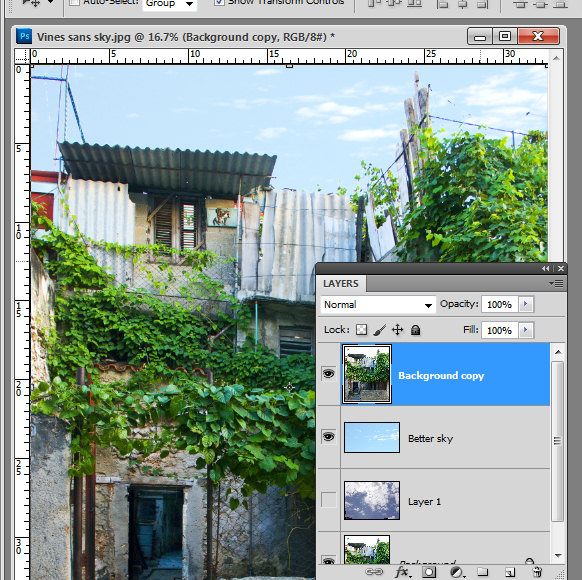
Having lightened the sky, you’ll can further blend it into the image by adjusting the opacity of the sky layer down a bit.

Because the original image is underneath the sky as well as on top of it the effect of reducing opacity is to blend the sky into the underlying image.

If you find some bleeding of the sky into the buildings you can add a mask to the sky layer by selecting that layer and click the Add Layer Mask icon at the foot of the layer palette.

Paint with black on the mask to remove any blue sky in lighter areas of the building.

Typically if you find that you’re getting distinct over-lapping of sky around the edges where the blown out sky meets buildings or other elements in the image, the problem will be that you’re trying too hard to replace the blown out sky with something that is too much sky for the image.

You’ll get a better result if you work with a much lighter but still interesting sky.

If you find that you have some very light elements in the original image that are showing white fringing over the blue sky you can avoid these by placing a portion of the sky with white clouds in it under these areas to minimize the obvious white edges.

Helen Bradley

Friday, February 18th, 2011

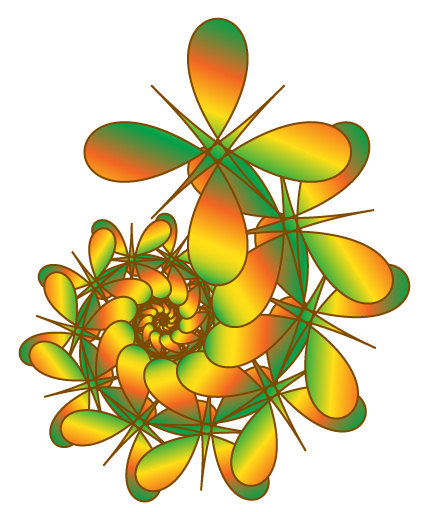
Create Cool Spirals in Illustrator

Spiral shapes are simple to create in Illustrator using some of its built in effects.

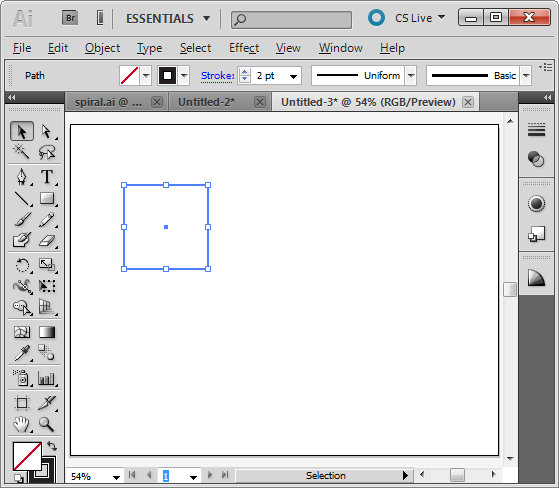
To get started, create a new image and select the rectangle tool. Hold Shift as you drag to create a small square on the artboard.  Set the stroke to around 2 pixels, set black as the stroke color and don’t apply any fill.

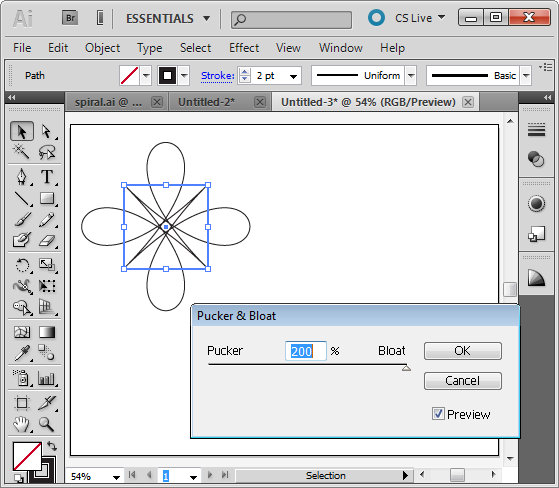
With the shape still selected, choose Effect > Distort & Transform > Pucker & Bloat. Enable the Preview checkbox and drag the slider to create an interesting shape. Here I dragged it to 200, which gives an interesting floral shape. Click Ok to confirm the transformation.

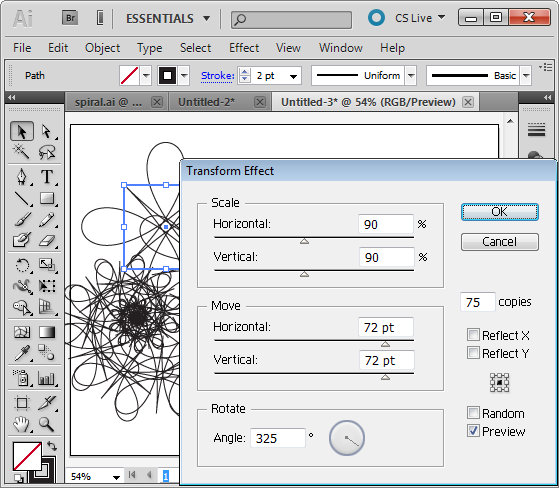
To create the spiral, with the shape still selected choose Effect > Distort & Transform > Transform to open the Transform Effect dialog. Enable the Preview checkbox. Set the number of copies to, for example, 75 and then experiment with various settings of the various sliders.

Changing any of the sliders will alter the shape significantly. Here I set Scale: Horizontal and Vertical to 90% so the shape gets incrementally smaller each transformation. I set the Move: Horizontal and Vertical to 72 pt so the shape moves both horizontally and vertically a small increment each transformation and the Rotate Angle to 325 degrees so each shape is rotated as it is transformed.

Once you have a shape that you like, click Ok.

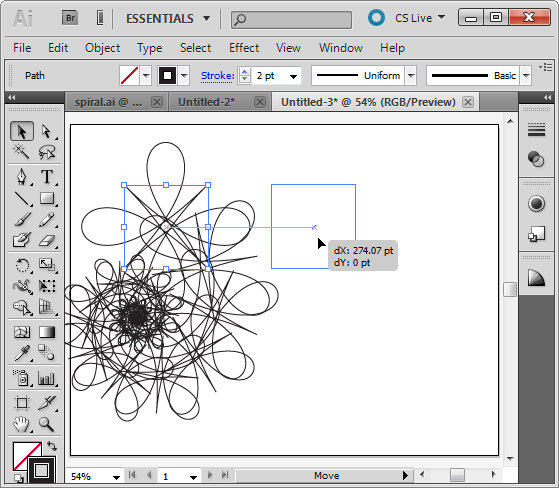
If necessary, use the Selection tool to move the shape back so it sits within the artboard.

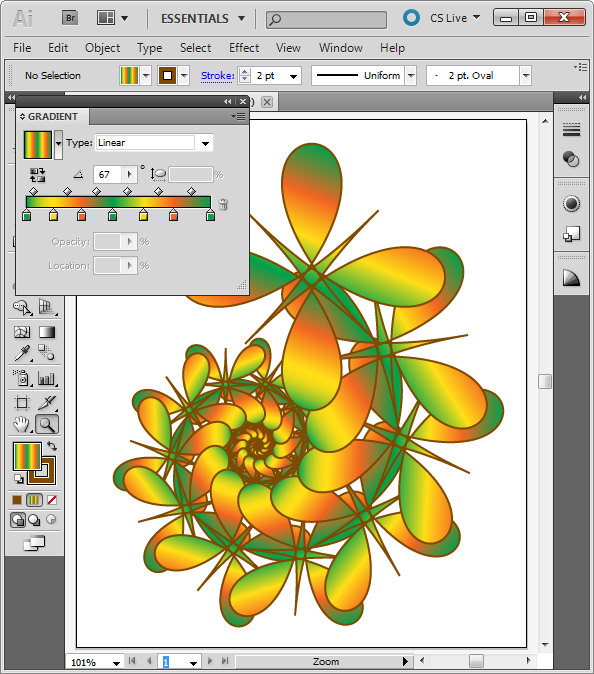
With the shape still selected, set the Stroke to a color of your choice. Select Fill and select a gradient such as the built in Green, Yellow, Orange gradient. By changing the angle of the gradient, for example, you can change the look of the filled shape.

In an up coming blog post I’ll show you more about working with Gradients in Illustrator.

Helen Bradley

Thursday, February 17th, 2011

Excel – Hide a sheet in a workbook

Excel hide a sheet in a workbook from view

If you have data on a worksheet that you don’t want others to see, you can hide the sheet but in such a way that the data on that sheet can still be used in formulas, for example.

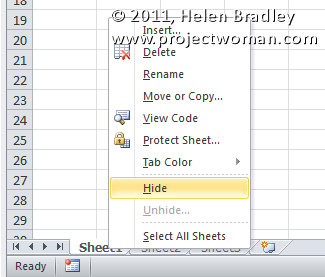
To do this, right click the sheet tab for the sheet to hide and select Hide.

Now that the sheet is hidden, you can unhide it if necessary at a later date by right clicking any sheet’s tab and choose Unhide and then select the sheet to unhide.

If you hide the last sheet in the workbook, it will be less obvious to a user that there is a hidden sheet that they’re not being given access to.

Helen Bradley

Wednesday, February 16th, 2011

A cool resource for understanding Av and Tv

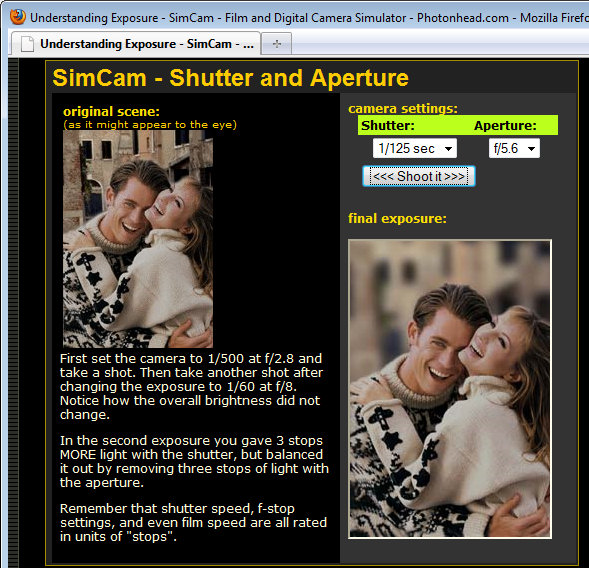
photon simulator showing how shutter speed and aperture relate when taking photos

I’ve been explaining recently why you might shoot in Av (Aperture Priority) or Tv (Shutter Priority)  mode.

Sometimes it can be hard to understand these things so I’ve found a cool tool you can use to see how these interact. Click here to visit the hands on simulator.

The simulator is an interactive camera that you can use online to experiment with aperture and shutter speed. You get to set the speed and the aperture and take your shot – the preview shows you what the image will look like with those settings.

Helen Bradley

Tuesday, February 15th, 2011

Create the Orton effect in Lightroom

The Orton effect is a process named after photographer Michael Orton. The process is a darkroom one where you take two negatives, both overexposed – one properly focused and one slightly out of focus. Sandwiching these together and processing them gives you an image with a slightly surreal look to it.

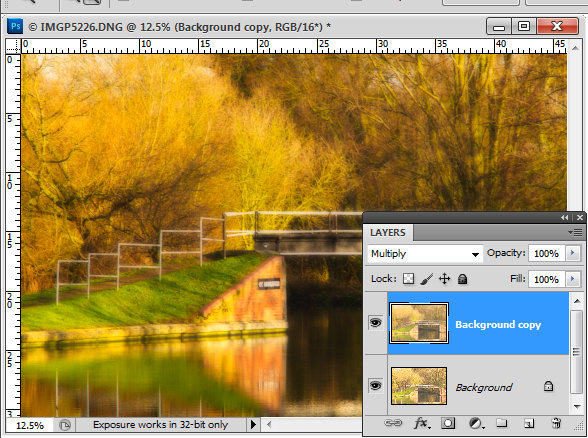
In Photoshop you can create a faux Orton look by duplicating your image’s background layer, set the layer’s blend mode to Screen and flatten the image. Duplicate this layer and set the blend mode to Multiply. Add a medium size radius Gaussian Blur to the topmost layer and, if desired, lighten the image and add some grain to it to give it a classic Orton look. I have a detailed blog post showing how to do this step by step here.

I’ve seen a few people who have said that you can’t replicate this effect in Lightroom because you don’t have layers in Lightroom. However, I’ve developed a workaround solution that gives a comparable result which I really like.

The advantage of this solution is that it can be saved as a Lightroom preset so you can apply it to other images at any time in future.

The process involves starting out with a well-adjusted image so process it as you would any image.

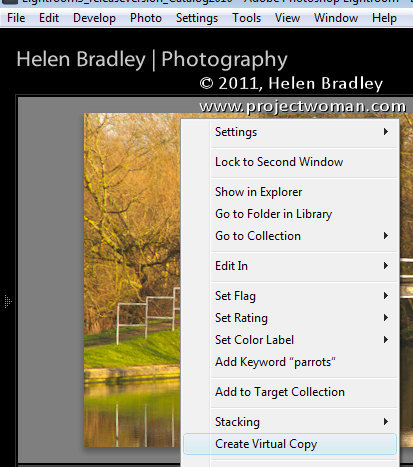
If desired make a virtual copy of the image by right clicking it and choose Create Virtual Copy.

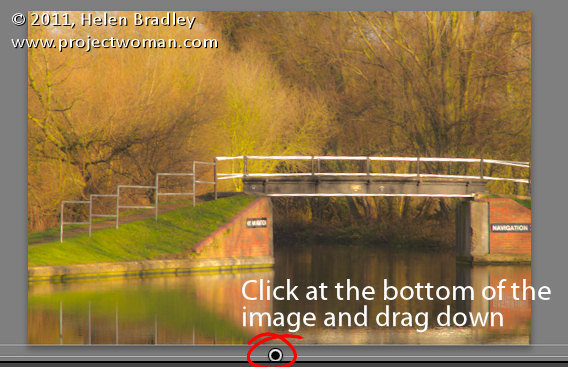
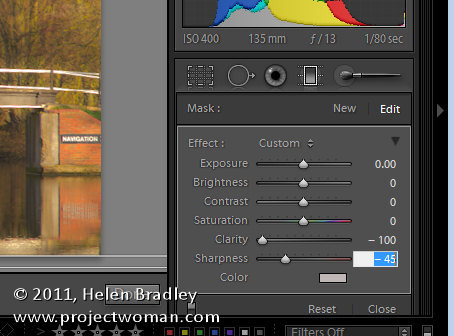
Add a graduated filter to the image. Start the filter just inside the bottom edge of the image and drag down until you are just over the edge. What you want is for the filter to be anchored to the top edge of the image and to extend all the way across the image at a full intensity.

Set the Graduated filter so all values are zero except Clarity = -100 and Sharpness = -45. The combination of negative clarity and sharpness softens the image. Click the Done button under the image.

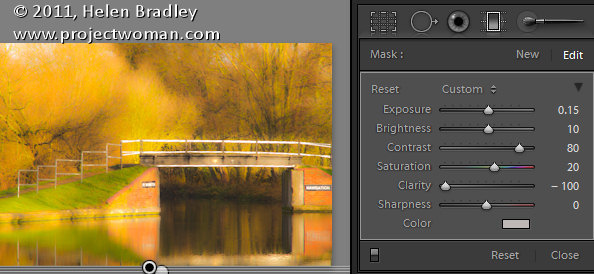
Now add a second Graduated filter over the top of the other one. Apply these settings to the image. Exposure +0.15, Brightness +10, Contrast = +80, Saturation +20, Clarity -100.

You can vary any of the settings on this last Graduated filter if desired to improve the image. What you’re looking for is an image with an ethereal glow.

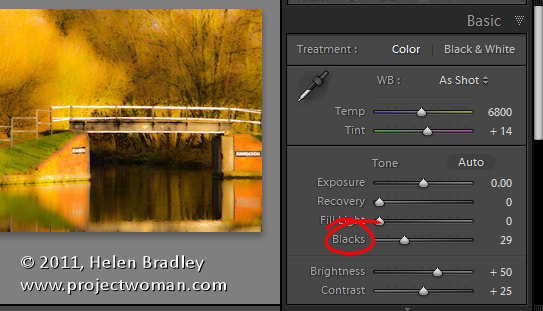
It will help you to get this effect if you boost the Blacks in the image in the Basic panel.

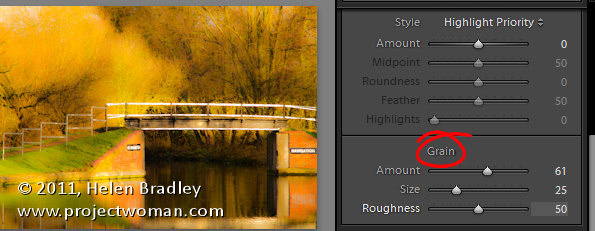
Finish off the effect by opening the Effects panel and add some grain to the image.

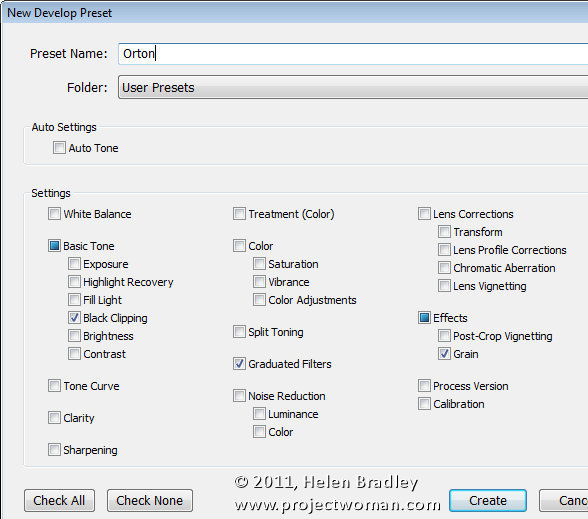
To save this as a preset, click the plus symbol opposite the Presets panel on the left – give the preset a name and disable all checkboxes and then select only the Grain and Graduated Filters checkboxes. If you want to add the increased Black to the preset, click the Black Clipping checkbox too. When you’re done, click Create to create the preset.

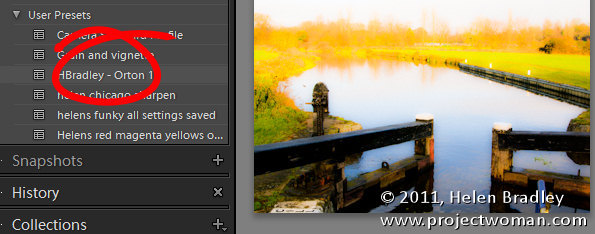
You can now apply this preset to another image. First make sure to properly expose the image and then, open the Presets panel and click your preset to apply it to your image.

You may need to tweak some of the settings for the image as a result of doing this but you should have an image that has a glow effect to it and with a good approximation of the classic Orton look.

Of course, you can achieve the same effect in Adobe Camera Raw.

If you want to avoid the work and use my preset instead – here’s a link to download my free Orton Lightroom preset.

Helen Bradley

Friday, February 11th, 2011

Lightroom – working with RAW and JPG

Lightroom how to handle raw and jpeg jpg images captured at the same time separately
When your camera is set to capture in RAW+ so it is recording not only the RAW image but also a JPG image to match you may find that Lightroom shows you only the RAW version of the file.

This is because Lightroom, by default, treats the RAW version and the JPG images as one.

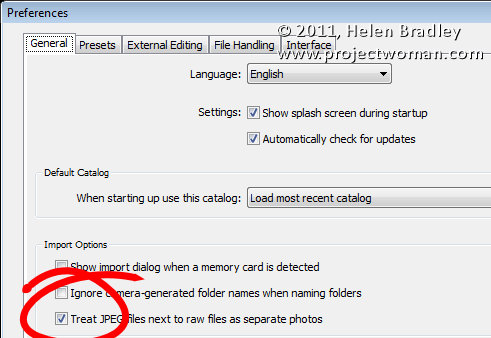
However, if you want to deal with them separately, choose Edit > Preferences (Lightroom > Preferences on the Mac) and select the General tab and select the option: “Treat JPEG files next to raw files as separate photos”.

Now Lightroom will treat the RAW and the JPG images as being different images so you’ll see both images in your Grid, Loupe and Filmstrip views.

Helen Bradley

Friday, February 11th, 2011

Excel 2007 & 2010 – Hidden add-ins

Excel 2007 2010 analysis toolpak lookup wizard solver add-in

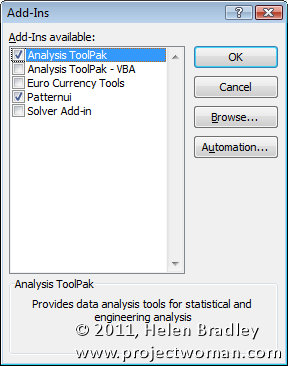
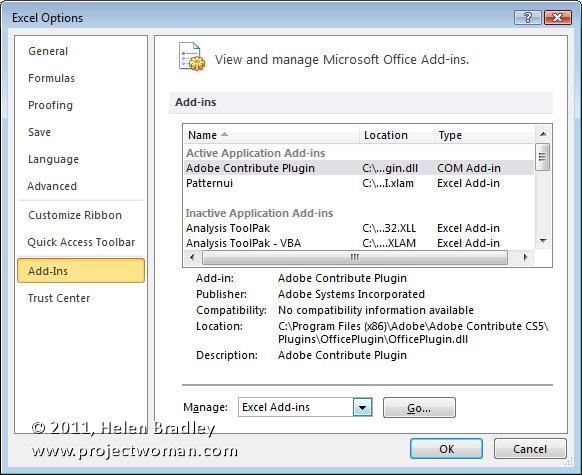
Excel 2007 & 2010 come with a number of add-ins that you can get to by choosing the Options button (File in Excel 2010) and choose Excel Options (Options in Excel 2010) and click Add-ins. From the Manage dropdown list choose Excel Add-ins and click Go.

Image explaining how to install the Excel 2007 2010 analysis toolpak lookup wizard solver add-in

A list of available Add-ins appears in the list. Any that don’t have their checkboxes checked aren’t enabled right now.

One you might want to enable is the Analysis Toolpak – this gives you access to functions like RANDBETWEEN and NETWORKDAYS. There’s also possibly a Lookup Wizard (in Excel 2007 only – it was discontinued in Excel 2010) and a Solver add-in in the list.

Click on any of the Add-ins to add them to Excel. Once you do, they’ll be available every time you launch Excel.

RANDBETWEEN is a handy function for filling cells with a random value. It’s syntax is RANDBETWEEN(startvalue, endvalue) so to fill a range with values between 100 and 200 use =RANDBETWEEN(100,200) then copy it to the range to fill. You can read more about the function here: Random numbers in Excel.

NETWORKDAYS  will calculate the number of working days between two dates. You can read more about this function here: Excel – calculating workdays with Networkdays.

Helen Bradley

Thursday, February 10th, 2011

Valentine’s Day photography – Capture the Essence of You

Whether you’re basking in the first throws of a new relationship, newly hitched or coming up to your silver anniversary, February is a time to focus on your relationship with your husband, partner, or significant other. It’s a time to bring the two of you to the forefront and what better way to do this than in your photos?

If you haven’t done this before, the ‘future you’ will appreciate the time you spend now in chronicling the little things in your relationship. Think how wonderful it will be, tucked up in your rocking chair one day, to look back on the early days of your relationship?

There are lots of ways you can make a photographic record of your lives together. While visiting a professional photographer for a custom portrait will give you a lasting showpiece, some of the best shots can be captured yourselves. These are photos of things that are meaningful to you both and that capture the things that are important to you and your relationship.

Look around at the day to day things in your life. Take photos of your shoes, side by side in the hallway, the favourite mugs that you use each morning or the magazines you each read. Capture the good and the bad – such as your hands clasped together, the favourite shirt he loves but you hate, and the assemble it yourself furniture that nearly caused you to divorce while putting it together!

Take the time to photograph each other too. It’s a fun way to spend some time together and to get some great photos to boot. Try to capture his goofy grin and get him to catch you with that dreamy look in your eyes he tells you that you get when you’re imagining yourself in a new pair of Jimmy Choo’s.

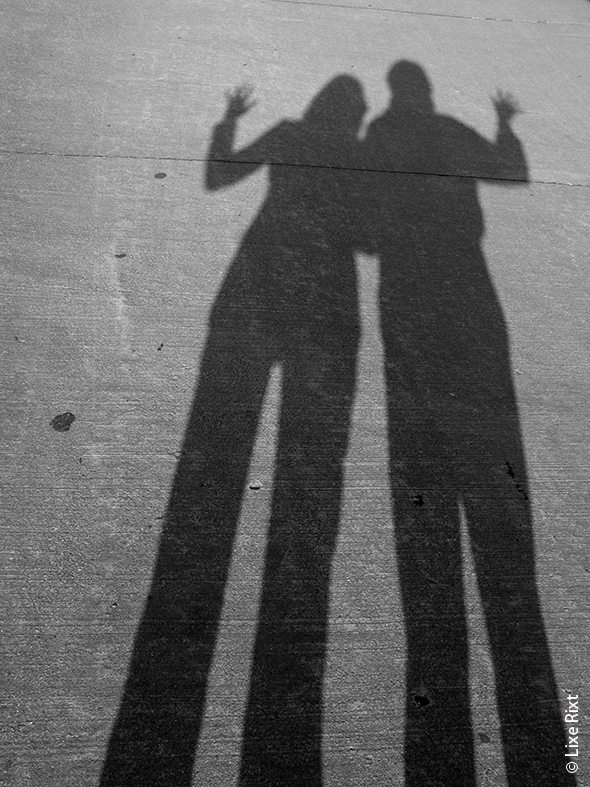
For “together” shots, use the camera’s delayed shooting mode. Have your partner sit or stand in place and set up the camera on a flat surface making sure it’s focused on them. Enable the delayed shooting mode (check your camera’s manual if you’re unsure how to do this) and join your partner for the shot. Repeat as often as desired to get that perfect shot.

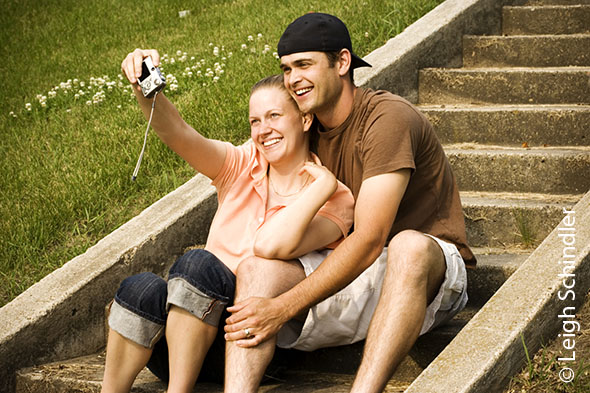
You can also take “together” shots by standing really close and holding the camera up in the air in front of you facing towards you. Snap away as you pose or enjoy a joke. This is a more “hit or miss” approach but it’s possible to get some fun photos this way.

If you have one of those fairground photo booths nearby, spend a couple of pounds and take a strip of photos of the two of you – just the physical effort of jamming yourself into the booth is enough to guarantee ear to ear smiles and a sense of fun.

For a more romantic portrait of your lives, take a photo of your partner lit with candle light or soft lighting at home. You can do this by placing lighted candles where they will light his face and, if desired, use some other soft lighting such as a small lamp but keep it out of the photo. Turn off the camera’s flash or it will ruin the shot and set the camera to night shooting mode. If you can set film speed on your camera, opt for 400, 800 or higher so that the camera will be more sensitive to the light that is available (and the photo will have a wonderful grainy look too). Ask your partner to sit very still as the shot might take a second or more to be captured. Use a tripod to steady the camera because you won’t be able to hold it still this long. You will find that the candlelight will throw a lovely coloured light into the shot and give your partner’s features a soft look.

Helen Bradley

Tuesday, February 8th, 2011

Straightening an image in Word 2010

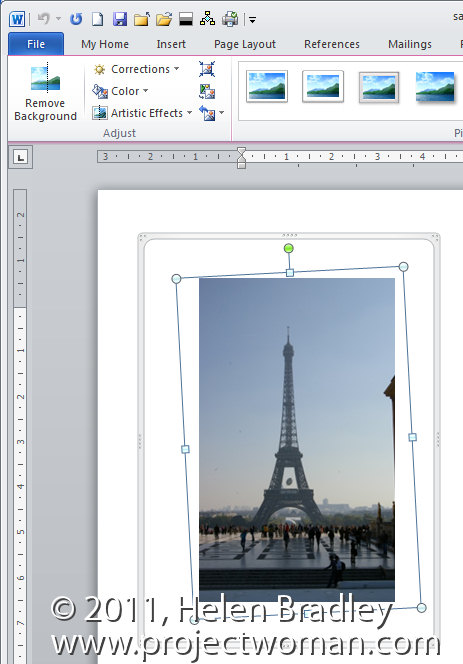
While Word 2010 has no tool for straightening an image, you can create the same effect.

step 1

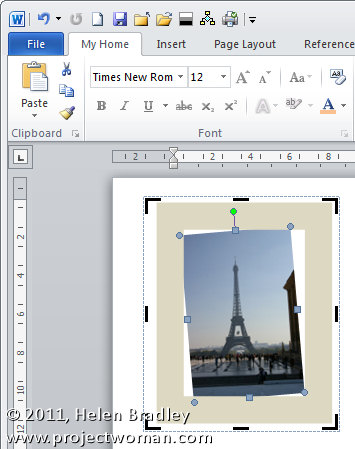
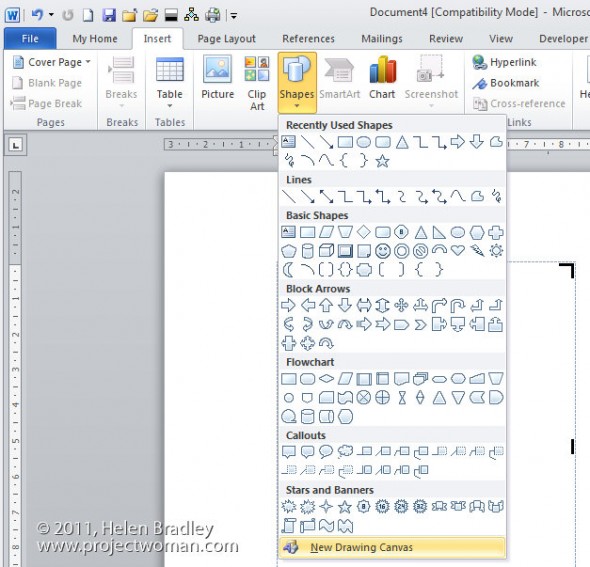
To do this, I’d suggest you start with a new drawing canvas which is Insert > Shapes > New Drawing Canvas to draw a canvas on the screen.

step 2

Adjust it to just larger than the image that you want in your document and then click inside the canvas and choose Insert Picture to select an image to insert.

Size the image once it’s placed inside the drawing canvas.

Step 3

Now with the canvas selected but not the image, choose Insert > Shapes and select a rectangle shape.

Draw the rectangle shape over the top of the image.

From the Drawing Tools> Format tab, set the Shape Fill to No Fill and the Shape Outline to White and set the Outline Weight to a large weight. To do this, you’ll probably need to select the format shape options so that you can set the shape outline to something like 40 points. You need something that will cover the edges of the shape that you are about to crop.

In this image, I’ve set the outline of the rectangle to a light grey so you can see what you’re aiming to achieve:

Step 4

Now with the image selected rather than the shape, rotate the image until it is straight. Select the image and click the Crop button crop away a little bit around the edges of the image. You don’t need to crop too much but you might need to crop a little bit.

Click outside the image and now adjust the shape itself the white border you created so that it covers the area of the image that you want to hide because you’ve rotated the image.

In some cases, you may still not have enough border so you can adjust it to make it wider or narrower as required not by selecting the rectangle and choose Drawing Tools > Format tab > Shape Outline > Weight> More Lines and now increase the size of the line until you have enough border to hide the outside of the image.

The border grows from the middle out so you need to add about half as much extra border than you think you need.

Once you’ve added the extra border, click on the border and drag it outwards until it covers the uneven edges of the image.

Essentially what you’re doing here is rotating an image then using a white frame with no fill placed over the top of the image to mask out the area of the image that is on an angle and that you don’t want to see.

When you’re done, you can resize the drawing canvas until it fits closely around your image. It should not extend over the image or you will distort the frame.

Placing the image and frame inside a drawing canvas means that you can just click and drag on the drawing canvas edge and it will move both the frame and the image in your document.

Helen Bradley

Tuesday, February 8th, 2011

Understand your camera’s settings – Part 3 – ISO

Image: ISO3200, f5.6, 1/80s – the high ISO gives good sensitivity to light allowing this image to be captured quite fast in a relatively dark NY subway station.

In part 3 of this series on understanding your camera’s manual settings I’ll explain how to combine a choice of ISO settings when varying Aperture and Shutter speed.

In addition to Aperture and Shutter speed you can also configure your camera’s ISO setting. You would do this to adjust for the situation where there is not enough light for a shot or where there is too much light.

ISO is the camera’s sensitivity to light and small ISO values such as 80 and 100 indicate low sensitivity so the camera needs more light to take the photo. High values like 400 and 800 (and even up to 6400 and beyond) increase the camera’s sensitivity to light and can be used when you need more light, for example, where the shutter speed or aperture you want to use can’t give the light you want.

Take care when using very large ISO values as these are susceptible to noise so, using a value of 1600 or more might give you a good exposure but the image may have a lot of digital noise as a result.

Small values like 100 and 200 should show little noise at all.

Image: ISO100 f/4.5 1/500s – in bright summer sunlight, the ISO 100 value reduces sensitivity to light still allowing for a fast shot.

Of course, even excessive amounts of noise are preferable to getting a blurred image because you couldn’t hold the camera steady long enough to take it.

While the Auto setting on your camera will ensure that you get a good photograph most of the time, for creative purposes being able to configure your camera to adjust either the aperture or the shutter speed will give you more and varied options for getting even better images.
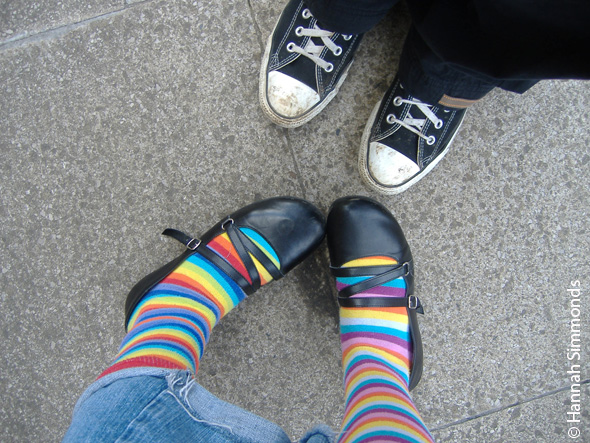
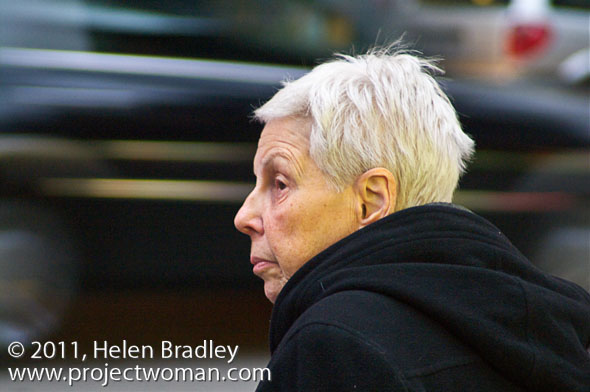
Image: ISO 1600, f/5.6, 1/15s – At dusk in a NY street, the high ISO gives good light sensitivity and the slow shutter speed allows the cars in the background to be blurred nicely.
Helen Bradley