Thursday, May 30th, 2013
A Quick Guide of Shortcut Keyboard Combinations to Accent Marks over Characters
Word allows you to create accented letters quickly using its inbuilt accent shortcuts. To do this, press the accent shortcut key combination, then release, and follow it up with the letter to accent.
Some of the more commonly used shortcuts are:
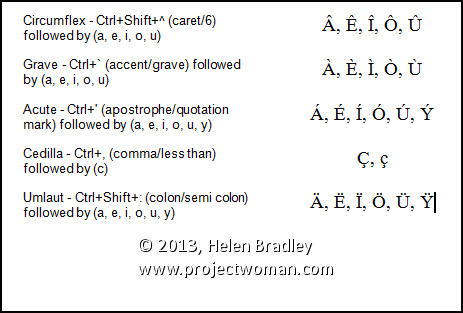
Circumflex – Ctrl+Shift+^ (caret/6) followed by (a, e, i, o, u)
Grave – Ctrl+` (accent/grave) followed by (a, e, i, o, u)
Acute – Ctrl+’ (apostrophe/quotation mark) followed by (a, e, i, o, u, y)
Cedilla – Ctrl+, (comma/less than) followed by (c)
Umlaut – Ctrl+Shift+: (colon/semi colon) followed by (a, e, i, o, u, y)
Helen Bradley
Labels: ^, ;, :, ', ", <, 2010, 2013, 6, a, accent, Acute, c, Cedilla, character, Circumflex, Combination, CTRL, e, follow, following, Grave, i, inbuilt, key, keyboard, letter, Microsoft Office, Microsoft Word, o, shift, shortcut, tip, trick, u, Umlaut, Word, y
Categories:office
posted by Helen Bradley @ 6:02 am6 Comments links to this post
Tuesday, May 21st, 2013
Learn more about the formatting applied to text in your document with this handy Keyboard Shortcut
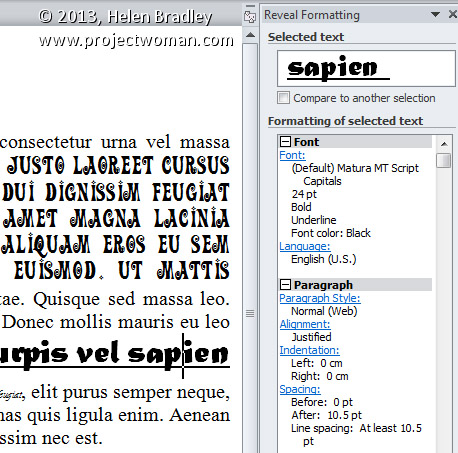
If you want to quickly find out what formatting has been applied to any piece of text, click in the text and press Shift + F1. A task pane will open in the right of Word window. This Reveal Formatting task pane displays details about the text format being used for the word that your insertion point is closest to.
With this task pane open you can click on any piece if text to learn more about its formatting.
Helen Bradley
Labels: 2010, 2013, Combination, F1, format, formatting, insertion, key, keyboard, Microsoft Office, Microsoft Word, pane, point, Reveal, Reveal Formatting, right, shift, shortcut, task, text, tip, trick, Word
Categories:office
posted by Helen Bradley @ 5:53 am1 Comment links to this post
Saturday, May 18th, 2013

You can easily enable offline viewing of any Google Docs documents. By default this ability is turned off, so you may want to enable it for emergency situations if you rely on Google Docs for viewing and editing important files. Keep in mind that you must be using Google’s Chrome web browser to do this. Chrome can be downloaded here. Also note spreadsheets can only be viewed, not edited, using this method.
To do this, go to your Google Drive and click the More button along the left side, under the Create button. This will open a small dropdown menu that includes the Offline option. Select this, and then follow the simple instructions to enable offline mode. This really involves just two clicks and some waiting. Once you have selected the Enable Offline button, you’ll have to wait some time so that all of your documents can be downloaded to your computer for offline storage. All offline documents will be listed in the Offline section once this is done.
If you want to disable offline editing for any reason, simply click the gear icon toward the top right of Google Drive and select Disable offline.


Helen Bradley
Labels: documents, editing, google docs, mode, offline, viewing, work
Categories:hunter, office
posted by Hunter Delattre @ 9:00 amNo Comments links to this post
Wednesday, May 15th, 2013
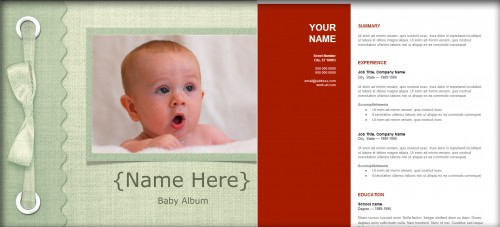
When creating a new presentation or document in Google Docs, you might find that the default templates don’t provide the theme you want. Fortunately, Google provides an easy way to find the perfect template for your situation, from baby photo albums to résumés. To find a template suitable for you, simply visit https://drive.google.com/templates?view=public. You can search by name, category, and popularity to quickly find whatever you need.
Once you’ve selected a template you like, simply click the Use this template button and a new document will automatically open with the chosen template, ready for use.
Helen Bradley
Labels: google docs, new, resume, search, templates
Categories:hunter, office
posted by Hunter Delattre @ 9:00 amNo Comments links to this post
Monday, May 13th, 2013
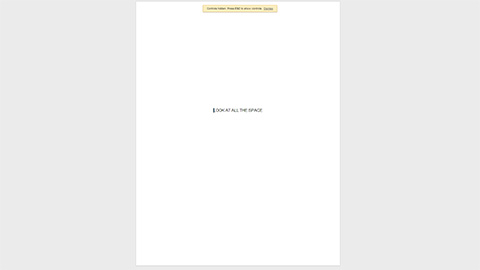
If you like working with the cleanest view possible, Google Docs makes it easy for you. First select View > Full screen. This will remove all menus from the screen, so make sure you don’t need to access any buttons while using this view. Now you can make your browser itself full screen. In most browsers you can accomplish this by pressing F11. With these options you will see absolutely nothing but the page you are typing on.
To undo these options, press F11 again to eliminate the browser full screen, then esc to eliminate Google Doc’s full screen mode.
Helen Bradley
Labels: full screen, google docs, maximum, space
Categories:hunter, office
posted by Hunter Delattre @ 9:00 amNo Comments links to this post
Monday, May 13th, 2013
Finding and Fixing Page Numbers that Can’t be Seen and/or Won’t Print
If you have included page numbers at the foot of a page and find that they’re missing from your printouts the problem lies with your page settings. The footer text is being forced to print so far down the paper that your printer is ejecting the paper before this point is reached.
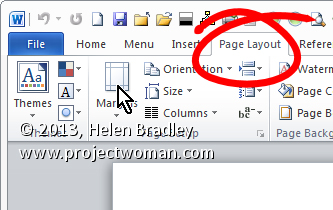
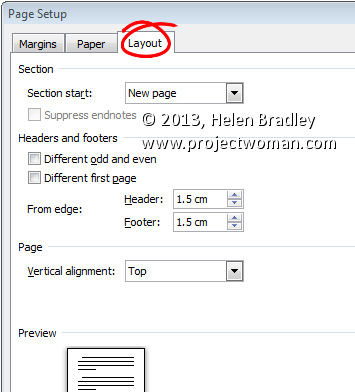
Solve the problem by selecting the Page Layout tab, click the Margins dropdown list, and click Custom Margins. Now, in this dialog select the Layout tab. Finally, increase the From edge: Footer measurement slightly. Experiment to find the smallest increase which will allow your page numbers to print.
Helen Bradley
Labels: 2010, 2013, Custom, Find, fix, footer, From edge, layout, locate, margins, measurments, Microsoft Office, Microsoft Word, Number, Page, Page Layout, print, tip, trick, Word
Categories:office
posted by Helen Bradley @ 6:42 am2 Comments links to this post
Sunday, May 5th, 2013
Get to Your Previous Insertion Point with This Shortcut
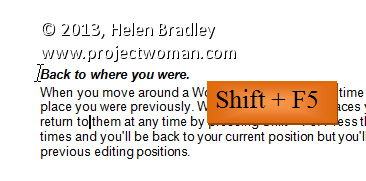
When you move around a Word document it can be time consuming to find the place you were previously. Word records the last places you worked and you can return to them at any time by pressing Shift + F5. Press this combination four times and you’ll be back to your current position and along the way you’ll have visited three previous editing positions.
Helen Bradley
Labels: 2010, 2013, F5, insertion, key, key combination, Keyboard Shortcuts, place, point, previous, record, Return, saver, shift, time, tip, trick, Word
Categories:office
posted by Helen Bradley @ 6:34 am1 Comment links to this post
Tuesday, April 30th, 2013
Move a Paragraph, at Any Time, with Ease!
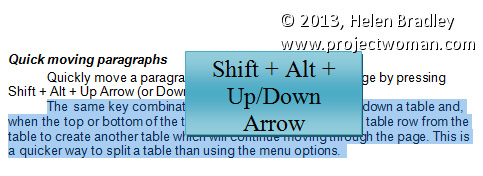
To quickly move a whole paragraph up or down a Word document, click in the paragraph and press Shift + Alt + Up Arrow (or Down Arrow).
The same key combination will move an entire table row up or down a table and, when the top or bottom of the table is reached, it detaches the table row from the table to create another table which will continue moving through the page. This is a quicker and simpler way to split a table.
This tip works in just about any version of Word.
Helen Bradley
Labels: 2010, 2013, Alt, bottom, down, down arrow, key, key combination, Keyboard Shortcuts, Microsoft Office, Microsoft Word, move, moving, Paragraph, quick, row, shift, split, table, tip, top, up, Up Arrow, Word
Categories:office
posted by Helen Bradley @ 6:20 am1 Comment links to this post
Wednesday, April 24th, 2013
How to make a New Page (or Page Break) When and Where you Want
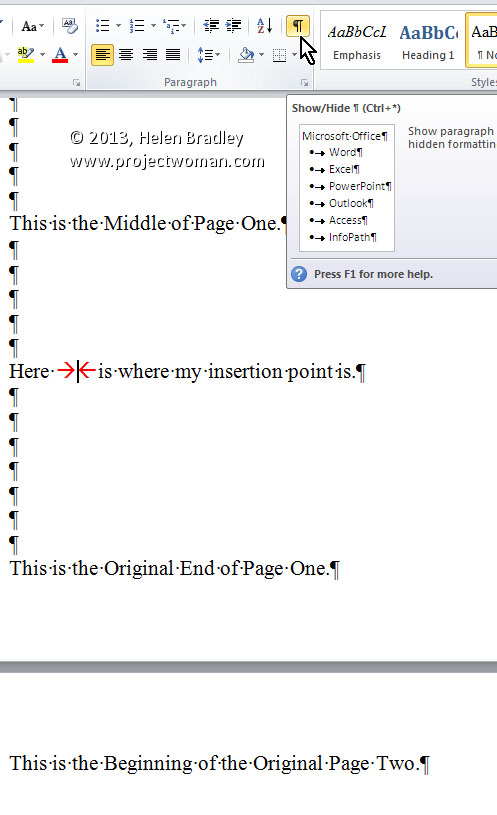
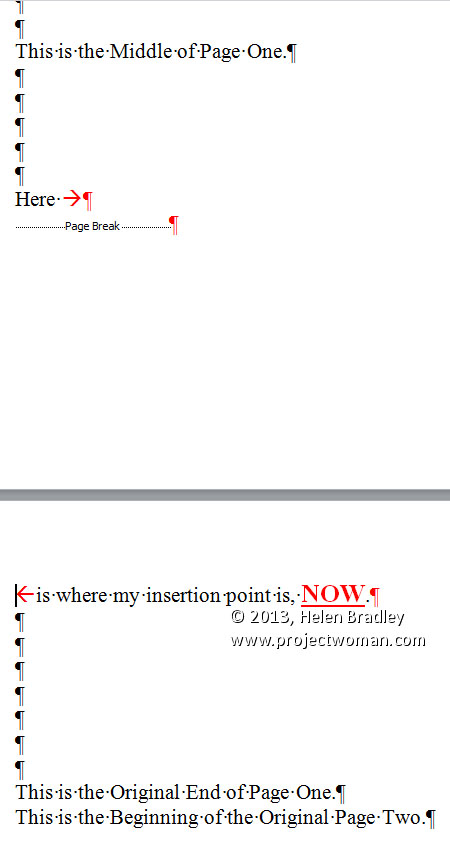
To create a new page in a Word 2010 and 2013 document before you’ve reached the end of your current page, simply press CTRL + ENTER. This places a ‘…Page Break…’ in your document exactly where your insertion point was. It also moves the insertion point onto the top of the next page. You can see the page break marker if you select the ‘¶’ button on the Home tab of the Ribbon.
Lastly, if you need to, you can delete the page break by positioning the insertion point immediately in front of it and pressing Delete.
Helen Bradley
Labels: 2010, 2013, create, CTRL, ENTER, instantly, Microsoft Office, Microsoft Word, new, Page, Page Break, tip, Word
Categories:office
posted by Helen Bradley @ 6:50 amNo Comments links to this post
Tuesday, April 16th, 2013
Using Word to Create Multiple Return Address Labels
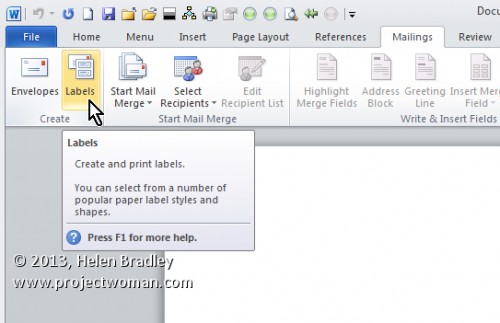
Create your own return address labels in Word 2010 or 2013 by selecting the Mailings tab and clicking the Labels button. Type your address into the text area under Address.
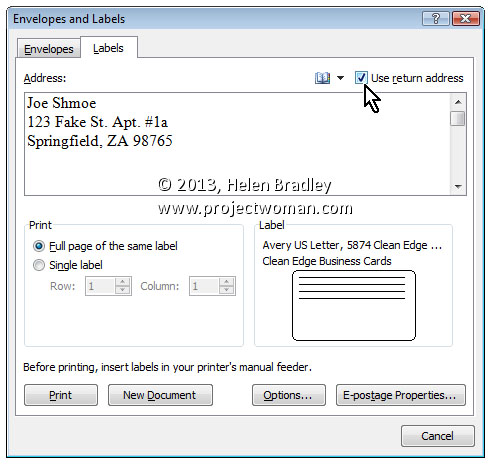
Alternately, select the ‘Use return address’ checkbox and select the address to use from your address book or from your Outlook contact list.
Select the ‘Full page of the same label’ option button and select Options to select your paper from the list.
Select New Document to create a document full of your labels or click Print to send the job straight to the printer.
Helen Bradley
Labels: 2010, 2013, Address, Full page of the same label, Label, Mailing, Microsoft Office, Microsoft Word, option, print, Return, tip, Use Return Address, Word, Word 2013
Categories:office
posted by Helen Bradley @ 6:30 amNo Comments links to this post


