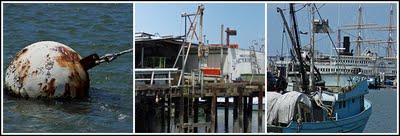
Recently LisaMarie from LisaMarieDiasDesigns.com asked me to look into creating a tutorial for her newsletter subscribers to show how to create a template with a 3 pixel frame around it and openings for three 2″x2″ or 3″x3″ images.
The process of designing a solution is a little complex so I’ve done two things. First of all, I’m giving you the templates as PSD files that you can use to create your own design, but secondly I’m going to show you how to do it yourself. So, if you want to know how to create a reusable design like this or one that can be used with different size photos, here’s how:
I’ll step you through creating a solution for displaying three 3″x3″ images at 72 dpi with a 3 pixel frame around each of them.
Step 1
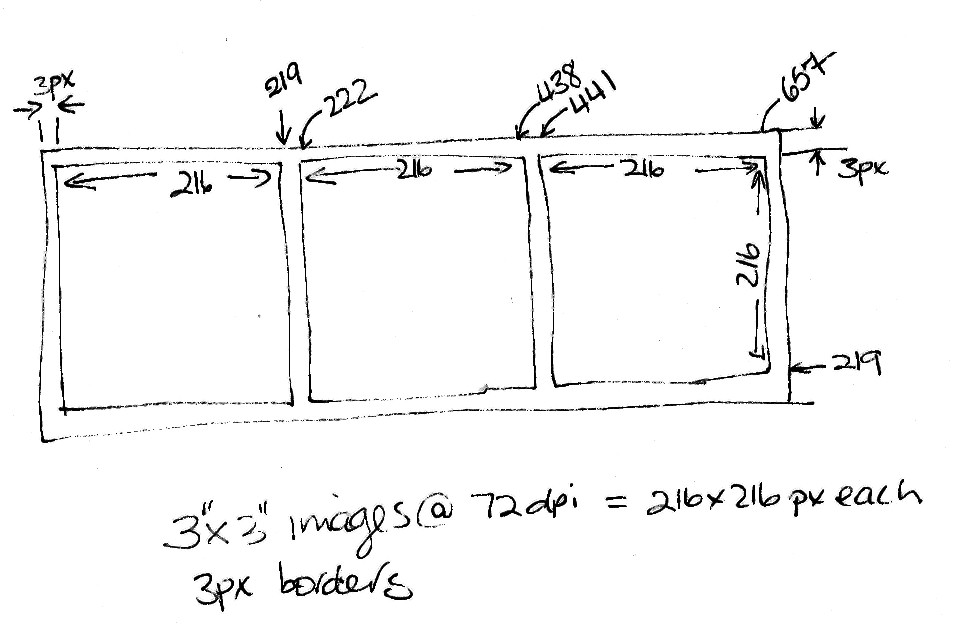
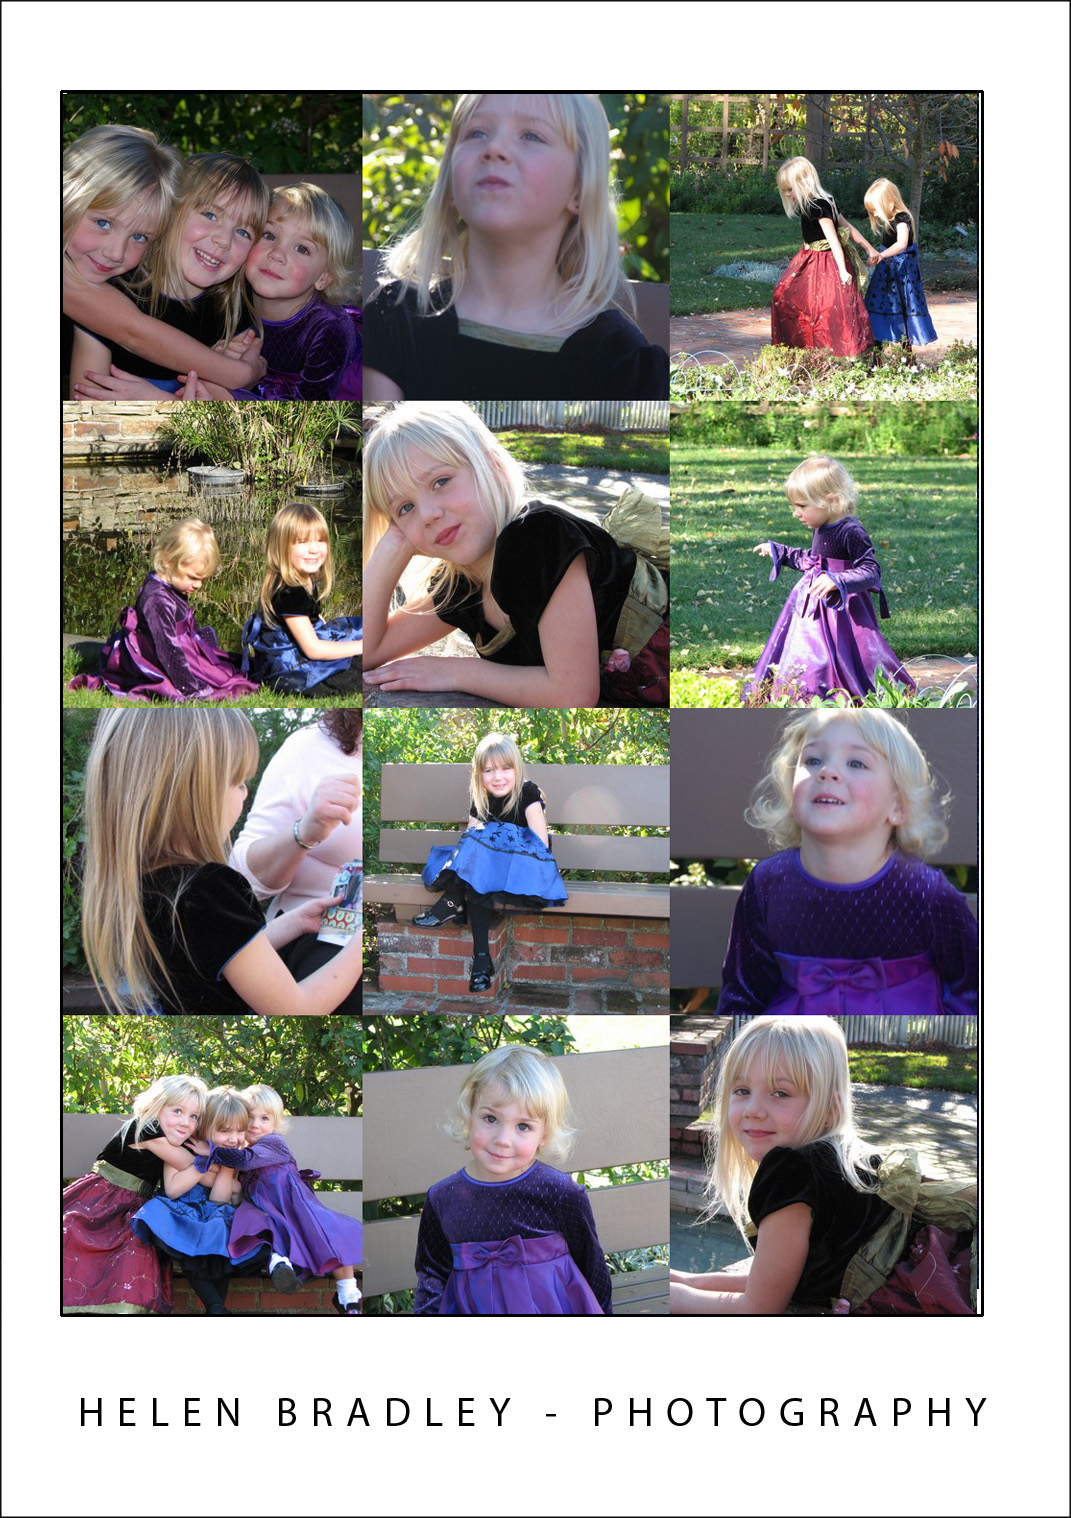
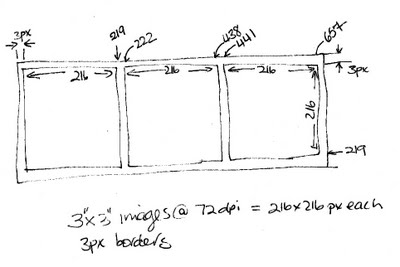
It’s a good idea to sketch the design on paper and work out the dimensions before you start. For three 3″x3″ inch images at 72 dpi the starting image needs to be 660 x 222 pixels and it will look like this.
Step 2
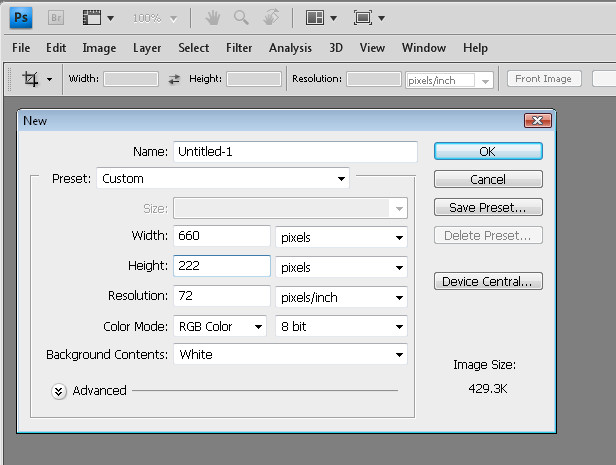
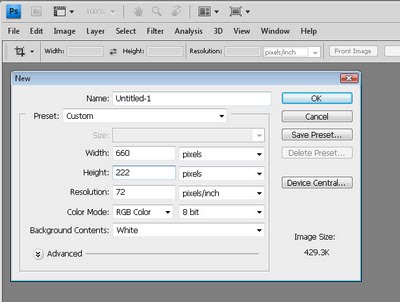
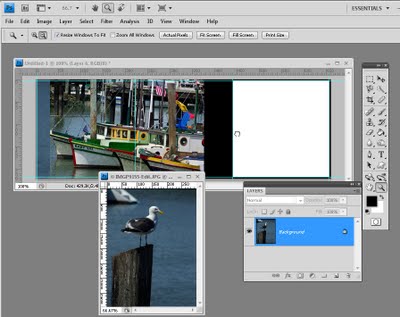
In Photoshop, choose File > New and create an image 660 pixels wide and 222 pixels high with a resolution of 72 pixels per inch.
Set the background to be white and click Ok.

Step 3
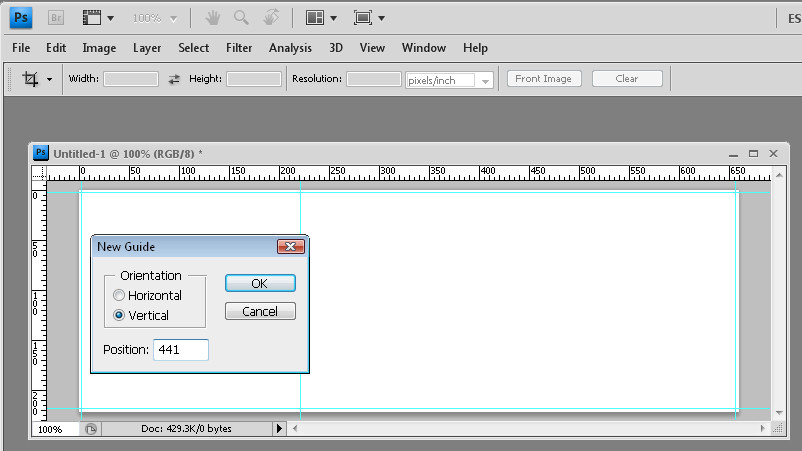
To add the gridlines, choose View > New Guide and create a vertical guide at 3 pixels. Repeat and create a second vertical guide at 222 pixels. Repeat and add a third vertical guide at 441 pixels and a fourth one at 657 pixels.
Add two horizontal guides, one at 3 pixels and one at 219 pixels.
Step 4
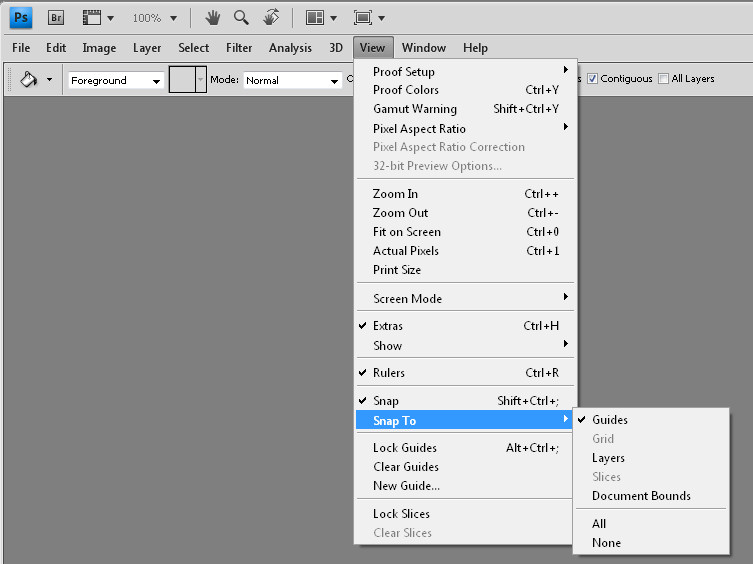
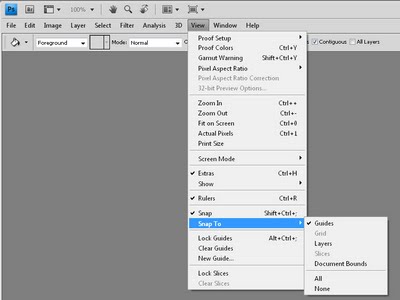
Now choose View > Snap To and select None.
Repeat and choose View > Snap To and select Guides.
Make sure that the View > Snap option in the menu is checked.
Now selections and images will snap to the guides that you have created.
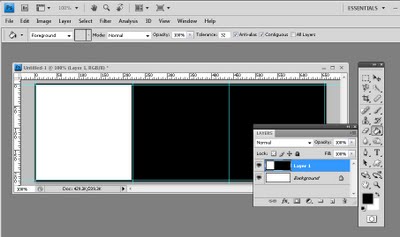
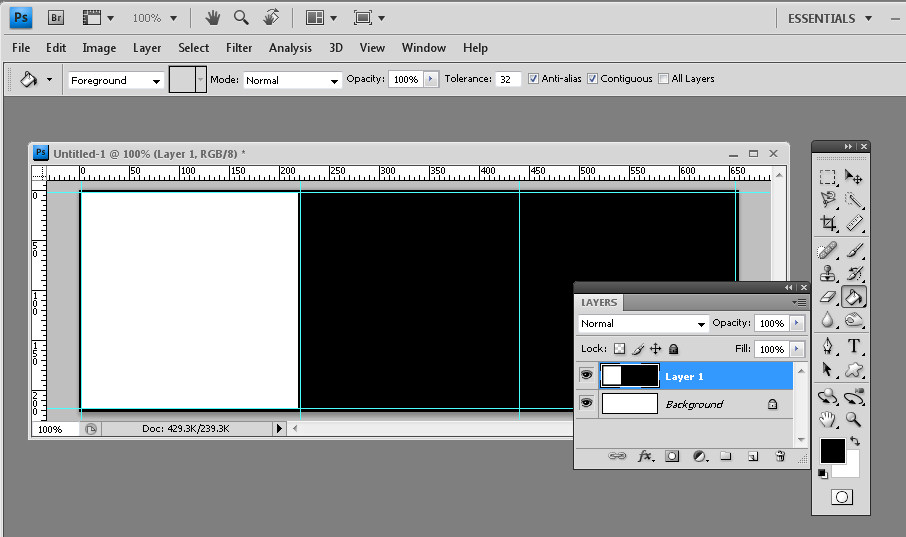
Step 5
Add a new layer by choosing Layer > New > Layer and click Ok.
Click the Rectangular Marquee tool and from the tool options area select Fixed Size and set the Width to 216 pixels and the Height to 216 pixels.
Click on the image where the two guides intersect in the top left corner of the image. The selection will snap to these guides.
Make sure that white is selected as your foreground color and press Alt + Backspace on the PC (Option + Delete on the Mac) to fill the selection with white.
Switch to black as your foreground color, press Ctrl + D (Command + D on the Mac) to deselect the selection and, with the Paint Bucket tool, click somewhere in the layer not where you added the white, to fill the remainder of the layer with black.
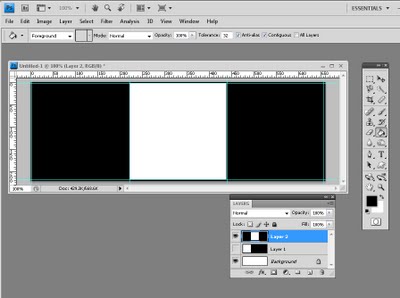
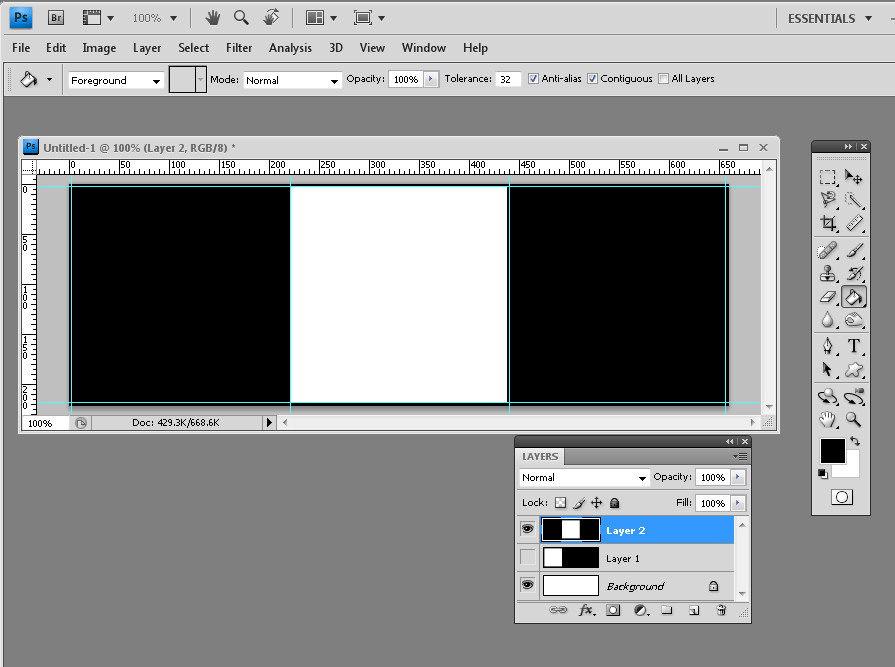
Step 6
Add a new layer to the document by choosing Layer > New > Layer. Hide the previous layer if desired.
Select the Rectangular Marquee tool and click at the intersection of the second vertical guide and the top guide. Your selection should appear in the middle of the image. Fill this with white. Deselect the selection and then fill the surrounds of that layer with black.
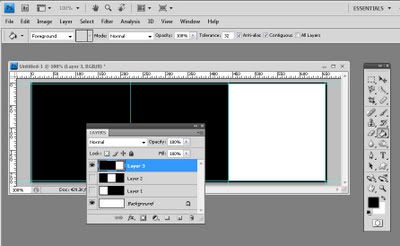
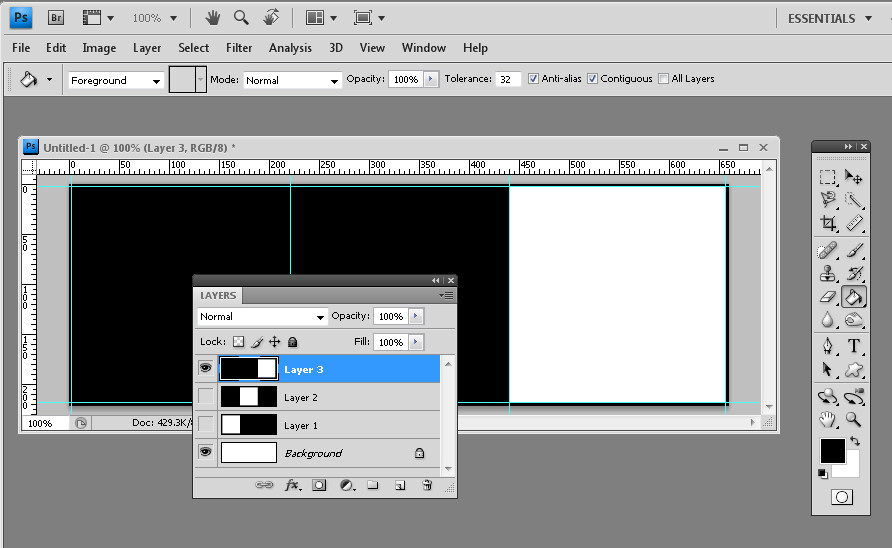
Step 7
Repeat once more, this time clicking at the intersection of the third vertical guide and the first horizontal guide.
Again, fill the selection with white and then fill the remaining portion of the layer with black.
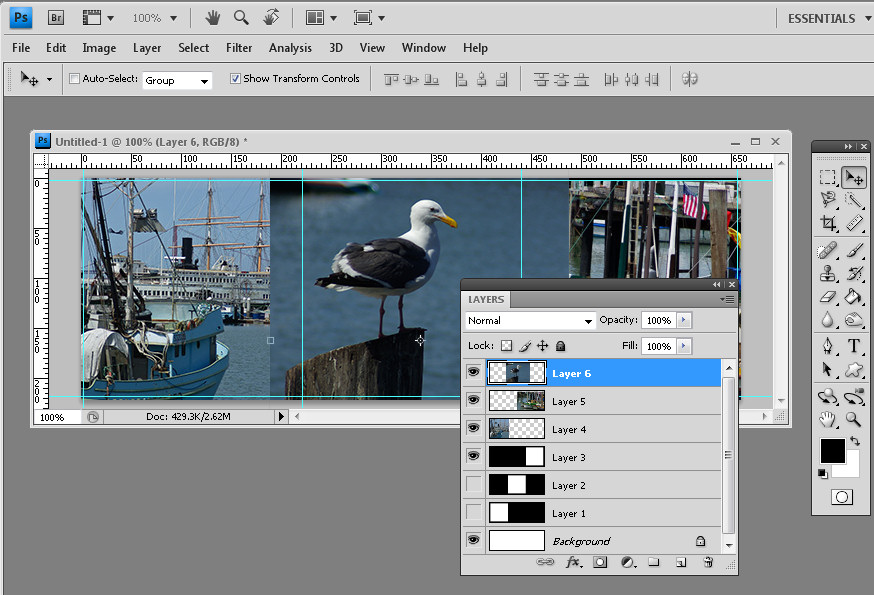
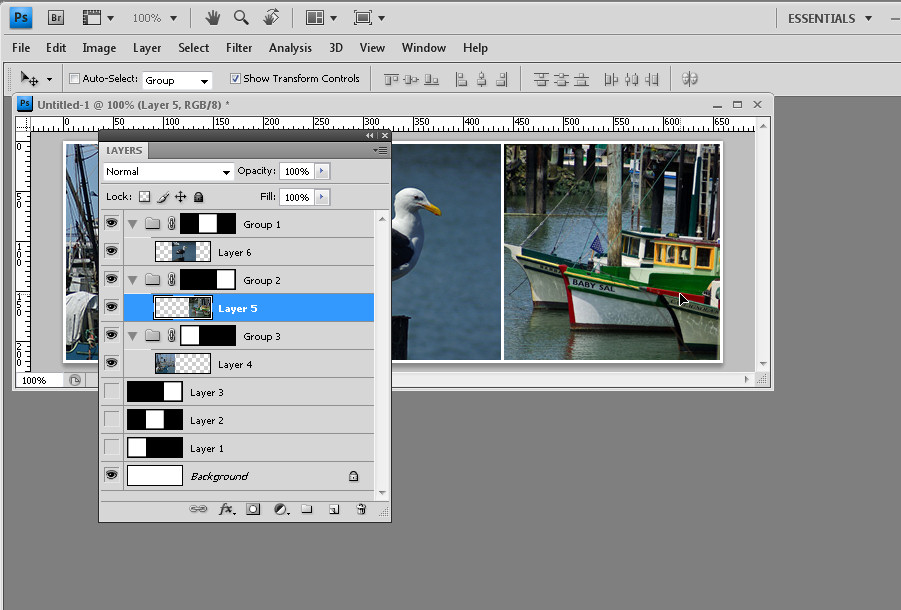
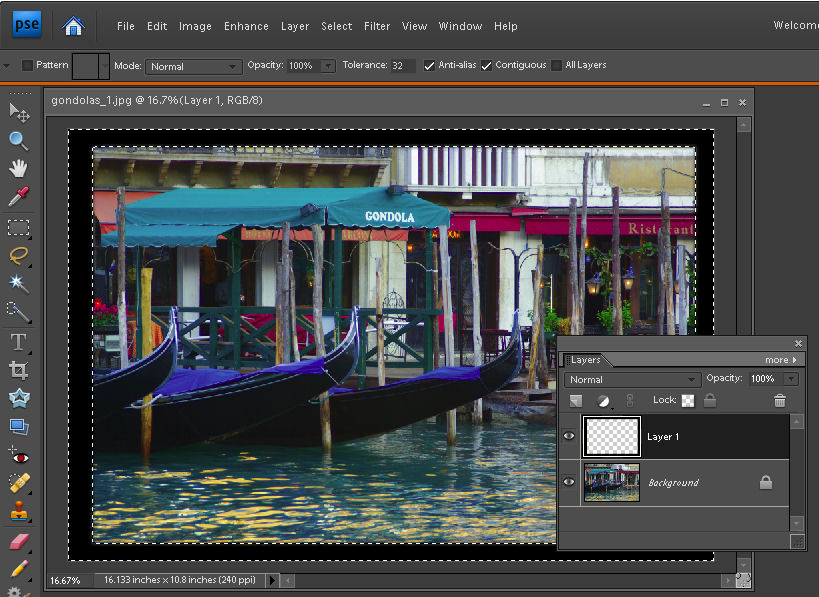
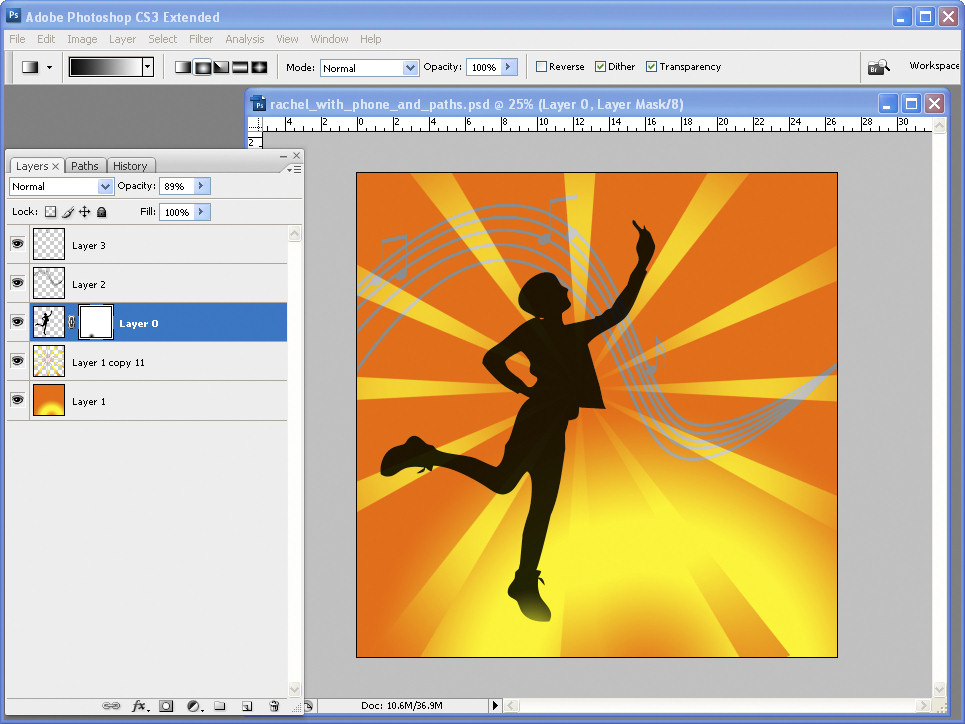
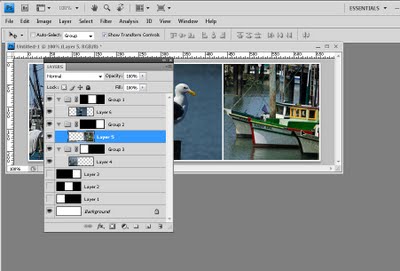
Your layers palette should look as this one does.
Step 8
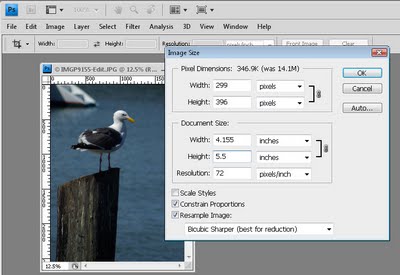
Now open the images to use. You should size these to a minimum of 3″ by 3″ but the project will work just as well if they are a little bigger.
In fact, you may want to make your images bigger than this so that you can see how the masking process will ensure that your images do not have to cropped to the exact size for this design to work.
For example, to size an image to around 3.5 x 5 inches at 72 dpi, open the image, choose Image > Image Size. Enable the Constrain Proportions and Resample Image checkboxes and select Bicubic Sharper as the mode for resampling the image. Enter 72 pixels per inch as the resolution and type either the width or height to use such as 5″ – Photoshop will automatically calculate the other measurement. Click Ok to resize the image.
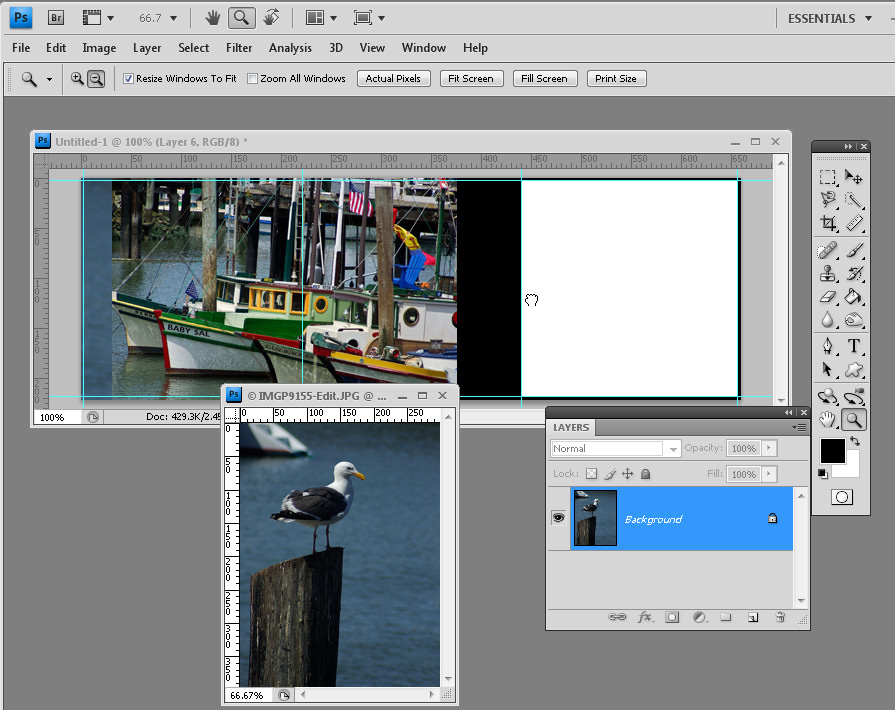
Step 9
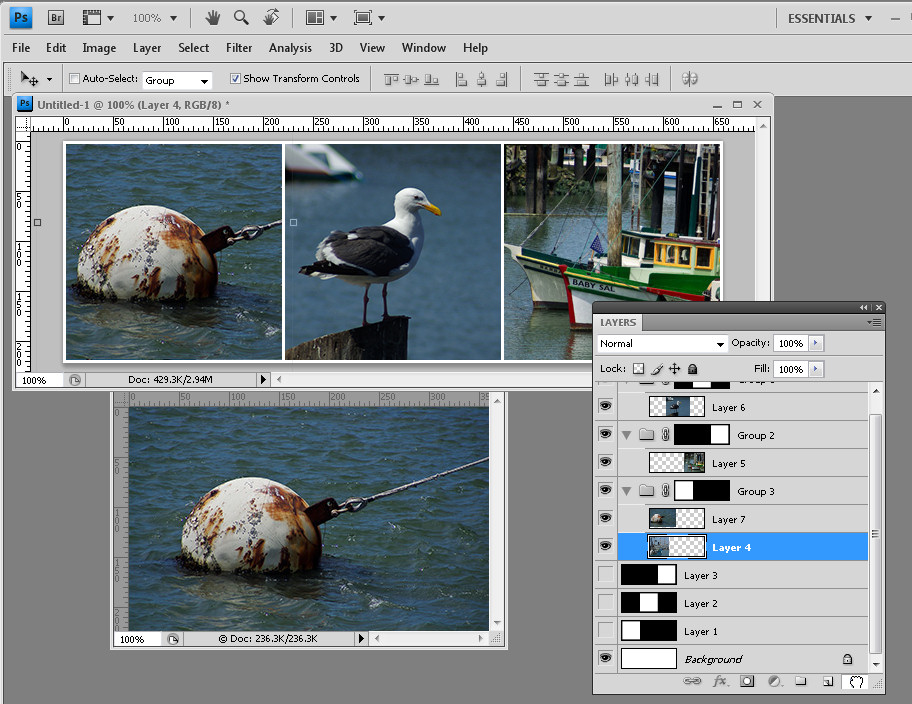
Open the first of the resized images and drag its background layer into the composite image that you’re working on.
Repeat for the other two images. It doesn’t matter what the document looks like at this stage.
Step 10
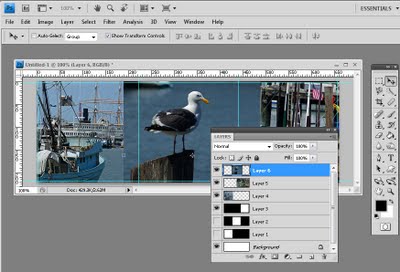
Select one of the layers that has an image on it and use the Move tool to drag it roughly into position where you want it to appear in the final presentation.
Do this for the second layer and for the third.
Ignore for the moment that some of the images are overlapped and extend over the borders.
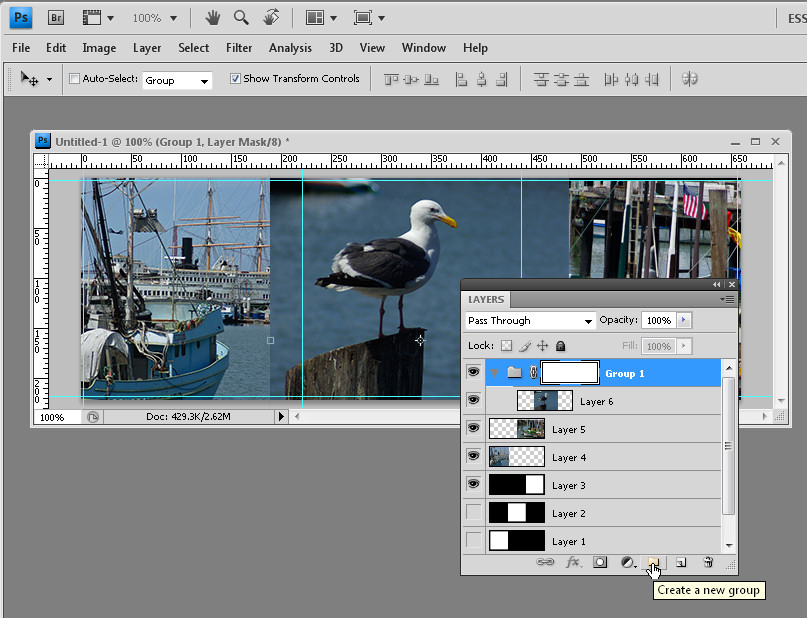
Step 11
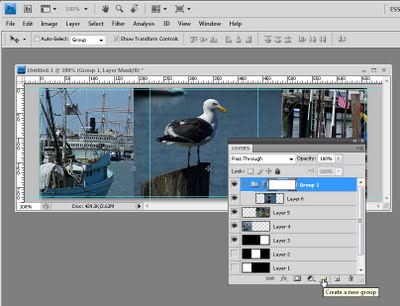
Select the first of the image layers and click the Create a New Group button at the foot of the layers palette. Drag and drop the image layer onto the new group so that it is inset underneath it. Click the group layer name and click the Add Layer Mask button at the foot of the layers palette.
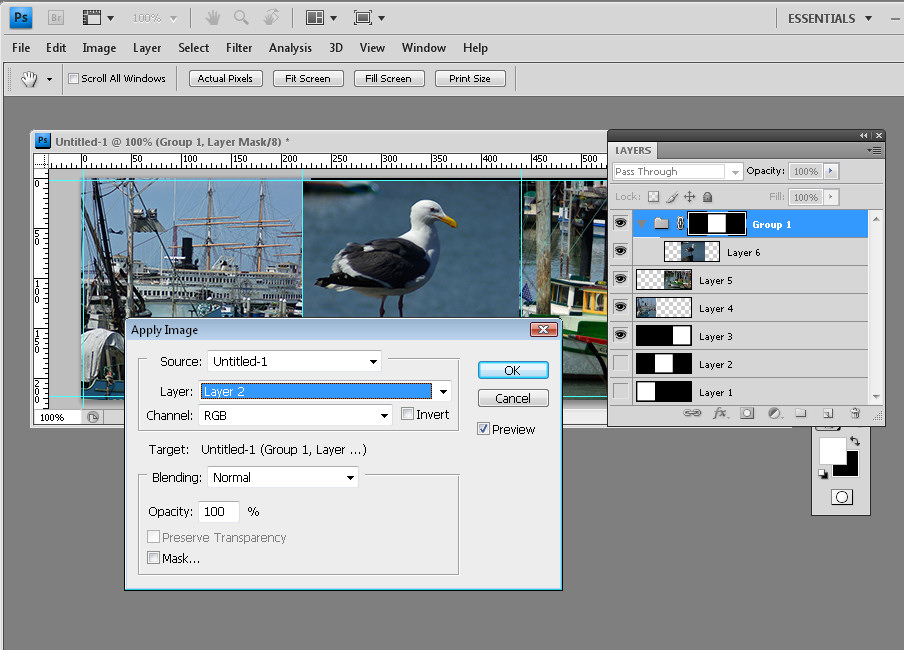
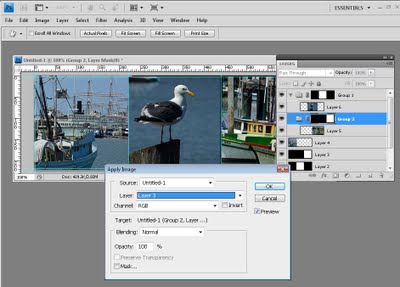
Step 12
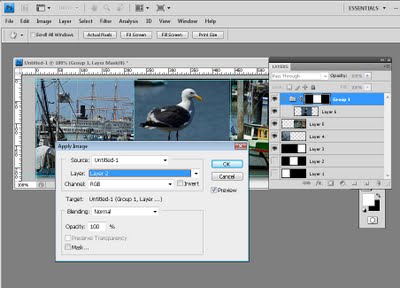
Click on the layer mask thumbnail so that it is selected.
Choose Image > Apply Image and from the layer dropdown list, select the layer in the layers palette that has the white square where this image should be in the design. Click Ok.
This applies a layer mask to this layer masking it to that small square size.
Step 13
Select the second image to work with and click the Create a New Group icon at the bottom of the layers palette.
Drag and drop the image layer onto the new group so that it is inset underneath it. Click the group layer name and click the Add Layer Mask button at the foot of the layers palette.
Click on the layer mask thumbnail so that it is selected.
Choose Image > Apply Image and from the layer dropdown list, select the layer in the layers palette that has the white square where this image should be in the design. Click Ok.
This applies a layer mask to this layer masking it to that small square size.

Step 14
Select the final image to work with and click the Create a New Group icon at the bottom of the layers palette.
Drag and drop the image layer onto the new group so that it is inset underneath it. Click the group layer name and click the Add Layer Mask button at the foot of the layers palette.
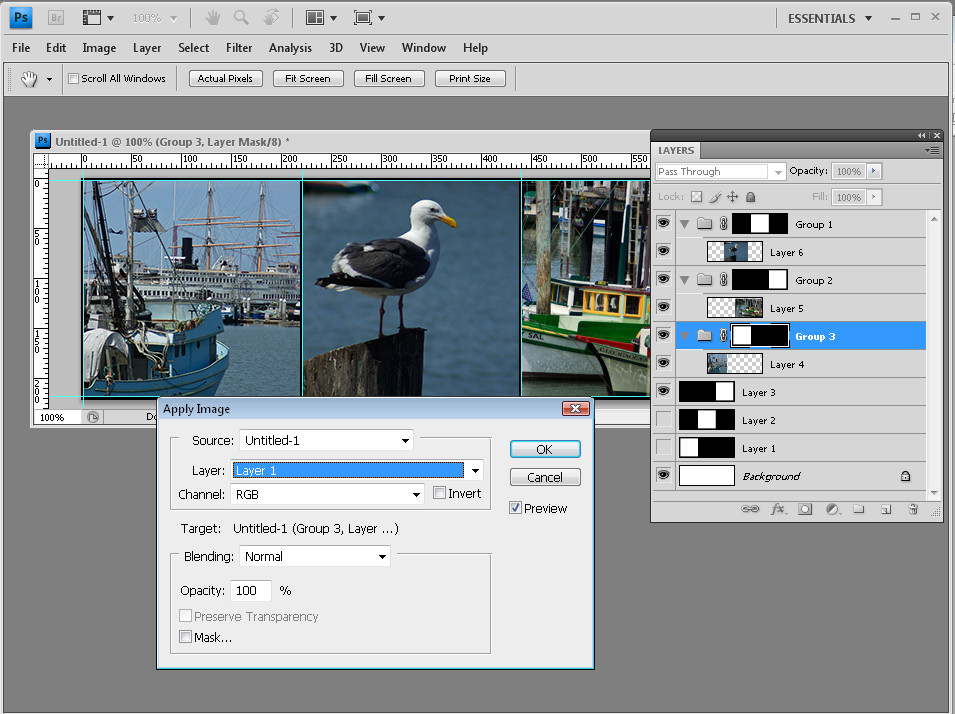
Click on the layer mask thumbnail so that it is selected.
Choose Image > Apply Image and from the layer dropdown list, select the layer in the layers palette that has the white square where this image should be in the design. Click Ok.
This applies a layer mask to this layer masking it to that small square size.

Step 15
You can now disable or delete the three layers which contain the black and white designs as they are only used to create the masks.
You can also remove the gridlines by choosing View > Clear Guides.
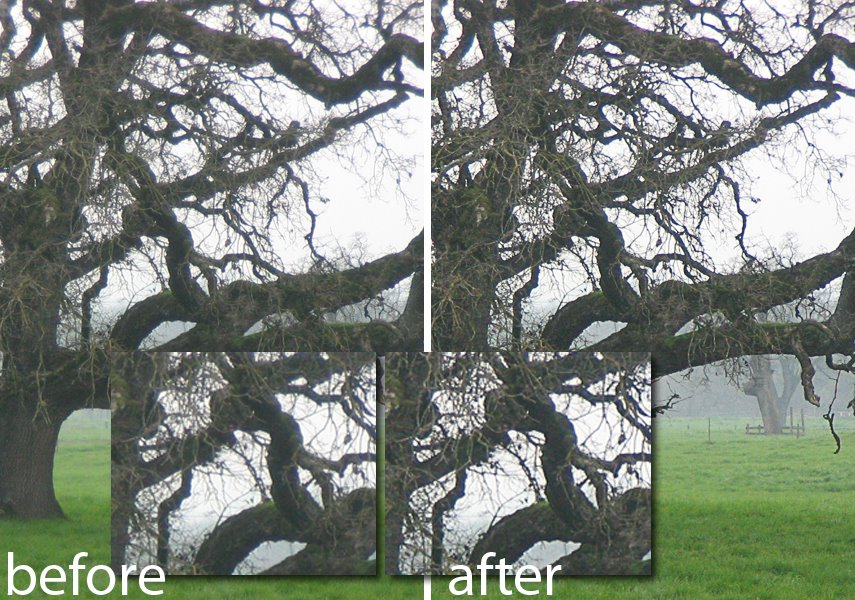
This is your final design.
Step 16
Any of the images in the design can be adjusted by clicking on the image layer, click the Move tool and then drag the image around inside that layer.
Provided the image is larger than 3″ x 3″ you can move it so the piece of the image you want to feature appears in the desired position. The mask ensure the image does not extend over the borders.

Step 17
You can also replace the images – this is how you will use the template in future.
For example, open another image to use and resize it as you did the earlier images.
Drag and drop the image into your file as a new layer. Drag the layer into the group for the position it will appear in the design and remove the image that currently occupies that position. As you can see, all you need do is to position and resize your images; none of the rest of the layout needs to be recreated.
Once you understand the basics of creating this design you can mark out and create a display image that will hold 2 x 2 images and even 2 x 3 or other varieties of sizes.
To make it simple for you, here are two PSD file downloads for the 2 x 2 and the 3 x 3 design that you can use yourselves:
2x2layout.psd
3x3layout.psd
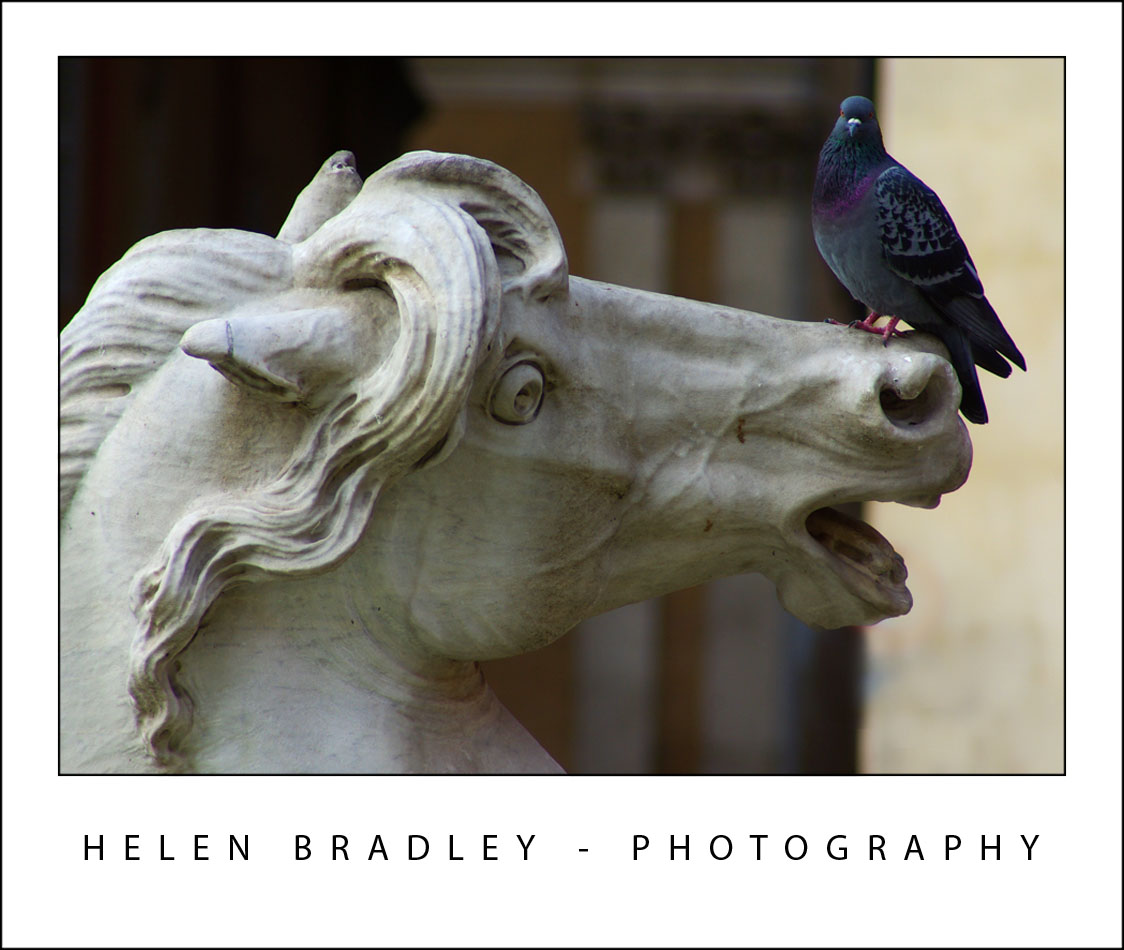
Helen Bradley


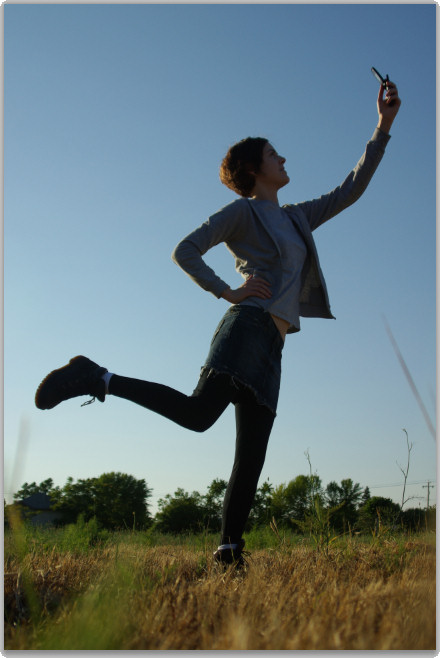
 Do your travel photographs look just like everyone else’s?