Wednesday, March 21st, 2012

Shoot right at night – Tip #8 – Closed shops

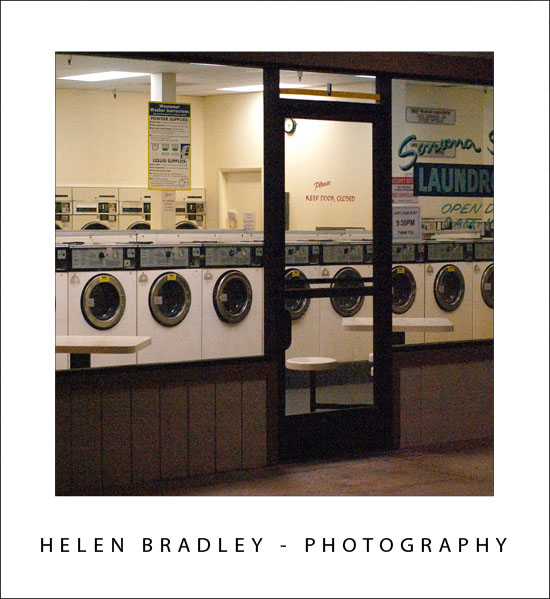
After dark you will find many shops completely blacked out but those which are lit or partially lit offer unique opportunities to photograph empty places.

Without people around to question what you are doing you can spend the time you need to do to find great subjects to capture. Look for different colours of light and repeated objects – here the local laundromat provides a moody subject which is only enhanced by the grain from the high ISO setting used.

Helen Bradley

Friday, March 16th, 2012

Shoot right at night – Tip #7 – Night activity

In busy cities and even in country towns you will find that the activity at night differs from that during the day.

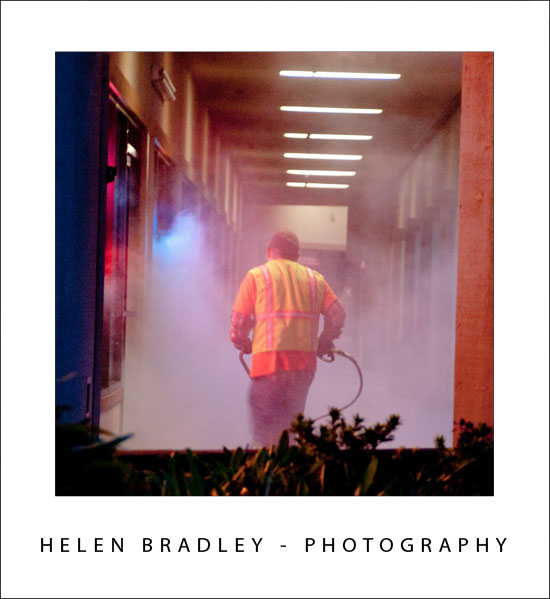
Tankers deliver fuel, people clean areas that aren’t cleaned during the day and they are all great subjects to shoot.

Take the time to search out unusual activities to capture them. Here a cleaner was throwing up a cloud of steam and water and, captured in the night lights of the shops it made for an interesting shot.


Helen Bradley

Thursday, March 15th, 2012

Content aware resizing in Gimp

In a previous post, I looked at content aware resizing in Photoshop CS4 http://projectwoman.com/2009/09/smart-scaling-with-content-aware-scale.html which is the same as in CS5. I also mentioned the online application called Rsizr http://www.rsizr.com. Today I’m going to show you a plug-in for Gimp that does pretty much the same thing.

The tool is called Liquid Rescale which you can download from here: http://liquidrescale.wikidot.com/. Close Gimp, install the application and then reopen Gimp and you will see the application on the Layer menu.
This plug-in is an alternative to the crop tool. You use it to reduce an image’s size but, where the crop tool removes the data from one or more sides of an image, content aware resizing removes it from the middle of the image. This gives you basically the same looking image but smaller in one dimension. You might use this, for example, to remove some empty area from the middle of an image where the more interesting parts of the image are to either side of it.

The same tool can scale an image up to make it larger in one direction – and this time it will create extra data in the image to fill the space. You might use this, for example, where you have a rectangular image that you want to make into a square image without losing any detail.

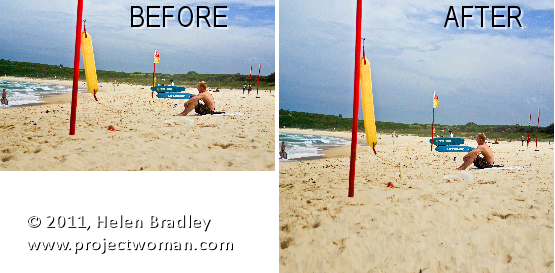
To see how this can be done, I’ll take this beach image and size it down from 3571 pixels wide to 3000.
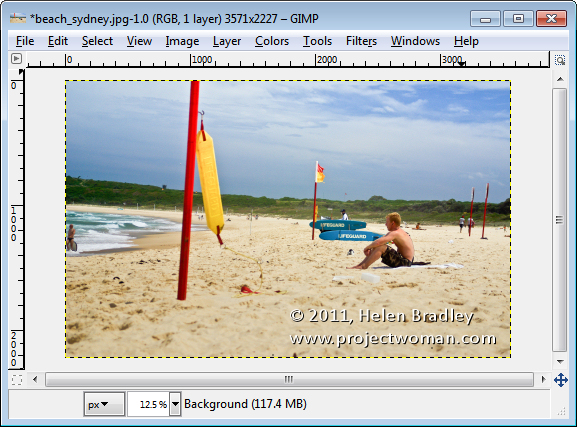
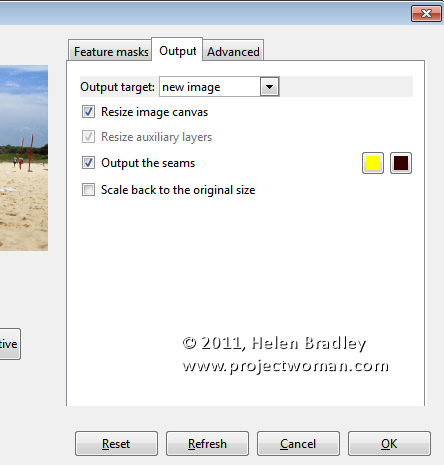
Open the image in Gimp and choose Layer > Liquid rescale. When the dialog appears, click the Output tab and set Output Target to a New Image. Enable the Resize image canvas checkbox and click Ok.
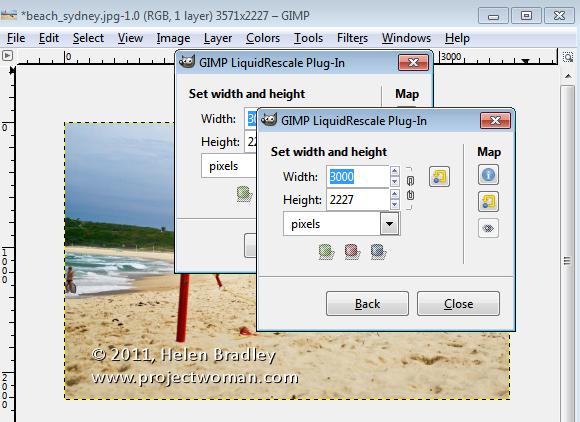
Set the new image width – I set this to 3000 but made sure that the link icon was disabled as I don’t want the height altered. Click Interactive and wait as the image is resized.
The program resizes the image by removing unimportant details from it and keeping what it understands to be the important bits. This is the result:
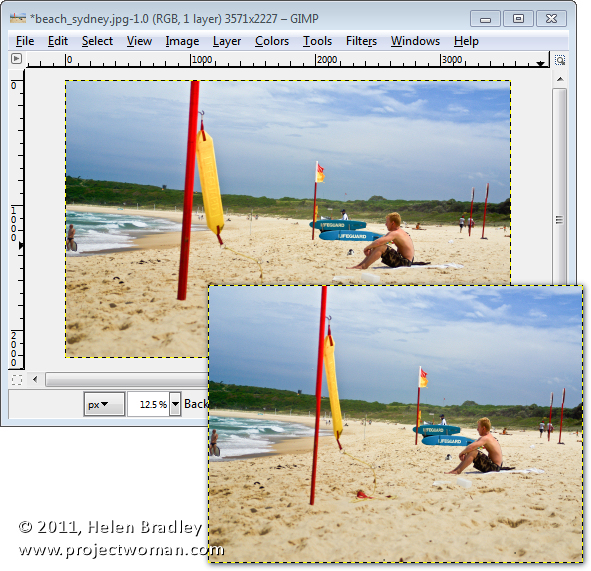
If you find that some elements in the image are squeezed or damaged by the process, you can create a mask to prevent this from happening.

To do this, click the original image again and choose Layer > Liquid rescale and set up the Output tab options.

Click Feature Masks and, to create a protective mask, click the Feature Preservation Mask option and click New. The paint color will be set to green so select a brush, enlarge it to an appropriate size and paint over anything on the image that you do not want to change as the image is resized.
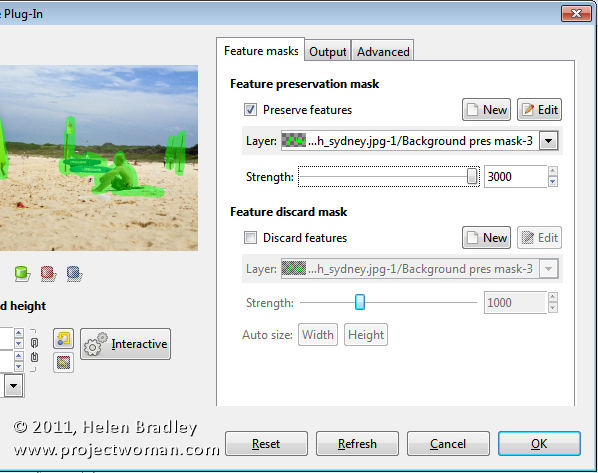
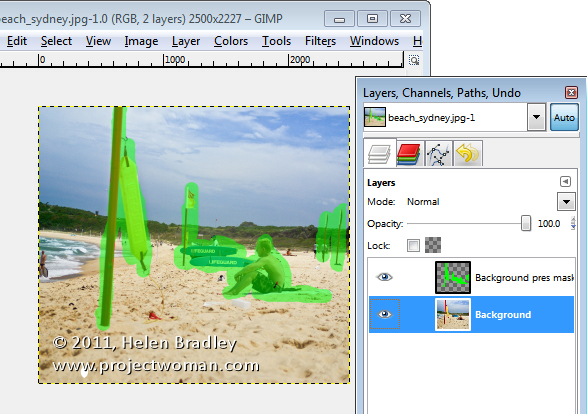
In my case, that is the swimmer at the front of the image and the lifeguard and boards at the back. I’ve added some other bits I don’t want skewed out of alignment like the vertical poles too. Anything else can be adjusted except these elements. When you’re done, click Ok.

Type the size for the new image and click Interactive and wait as the image is resized. Here I chose for the image to be reduced from 3571 to 2500 pixels wide, and the surfer, boards and flags have all reduced well. The protected areas have not been touched.
The plug-in also has a tool that you can use to remove elements from the photo. In my image let’s take out the large pole in the foreground. In this case you use a Feature Discard Mask – and paint in red over the area that you want removed from the image. Adjust the strength to the highest value, set the width value by clicking Auto size: Width so that the image is scaled to the appropriate width for the item you are removing and click Interactive.
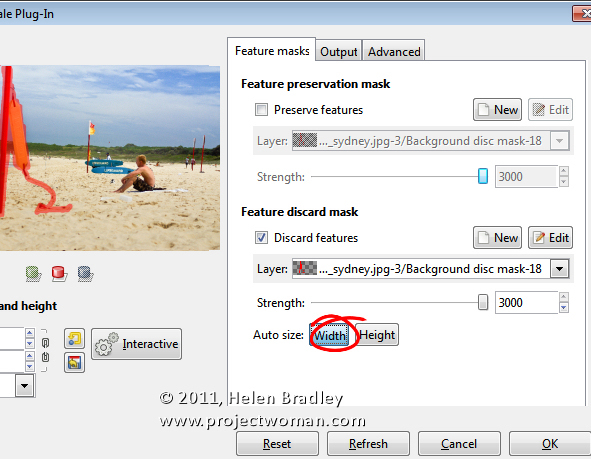
In this case, the flag has gone but we’ve got a bit of a repair job to do with the rest of the image to fix it up. It would require some work with the clone tool to fix up the image but Liquid rescale has got us some part of the way towards where we are headed.
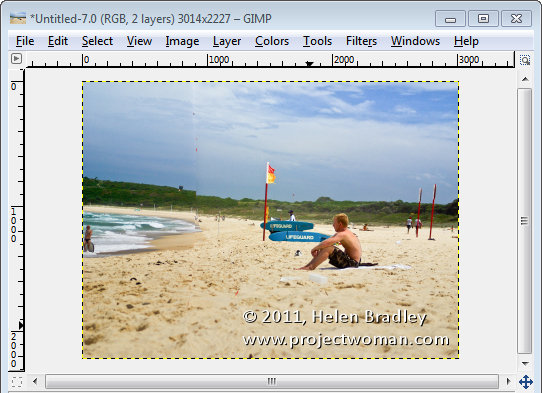
You can also use the plug-in to enlarge an image. In this case, we’ve enlarged the image to create a square image.
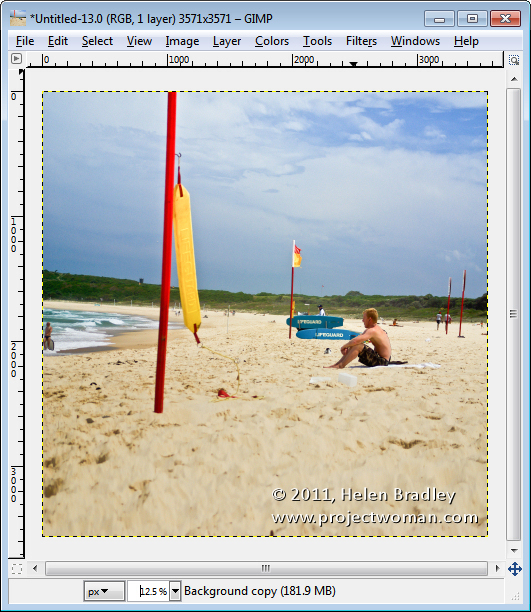
The rescaling process isn’t perfect but generally you’ll get a good enough result that with a small amount of cloning afterwards using the clone tool you’ll be able to produce a realistic result.

Helen Bradley

Tuesday, March 13th, 2012

Shoot right at night – Tip #6 – Early Morning Sun

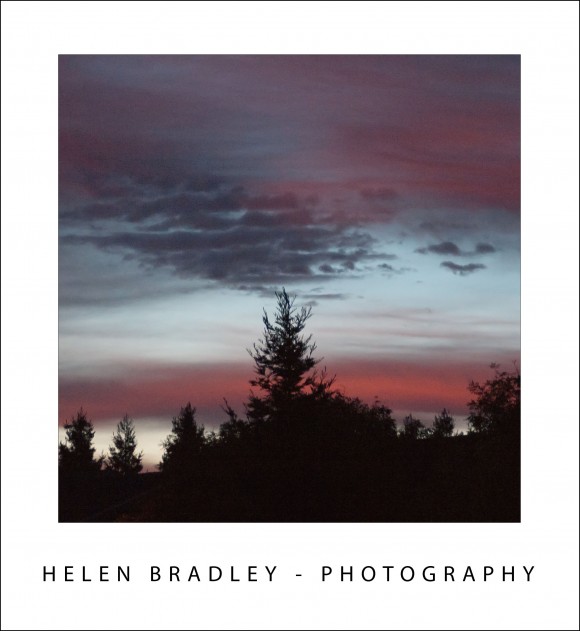
If you’re shooting after sundown or if you are up early in the morning before the sun is up look for drop dead gorgeous skies.

If you can capture the last rays of a dying sun or the first rays in the early morning you’ll get great color and wonderful silhouetting of anything between you and what light there is. Look for interesting trees, buildings and other features to capture as silhouettes.

Use a slow shutter speed, wide aperture or a high ISO (or all three) and be ready to capture the hues as they change from minute to minute across the horizon.

Helen Bradley
Monday, March 12th, 2012

Deleting catalog backup files

I’ve been talking to a few people lately about deleting catalog backup files. If you backup and optimize your catalog every time you close Lightroom then, over time, you will end up with a lot of excess catalog backups.

Each of these backups will consume disk space so the question becomes – what is in these backups? What use are they? And can they be deleted safely?

Backup your catalog

When you set Lightroom to make a backup of the catalog what it does is to make a backup of just the catalog and not your images, or your previews, or the sidecar xmp files for your raw files, or your presets. While having a catalog backup is undoubtedly a useful thing, it is incomplete so you will need to have a system backup system in place to backup what Lightroom does not.

In fact, because Lightroom’s backup is only a catalog backup, some people don’t do a backup this way and instead rely on their regular system backup to take care of backing up everything – catalog included. I prefer to at least have Lightroom do a regular catalog backup but that’s my personal preference.

Which backups to keep?

Because the catalog backup files are all stored in different folders by date they will build up over time and keeping them all is not a necessity.

You can be selective about which ones you keep – you should, at least, keep the most recent backups because if your catalog is corrupt you will want to be able to recover using these. If the most recent backup has issues then you would progress backwards until you get one which isn’t corrupt.

So, if I use Lightroom every day, I would keep the backups from this week and then one from last week and one from last month and beyond that I could feel pretty safe about deleting the others.

Delete a catalog backup

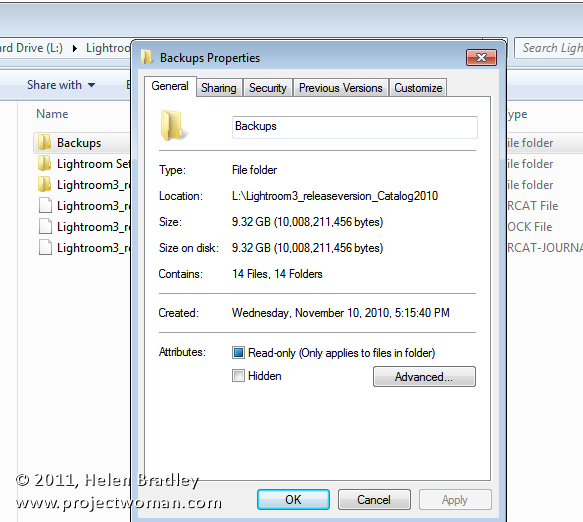
To delete a backup, locate the backup folder and identify the backup folders to delete and go ahead and delete them.

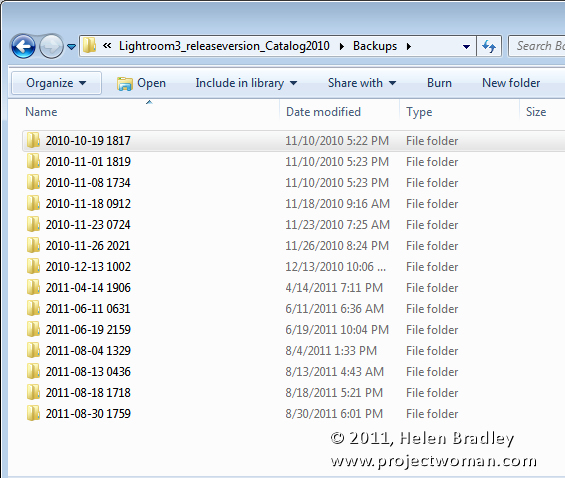
You will find your catalog backups, if you didn’t change the default location for them, in a folder called Backups inside your Lightroom catalog folder.

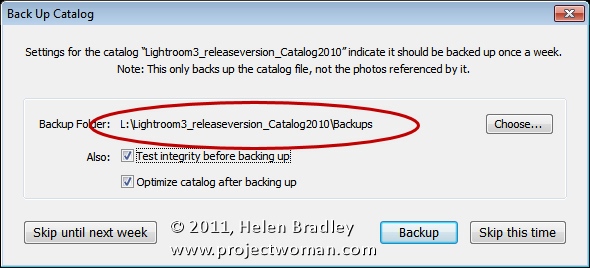
If you changed its location you can find the location you selected when you’re next prompted to backup Lightroom – the location is reported in the dialog prompting you to backup. Here too you can change that location if desired.

One issue with the Lightroom catalog backups is that the location, by default, is inside the folder that contains the Lightroom catalog. So, if the disk containing the catalog becomes corrupt you could lose your Catalog backups too. You may prefer to backup to a different disk to protect against this likelihood.

Every one of us will have different preferences for how we backup, where we backup to, the frequency of backup and what we backup. It’s over to you now – do you use the Lightroom Catalog backup tool? If you do, do you store your backups in the default location? Do you delete excess backups regularly?

Helen Bradley
Saturday, March 10th, 2012

Pixel Bender Droste Filter video tutorial

I work for Practical Photoshop mag in the UK which is a totally cool job. One of the projects I did recently is creating a spiral image using the Droste filter for the Pixel Bender extension for Photoshop CS4 & CS5 – try saying that quickly 5 times!

The guys at the mag – Ben and James have added my video tutorial to the magazine’s YouTube channel. Here is the video in all its glory and I highly recommend you subscribe to the channel there are some terrific tutorials there (if I say so myself!):

Helen Bradley
Wednesday, March 7th, 2012

Shoot right at night – Tip #5 – Capture movement

When you’re capturing shots with a slow shutter speed of a half a second or more, look out for things that are moving in an interesting way to capture them.

The tail lights of cars moving away from you look great when they are caught as parallel strips of red light.

You can get a similar effect with cars and other traffic which moves perpendicular to you – in this case you will catch both the light from headlights and tail lights as they move across your path.


Helen Bradley

Monday, March 5th, 2012

Templates in Photoshop

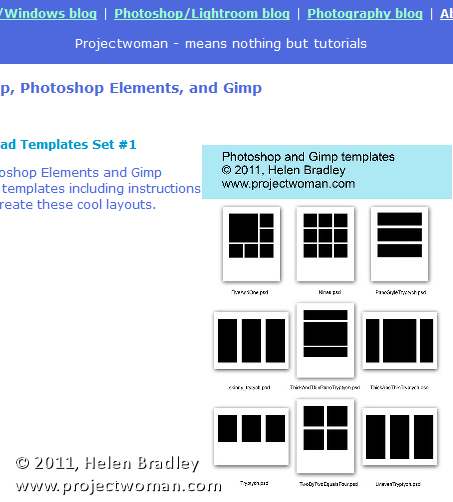
A short while ago I wrote an article on using templates to create a collage or montage of images in Gimp. Sometime after, the templates that I suggested you  could use were taken down from the original website.

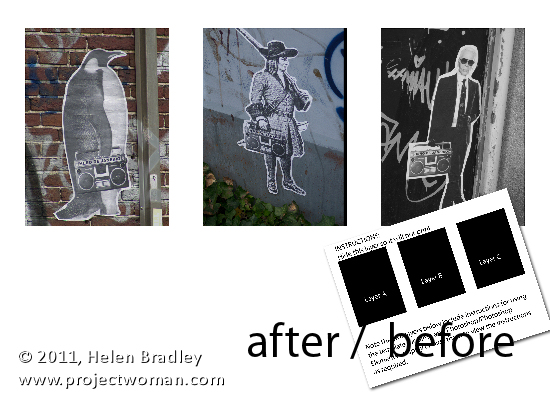
To help out our Gimp readers, I created a new set of templates and as I was making them, it seemed like a good idea to include instructions for Photoshop and Photoshop Elements as well as for Gimp. Here, therefore is how to use a downloadable template to create a montage of images:

Start by visiting this site and download the template zip file: http://projectwoman.com/articles/45PhotoshopTemplates.html

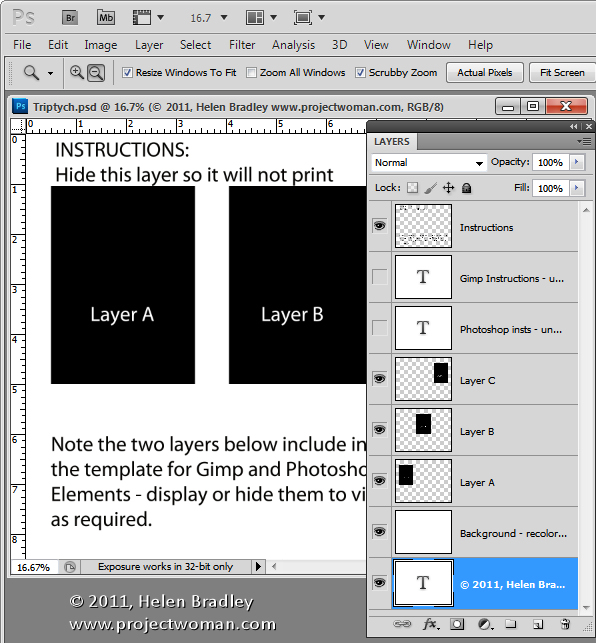
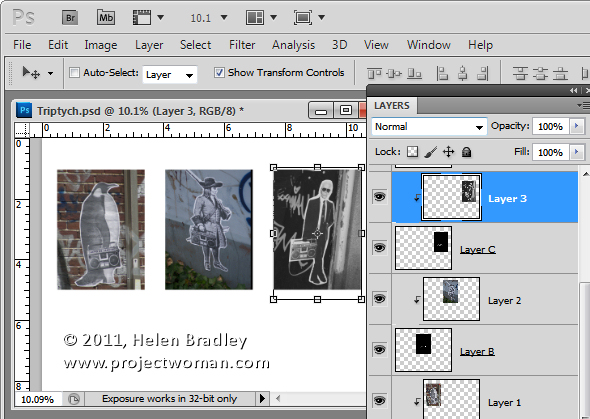
Then unzip the templates, save them where you can find them when you need to use them and open one of them. I’ve used the template triptych.psd.

When you open it, you’ll find that there are a series of layers. The top layer can be disabled or deleted at this point. The next two layers are instructions for Gimp and Photoshop users. Again, you can discard these two layers.

Open up the three images that you plan to use for this triptych. Images that are in portrait orientation will look best but you can use anything that you like – just be aware that you’re going to take a portrait orientation slice of the image.

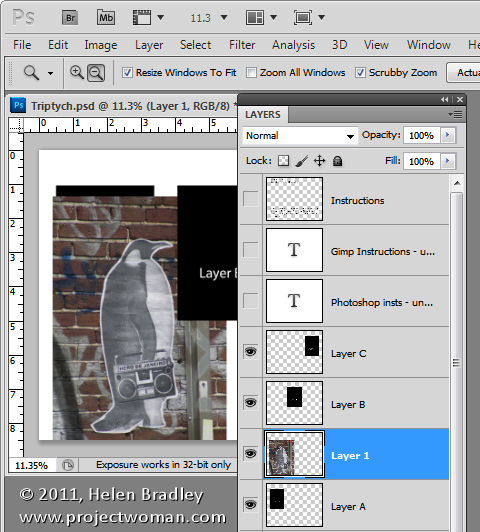
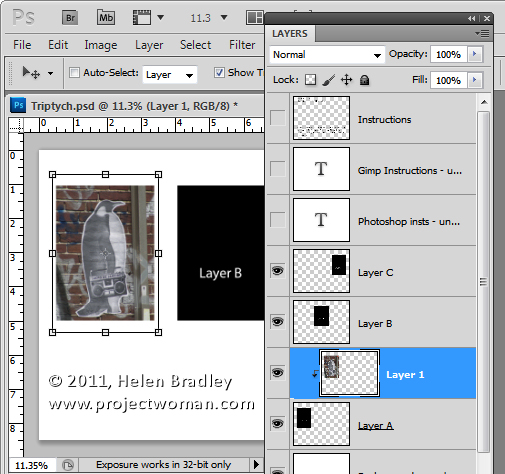
In the template, click on Layer A and then click on the first of your images and drag and drop the background layer from the first of your images into the main image.

Click on the Move tool and size and position the image so that the interesting portion of it is over the black background. Click to accept this size and positioning and then with the new layer still selected, choose Layer > Create Clipping Mask. You’ll see that your layer is clipped to the size of the underlying shape.

You can fine-tune the placement and sizing by moving the contents of the new layer.

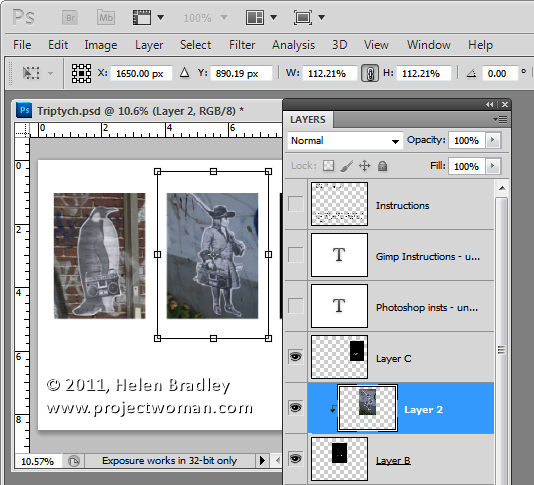
Now click on Layer B and again drag and drop the background layer from the second image into this template. Again, position the interesting portion of the image over the underlying background, sizing the image if desired. Create the clipping mask for that layer by selecting the image and choose Layer > Create Clipping Mask.

Repeat this for Layer C using your third image.

When you’re done, you can adjust the background of the image if desired by recoloring the layer marked background recolor if desired. You can now save and print the image or upload it to the web.

This same process can be used in Photoshop Elements.

Helen Bradley
Friday, March 2nd, 2012

Shoot right at night – Tip #4 – Capture silhouettes

At night, if you’re using what light there is, you need capitalize on it. One option is to look for silhouettes where you capture a subject in front of a light source.

In this image shot in New York after dark on a wet night I used the lights of the oncoming traffic to backlight this woman as she walked down the road trying to hail a cab.

Because she was moving fast I was walking behind her at a similar pace so there was no chance to stop or use a slow speed so this image had the ISO set high to capture what light I had.

Helen Bradley

Wednesday, February 29th, 2012

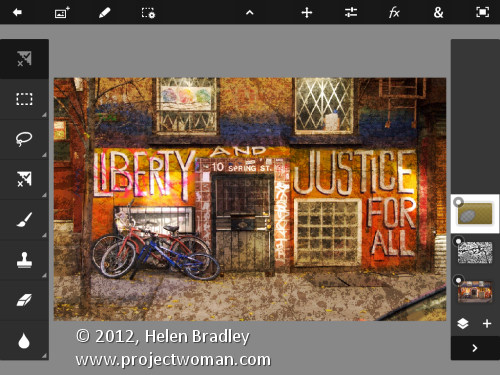
Adobe Launches Photoshop Touch for the iPad

It has been a long time coming – way too long – but Adobe finally launched Photoshop Touch for the iPad.

I have reviewed it here for PC World and I wrote a how to for creatively editing images with it for Digital-Photography-School.com.

The app costs $9.99 so it isn’t cheap by iPad app standards but I think it is worth it. Downsides are non editable text, 1600 x 1600 px file size limit, no true editable masking tools and no adjustment layers. But it does have good layer tools (unlike Adobe Ideas you don’t have to shell out 99c for each new layer!), blend modes and it is easy to use.

Helen Bradley