Friday, April 12th, 2013

Talk to the Animals – Photograph at the Zoo – Part 2

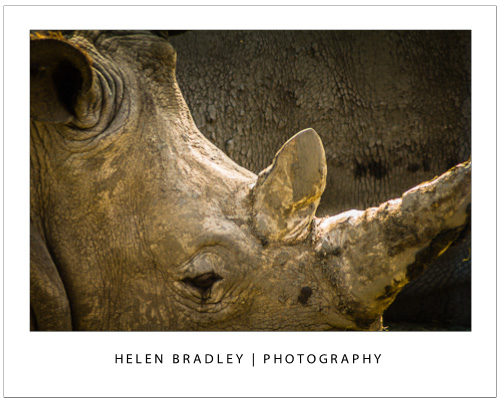
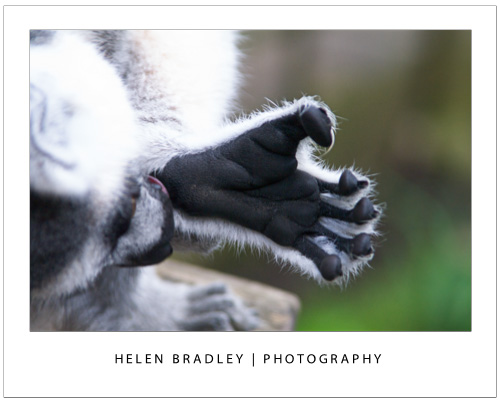
Photographing at the zoo offers unique opportunities for getting great animal photos

Zoos are a great place to polish your photography skills and to get photos of animals and birds you may never see otherwise.

However, just because the animals are caged doesn’t mean they are easy to photograph so there is plenty to think about and work around.

The plus is that your perseverance will be rewarded and you can get some truly great photos if you know how. Here are some tips for a successful day photographing at the zoo.

Camera settings

To get in close to the animals, use the longest zoom lens you can handle. The downside of a zooming in close with a big zoom lens is that any movement will be exaggerated so you will need to hold the camera steady to capture the shot in focus.

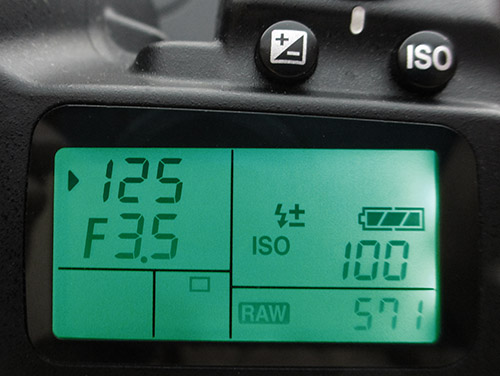
Using a large aperture like such as f3.8, f4.0 or f4.5 will let more light into the camera so the exposure time can be reduced to help you get sharper images. Also consider increasing the ISO to get a faster shutter speed.

A side benefit of using a large aperture on the lens is that you will get a shallower depth of field around the subject and the background and foreground will be blurred. When you’re shooting at the zoo this is an advantage as it minimizes the impact of cages and man made objects.

Just ensure that the camera focuses accurately on the animal you are photographing because of this short depth of field is a double edge sword – if you’re not focused tight on the subject it will be out of focus.

Shooting in low light

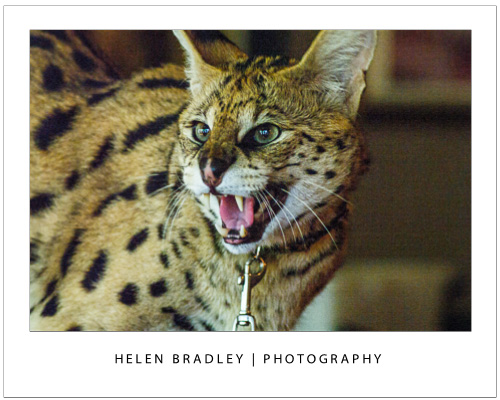
Some displays at the zoo are indoors and to shoot in these low light conditions start by adjusting your camera’s ISO equivalency to a high value such as 800, 1,600 or 3,200.

At these settings the camera is more sensitive to light so you can capture your image without using a flash. Not only is the use of a flash typically not permitted in indoor displays, it is also unlikely to give you good results because, instead of lighting the scene it is more likely to bounce back at the camera or wash out the scene.

Take care to adjust for what lighting there is in indoor displays. Very often the lights throw an orange or green cast over the image.

Adjust the white balance setting on the camera to negate the cast and you won’t have to clean up your photographs later on.

What to capture


When you’re planning what to shoot, look for opportunities such as capturing an animal when it is looking directly at you.

To do this, you will need to be in a good position relative to the animal and you will need to be patient – and lucky.

Another option is to capture the animal where you can see its eyes and when it is doing something interesting like eating or yawning. Again, take your time, be ready with your camera positioned and be patient.

In some circumstances you may find yourself forced to shoot through glass or perspex. Walk around the area to find a good place where there are minimal reflections and where dirt on the window won’t be distracting.

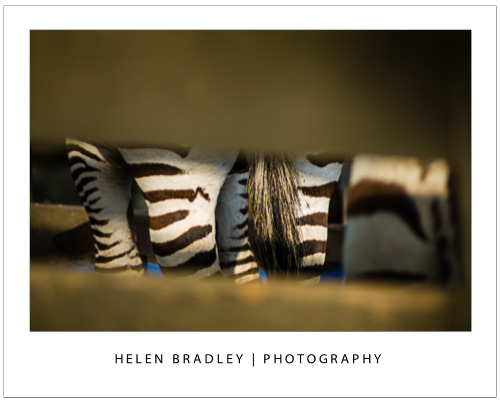
If you’re forced to shoot an animal through a fence, get close to the fence so you can shoot through gaps in it or make the fence an interesting feature.

Even if you’re forced to crop parts of the animal away to get a clear shot you can still end up with a worthwhile image.

Of course, always photograph from a safe distance – some animals are belligerent and dangerous and up close to a fence won’t be safe if they are the other side of it.

If you have the luxury of spending time with animals that are active and in a good position for you to capture them, spend the time you have wisely.

Take your time

Instead of taking a couple of good shots and moving away from the animal, wait around to see what creative opportunities arise that might give you a great shot.

By waiting, you may find the animals interact with each other, playing or fighting or that they arrange themselves in interesting patterns that turn a good photograph into a great one.

When you’re next looking for an opportunity to hone your photography skills it may be time for a visit to your local zoo to take advantage of the wealth of photographic opportunities offered there.

Helen Bradley

Wednesday, March 13th, 2013

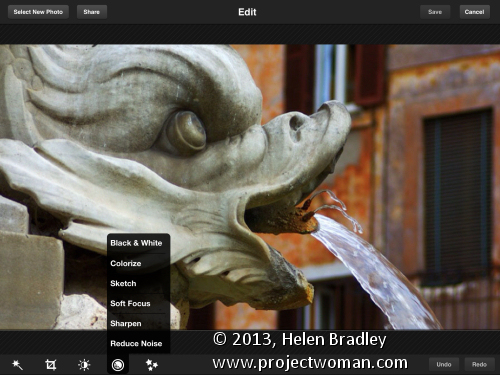
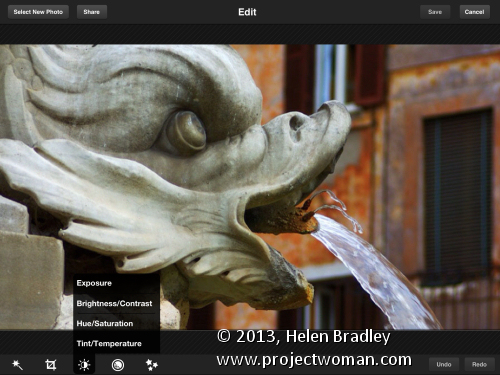
Updated review – Photoshop Express for the iPad

I’ve been revisiting some of the apps I’ve previously reviewed to see what changes have been made to them recently and how they have developed. One of these apps is Adobe Photoshop Express for the iPad. This app is free but it does have some in app purchases – one of which – the Camera pack that includes Noise removal – you can safely ignore. I think it is expensive and not worth the $4.99 that Adobe charges for it. However, ymmv.

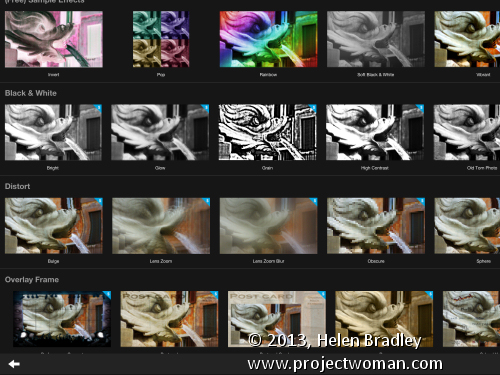
The free Effects in Photoshop Express are pretty limited and there are just nine of them so unless you buy the add on Effect Pack ($2.99) you won’t have a lot of creative options. That said, the Effect Pack has a lot of fun effects in it. You could get access to similar effects for free in other apps, but if you want everything in one place you might consider this pack worth shelling out for. There is also a Border pack for 99¢.

Like many free apps the add on borders and effects are shown in the app so you can see them but not use them unless you buy them. You can’t hide them either so this might be a bit off putting – personally I’d rather not see what I don’t own, but that’s my take on it.

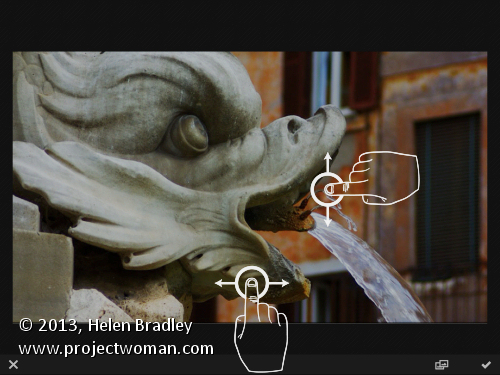
One change to the app that I like is the on screen prompts showing you how to use the app. This was a huge complaint that I had initially with the app as it had no indication as to how you made your adjustments. I thought at the time that this made it very hard for inexperienced users to use the app as it wasn’t clear how to do so. In a free tool aimed at beginner users I thought this was inexcusable.

Now the first time you choose an option like Brightness and Contrast an overlay appears showing you how to adjust these options. It’s much less confusing and a whole lot easier to work with. So much so that I’d wholeheartedly recommend this app for beginner to intermediate users.

In Photoshop Express you can edit images from your Camera Roll or capture images using the app. What you cannot do is upload images to Adobe Revel – the new online replacement for photoshop.com (and which was previously called Adobe Carousel – have I confused you yet?). You can also not download images from Adobe Revel to edit them in the app. Since Adobe owns all these sites and apps it would be nice if all its apps and storage locations talked to each other instead of operating in isolation.

Other changes I noticed is that the feature for adding effects and borders has been revamped allowing you to see the full range of effects and borders in one large screen already in place on a small version of your images. Those that are not enabled have a blue mark on the corner and there is a shopping cart link in the bottom right of the screen that you can use to buy add on packs, if desired.

So far as sharing is concerned, Photoshop Express is light on options when compared with some other apps. You can share to Facebook, Twitter, Tumblr and email images but that is all. You can also save images to your Camera Roll.

In all, the changes to Adobe Photoshop Express are welcome and make the app a lot more usable for its target audience. I now actually like this app and would heartily recommend it particularly for beginner to intermediate users looking for a simple and easy to use photo fixing tool.

Helen Bradley

Friday, February 15th, 2013

Setup and Wait – the secret of great shots

Often the secret to a great shot is to stop and wait

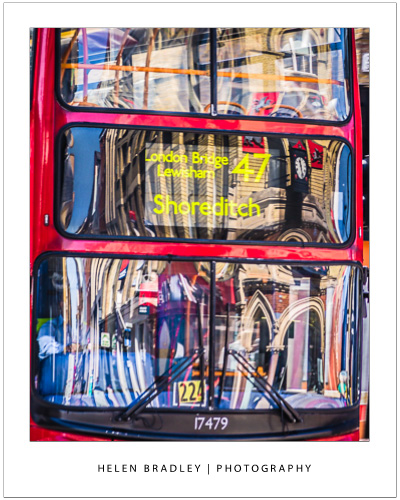
I shot this image in London recently. I had stopped at a busy street corner waiting for the lights to change and I saw a double decker bus go past and I caught the reflection in the front window. It was bright and colorful – but before I could do anything the bus motored past.

I had a choice, keep walking or stop and wait. I waited. I stood on that street corner waiting for the next double decker bus to come past in a position where the reflection hit the window nicely and without any distracting vehicles between the bus and me. I also wanted a clean bus so the window would reflect well.

It took a while and I shot quite a few buses until I got this shot. It’s a lucky shot in part because I saw the possibilities, the rest of the shot is pure patience – waiting long enough for the situation to occur again.

Do you stop and wait for things to happen or do you just keep moving on?

Helen Bradley

Monday, February 11th, 2013

Are you lucky or do you make your luck? Brick Lane street art

Are you lucky or do you make your luck – photographing street art in Brick Lane, London

I have been going back over some images I shot in Brick Lane area in London recently. Brick Lane if you don’t know it is probably one of the best known areas in London for graffiti and street art and I spent an entire day there and didn’t cover all of it by any means. It is a fantastic area of London as it quite ethnically diverse with graffiti artists existing alongside members of the local  Bangladeshi-Sylheti community.

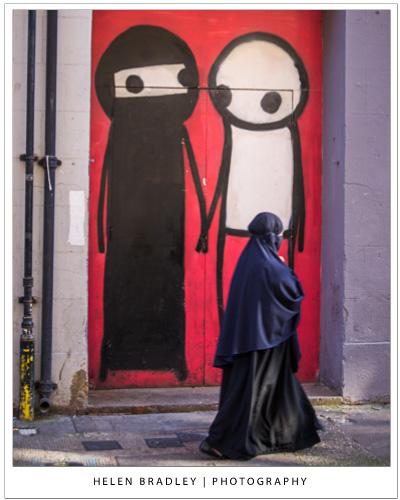
The art here is amazing and very diverse. It varies from stencil and sticker art to full size painted images. I met one of the local artists Stik when I was there. Someone knew him and saw me photographing his work and introduced me which was amazing. I also managed, later in the day, to get the image below of one of Stik’s pieces of work.
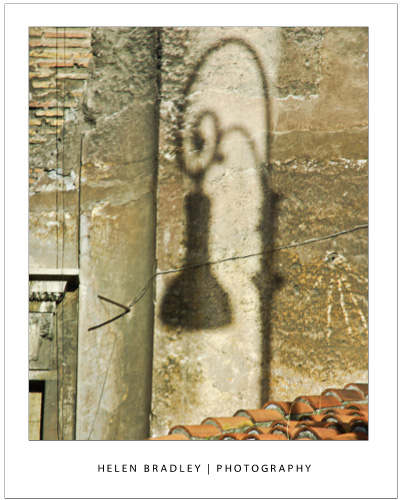
This is where I ponder the luck or make your luck question. This image has an element of the unusual  – there weren’t many women around the street and few in traditional clothing so that was unusual and that she walked past this particular piece of art the moment I was standing there – well that was very serendipitous. But lucky? I’m not sure. I think to an extent as photographers we make our luck when we open our eyes.

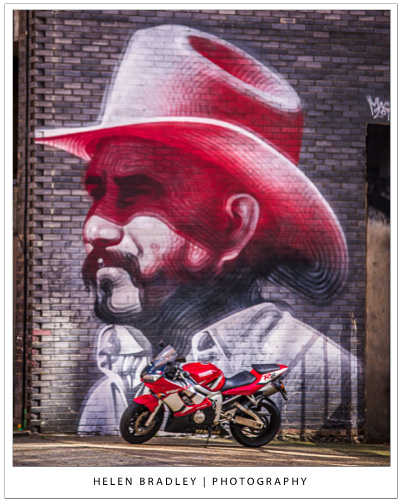
You see – cool stuff is all around but you have to see it and you have to be there with a camera in hand and that isn’t lucky – that’s work. You carry a camera through days of taking ho hum shots and getting rained on and seeing nothing that works for you and then occasionally you are rewarded with a result you’ve earned through . I think this image was, in many ways, earned. So too was the one above. I saw the art and then the bike and then I had my picture.


Helen Bradley

Saturday, December 29th, 2012

Photography tip of the day – Hand holding a lens

This simple calculation shows how slow you can shoot and still hand hold your lens

There are some simple calculations you can make to determine the optimal length of time you can hand hold a lens for.

This is important information to know because managing a 70-200mm lens at 70mm is very different to managing it at 200mm. Increasing the zoom reduces the length of time you can handhold the lens because any movement in the lens will be exaggerated at full zoom.

The rule of thumb for calculating the length of time to handhold a lens is to take the inverse of the focal length. So, with a 70-200mm lens at full zoom the calculation gives you a handhold time of 1/200 sec, at 70mm  it is 1/70 sec.

For a 70-300mm lens at full zoom, your limit is around 1/300 sec.

You can improve these times with Image Stabilization or anti shake features if they are built into your lens or camera but these values give you a rough guide to help you avoid capturing blurry photos.

Helen Bradley

Saturday, December 22nd, 2012

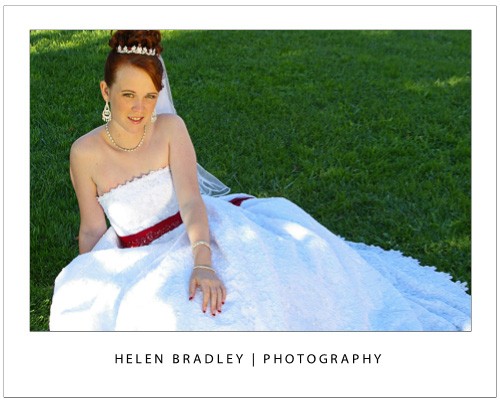
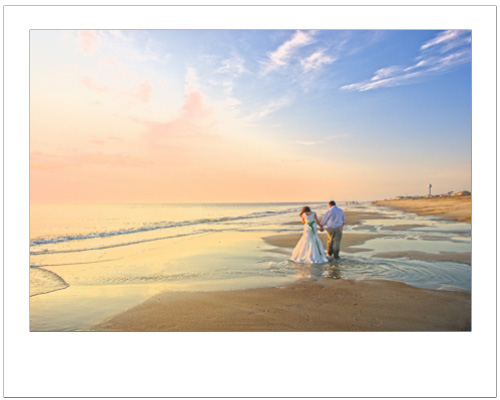
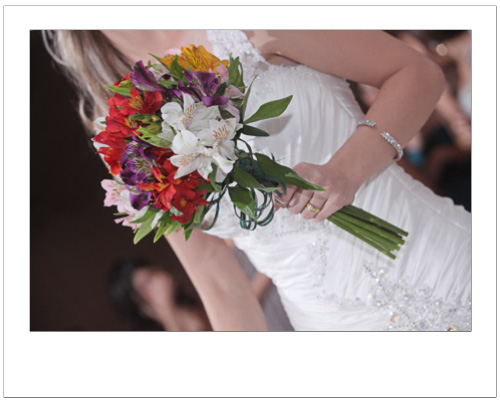
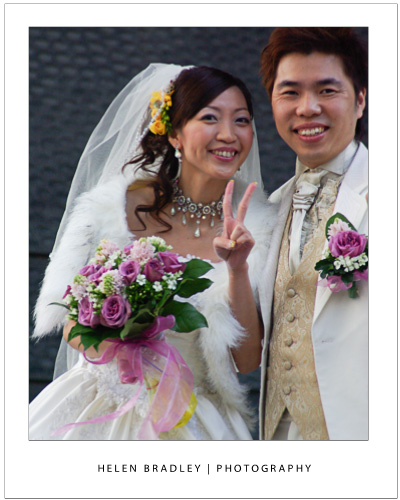
Wedding Photography – How to

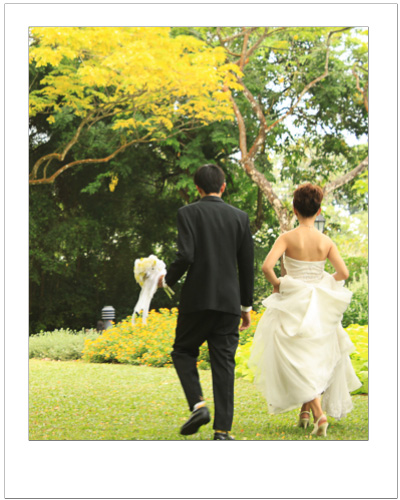
 photo credit: arki www.sxc.hu

Here’s what to do when a friend asks you to photograph their wedding.

If you’re even a passable photographer, chances are that one day, someone will ask you to photograph their wedding. Before you take the plunge, here are some things to think about when shooting a big event like a wedding.

The demands of wedding photography

Photographing a wedding is different to just about any other photography you’ll do. You only get one chance at it and you run the risk of severely disappointing everyone if you don’t pull it off.

Wedding photography is a job that professional photographers charge a lot of money to do and, for good reason. So, it’s not a task you should take on lightly – if you really don’t feel up to the task say no rather than doing a bad job of it.

However, that said, it can be a rewarding experience if you get it right. And the key to getting it right is preparing well and having a well thought out and practiced plan.

Scoping the job

Talk to the bride and groom well before the wedding. Ask how many photographers there will be, if there are a few, determine who will be responsible for what so you aren’t tripping over each other on the day and missing out on key shots because you thought someone else was taking them.

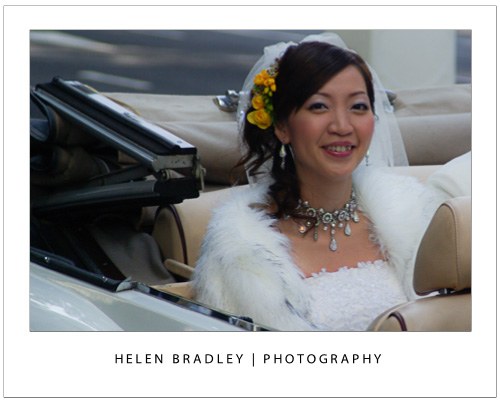
photo credit: Mike Clarke
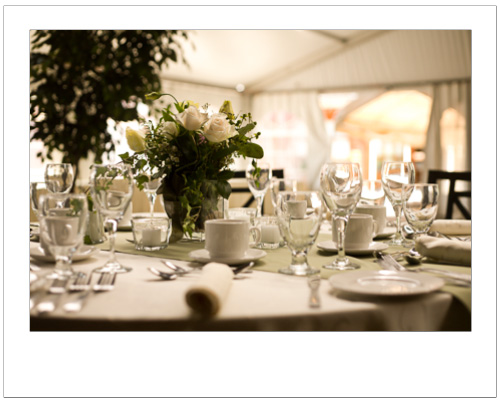
Wedding photography involves photographing everything from reception guests to decorated tables.

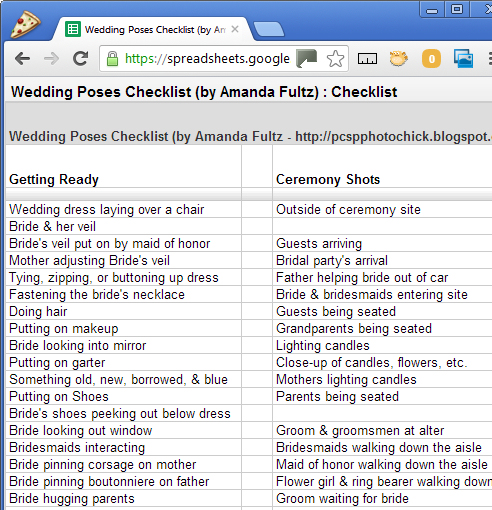
Make a list of the photographs that the couple want taken. Have a detailed checklist printed up with the images they want you to capture. If you order this in the approximate order of the ceremony and reception it will be easier to make sure you get everything you need.

There are some good web sites that have information on wedding photo lists including this one: http://spreadsheets.google.com/pub?key=ppuF_0dv6H8zTjdPjs4D4MQ

Enlist the help of a skilled assistant. You need someone to help you organise group pictures and run around getting batteries and holding things for you. Your assistant can also double check to make sure you don’t miss any photos on your list.

Before the wedding visit the locations that will be used such as the church and the venue for the reception. Check these at around the same time of the day as the wedding will take place so you can get an idea as to what lighting will be available.

Finding a location in the shade saves the effort of having to diffuse the sunlight when it is very bright.

If possible, place your assistant where the bride and groom will stand and shoot some sample images to check the lighting and your camera settings.

Photo credit: theswedish www.sxc.hu

Also check locations inside the church and the reception venue where you can take photos, particularly places with clean or interesting backgrounds. If you can’t find clean backgrounds to work with, plan to use a wide aperture lens so the background won’t be in focus.

If you’re not able to use a flash such as in a church, you will need to use a fast lens and you will need to know how to use it before the day. If you don’t have a lens, consider borrowing or renting one but test it thoroughly before the big day.

You need to be very familiar with how it performs and how to configure it for best results. However, that said, avoid changing lenses too often as you risk getting dust into the camera which can ruin your photos or cause you a lot of work cleaning them up.

Photo credit: www.sxc.hu

Checklist of kit

Make a checklist of the kit that you will need. This includes cameras, batteries, memory cards, tripod, computer, diffusers and so on. If you will be shooting out of doors a diffuser will help to control bright light and your assistant can hold it for you.

If you’re shooting indoors you’ll need an off-camera flash if not a special lighting rig. Make sure that both you and your assistant know how to use every piece of equipment. A second camera body is essential as a backup if something happens to your main camera.

photo credit: Alexey Ivanov

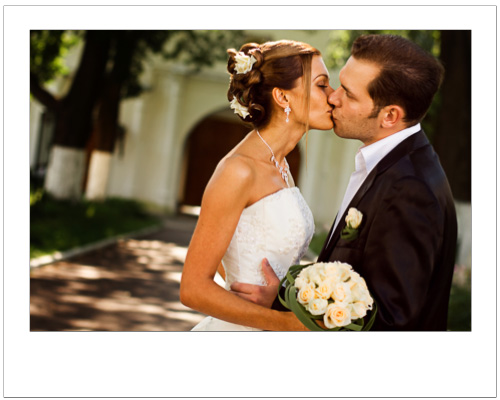
A large aperture lens throws the background into soft focus minimising its impact.

Photographers are never late!

Arrive in plenty of time to set up before the wedding. In many cases you will be expected to photograph the bride as she and her attendants get ready and leave her house.

You may also be asked to photograph the groom and his groomsmen before the ceremony. Make sure you have scouted an appropriate location and you have sufficient time to do everything required of you.

If you’re the sole photographer, don’t expect to see any of the ceremony or to enjoy the reception – you’ll be working pretty much full time capturing images. Carry plenty of bottled water if it is a hot day and some energy bars too.

At the reception, move around the guests capturing a good range of photographs both candid and posed images as well as small detail images such as those of the table settings and the cake and so on.

Check your camera settings regularly throughout the day and every time you change locations. Check the camera’s white balance setting, check the image size and compression and exposure compensation and ISO to make sure nothing has altered.

If possible, shoot RAW and process the images into JPEGs later on. Take lots of photos – it’s too late at the end of the day to realise you should have shot more ‘film’. Count on taking anywhere between 500-1000 photos so you have plenty of images to choose from. Avoid setting any fancy in camera settings and shoot in colour knowing you can always convert to black and white later on.

Post Processing

After the wedding download all the photos to your computer and, if possible, don’t delete them from the camera cards until you have them checked and backed up. If you are giving the photos to the bride so she can print her own album, you should still perform some basic image editing tasks.

Check each image and only give the bride the best of them culling the bad ones. If the images need lightening or contrast enhancement, do this. Rotate the photos so they are so all in the correct rotation, and crop away any obvious problems.

Burn the images to a DVD and make a backup copy of these disks too. Do this before removing the images from your PC or from the original memory cards, if possible just to be safe.

If you’re well prepared and focused on the task at hand you have a good chance of doing a good job.

Helen Bradley

Friday, December 14th, 2012

Summer (down under) Travel Photography Checklist

Travel to the beach and cooler climates with a camera requires planning and forethought.

It used to be that travelling with a camera was as simple as tossing it into your bag and driving via the camera store for a few rolls of film on your way to the airport. Not any more. While you won’t need film when travelling with a digital camera the entire process is more complex than it used to be and good preparation is the key to having everything available when you need it.

Charge up

The first thing you’ll need is plenty of batteries and a charger. Digital cameras consume batteries at an alarming rate and buying disposable batteries is false economy. Instead, invest in a charger and rechargeable batteries. Depending on how much photography you plan to do, I recommend three sets of batteries – one in the camera, a spare in your bag and one set back at the hotel charging.

If your camera takes regular size AAA batteries by all means use disposable batteries in an emergency but they’re not a long term solution. Make sure your charger has the right plug and voltage rating for where you’re headed – for example, while the USA uses two or three prong 110 volt plugs, the plugs and voltages in Europe and the rest of the world all differ.

Read the Manual

While I don’t recommend a camera manual for light reading, it’s worth taking if you have room. On holidays you often have free time you don’t have at home and it’s a good time to read up on what your camera can do and to experiment with camera settings to take some interesting and varied shots.

Filters and Lenses

If you have specialist filters like a polarizing filter, take that with you – the filter reduces glare and will give you vivid blue skies and is a must for summer shooting.

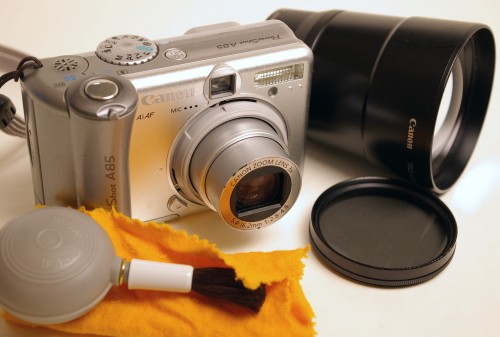
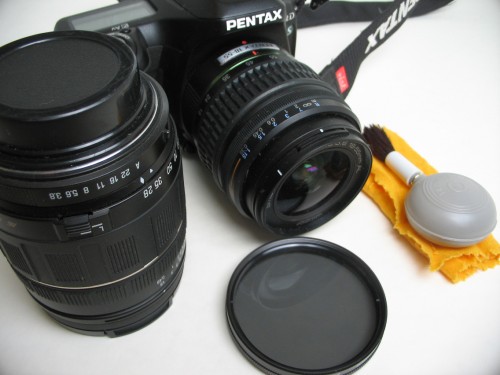
Pack a special lens cleaning cloth to clean your camera’s lens if it gets dust or sand on it. Never use your beach towel or tee shirt – these can scratch the lens and keep your lens cloth in a sealed bag to keep it clean. A small brush also works to dust off the lens.

Storage Cards

Depending on how many photos you think you will shoot and how long you are travelling for you may need a two or more storage cards on which to store your photos. I generally pack 5-8 cards of various sizes which will see me through a couple of days photographing. Your camera will show you how many photos will fit on your card – when you turn it on this number will be displayed.

Use this as a guide to determine if you’ll need more space. If you carry multiple cards, make sure you have the containers for them – they are easily damaged if you don’t take care of them.

Lug the Laptop

I find that for a long weekend, multiple cards are easier to carry than a laptop computer to download photos onto but as soon as I travel for more than a week, a computer is a necessity. In addition, with a computer, I can burn photos to a DVD or onto a second drive so I have a backup.

Remember that your computer will require a charger as well and you’ll need the cable to connect your camera to your computer. If you find yourself short on space on your camera card, check the photos you’ve taken and delete any that aren’t worth keeping.

Carry cases

Take a carry case or camera bag for your camera and store it in the bag when it’s not in use. Always make sure your camera has its wrist strap attached and hold it carefully so you don’t lose or drop it.

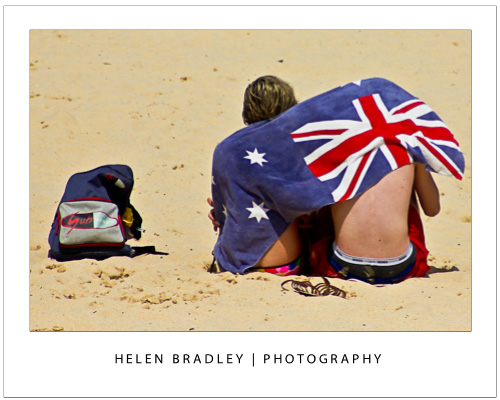
If you’ll spend time on the beach a zip lock plastic bag will keep the sand out of the camera and a small ice chest or cooler will keep the camera cool while you play – put the ice in your drinks and the camera in the cooler!

Protect against loss

It’s also a good idea to put your name and address on your camera – if it does go missing it has a chance of being returned if you do this. I use the StuffBak service to label all my electronics.

Test before you leave home

Before you leave home, test everything to make sure it works. On holiday is not the time to discover you don’t know how to download photos from your camera or that the cable you bought doesn’t work!

Also check that the DVDs and external drives you’re planning to use to burn a copy of your photos work with your computer. Make sure you have empty space on your computer for storing your images too.

Before you leave, download and delete all the photos from your camera’s card and start with an empty card and freshly charged batteries. Pack everything carefully, remember the sunscreen and a hat, cancel the paper delivery and have a great holiday!


This handy checklist from http://projectwoman.com/2009/12/10-things-for-your-camera-bag.html will help you pack:

10 things you should always have with you

3 sets of batteries – one in the camera, one in the charger and one in your pocket

Batterycharger and a power cable suitable for use wherever you’re travelling

Spare memory stick or smart card for extra storage on the road

Cooler in which to place the camera to keep it cool in the sun (leave the ice behind)

Polarising filter to suppress reflected light for more colour in your images

Tripod for capturing macro images and for longer exposure shots

Camera manual to refer to if you have questions that you can’t resolve

Lens cleaning cloths, cleaning fluid and a brush to blow dust from the lens

A variety of lenses including a macro lens if your camera takes interchangeable lenses

Underwater camera housing for your digital so you can take it swimming with you

Helen Bradley

Sunday, December 9th, 2012

5 Light taming Tips for Capturing better photos


These handy tips will help you tame any light condition to capture great photos:

Tip 1 – Time of day

In the early morning and late evening the light can be quite spectacular and you can capture not only sunrises and sunsets but also interesting coloured lighting effects on trees, buildings and your subject’s face.

Tip 2 – Silhouettes

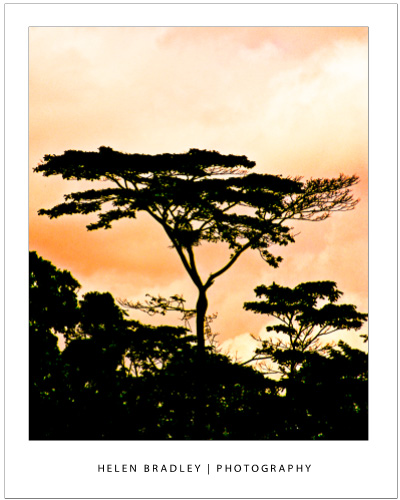
When the sun is down low look for opportunities to photograph into the sun and capture objects between you and the sun in silhouette. Look for subjects that have interesting shapes and where the skies behind them are well lit and colourful.

Tip 3 – Use available light

Look for light sources that are more interesting and varied than your flash. Place the subject close to a window to capture natural light or use reflected light, a skylight or even a lamp. Lighting a subject from the side is often more interesting than using the flash straight on.

Tip 4 – Capture Shadows

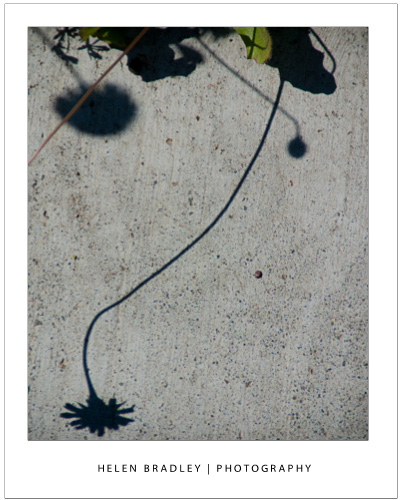
In the intense sun of midday look for interesting shadows and plays of light and dark on buildings and other surfaces. Although the harsh sun of midday is the worst time to photograph it doesn’t mean you can’t get great shots.

Tip 5 – Perfect skies with a Polarizer

Invest in a quality Polarizing filter for your camera. This filter cuts the glare and reflections when shooting in bright sun and at the beach or in the snow. It gives you bright blue skies and crisper more saturated colours.

Helen Bradley

Monday, December 3rd, 2012

Holiday Photography – Capture the little things

Seasonal photography – What to shoot and how to do it successfully

From now to early January is a time for celebration and whether you celebrate Christmas, Kwaanza or Hanukkah, chances are that your house will be filled with fun and laughter and a decoration or two at least.

This fun time of the year is ripe for photographing opportunities and Christmas itself is one of the most popular topics for photography. I love to photograph this time of the year and there is lots to photograph – everything from the cards you receive to the tree, decorations, gifts and even carolers who serenade you with seasonal songs.

When photographing  indoors, for best results, make sure you have plenty of light. I like to use light from not only the Christmas tree itself but also from lamp shades as they cast a very soft and yellow light that warms the image.

Where possible, use a tripod and the night setting on your camera. If you don’t have moving objects or kids to think about, then switch to night mode, turn the flash off and take a long exposure. The light will be softer and the image will have a quality you simply can’t capture with the flash.

If you’re using a flash, remember its effective distance is around 3 yards so make sure anything you want to light is in this range.

Helen Bradley

Monday, November 12th, 2012

Photography Self Assignments

Improve your photography by undertaking self assignments. In this video I’ll describe how to undertake a self assignment, some topics for it, and how to assess your progress.

Transcript:

Hello, I’m Helen Bradley. Welcome to this video tutorial. Today I’m going to talk about photographic self-assignments. What is a self-assignment. Self-assignments are short self-assigned photo projects that you shoot just for the sake of shooting. And typically they shouldn’t require you to go out and buy anything special or to go anywhere special to do them. They are the sort of thing you could go and do immediately after you’ve finished watching this video — grab your camera and you’re ready to start.

It’s a good idea to do self-assignments regularly and when you are not under pressure to capture anything at all worthwhile so you’d never undertake one when you are the main photographer at a wedding for example. Self-assignments are generally quite short so you can spend as little as a few minutes at a time on them — but of course they can consume a lot more time if you have it available.

Self-assignments technically have a topic — you’re not just out to shoot, you’re out to shoot a something or to practice something — you’re not aiming to shoot ‘keepers’ so much as you are aiming to learn something. Self-assignment should take you out of your comfort zone and help you see things or experiment with techniques and your kit.

Preparing for a self-assignment

When you’re preparing for a self- assignment, firstly you need to allocate the time to work on your self-assignment. Often you can find it by repurposing time you already spend doing something such as walking to the bus station — make this the time that you work on your self-assignment. Or you could park a few blocks from your office and walk there, walk at lunchtime or walk when you get home at night and, as you walk, you can photograph for your self-assignment. If you don’t get out a lot then photograph inside your house or your backyard or spend the time waiting at an airport or train station catching shots for your current self-assignment.

You will also need to take a camera with you — everywhere. It doesn’t have to be your good camera but it’s good if it is. It might seem strange to carry your camera with you all the time but the more you do so, the less uncomfortable you will feel and you’ll really notice it when you don’t have your camera handy.

Topics and subject matter

Plan your self-assignment — You’ll need a topic or a focus for your shooting. It should be something that challenges you and forces you to learn something new or to look at the world a little differently. Some topics which you might want to pursue are: saturated colors, circles, paint marks, streetlights, the color blue, doors, shadows, repetition, food, street art, reflections, or alphabet which is a great one for the airport. Don’t expect to always nail the project on day 1 — so if you’re shooting something like circles — it’s worth going over the same territory a couple of days in a row — notice how many more circles you see on day 2 than you did on day 1. Your assignment might also be related to a piece of your kit — perhaps you have an unused or little used lens in your case — unused because you really don’t know how to use it — and because you can’t trust yourself to use it for important situations the cycle becomes self-repeating so you never use it.

Set yourself a self-assignment to shoot with the lens for a couple of weeks. By the end of the two weeks you’ll know a lot more about the lens and how to use it. If you’re someone who always uses the Auto mode on your camera now is a good time to start using Aperture Priority or Shutter Priority mode and start learning what creative possibilities they might offer. Determine the topic or focus of your self-assignment and a timeframe to work in. Once you’re done with the first assignment you’ll ready to start on the next but don’t be surprised if you continue to shoot these self-assignment themes in other situations.

Assess the results

When you are working on a self- assignment, download the images as often as you can and view the results. Assess how you’ve gone in your project. How easy was it for you to ‘see’ things that matched your topic. Assess the technical aspect of your shots — are they in focus, is the depth of field used appropriate for the subject matter — how would you improve the shot next time and what will you do differently tomorrow? If you’re working on a self-assignment to learn how to use a piece of kit, ask yourself what have you learned about it. What worked and what did not work. Analyse the results in front of you to determine what you’ll try that will be different tomorrow or the next day. What you’ll gain Self-assignments are creative learning projects so approach them with a sense of wonder and enthusiasm for your topic — reward yourself when you see something you wouldn’t have noticed if you hadn’t been doing your self-assignment.

Self-assignments can help you see the world different and they’re guaranteed to make you a better photographer. If you are a creative person who wishes they could photograph more but have to juggle photography with other commitments then self-assignments provide a creative outlet that can be fit into even a few minutes of your spare time.

I’m Helen Bradley. Thank you for joining me for this video tutorial. I encourage you to subscribe to my YouTube channel and visit projectwoman.com for more photography tips and tricks.

Helen Bradley

Page 2 of 512345