Wednesday, May 8th, 2013

Fix and perfect a portrait of Mum – Part 2


Image credit: UglyHero at www.sxc.hu

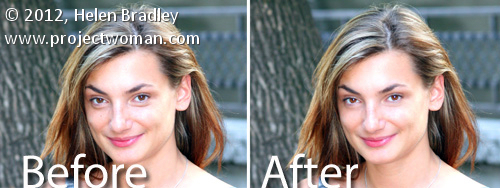
Once you have captured a great image of mum it’s time to fix it before sharing.

In a recent blog post I talked about how to take great photos of mum for Mother’s Day or any other occasion. Today I am going to explain how to process them.

Once you’ve downloaded and chosen the best shots – it’s time to fix the photos.

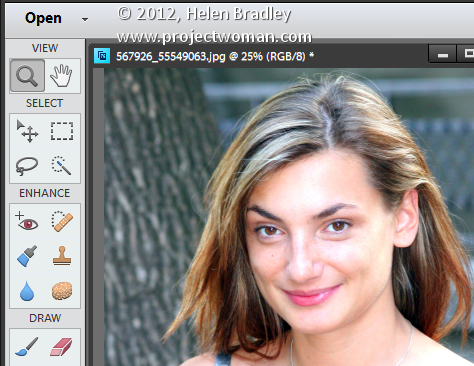
Start out with adjusting the white balance if the images need this. You might also want to warm the image if it is too cold so add a slight yellow/orange color cast to it to warm it a bit. This image is a little bit too blue for my taste and it will look better a bit warmer.

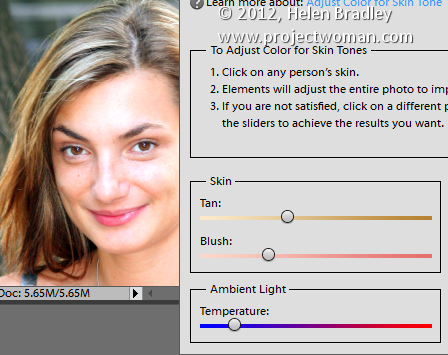
You can do this in Photoshop Elements – a good fix there is to adjust the skintones as explained in this blog post http://projectwoman.com/2010/03/step-8-photo-editing-workflow-fix-skin-tones.html. Photoshop doesn’t have this fix but whenever I use Photoshop Elements I find it really useful. You can fix skintones and warm the image all in the one step.

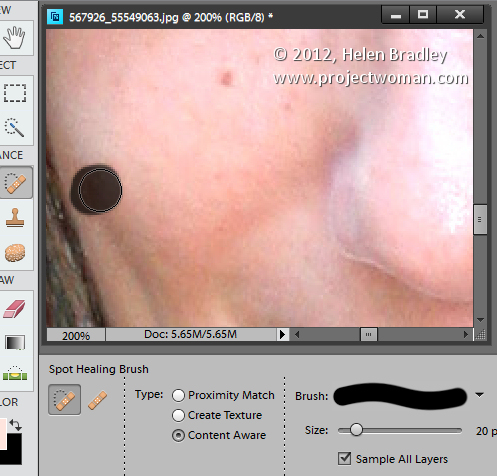
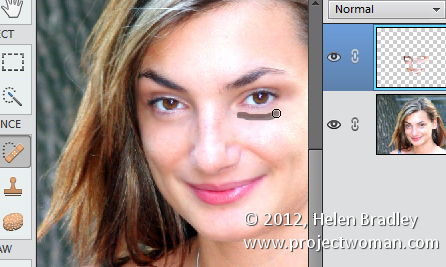
I will then fix any skin blemishes – if you’re using Photoshop Elements do that with the Spot Healing Brush Tool. The process is as simple as painting out the problem areas and the uneven skin tones will be smoothed.

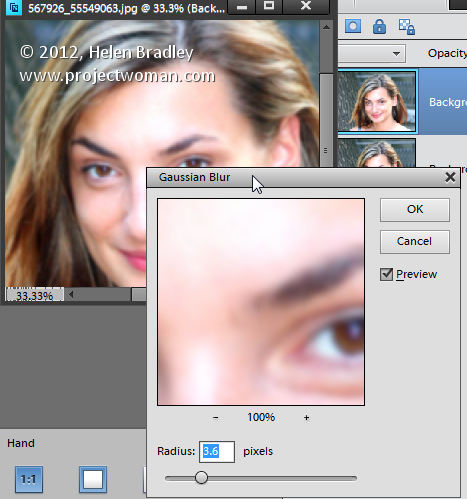
To lessen the effect of wrinkles a good fix is to make a duplicate of the image background layer (Layer > Duplicate Layer) and to blur this duplicate layer with a small radius Gaussian blur filter (Filter > Blur > Gaussian blur).

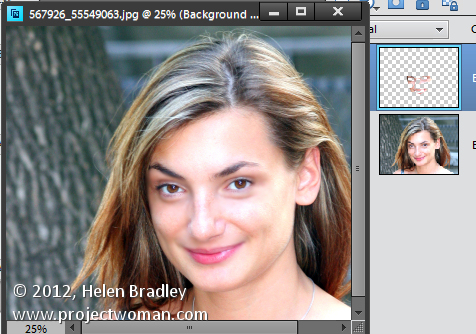
Then selectively erase the top layer to reveal the sharper features underneath leaving the blur over the wrinkles. You will want to erase pretty much all but the area under the eyes. Finally, reduce the Opacity of the top layer to blend the two layers together if desired. If you’re handy with using masks do it with a mask instead of the eraser.

If the fix is not enough, use the Spot Healing Brush Tool on the top layer to blend out the wrinkles and dark areas under the eyes even more.

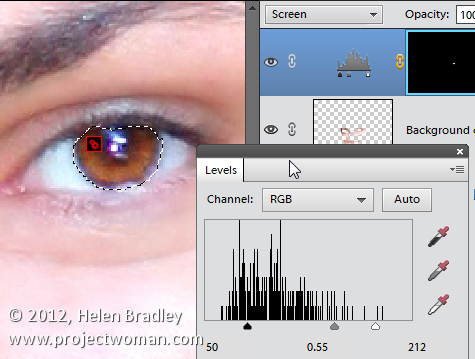
I like to use the Photoshop Elements Lightening Brush to lighten a person’s teeth slightly and I’ll often use the Saturation Enhancing Brush to brighten their eyes. Err on the side of caution though, the edits you make should be subtle and gently enhance the photo – you’re not applying Halloween makeup!

If your mum gets just one photo that she loves of herself from those you’ve taken – you’ve given her a wonderful gift. Best of all, you can bet she’ll be happy to pose for you again next year.

Helen Bradley

Wednesday, May 8th, 2013

Portraits of Mum – Part 2 – select and fix

In my last blog post I talked about how to take great photos of mum for Mother’s Day or any other occasion. Today I am going to explain how to process them.

Once you’ve downloaded and chosen the best shots – I use Lightroom because it is so simple to use, it’s time to fix the photos.

I will adjust the white balance – in the series of images I shot the white balance was a little too warm so I cooled the images down and adjusted the Exposure in the Develop module.

I will then fix any skin blemishes either in Lightroom or, if you’re using Photoshop Elements, for example, I’ll do that with the Spot Healing Brush – it is as simple as painting out the problem areas and uneven skin tones.

To lessen the effect of wrinkles a good fix is to make a duplicate of the image background layer and to blur this duplicate layer with a small radius Gaussian blur filter (Filter>Blur>Gaussian blur). Then selectively erase the top layer to reveal the sharper features underneath leaving the blur over the wrinkles. You will want to erase the blurry eyes and mouth and perhaps some of the blurred hair. Finally, reduce the Opacity of the top layer to blend the two layers together for a great result.

If your images are a colder blue color then use a warming filter to give the portrait a warm pink glow which is very flattering to skin tones. In Photoshop Elements, to do this, choose Filter > Adjustments > Photo Filter and choose a Warming Filter (85). You can set the density of the filter to control how strongly it is applied. In the Lightroom Develop module, you can drag the Temperature slider a little to the right.

I like to use the Photoshop Elements Lightening Brush to lighten a person’s teeth slightly and I’ll often use the Saturation Enhancing Brush to brighten their eyes. Err on the side of caution though, the edits you make should be subtle and gently enhance the photo – you’re not applying Halloween makeup!

If your mum gets just one photo that she loves of herself from those you’ve taken – you’ve given her a wonderful gift. Best of all, you can bet she’ll be happy to pose for you again next year.
Helen Bradley

Saturday, May 4th, 2013

Photography quick tip – get up close

You can instantly add a something extra to just about anything you photograph if you get up close

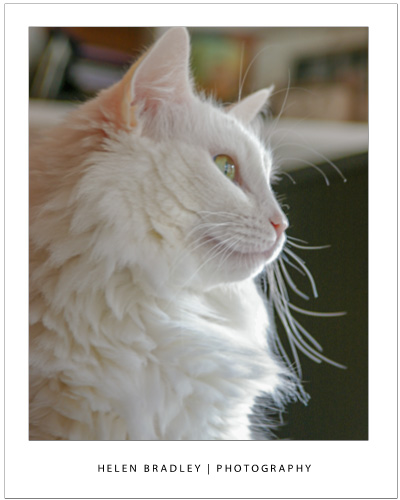
For portraits and pet photos you can get more detail in your shot by getting closer to your subject.

Take a few steps forward to get in close to your subject or use the camera’s zoom if you can’t get physically closer. Fill the viewfinder with your subject and then shoot. Not only will your subject look great but you will remove excess background from the image which generally removes unnecessary and unwanted detail.

Helen Bradley

Friday, May 3rd, 2013

Ask the locals – how to photograph street art

Whenever I travel one of the tasks I have is to find good places for street art. It’s not like it makes the top 10 things to see in many, if any, cities in the world!

While I do a lot of research on the internet before I leave I also rely a lot on local information – trick is who to ask. Usually the well dressed, well heeled local or anyone who looks conservative it not my pick! Instead, on a recent trip to Baltimore it was the guys at the Utrecht art store. They were not only so nice in helping me find the supplies I wanted – a new batch of Prismacolor pencils – but also they helped me find graffiti and street art. They took the time to give me a mini hand drawn map of where to find Graffiti Alley – tucked between Howard and North and just the sort of place you need some insider knowledge or lots of dumb luck to find.

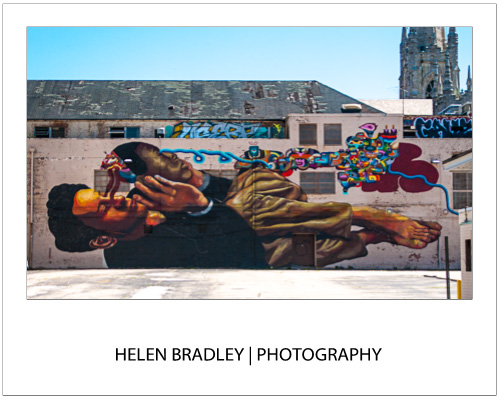
Nearby Graffiti Alley on Charles Street I found this piece of art, painted across the back of a parking lot. It was a really big project and basically untouched. There is a bit of art around it in the parking lot and most of it too is untouched. Not so Graffiti Alley where there are layers and layers of art, compelling in a very different way. Luckily a woman waiting in a parked car for her partner joined me for my walk up Graffiti Alley – if I wasn’t concerned about my safety (I was) she was! She insisted in walking with me to keep a lookout – I appreciated it, the alley does a dog leg and much of it is invisible from the road. I was glad of the company!

Helen Bradley

Wednesday, May 1st, 2013

Portraits of Mum – Part 1 – How to get the best shot

Helen Bradley explains how to get the best shots of that very important person in your life – mum!

My mum hates being photographed! I’m not that fussed about photographs of myself either. As I age, my face doesn’t always refect the age I feel inside and many photos catch me looking less attractive than I’d like to look. I have every sympathy for my mum who is obviously years older again than I am.

However, chronicling the women in our lives, our mums, mums in law, grandmothers and aunts is an important part of recording our family history. This mother’s day or some time soon, grab the special woman in your life, sit them down and take a portrait that they’re happy to look at. It’s not difficult when you know these few tricks for capturing them at their best.

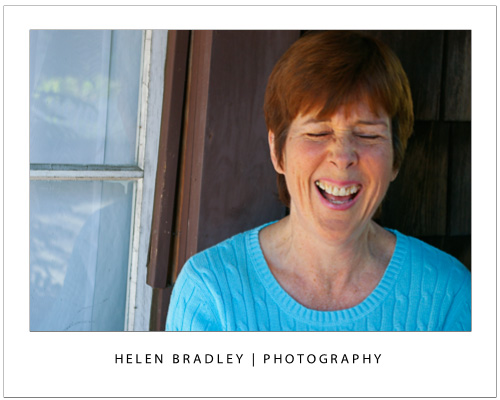
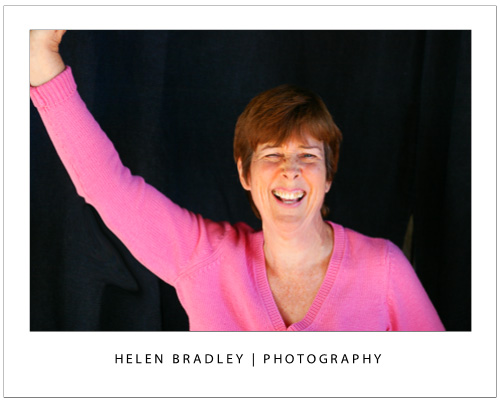
When something really strikes your subject as funny – be ready to capture a one off shot that will make you smile.

Most people look better looking up at the camera rather than looking down at it. Even someone with no double chin will get one when looking down! Looking down at the camera also accentuates a person’s nostrils which isn’t always flattering.

When taking a photo, position your mum so you can stand higher than she is – this usually means that she needs to be sitting down. Find a place indoors with good natural light and shoot inside or find a shady spot outside.

For our pictures of Anne here we hung some dark curtains from a front porch to shield the worst of the bright and uneven sunlight and shot outdoors.

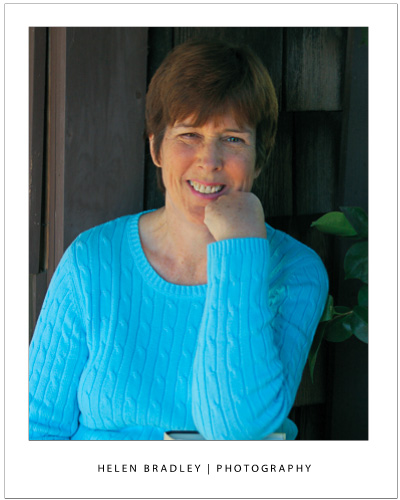
Here the subject leans on a favourite book and the pose is nice and relaxed.

Using a tripod will ensure that the camera is still when you take the shot – if not, focus on keeping it steady – especially if you start clowning around and you need to laugh. Jokes are good – in fact anything that works to make mum relaxed will help lots. I usually take a friend who is a bit of a wag with me and she makes comments and asks questions of the person I’m shooting. By the time a few minutes have passed the person being photographed forgets I’m even there.

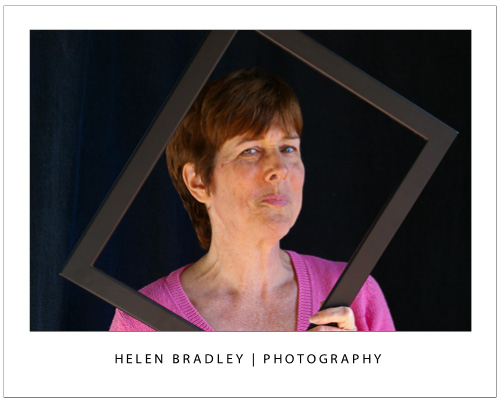
Having something for your mum to hold or to rest on works well as it gives her something to do with her hands. We used an empty picture frame, a chair turned backwards, a book and a sledge hammer (there was some discussion about eyelet setting that prompted Anne to pick it up) when shooting.

Holding a frame gives the subject something to do with her hands and the natural reaction is to ham it up a bit for the camera.

You can use anything from a flower to a stuffed toy – whatever helps to take mum’s attention off the fact that you’re photographing her. Ask mum to wear some light makeup – while you can remove obvious blemishes later on, the even skin tones you get from wearing makeup can save hours of fixing on the computer and really will improve the portrait a lot.

Having the subject lean on something – here a chair turned around gives them something to do with their hands.

When you’re shooting, take lots of photos. I take as many as I can with the promise that I’ll keep only the best and anything that the person absolutely hates will be deleted – no questions asked. After all, I want to do this again and building trust in me as a photographer is really important.

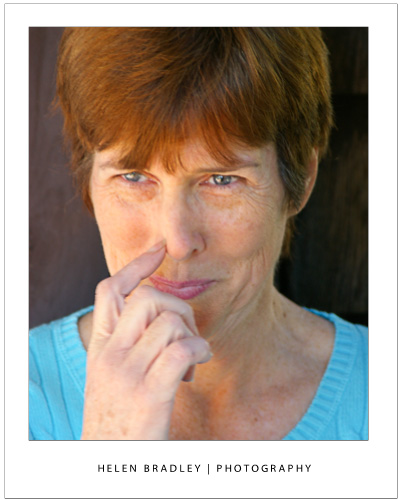
Keep shooting even when the subject is scratching their nose!

You will find that the best shots generally have the person looking direct at the camera – this isn’t to say you won’t get great shots when they’re looking elsewhere but you can improve your chances by having them look at the camera as much as possible. When shooting, fill the frame with the person’s face. The closer you get, the more detail you will capture and the more intimate the resulting portrait will be. Check the results from time to time to make sure they are well lit and check again every time you move position, because the light will change – particularly when you are out of doors.

Here we asked our subject to strike some funny poses and the result was captivating.

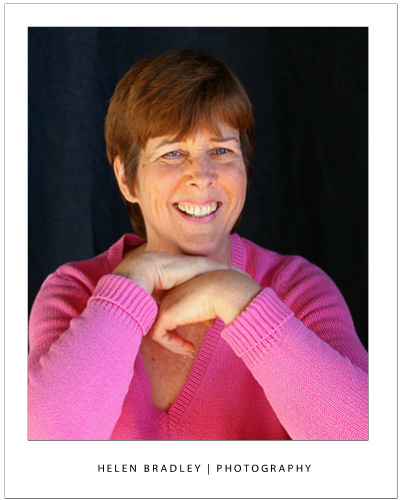
If time permits, have mum change clothes half way through the shoot to a different colour so you get a different feel to your photos. You might be surprised how some colours work better with certain skin tones. We liked Anne in the pink jumper best of all. If you have the space to work, move around to get a different perspective of your mum, but always take care that the background isn’t cluttered and that it remains unobtrusive.

Helen Bradley

Wednesday, April 24th, 2013

Photography quick tip – add a frame

Looking to add something extra to your photos? Add a natural frame

When composing a photo, add more interest to the photo by framing it with something in the foreground.

You can use a window or tree to create a natural frame for a landscape or a building to give the image more depth.

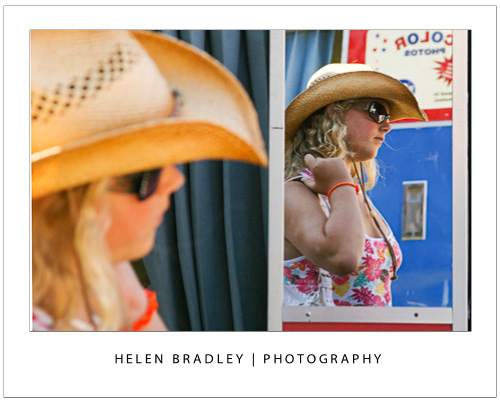
Here the subject herself creates a frame for her reflection in the mirror.

Helen Bradley

Monday, April 22nd, 2013

iPhoto won’t enlarge images

Learn how to enlarge images from iPhoto – because it won’t do it for you!

If you try to export an image from iPhoto on the Mac you’ll be invited to resize it on export. Funny thing is that even if you ask for the size to be larger than the original iPhoto won’t warn you it is about to ignore your request – seriously! It happily takes the size you ask for and, if it is bigger than the original, it exports the image at the original size but doesn’t tell you it did so. So you can think you’ve been successful but you have not.

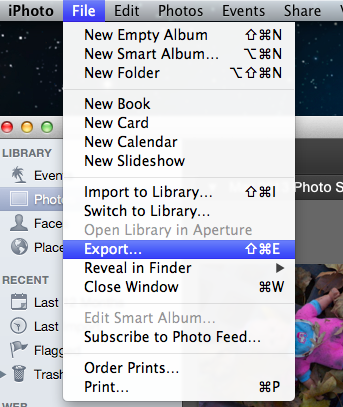
In short, you can’t enlarge or upsize an image from iPhoto. So here’s a simple solution – I use PIXizer.com. So, start from inside iPhoto, select an image and then select File > Export.

Then select to export the image as a JPEG maximum quality and leave the size set to Full Size – ie the original image size.

Then export the image to your desktop or somewhere else it will be easy to find.

Launch a browser and head to PIXizer.com.

Click Choose File and choose a file to upload and use the tabbed panels to choose the quality and image size. When you click to Preview Image the image is uploaded and resized. You can then click to download it and it will download automatically to your download folder.

I like the efficiency of PIXizer – it would be nice if iPhoto actually enlarged images but since it won’t – I now have a free and quick and easy solution when I need a quick image enlargement.

Helen Bradley

Helen Bradley

Saturday, April 20th, 2013

Spring photo inspiration and how to capture great flower photos

Capture the magic of spring with great flower photos

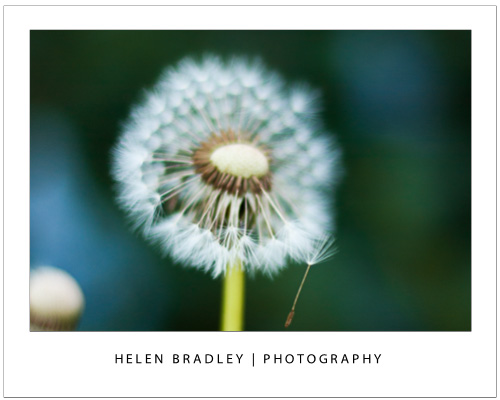
There’s simply no better time to get out and take photographs than in Spring. The weather is great, the colors are spectacular and the flowers are at their peak. Flowers are great to photograph – they don’t get fractious and they don’t blink so they’re good subjects to practice your skills on. Here, I’ll introduce some techniques to try that will ensure you get great photos.

Get up close and personal
When you see a wonderful flower to photograph, move very close so the flower fills the camera’s viewfinder or its LCD screen. When you are this close, the camera won’t focus properly unless you set it to Macro mode – this is indicated by the flower icon and it’s usually easy to find. If you can’t see it, check your camera’s manual to learn how to set this mode. With macro mode set, you should see the flower in focus and you can take the shot.

Macro mode not only ensures the flower will look crisp and in focus but it also has the effect of blurring out the background detail. In macro mode your camera shoots with a short depth of field so only objects on the same plane as the flower should be in focus, things closer to you or further away than the flower won’t be in focus. This is an effect that photographers try to achieve. It is, however, critical that your camera focuses on the flower.

To check the camera is focusing correctly press the shutter release half down and check the LCD screen. If the object is out of focus, let go the shutter release, move the camera so the flower is centred in the screen and press half down again. When the focus is correct, continue to hold the button half down as you move the camera slightly to compose the shot. Then continue to press the button to take the shot.

Even though the background in the shot will be blurred in macro mode, you should still check that any background that is visible is not distracting. If it will ruin your shot, move and try shooting from higher up or lower down so the background isn’t as visible.

Apply the rule of thirds
Apply the Rule of thirds to your flower photography. This rule says you should divide the area being photographed into a grid like a tic tac toe board. Place something of interest along one of the horizontal or vertical lines or where the lines intersect. The result is that you’re not centering everything – and your photo will look much better.

Vary your position
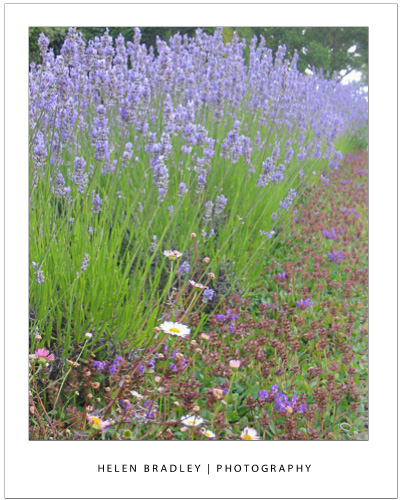
Don’t take all your photos close up and, instead, look out for opportunities to photograph masses of flowers. If you position yourself carefully you can make a bank of flowers look as if they go on forever!

Include the kids
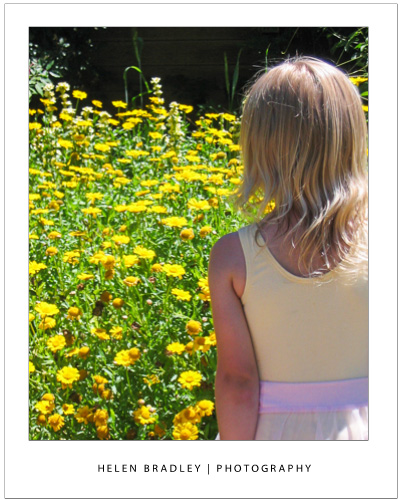
Occasionally, include children or other people in your flower photos for some added interest.

Shoot side on and from underneath
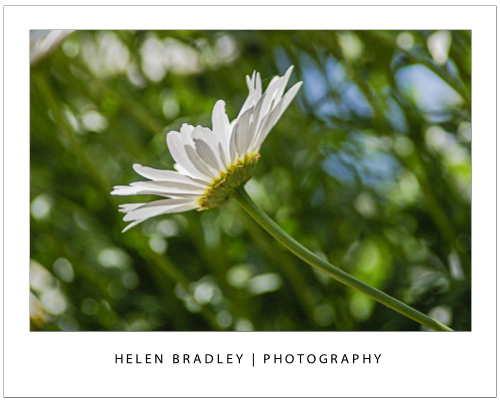
Vary how you shoot your flowers too. While it is typical to take photos of a flower looking into it, you don’t have to take them this way. Shooting from the side will show the shape of the flower and, in some cases, this is what makes them compelling subjects.

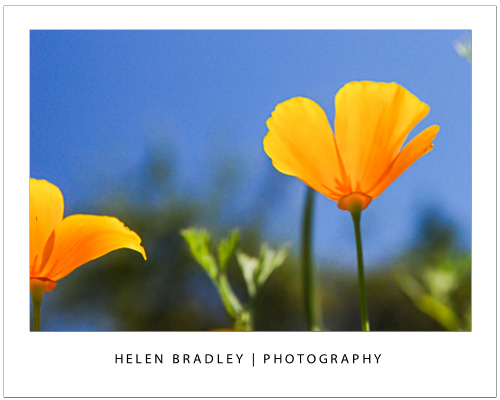
Unusual photos can also be taken shooting blind from under the flower. To do this, you’ll benefit from having a polarizing lens on your camera particularly if you’re photographing on a sunny day. This will cut a lot of the glare and give you deep saturated colors. Hold the camera at ground level under the flower and shoot up through the flower to the sky avoiding shooting direct into the sun. The results you’ll get will be of the “hit or miss” variety – because you can’t see what you’re shooting you’ll have to try a few times until you get results you like. However, you’ll get a totally new perspective on things and you just might be surprised at how interesting the photos are.

Walk and snap
If you’re lucky enough to live in a rural area, take a walk along your favorite towpath or lane and capture the wild flowers that are so often overlooked as subjects for photography. If you live in a city – visit a local park or photograph the colorful display of a local flower vendor. When you’re shooting up close, one flower is all you need to get a wonderful shot.

Helen Bradley

Friday, April 12th, 2013

Talk to the Animals – Photograph at the Zoo – Part 2

Photographing at the zoo offers unique opportunities for getting great animal photos

Zoos are a great place to polish your photography skills and to get photos of animals and birds you may never see otherwise.

However, just because the animals are caged doesn’t mean they are easy to photograph so there is plenty to think about and work around.

The plus is that your perseverance will be rewarded and you can get some truly great photos if you know how. Here are some tips for a successful day photographing at the zoo.

Camera settings

To get in close to the animals, use the longest zoom lens you can handle. The downside of a zooming in close with a big zoom lens is that any movement will be exaggerated so you will need to hold the camera steady to capture the shot in focus.

Using a large aperture like such as f3.8, f4.0 or f4.5 will let more light into the camera so the exposure time can be reduced to help you get sharper images. Also consider increasing the ISO to get a faster shutter speed.

A side benefit of using a large aperture on the lens is that you will get a shallower depth of field around the subject and the background and foreground will be blurred. When you’re shooting at the zoo this is an advantage as it minimizes the impact of cages and man made objects.

Just ensure that the camera focuses accurately on the animal you are photographing because of this short depth of field is a double edge sword – if you’re not focused tight on the subject it will be out of focus.

Shooting in low light

Some displays at the zoo are indoors and to shoot in these low light conditions start by adjusting your camera’s ISO equivalency to a high value such as 800, 1,600 or 3,200.

At these settings the camera is more sensitive to light so you can capture your image without using a flash. Not only is the use of a flash typically not permitted in indoor displays, it is also unlikely to give you good results because, instead of lighting the scene it is more likely to bounce back at the camera or wash out the scene.

Take care to adjust for what lighting there is in indoor displays. Very often the lights throw an orange or green cast over the image.

Adjust the white balance setting on the camera to negate the cast and you won’t have to clean up your photographs later on.

What to capture


When you’re planning what to shoot, look for opportunities such as capturing an animal when it is looking directly at you.

To do this, you will need to be in a good position relative to the animal and you will need to be patient – and lucky.

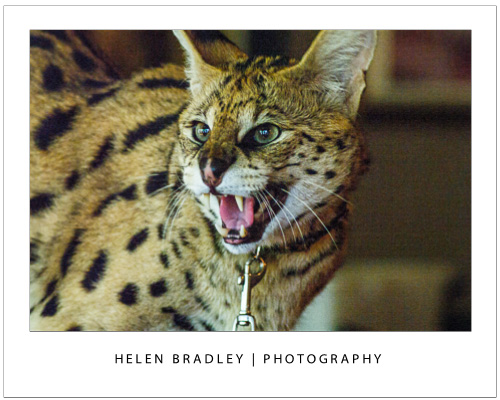
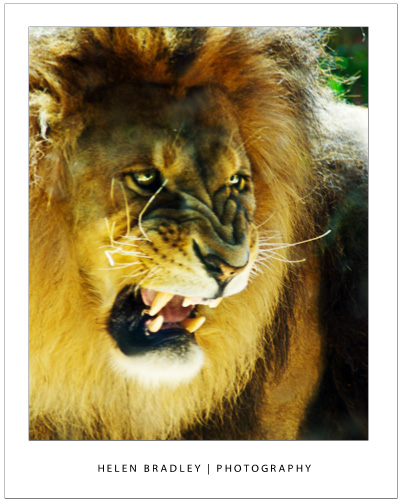
Another option is to capture the animal where you can see its eyes and when it is doing something interesting like eating or yawning. Again, take your time, be ready with your camera positioned and be patient.

In some circumstances you may find yourself forced to shoot through glass or perspex. Walk around the area to find a good place where there are minimal reflections and where dirt on the window won’t be distracting.

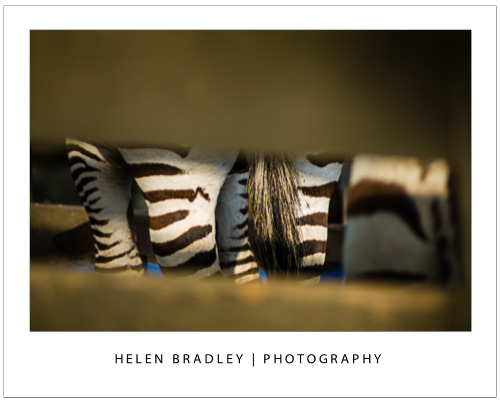
If you’re forced to shoot an animal through a fence, get close to the fence so you can shoot through gaps in it or make the fence an interesting feature.

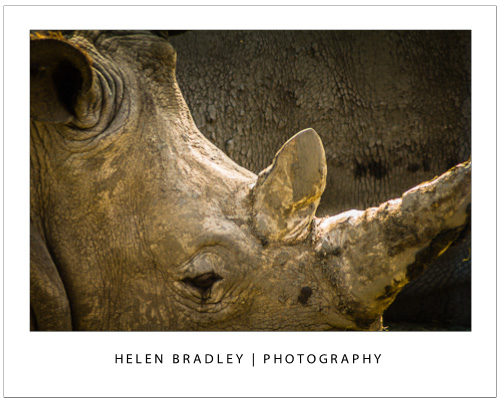
Even if you’re forced to crop parts of the animal away to get a clear shot you can still end up with a worthwhile image.

Of course, always photograph from a safe distance – some animals are belligerent and dangerous and up close to a fence won’t be safe if they are the other side of it.

If you have the luxury of spending time with animals that are active and in a good position for you to capture them, spend the time you have wisely.

Take your time

Instead of taking a couple of good shots and moving away from the animal, wait around to see what creative opportunities arise that might give you a great shot.

By waiting, you may find the animals interact with each other, playing or fighting or that they arrange themselves in interesting patterns that turn a good photograph into a great one.

When you’re next looking for an opportunity to hone your photography skills it may be time for a visit to your local zoo to take advantage of the wealth of photographic opportunities offered there.

Helen Bradley

Sunday, April 7th, 2013

Talk to the Animals – Photograph at the Zoo – Part 1

Your local zoo is a place to get great animal photos without leaving home

Zoos are a great place to polish your photography skills and to get photos of animals and birds you may never see otherwise.

However, just because the animals are caged doesn’t mean they are easy to photograph so there is plenty to think about and work around.

The plus is that your perseverance will be rewarded and you can get some truly great photos if you know how. Here are some tips for a successful day photographing at the zoo.

Pack the right kit

A digital SLR is a good choice for the zoo because most let you switch to manual focus which will be handy where you are trying to photograph an animal behind foreground foliage.

In this situation, the camera’s autofocus feature will have trouble distinguishing what you actually want to have in focus – being able to focus manually will let you have better control of what you shoot than using a point and shoot camera.

At the zoo you’ll be shooting at a reasonable distance away from most animals so a good zoom lens will get you close to the animals to fill the frame. A 28–200mm lens is a good choice as it offers a good zoom and is still easy to hand hold. A 70-300mm lens will get you in closer still but you have to be careful to hold it very still.

Also consider the issue of glare – you may not have a lot of choice about where you photograph so a polarizing filter may help you cut glare and get more saturated colours on a bright day.

When to go

Choosing the right time of the day can help you get better photographs. Photographing early in the morning or late in the afternoon when the light is softer and the shadows less harsh is always better than shooting at midday.

When you arrive at the zoo ask about feeding times, animal shows and anything that will get you close to the animals and preferably without cages between you and them.

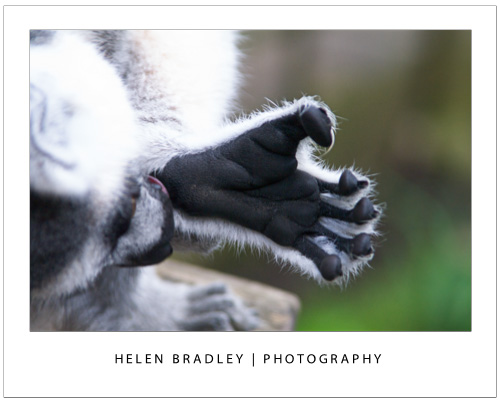
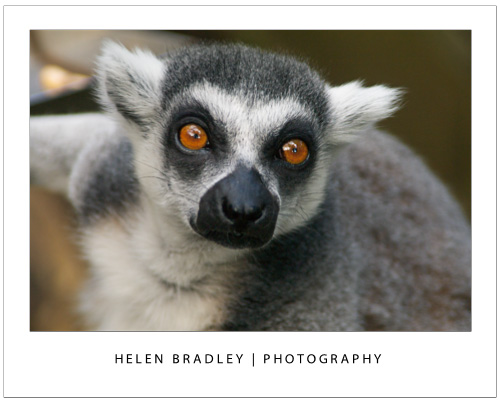
To this end I’ve attended the free flight Bird Show at Taronga Park Zoo in Sydney and I’ve paid to breakfast with Orangutan in Singapore. I’ve also paid to photograph koalas up close at Taronga Park Zoo – instead of having my photo taken with them – I paid to do the photography. In Stockholm I paid to get inside an enclosure with some very curious Lemurs and I’ve done safari photo tours at Safari West in California. In short, any time you can get close to birds and wild animals unencumbered by cages do so. You’ll find these situations typically less encumbered by other people taking happy snaps and you’ll have more space and time to shoot.

Elsewhere around the zoo if you can visit the animals at their feeding time you that will bring animals out of hiding into places where it’s easier to see and to photograph them.

You do, however, still need to be well prepared and well positioned to get the best photos.

Helen Bradley

Tuesday, April 2nd, 2013

Photographing in the Midday Sun Part 3

Here are some more techniques for capturing great images in full sun

The worst possible time to take photos is when the sun is overhead. But that doesn’t mean you should head home, because you can capture good images even when the light is harsh. Here are some techniques to put to use at midday:

Capture Reflections

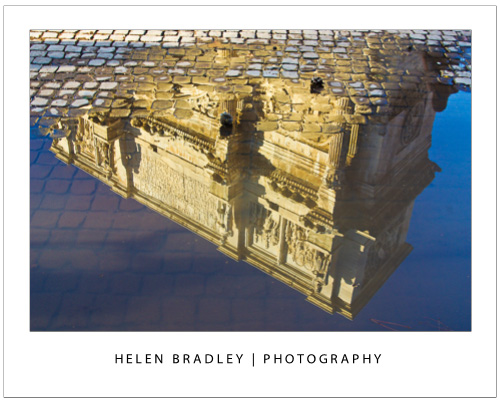
You can capture reflections in just about any light and when the sun is at its highest you’ll find interesting reflections where one building is reflected in another and also reflections in water such as in fountains and lakes where the surrounding areas are reflected.

If the water is still the reflections will be perfect and if the water is rippling you may capture abstract patterns. If you are experiencing sunshine after rain look for water on the ground so you can capture things reflected in puddles. In fact, reflections can be an interesting way of capturing a tourist attraction in a way that it’s different to what you’ve ever seen before.

Capture shadows

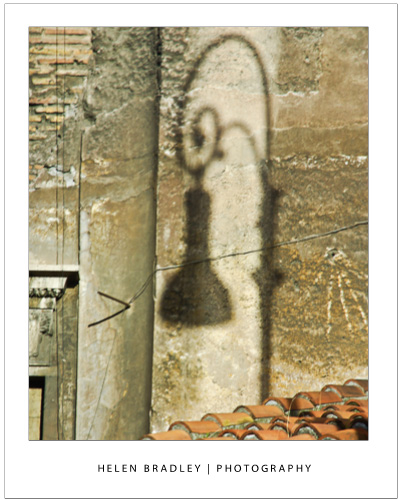
With the sun high overhead, anything between the sun and the ground or the face of a building will throw strong shadows. By looking for shadows, you can often capture an interesting image either by capturing the shadow rather than the object itself or by getting both the object and its shadow. The brighter the sun the crisper the shadows will be so look for an interesting contrast between the shadow and its surrounds.

Shadows are like reflections in that you won’t necessarily see shadows or reflections until you train your eye to look for them. When you do start looking for them you’ll see shadows and reflections everywhere and you’ll wonder how you ever missed seeing them before.

Capture Lens Flare

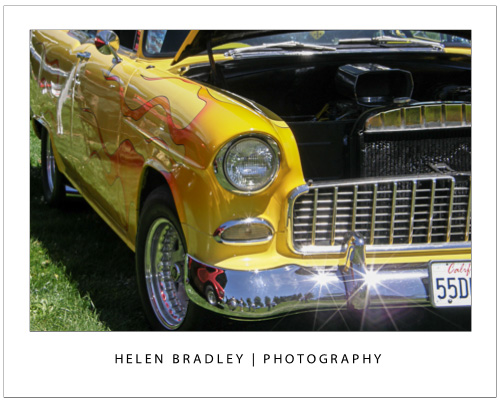
When the sun is very bright, you’ll find that shiny objects result in little flares where the sun hits them. These flares can make an attractive star shape and add sparkle to your images. You might also see interesting patterns where the sun is filtered through trees or along narrow alleys between buildings. Look out for these opportunities to capture light that you won’t see at other times of the day.

When capturing a lens flare you’ll may need to slightly underexpose the image so the flare is captured as a subtle star rather than an overexposed white blob. To do this, adjust your camera to manual mode and increase the shutter speed or reduce the aperture to underexpose the image.

Alternatively use the camera’s Exposure Compensation (EV) adjustment to underexpose the image. You will need to experiment with the setting but start with around -1 (one stop underexposed) and adjust from there. The result should be an underexposed image with a good looking flare. You can adjust the remainder of the image in post processing to bring back some detail. If you capture the image in a raw format, you will ensure you have plenty of image data to work with in post processing.

Go for Hot!

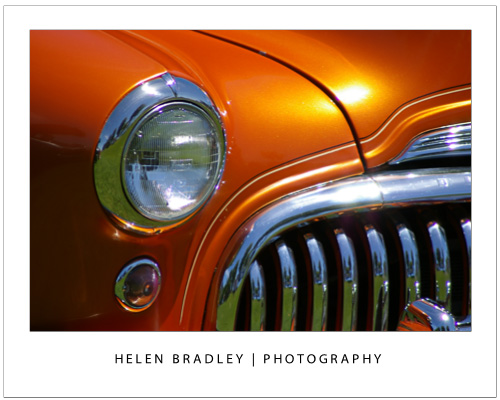
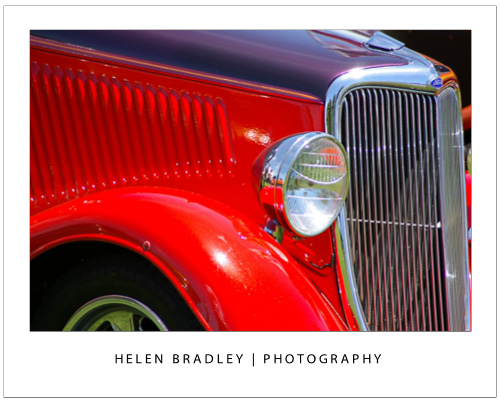
In bright sunlight colors can look very rich indeed. If you can zoom in to get the color and avoid excessive shadows or bright spots you can capture color that is nearly impossible to get in other light.

This car image was shot on a blistering hot day with high overhead sun in horrible conditions for photographing. By zooming in to remove all the background and choosing a great vehicle to shoot I’ve captured an image rich with color that would have looked a lot duller in other light.

Helen Bradley

Wednesday, March 27th, 2013

Photographing in the Midday Sun Part 2

Learn how to counteract bright sunlight buy using a Diffuser

One option if you are shooting in bright sunlight and which works well if you have someone to help you is to use a diffuser.

A diffuser is a semitransparent piece of fabric which is typically one of the options you get when you buy a reflector.

Your assistant holds this between the sun and your subject and as the light passes through it is softened and the contrast between light and shadow is reduced.

A diffuser makes it easy to capture great portraits in even the harshest light.


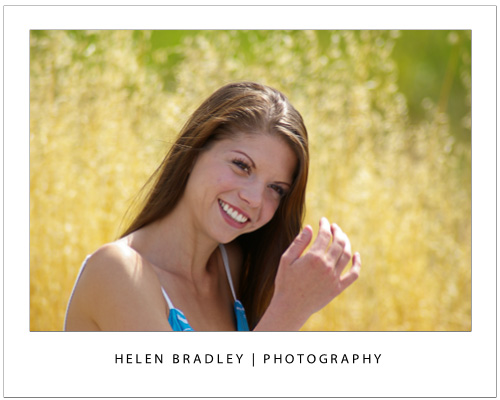
This image was shot in full sun, notice the contrast between the harsh shadows and bright light.


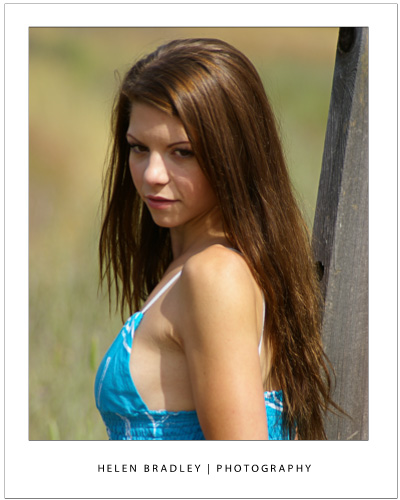
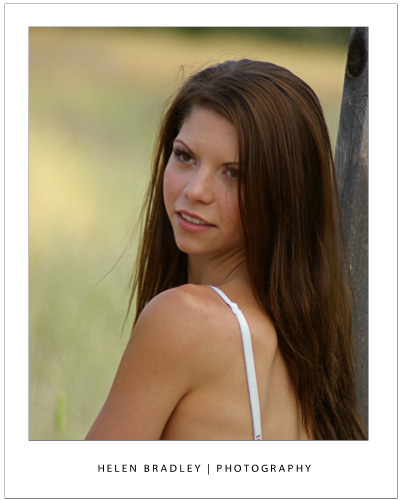
This image was shot with a diffuser.


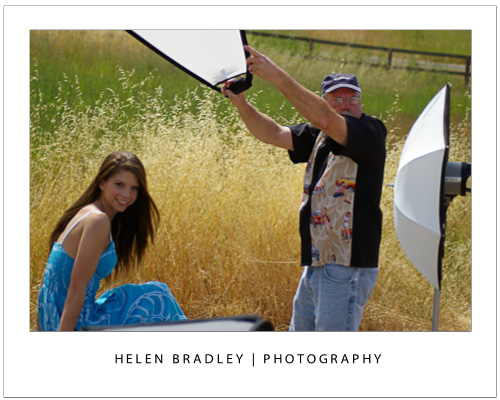
This is how the diffuser is used between the sun and the model to diffuse the light.

Helen Bradley

Friday, March 22nd, 2013

Sync photos from iPad or iPhone to your Mac

Learn how to download photos from your iPad or iPhone to your Mac


I’ve been using iCloud on the PC for a while now to sync photos from my iPad to my PC and it works well. On my new Mac, however, I had a problem, you see the feature is built in so you don’t have to install it – but you do have to find it! Here’s how:

1. Assuming you already have an iPad or iPhone and you have been taking photos with it, then you want to get them to your Mac. Start on your iPad and make sure it is set to sync. Do this in Settings – scroll to find Photos & Camera and make sure that My Photo Stream is turned on. This means that when you are on a wifi connection your photo stream will be synced with iCloud.

Note:
The photo stream has some limits. One is that iCloud itself only stores images for 30 days so after that they disappear. However provided you are connected via wifi on a regular basis these will be synced frequently so that won’t be a big issue.
On a device like the iPad and iPhone the photo stream will only contain those most recent 1,000 images – older ones are removed. This is because you have less space on your iPad and iPhone than on a Mac or PC. Remember too that the photo stream contains images from the iPad/iPhone and from your Mac or PC so this 1,000 image limitation is for images from all devices in total, so it’s not as big as it might seem.

On the PC that is less of a problem because you have a special Photo stream folder that you put images into to sync them, so you know how many you are putting there. It is more of an issue on the Mac because the process is more automated so you have to be mindful of what is happening. On your Mac or PC all the images from your Photo stream are stored – because there is more storage available on them.

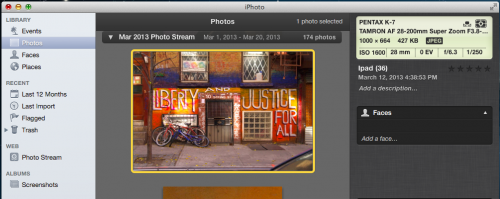
2. To set up the Mac. You need to click iPhoto to launch it and then click Web: Photo Stream and turn this on.

3. Now, if you are connected via wifi you can wait as your photo stream downloads automatically for you otherwise this will happen automatically next time you are connected.

Once images are downloaded to iPhoto they will be added to the Photos folder so even if you turn off Photo Stream at some time the images that are already downloaded will have be stored there permanently.

Helen Bradley

Thursday, March 21st, 2013

Photographing People in the Midday Sun Part 1

Here are some fun and interesting techniques for capturing great images in full sun

If you ask any photographer the worst possible time to take photos, it’s undoubtedly when the sun is at its highest – in the hours around midday. So should you simply pack up the camera and go home or is there a way to capture good images even when the light is far from ideal? Luckily, you can capture great images any time if you know how to make the most of the situation. In this column I’ll show you how to avoid the worst features of harsh sun still capture great images.

What is wrong with full sun?

Around the middle of the day the sun is overhead and it is quite bright and the light it throws is harsh and not soft or full of color as it is at sunrise and sunset. When it is overhead the sun throws strong shadows so if somebody is standing in full sun it is the top of their head that is well lit and their face will be in shadow. This is not an ideal time to take a person’s portrait but it can be done, and I’ll show you how.

You will face a similar problem if you are travelling and if your once in a lifetime opportunity to photograph something like the Eiffel Tower is at midday. If you’re to get a shot that you’ll be proud of you’ll need to be a little creative in how you capture the image. The good news is that with a little imagination and effort you might just go home with photos that are far superior to those that you might get in other circumstances.

Counteract the light – Find Some Shade

When you’re shooting a portrait in full sun there are a few things you can do to soften the light. One is to move the person into a shady situation – this removes them from the harsh light so you reduce the high contrast between light and shadow to something more subtle.

If you do this, make sure that the person is in full shadow and set your camera’s white balance mode to Shade if you are under trees or to Cloudy if you are in the shade of a building to give the portrait a warmer look. In fact, even when you are shooting your subject in full sun you will find the light will be quite cool and blue and your photos will benefit from being warmed up. The easiest way to do this is to select Cloudy as your White Balance setting. If you are capturing in a raw format you can adjust this in post processing, if desired.

Counteract the light – Use The Fill Flash

A second option is to fire the flash or fill flash on your camera to add light to the person’s face so you are lighting the areas that are in deep shadow. If you are doing this, make sure to check the image after you have captured it to make sure that you haven’t positioned yourself so close to your subject that the flash is over brightening their face.

There is a sweet spot between too much flash – which will bounce off your subject’s face leaving it bright and over lit – and too little flash which will leave the shadows too dark. If the flash is too much, take a few steps backwards and try again – if it is too little, then move a little closer to your subject.

You may also find that your camera has a feature for adjusting the flash so it fires at less than 100 percent intensity which can help reduce the over-brightening effect of too much flash.

Helen Bradley

Tuesday, March 19th, 2013

Improve your photography today with apps

image credit: © istockphoto.com, Yuri Arcurs

Learn how you can improve your photography with handy apps

Among the thousands of new apps and programs we’ve seen in the last couple of years, there are many that are ideal for photographers, both amateur and professional. Whether you’re a professional looking for a way to edit and share your photos, or someone who simply wants to do more with photos with your phone or tablet, there are dozens, if not hundreds of apps and programs designed to help you out. What you choose to use will depend to some extent on how serious a photographer you are, but ultimately there is something for everyone.

Here is a look at how to improve your photo taking and editing through 5 simple apps and programs.

Photoshop Express

This is a fairly self-explanatory app – from the makers of Photoshop and Photoshop Elements which most photographers will be familiar with. This app is by no means as complete or effective as the full version program, but the interface is simple and easy to use, and for basic effects on the go it is a handy app. It is free in its basic form, but has additional features available for purchase.

Camera+

If you’re looking for an app that improves the quality of your photos without any complicated editing, this is the one for you. Basically, Camera+ is a better version of the basic camera in your smart phone, and has the ability to take clearer, more sharply focused photos. You can apply basic effects such as contrast, color schemes and retro effects as well as crop and rotate the photo to improve the quality of photos that your phone’s camera captures.

Dynamic Light

This is a great app for manipulating the lighting in your photos. The end result can look more artistic than natural, so if that’s something that interests you as a photographer, this is definitely an app for you. You can select a photo and an effect, then adjust the “dynamic light” dial to control how the effect is applied to the image or you can shoot the image using the app. It’s a great way to turn an ordinary image into a striking one.

Filterstorm

A great app for photo editing, Filterstorm essentially takes the best features of Adobe Photoshop Lightroom and puts them in a simple app. It’s more about adjustments than filtering, but does allow you some simple effects for manipulating lighting, colour, and brightness among other things.

This is a guest post by Dylan Bailey. Dylan is a freelance writer and keen amateur photographer.
Helen Bradley

Page 2 of 111234510Last »