Saturday, January 26th, 2013
Change your default font settings in Google Docs
You can easily change your default font settings in Google docs using styles.
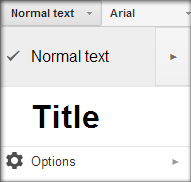
To change your default text style for all future documents, you must first update the Normal text style. Highlight some text with the formatting you want to adopt as your default, open the styles dropdown menu, and click the arrow next to Normal text. In the resulting menu, select Update ‘Normal Text’ to match. This redefines the Normal text style to match the selected text. To make this change permanent, open up the style menu again and select Options > Save as my default styles. This means that the new Normal text style will be used for all future documents. In this way you can set, for example, 12-point Times New Roman as your default font for Google docs.
If you ever want to undo all style changes, return to the options menu and select Reset styles. This will reset them to the original default settings, but only within that document, so you must then choose Save as my default styles again if you wish to make the reset permanent.
Labels: default, font, formatting, google docs, style, styles, text
Saturday, January 19th, 2013
Create Complex Mathematical Equations in Google Docs
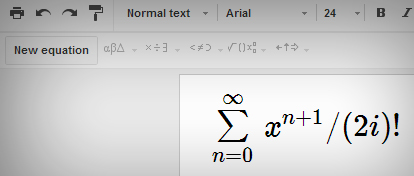
It can often be difficult to represent more complex mathematical equations in a word processor. Google Docs makes it easy with the equation toolbar. To activate it, select View > Show equation toolbar.
To create your equation, simply click New equation and begin filling it in with operations from the insert function dropdown menus. Even if you require none of the special operations provided, the New equation feature will also neatly format simple equations that can be entered using the keyboard.
Labels: create, document, equation, google docs, insert, math
Monday, January 14th, 2013
Download All of your Google Docs at Once
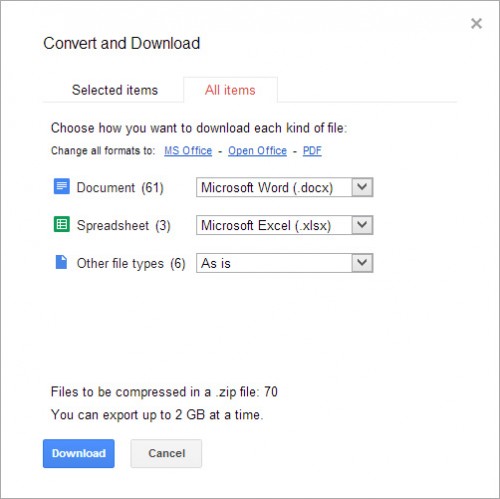
You can quickly save all of your Google documents to your hard drive by Right Clicking on any one of your documents and selecting Download…. In the popup window select the All Items tab along the top. Google Docs will display the quantity of each document type and allow you to select the format you want to download each type in. Click Download and all of your documents will downloaded as a zip file.
Google compresses the files into a zip file for you, which can take some time. If you have many documents, you can have Google email you the download link once it finishes the zipping process so that you don’t have to sit and wait.
Thursday, January 10th, 2013
Quickly Create New Folders in Windows
 Photo Credit: Kriss Szkurlatowski
Creating multiple new folders in windows can be a pain, since it forces you to click through multiple context windows every time. It can, however, be bypassed with a nifty set of keyboard commands that navigate those windows for you.
While in the Windows Explorer view, simply hold Alt and press F+W+F. This opens the File menu, selects New, and chooses Folder almost instantly. This is extremely useful because it allows you to create and rename multiple new folders without taking your hands off of the keyboard.
You can use these commands to open other menus as well. While holding Alt you will notice certain letters of menu selections become underlined. Pressing these letters on your keyboard will select that menu option. For example, Holding Alt and pressing F+W+S will create a new shortcut. This functionality extends to Microsoft Office as well. The next time you’re in Word, press Alt and see what you can start controlling with a few key strokes.
Labels: explorer, folder, keyboard, Microsoft, new, Office, shortcut, windows
Friday, December 28th, 2012
Why would you do that (Microsoft?)
Ok, I really really like the new Office 2013 suite. But there are always some things you don’t like and this one is a biggie. It is in Word 2013 and it’s not like I don’t like an added feature it is that Microsoft removed a feature I love and that I use every day.
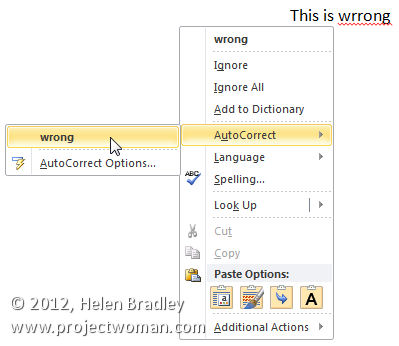
What is gone is the right click auto correct from the shortcut menu. In earlier versions of Word when you saw a spelling mistake indicated by a wiggly red line under a word you could right click and choose AutoCorrect and then select the correct spelling of the word. Word would then add this misspelling and the correction to its AutoCorrect list so that, in future, whenever you typed the word incorrectly Word would automatically fix it for you.
This right click feature has been removed from Word 2013 – Why? Who knows? It has to go down as one of the stupidest things that Microsoft has done – really there is no reasonable explanation for this feature being removed. It is totally frustrating not to have this feature on the right click menu.
If you need to use this feature you’ll need to make your own AutoCorrect list entry by choosing File > Options > Proofing > AutoCorrect options and enter the misspelling in the Replace list and the correct spelling in the With list. This is extremely inconvenient but it’s how Word 2013 now works – go figure! Thanks for the AutoCorrect love Microsoft – Not..
Labels: AutoCorrect, Microsoft Office 2013, missing, removed feature, spelling correction, Word 2013
Tuesday, December 18th, 2012
Trevor’s Quick Word Tip – Quick Bold, Italics and Underline
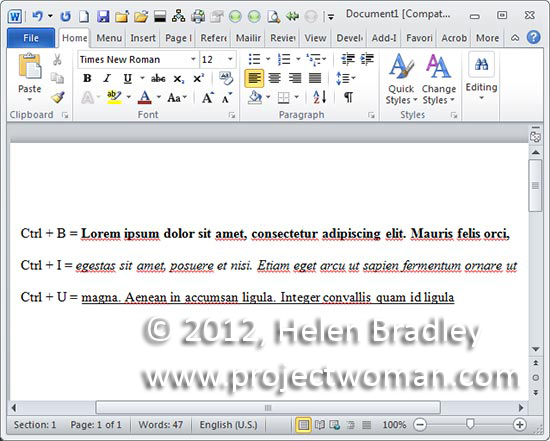
When you want some text to stand out by being bolded you can press Ctrl + B and then type the text. To turn bolding off, press Ctrl + B again. This also works to bold already typed text – select the text and press Ctrl + B to bold it. The keyboard shortcut Ctrl + I can be used to italicize text and use Ctrl + U to underline it.
Labels: bold, how to, italics, Microsoft Office, tip, trevor office, trevor payne, underline, Word
Friday, December 14th, 2012
Research and Fact Checking with Google Docs
Google Docs has a handy research tool built right into the page that utilizes Google’s massive information database. It can provide a useful catalogue of information on almost any topic.
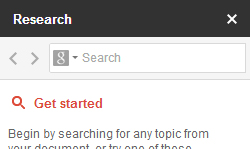
To open the Research module, go to Tools > Research. Alternatively, you can highlight some text from your document, right click, and select Research ‘[your text]’ from the context window. This will automatically research the highlighted text.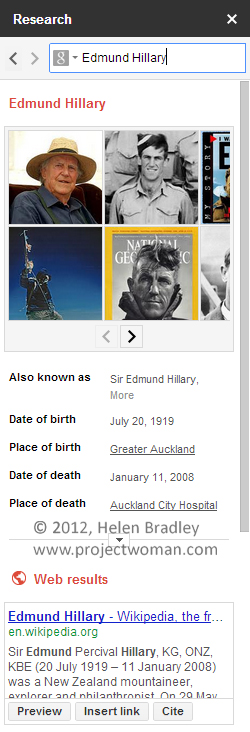
If your topic has any specially indexed information, it will be shown in a summary at the top of your results. It may also show relevant images and published papers on the topic. When Google has exhausted all the information it can find itself, it will simply display a list of search results. Yet these results also contain a useful set of tools unique to the Research module: Preview, Insert Link, and Cite.
Preview provides a quick look at the web page to help you determine if it will actually be useful to you. Insert Link automatically creates a link to the web page in your document. If you used highlighted text to open the Research module, it will turn that text into your link. Cite creates a neat citation for that web page, which is in MLA format by default.
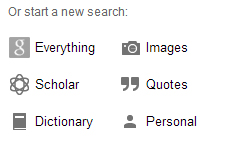
If we take a look at the main page of the Research module again, we’ll find search filters for different needs.
Everything provides the results we initially saw, with as much information as Google could provide. Images narrows your search to just that, a sidebar of topical images which can be easily dragged and dropped into your document. Scholar provides a list of published research papers for your topic, although it does not provide direct links to those papers. These can be easily cited the same way web links can.
Quotes provides a list of relevant quotes which can also be inserted into your paper. Google also highlights the most famous quotes for you. Dictionary provides a fast and light way to check words’ definitions. Finally, Personal simply shows any files you already have on your Google account that fit the query.
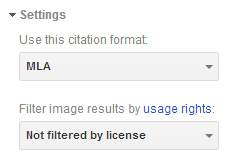
You can also make two important changes in the Settings dropdown menu. The citation format can be swapped between MLA, APA, and Chicago, depending on your need. If you’re using your document for commercial purposes, or if you simply hate unlicensed imagery, you can filter your image search results to show only those which grant a commercial licence.
Overall, the Research module is an excellent tool to help you quickly collect information and content for your document and is worth checking out.
Labels: apa, chicago, citation, dictionary, google docs, images, mla, quotes, research, tool
Tuesday, December 11th, 2012
Trevor’s Quick Word Tip – Open, New Document
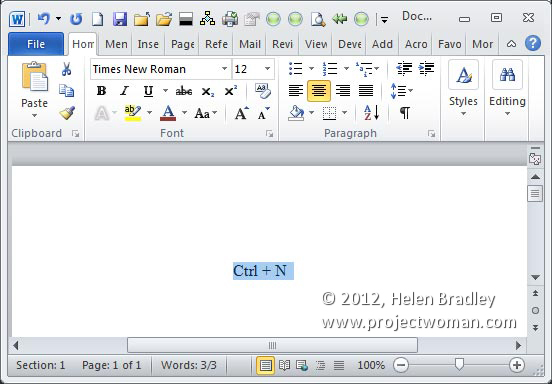
You can bypass the Open and New document dialogs in Word using shortcut keystrokes. To start a new blank document from inside the document you are working on now, press Ctrl + N. To open a document that already exists to reference or edit it press Ctrl + O and browse to locate and select the document to open and click Open.
Labels: how to, Microsoft Office, new window, tip, trevor office, trevor payne, Word
Tuesday, December 4th, 2012
Trevor’s Quick Word Tip – KeyTips on the Ribbon
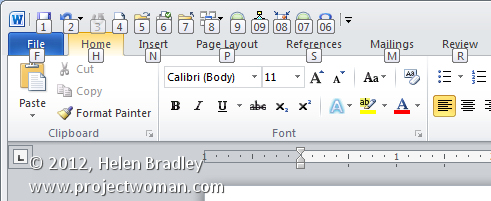
Navigating the Ribbon in Microsoft Office applications using the mouse can be tedious. You can navigate the Ribbon using the keyboard by pressing Alt. This displays what Microsoft calls KeyTips which are letters and numbers overlaid over each available option. Press the letter or number that corresponds to the command to select.
Labels: how to, Ribbon microsoft office, tip, trevor office, trevor payne
Sunday, December 2nd, 2012
Instantly Translate a Document with Google Docs
When you need to translate a documents to another language, Google Docs can do it for you.
When you need to quickly translate one of your documents to another language, Google Docs can instantly create a new, translated copy in any of Google’s supported translate languages.
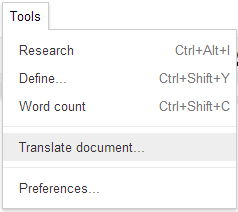
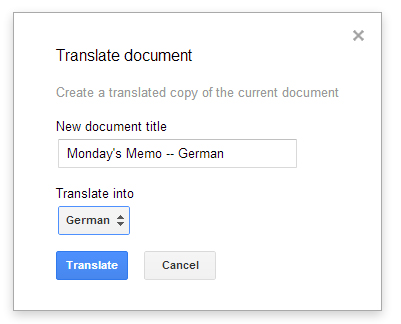
To do this, open your document, and click Tools > Translate document…. A dialogue will open up in which you select the language you want to translate to, as well as the name of the new translated document. Click “Translate” and a new tab will open with your translated document.
Keep in mind that, although it is improving constantly, Google’s translate feature will still only provide a rough translation. While understandable, it will be grammatically imperfect, and therefore it should not be used for official translations.
Labels: copy, document, google docs, translate
Thursday, November 29th, 2012
Google Docs & Microsoft Word – Increase typing efficiency with automatic substitution
Do you find that you often make the same typos over and over again? You can increase your typing speed and accuracy with Google Docs and Word’s automatic substitution tool.
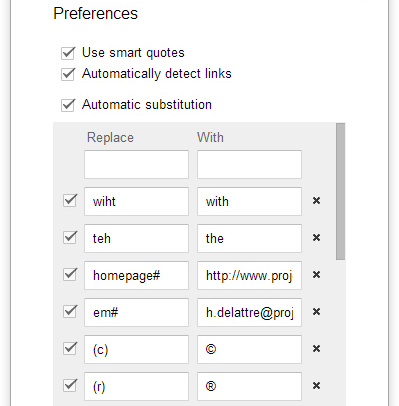
To start, if you are using Google Docs, go to Tools > Preferences and ensure that the box next to “Automatic Substitution” is checked. If you are using Microsoft Word, go to File > Options > Proofing > AutoCorrect Options > AutoCorrect tab and check “Replace text as you type”. The rest of the process is the same for both word processors.
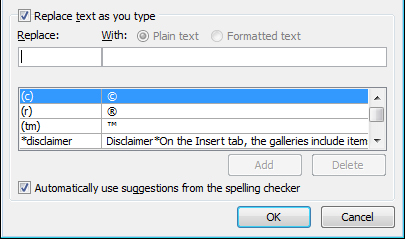 This is the automatic substitution dialogue in Word
Now you simply insert any potential typos into the “Replace” table and place the corresponding corrections in the “With” table. For example, if you tend to type “wiht” instead of “with”, you can add “wiht” and “with” to a row on your substitution table. Every time you type “wiht” it will be automatically corrected to “with”.
You can also use this tool to quickly type long strings of text. If you find yourself writing out your email address repeatedly, you can create an automatic substitution for it. Create a short phrase such as “em#” or “email#” for the Replace field, and put your email address in the With field. It is important that your phrase include a special character, such as the number sign at the end, so that the substitution will only occur when you intend it to. If your phrase were simply “email” you would never be able to write the word itself without the substitution taking place!
Your list is also preloaded with some useful substitutions that are worth reviewing, such replacing “(c)” with “©”.
Labels: AutoCorrect, automatic, google docs, replace, speed, substitution, typo, Word
Tuesday, November 27th, 2012
Trevor’s Quick Word Tip – Undo – Redo
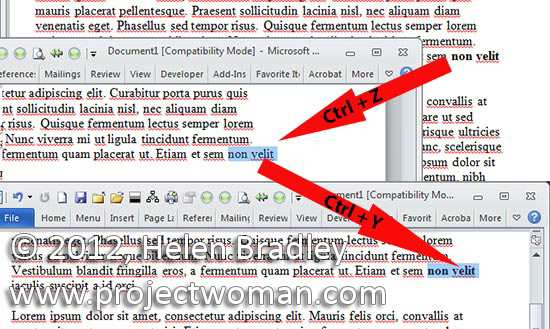
Made a mistake? Undo it with Ctrl + Z and, if you change your mind yet again, redo the undone command by pressing Ctrl + Y. In most programs you can press Ctrl + Z repeatedly to roll back your changes.
Labels: how to, Microsoft, Microsoft Office, redo, tip, trevor office, trevor payne, Undo, Word
Tuesday, November 27th, 2012
First 24 hours with your new Mac
Ok, yep, I just bought a brand spanking new MacAir – for a few reasons and one is its weight – it is so so light with its solid state drive. I got a 13 inch one with 8GB ram and 256 Gb drive but on reflection I really think I could have done with the 11.6 version except this larger screen does have a higher resolution.
So enough of my new toy – it’s a while since I’ve owned a Mac and while some things are all so familiar, many are not. Here’s my take on what I’ve learned so far.
1 Download Chrome and use it – I don’t like Safari much at all.
2 When you install Office 2011 Mac you’ll get an error asking you to close Safari. The red button in the top corner might close the screen but it doesn’t actually close the program – go figure! Instead you need to find it on the dock and right click it and choose Quit. Oh! your mouse only has one button? – Yikes! The shortcut is to Control + Click on the Safari button and then you can choose Quit. Then Office installs just fine.
3 Weather! If you swipe to the right (or press Control + Right Arrow) a cute little desktop appears with a calculator, calendar, weather and clock. Problem is that the weather is inevitably going to be the wrong city. Well check and look for the little i icon – it is the information/settings option. Click it and you can select the weather for the place you are interested in viewing.
4 Keychain – it’s a tool for storing passwords so you don’t have to enter them every time – but the dialog doesn’t make it clear exactly what it does and it talks about ‘private’ information so it looks scarier than it is! Bottom line – I use it.
5 Open a web page in a new tab – Command + click on the link.
6 Take a shot of the Mac Screen – Command +Shift+3: Capture the screen to a file on the desktop – if you add Control to this the capture goes to the clipboard instead. Or Command+Shift+4 to select an area to be saved as a file on the desktop – add Control to save it to the Clipboard. There are other options but that’s the basics to remember.
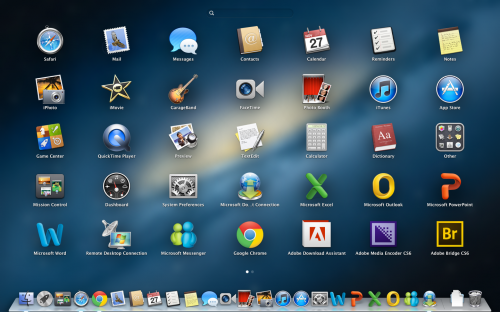
7 Can’t find your newly installed Mac apps – click the Launch Pad icon and you’ll see everything that is installed. Once you know how to do this you can start cleaning up the dock and get rid of the things you don’t use to make way for those that you do – but that’s another day’s post!
Labels: change weather on a mac, chrome, keychain, mac, macair, open web page, safari error installing office 2011, screen capture, screen shot
Tuesday, November 20th, 2012
Trevor’s Quick Excel Tip – Display Formulas
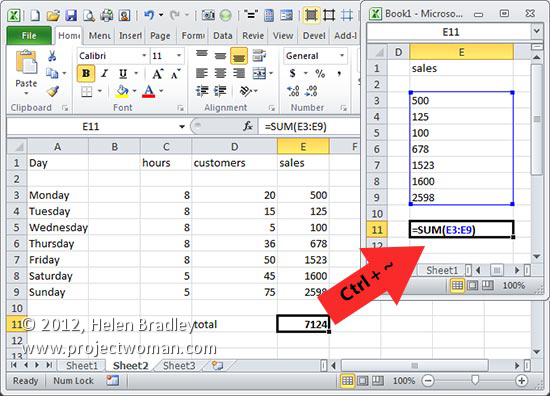
When you need view formulas instead of their results press Ctrl + ~ to display formulas in all cells in the worksheet. To return to viewing the worksheet as it was, press Ctrl + ~ again.
Labels: display formulas, Excel, formulas, how to, Microsoft, tip, trevor office, trevor payne


