Thursday, June 28th, 2012

Bulk delete photos from the iPad


I’ve been taking a lot of screenshots lately and I have over 1,200 photos on my iPad – a lot more than I really want to store there.

When I went to delete the photos in bulk, I banged my head pretty quickly up against a problem with the iPad. It’s not immediately apparent how you delete a lot of images at one time and deleting them one at a time will get very cumbersome very quickly.

Here’s how to do it:

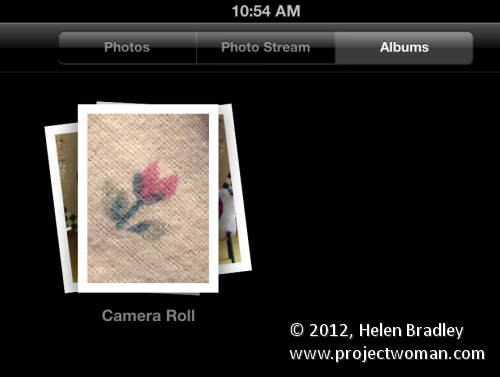
To begin, launch the Photos app, tap the Albums link and then make sure you’re viewing the Camera Roll or the place where your image are stored. I wanted to remove them from the Camera Roll so I tapped that.


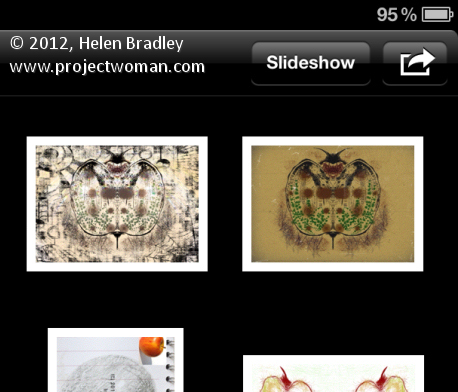
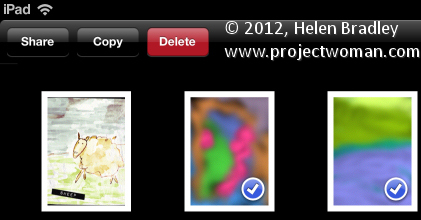
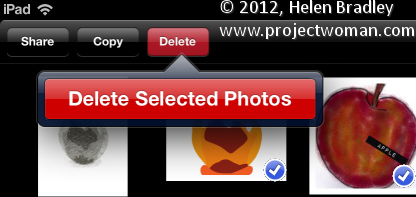
Now press the bent arrow icon in the top right corner of the screen and you’ll see options on the left for Share, Copy and Delete.


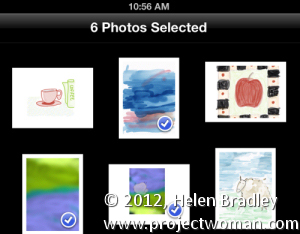
Tap an image to select it and then go ahead and select each of the images to delete – they’ll get checkmarks on them to show they are to be deleted. To undo the setting, tap the image again.


Then when I you have those you want to delete selected, tap the Delete button and choose Delete Selected Photos to remove them.


It is, as you might have expected this is ridiculously simple once you know how to do it but difficult until you do.

The good news is that the images aren’t removed from your iCloud download folder on your PC. So, for example, if you’ve previously had the images synched so they appear on your PC in a folder of iPad downloads, the images will still be on your PC at the end of the process – they’re just removed from your iPad.

Helen Bradley

Tuesday, June 19th, 2012

Transparency and the Gimp


One of the most confusing things for Photoshop users will be the concept of a transparent layer in Gimp.

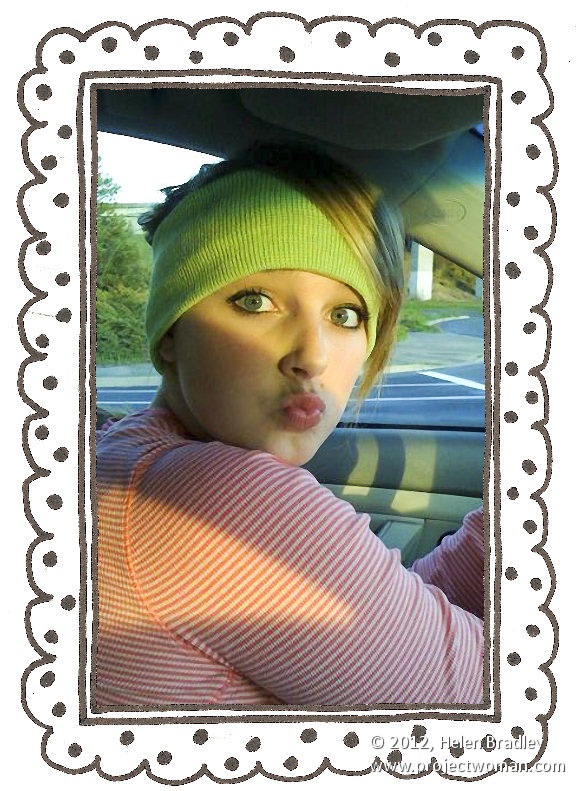
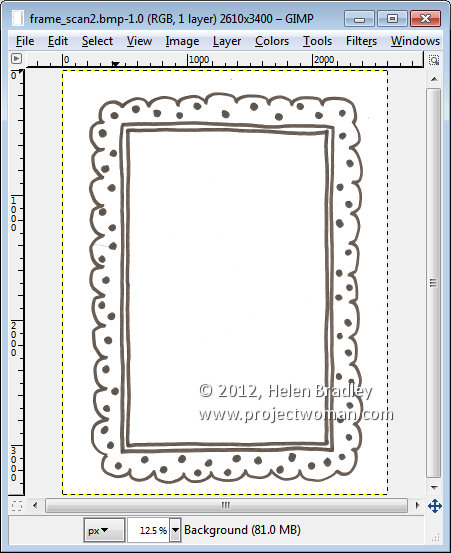
Consider the situation where you open an image such as this hand drawn frame here. The image is a BMP image and what I want to do is grab the middle out of the frame so that I can put something behind it.


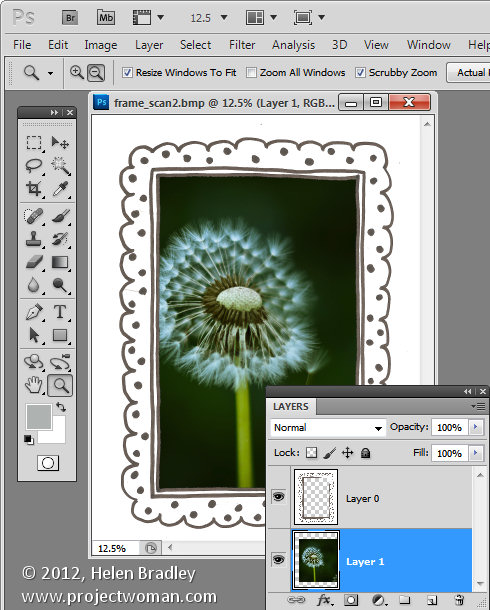
If this were Photoshop, I would convert the background layer to a regular layer by double clicking on it and press Ok. Then I would target the Magic Wand tool and click in the middle of the frame to select the middle area then press Delete to make it transparent so I can drop an image in behind it.


If you try this process in Gimp, all you get is an extreme level of frustration as nothing seems to work. Select and delete does absolutely nothing !

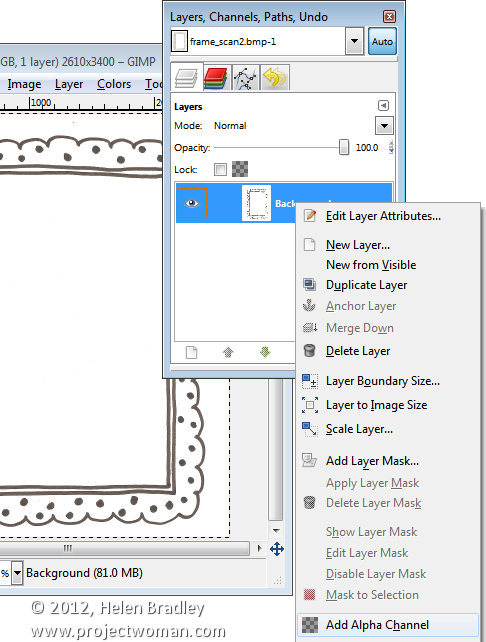
Here’s the solution. With the layer with the image on it selected, right click and choose Add alpha channel. This then allows you to select an area on the image using the Fuzzy Select tool, and press the Delete button. Then choose Select none and you will have a transparent middle to your image. It’s an easy process once you understand what’s happening but an extremely frustration one until you do.


Helen Bradley

Saturday, June 16th, 2012

iPad style Apps come to Photoshop – At last!

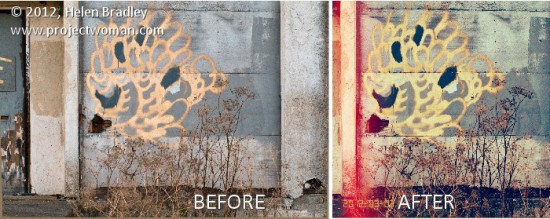
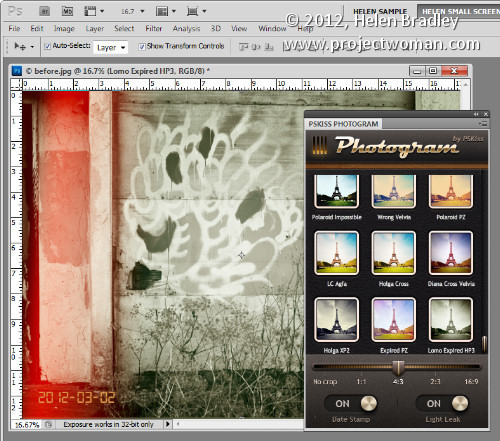
If you envy your friends their iPhone Instagram app and their iPad grunge photo editing apps then PSKiss has the solution. PSKiss recently released its PSKiss Photogram which is the first ever (at least as far as I’m aware) app like extension for Photoshop. It has all the coolness of an iPad app and it works on the desktop.

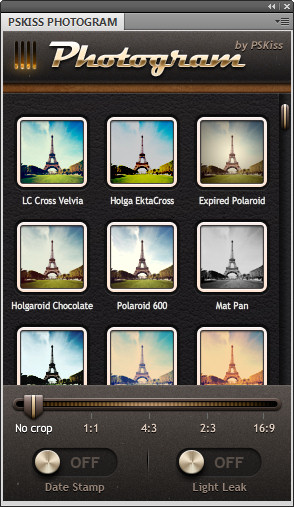
PSKiss Photogram is an extension so it installs like any extension and, when running, you see an iPad style interface with Instagram like features all running in a panel inside Photoshop.

You can download the extension from pskiss.com and right now the starter price is $9.90 which is comparable with many iPad apps. The extension is called Photogram and it has a distinctly retro look – it’s tag line is “Bringing the 70’s into Photoshop”.

Once you’ve downloaded the zip file, unzip it, fire up your Adobe Extension Manager and install the ZPG file. If you are using Windows 7 or Vista you may need to run the Extension Manager as an Administrator to install the extension in the correct location. To do this, right click the Adobe Extension Manager in your Start menu and choose Run as Administrator.

Once installed, close Photoshop if it’s open and then re-launch it. Start by opening an image that you want to work with. I grabbed an image of some graffiti I shot this morning  with a view to using it with this extension.

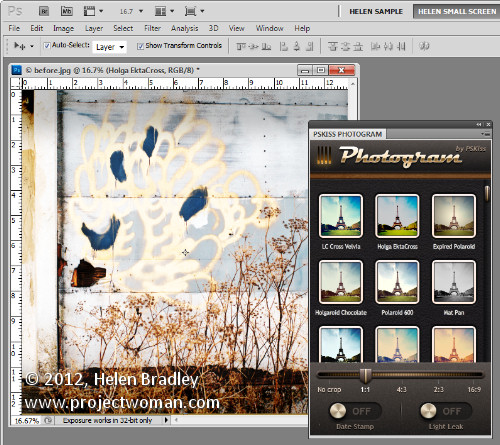
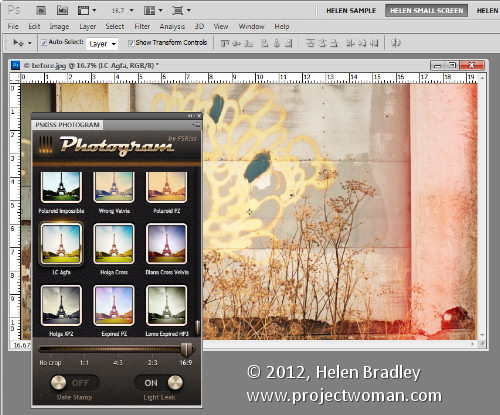
Run the extension by choosing Window > Extensions > PSKiss Photogram. The panel opens showing a series of image effects including Holga, Expired Polaroid, PolaroidPZ, Wrong Velvia and others. They are a mix of faux retro camera effects which are guaranteed to give your photos a very different look.

In addition to applying effects you can also crop your image to one of a number of crop ratios including No Crop, 1:1, 4:3, 2:3 and 16:9.

The app also lets you add light leaks by turning on the Light Leaks switch and add a date stamp which is set using the image metadata.

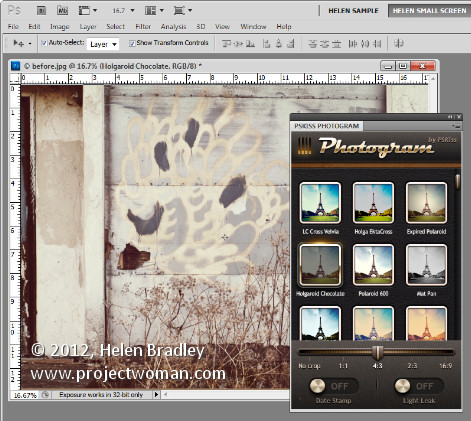
To apply an effect to an image, set the crop ratio, set the date stamp and light leaks switches then click an effect. You can wind back the processing using the History palette so click on Open in History to revert to the original image. If you choose a different effect it replaces the one you just applied and isn’t added to it so you don’t need to wind back your changes if you want to experiment with different effects.

The light leaks are random so they move around each time you click to add an effect.

If you want the same effect but a different crop, select a different crop and then reapply that same effect to it. You can tell which effect is in use as it has a glow around it and the title bar of the image indicates which effect is in use.

When you’re done, you can save the image as you would any regular image.

Helen Bradley

Thursday, June 14th, 2012

Shoot right at night – Tip #9 Shoot from Hotel Windows

If you’re travelling for work or pleasure, ask for a room on a high floor in the hotel and shoot the night skies from your hotel window. There’s always something of interest happening in the streets below even if you have a totally awful view in daytime, the nightlights can offer photographic opportunities you don’t get in the daytime.

When you’re shooting from a hotel or office window at night, turn out the room lights so you minimise the reflections in the glass. Look for interesting buildings and light effects, jam your lens up against the window and start shooting. A table or windowsill can be used to steady the camera for long exposures too.

Helen Bradley

Wednesday, June 13th, 2012

Add or Edit Outlook E-mail Subject Lines


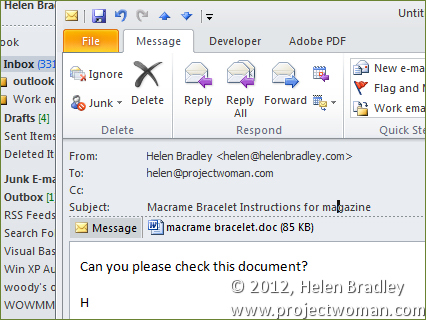
It is just plain annoying when you receive an email without a subject line or with one that makes little sense or which doesn’t relate to the email topic. Luckily you can fix this  very easily.

First locate and open a message that doesn’t have a sensible subject line or which has none at all. Click in the subject area – it’s greyed out but it is actually editable. Make your desired changes to the subject and add one if there is none.

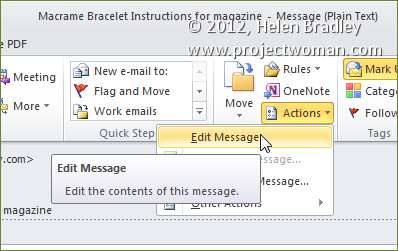
It is also possible to edit the message itself if you click the Message tab and choose Actions > Edit Message.


Once you are done, click Save to save your changes and close the file.

Helen Bradley

Thursday, June 7th, 2012

Recording Yes, No, Maybe so in Excel

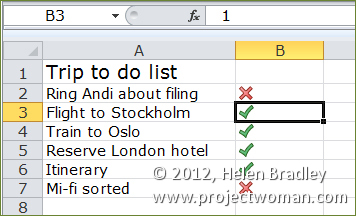
You can use Excel to fill a range with ticks and crosses to indicate Yes and No using a simple Excel Conditional Format.

To see this at work place a list such as to do items in column A of your worksheet. In column B, type the numbers 0 or 1 depending on when the task is completed or incomplete – 1 is completed, 0 is incomplete.

To make the numbers appear as checkmarks and crosses instead of 1 and 0, select the column of numbers and choose Conditional formatting from the Home tab on the Ribbon.

Select Icon Sets and then select the indicator set that has a checkmark, exclamation mark and cross in it.

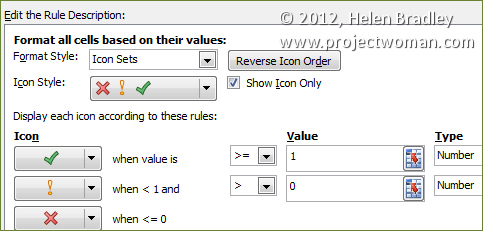
To fine tune this conditional formatting rule so it displays just the checkmark or the cross and not the numbers themselves and so it works correctly, keep the range selected and, from the Conditional Formatting dropdown list select Manage Rules. Select the Icon Set rule, select Edit Rule and click Format all cells based on their values in the top of the dialog.


Select the Show Icon Only checkbox and, set the checkmark to read >= 1 and set the Type to Number. For the ! icon set it to read > 0 and set its type to Number also. Click Ok.

You can change the icons by simply typing 1 or 0 into a cell.

Helen Bradley

Sunday, June 3rd, 2012

Edit and Create on the go with Adobe Photoshop Touch

By Helen Bradley

On Monday, Adobe launched its Photoshop Touch application for the iPad. This long sought after app runs on the iPad 2, and not on the iPad 1, and it requires that you have iOS 5 installed. The app costs $9.99 which is at the high end of the price range for photo-editing apps in general but Photoshop Touch seems to have got the feature set about right so most people will probably consider it worth the money.

I use the iPad a lot for working with photos I’ve shot using a digital SLR camera in raw and which I’ve resized, converted to jpeg and downloaded to the iPad. Those images I have on the iPad are there because they are funky or because they lend themselves to some artistic play. So, I looked at Photoshop Touch in this light – I wanted to see if it would be part of my iPad image creative workflow. For heavy duty work, Photoshop and Lightroom will remain my tools of trade.

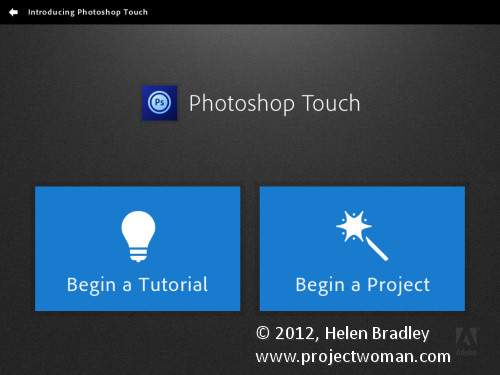
When you launch Photoshop Touch you get two options, viewing the tutorials or doing some work.
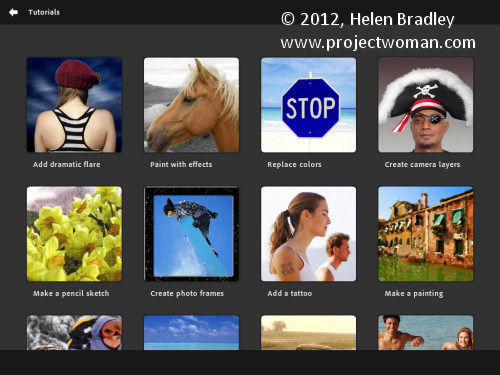
There are 10 tutorials that you can work through each of them is project based so you learn the program by learning a technique not by learning how individual tools work. These are text and image tutorials and not video ones, but they are interactive so you can learn as you go.
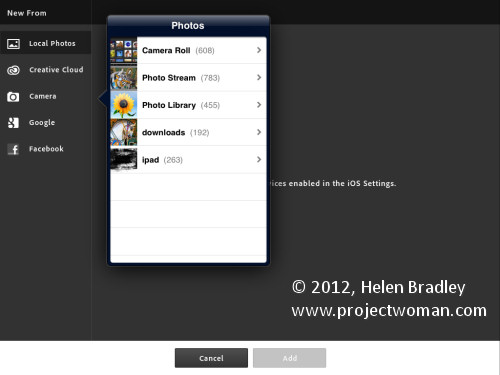
The second option is Begin a Project which is where I’ll start. You get the choice of adding an image from your iPad, the Adobe Creative Cloud, the Camera, Google or Facebook. I chose Local Photos then the Photo Library and an image from my iPad.
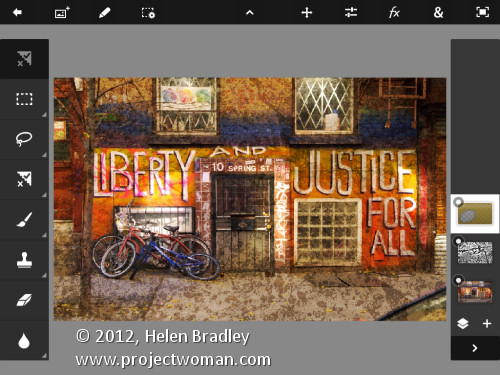
In the main editing area you’ll find the tools on the left, layers on the right and menus across the top. The program pays lip service only to Photoshop.  Some icons are familiar but others are more iPad than Photoshop so Photoshop users may find it a bit confusing where iPad artists will find it more familiar.
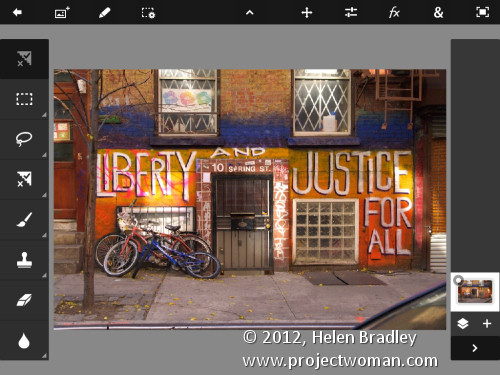
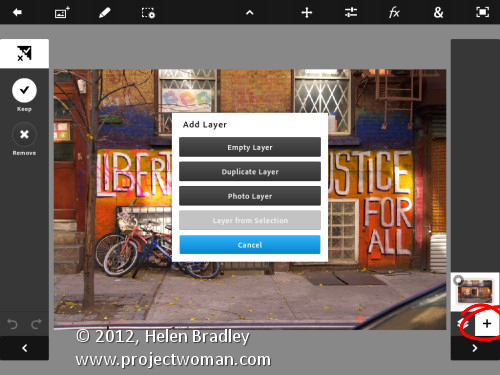
You can add multiple images and multiple layers. I wanted to texture this image so I clicked the Add Layer button and selected Photo Layer.
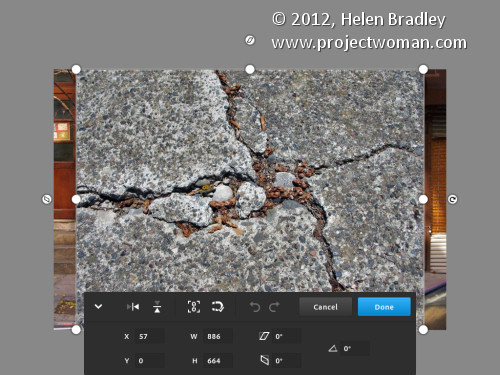
Once you select a second photo you get to size it as you import it – you can also rotate, flip or skew it too. Click Done to proceed to the editing area.
Now, with the layer selected, you can apply adjustments to it.
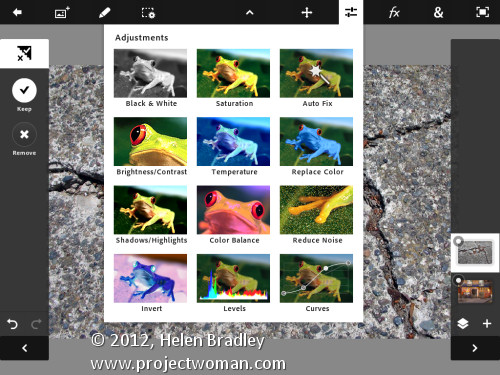
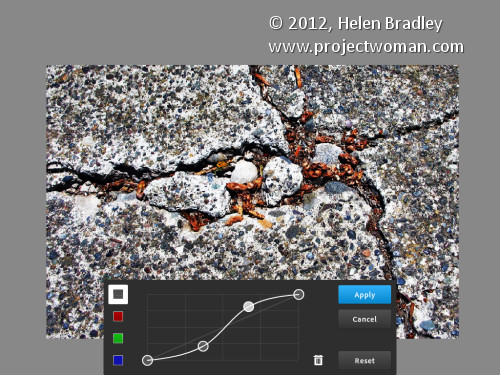
I chose Curves as this was a texture and I wanted more contrast. There are no adjustment layers so the Curves adjustment is being applied just to the targeted (top) layer. As you can see, you can adjust the RGB composite channel or the individual red, green and blue channels.
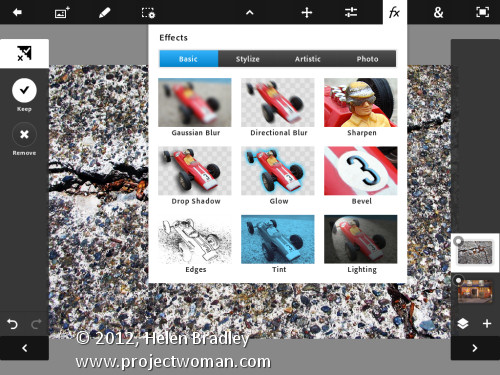
With the texture layer still targeted you can apply a filter to it by clicking the FX button. There is a range of filters including Basic, Stylize, Artistic and Photo. Some add things like drop shadows, blurs and glows and others are more artistic.
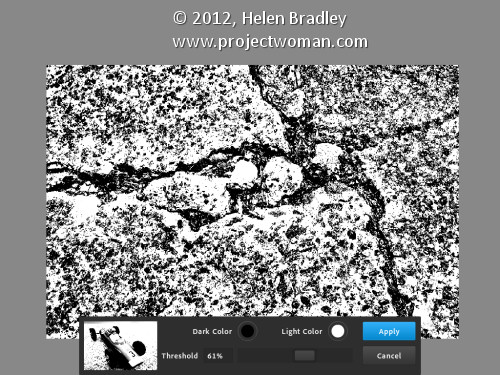
I chose Stylize > Old Photo, configured the settings and tapped Apply. Unlike Photoshop where the foreground and background colors need to be selected before you run a filter, here you can select the colors to use in the filter settings – this really is a feature that Photoshop should have.
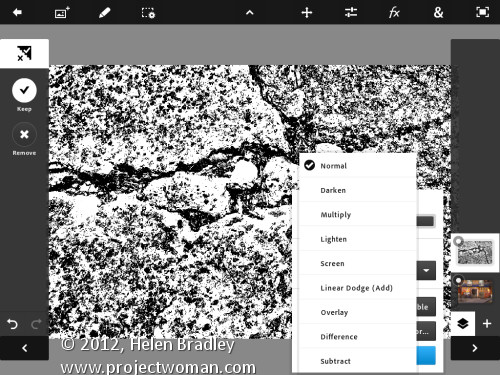
To blend the layers you click the Layer icon and you get a choice of blend modes and the chance to adjust the layer opacity.
There are no masks but you can use a gradient to fade the effect – when you do the gradient is applied to the layer and you can only undo it by tapping Undo – you can’t go back and edit it.
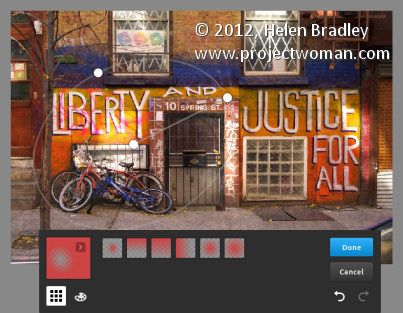
You can also add a new Empty Layer and fill it with a gradient.
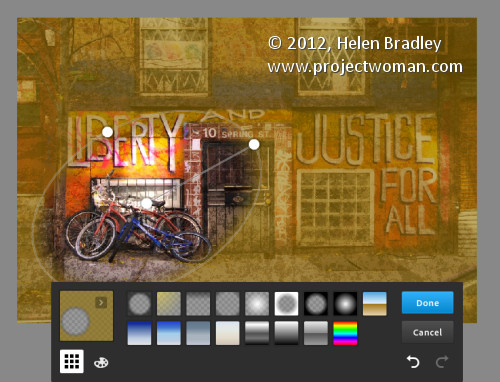
And then blend it using a layer blend mode as I have done here.
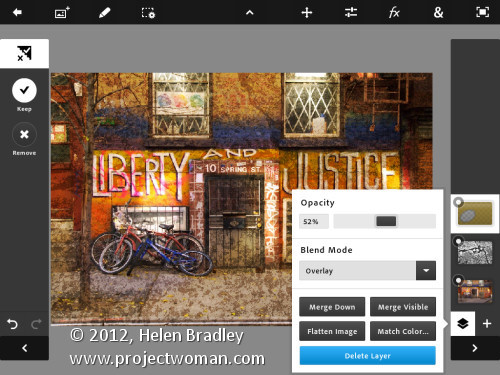
I finished by cropping the image and then saving it.
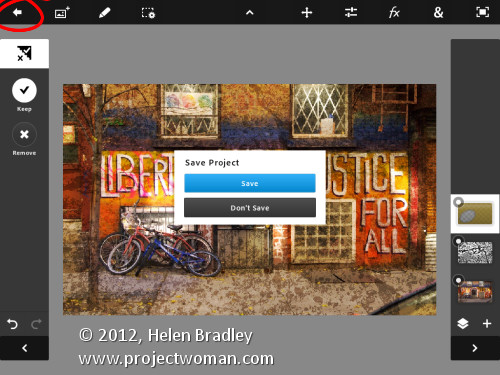
You can then email it or send it to the Camera Roll or upload the project to the Adobe Creative Cloud so you can access them from there.
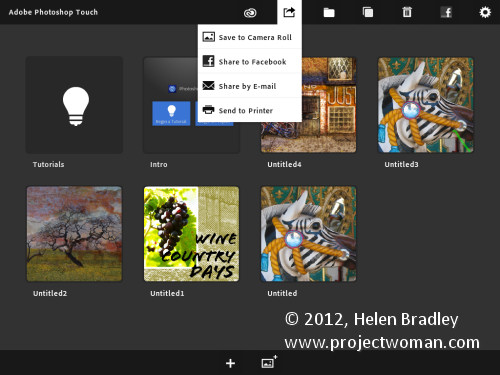
There are limits to Photoshop Touch and one is the 1600 x 1600 pixel image size limit. The text tools are rudimentary and, as a long time Photoshop user, I’d like to see editable masks and editable text. That said, for fixing photos and tinkering with creative projects this program is a welcome addition to the Adobe family.

This app will appeal to a range of users. There are plenty of basic tools that are easy to use but also some more advanced features for working with images. The Scribble Extract tool does a reasonable job of extracting a subject from a background and you can tinker with gradients and fades to get some interesting effects. You don’t need to know how to use Photoshop to use the app but your knowledge won’t go astray.

Helen Bradley
Friday, May 25th, 2012

Add a Photo Border in Lightroom

One hidden feature of the Lightroom print module is the ability to add a frame to an image. In this post I’ll show you how to add a frame to an image before exporting it as a JPEG image ready for uploading to the web or printing.

In Lightroom 3 you can create an image and export it as a JPG image from the Print module – however before you set this up, it’s a good idea to create a frame to use. I’m going to use a hand drawn border but you can use anything of your own design.

Step 1

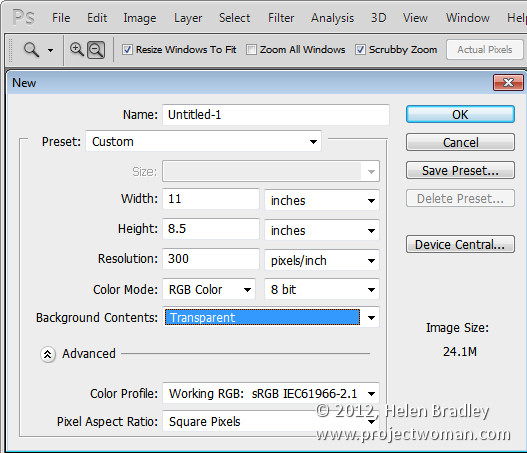
Start in a program like Photoshop and create a new image the size that you want to print from Lightroom. This is a critical step because the border image that you’re about to create cannot be resized any larger in any dimension than the Lightroom file dimensions that you plan printing to.

So, for example, if you want to print a landscape image on letter paper you need to create a frame image of the exact dimensions (or at least the exact ratio of dimensions) of an 11 x 8.5 inch sheet of paper. If you do this, the frame can be sized to the full size of the image in Lightroom.

Set the resolution of the new image as desired – I do this so it matches the resolution that I want to print from Lightroom at – so I use 300 dpi

Step 2

Design your frame making sure the inside of the frame is transparent if you plan for your frame to be placed over the image in Lightroom.

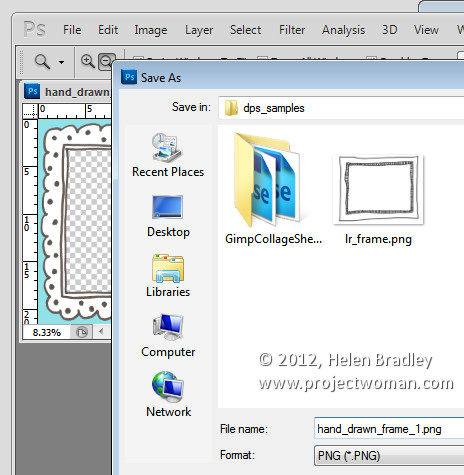
When you are done, choose File > Save As and save the image as a PNG format file so that the transparency information is retained – the JPEG image file format doesn’t support transparency.

Step 3

Close Photoshop, open Lightroom, select the image to print and click to open the Print module.

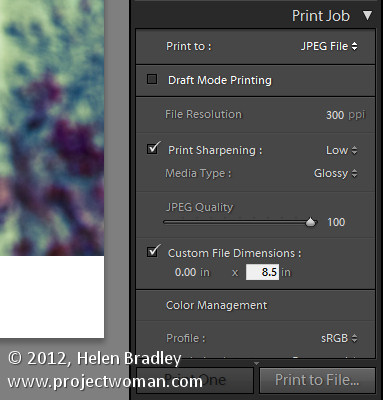
From the Layout Style panel select Custom Package. In the Print Job panel select Print To: JPEG File. Select Custom File Dimensions and set the size to the same 11 x 8.5 inches that you set the frame to be.

Set the File Resolution to the desired resolution – I’ve used 300 dpi.

Step 4

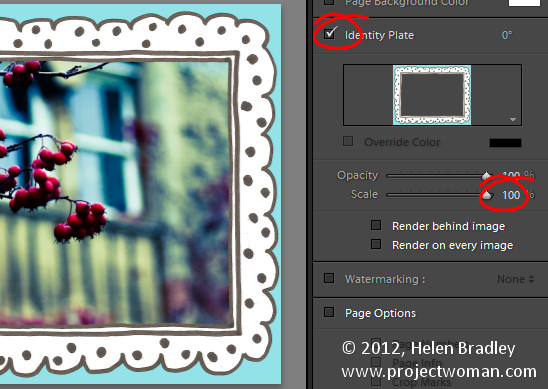
You will add the frame as a graphical Identity Plate. So open the Page panel and select the Identity Plate checkbox. Click on the identity plate box and, from the menu which appears, choose Edit then select the Use a Graphical Identity Plate option button. Click Locate File, select the frame png file you just saved and click Choose. You will most likely be warned that the file is very large – if so, click Use Anyway and click Ok.

The frame will appear as an Identity Plate over the top of the image. Adjust the Scale slider to size it up to 100 percent which should ensure the frame fills the page size that you are working with.

Step 5

As the middle of the frame image was created as transparent, the image underneath it shows through it.

You can use the Render Behind Image option to place the frame under the image if that’s the way you have designed it to work.

Once you’ve added your identity plate select to print to file and the framed image will be printed to a new file.

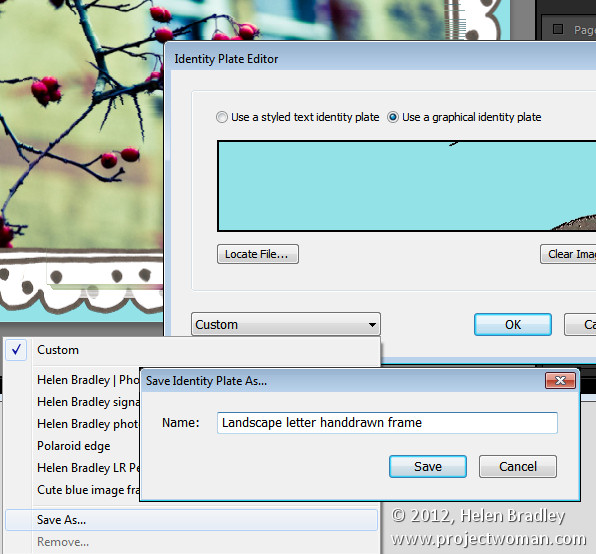
Before I am done, I click the Identity Plate box again and choose Edit and then from the Custom dropdown list I choose Save As to save the graphic frame as an Identity Plate I can use at any time in the future.

Armed with Photoshop you can create any sort of frame and import it as an identity plate to add a border to an image in Lightroom.


Helen Bradley

Thursday, May 24th, 2012

Faux HDR effect in Lightroom 4

I just uploaded a new video tutorial on how to create a faux hdr image in Lightroom. This image really didn’t inspire me when I first looked at it, but clearly at the time I captured it something had caught my eye. When I applied this faux hdr effect to the image it just came to life. The process is very quick and very simple, and the video is very short – only just over 5 minutes and you’ll know all you need to know to salvage your own images.


Helen Bradley

Sunday, May 20th, 2012

Hand drawn frames in Photoshop

One technique I’ve seen used a lot lately on blogs, websites and even email newsletters is a hand drawn frame effect.

In this post, I’ll show you how to create an effect like this and save and use it for your images.

Step 1

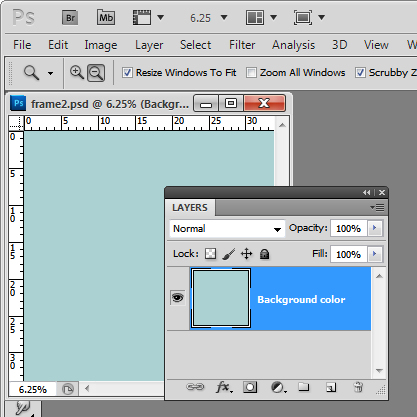
Start with a new image in Photoshop. A good size frame is important to create as you can size it down but not size it up as successfully. Start with an image around 4,000 pixels square with a resolution of 300 pixels RGB color and transparent background.

When the image opens, fill the background with a color of your choice, I’ve chosen a blue fill color.

Step 2

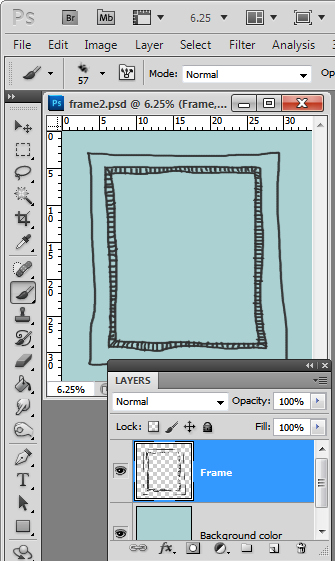
Add a new layer and then select the brush tool and a smallish brush. You want something that is going to ‘paint’ looking a little bit like pencil marks so I chose the Chalk 11 pixels brush and sized it up to around 57 pixels.

Select black or a dark brown or dark gray color as the foreground color and hand draw your frame. It will help if you use a tablet to do this although that’s not necessary and a mouse can be used.

Draw the frame so it has closed inside and outside edges to make the next step easier.

Step 3

Target the Magic Wand tool and click inside the frame. This selects the inner portion of the frame.

Choose Select >  Inverse to invert the selection.

Now hold the Alt key and click with the Magic Wand tool on the outer area of the image so you remove the outer edge from the selection.

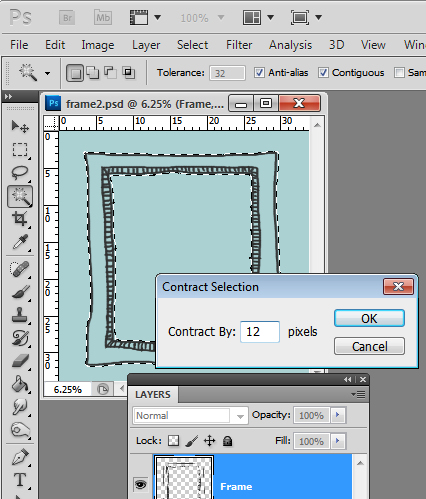
To eliminate any anti-aliased edges, choose Select > Modify > Contract and contract the selection by around 12 pixels.

Step 4

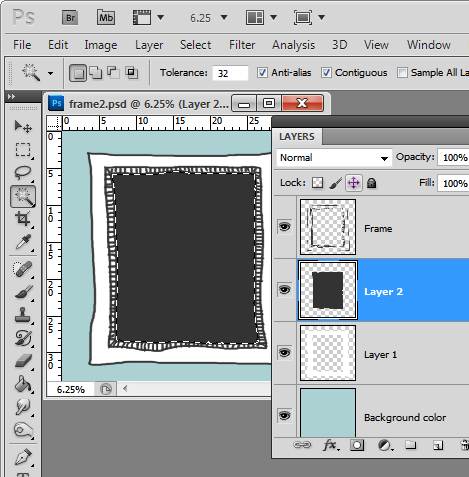
Add a new layer between the frame drawing and the background and fill it with white.

Return to the frame layer and select the inside again, this time choose Select > Modify > Expand and expand the selection by around 12 pixels.

Add a new layer and fill the selected area with a black/brown or dark color. This is the template for your image.

Save this image as a layered .psd file so you can use it anytime in future.

Step 5

To frame an image, open an image to frame and this frame too.

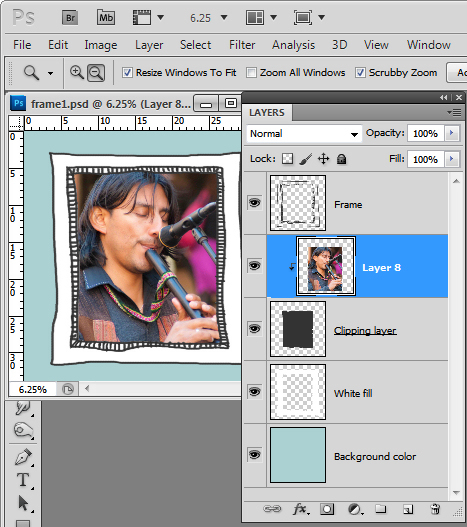
Drag the background layer of the image into your frame image holding the Shift key as you do so to center it. Press Ctrl T + Ctrl 0 to size the image to size. Make sure the image layer is directly under the drawn frame and above the dark template layer.

Now, with the image layer selected choose Layer > Create Clipping Mask to clip the image to the size of the inside of the frame.

You can move the image layer using the Move tool so it is positioned as desired.

Now size and save the image for print or the web.


Helen Bradley

Page 2 of 8412345102030Last »